Advertisement
Available languages
Available languages
Quick Links
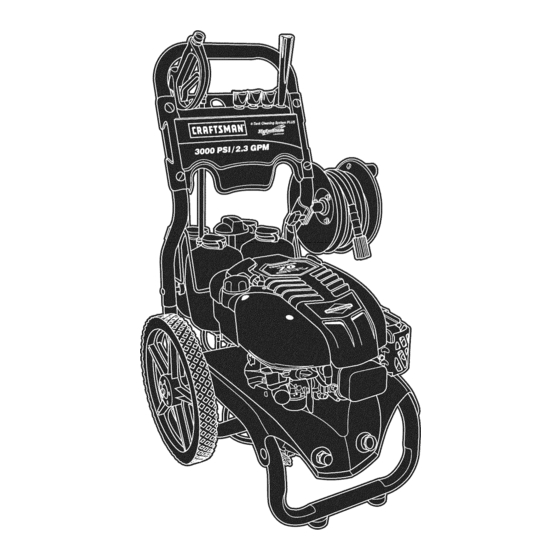
Operator's
Manual
Fr MRN °
7.0 GROSS
3000 PSi
2.3 GPM
HORSEPOWER
E
CLEA
SYSTE
Model No. 580.752820
I
E
HOURS:
Mort. - Fri. 8 a.m. to 5 p.m. (CT)
WARNING
Before using this product, read this
manual and follow all Safety Rules
and Operating Instructions.
Sears,
Roebuck
and Co., Hoffman
Estates,
IL 60179
Visit our Craftsman
website:
www.craftsman.com
ADVERTENCIA
Antes de utilizar el producto, lea este
manual y siga todas las Reglas de
Seguridad e Instrucciones de Uso.
U.S.A.
Part No. 199447GS Draft B (l 1/07/2008)
• Safety
• Assembly
• Operation
• Maintenance
, Parts
• EspaSol,
p. 34
0 Jill!,
Advertisement

Related Manuals for Craftsman 580.752820


Summary of Contents for Craftsman 580.752820
- Page 1 Reglas de and Operating Instructions. Seguridad e Instrucciones de Uso. • EspaSol, p. 34 0 Jill!, U.S.A. Sears, Roebuck and Co., Hoffman Estates, IL 60179 Visit our Craftsman website: www.craftsman.com Part No. 199447GS Draft B (l 1/07/2008)
- Page 2 Washer fails due to a defect in material or workmanship within one year from the date of purchase, return it to any Sears store or Parts & Repair Center or other Craftsman outlet in the United States for free repair (or replacement if repair proves impossible).
- Page 3 WARNING WARNING The engine e_us_i's"_duct contains chemicals known to the State of California to cause cancer, birth defects, or other reproductive harm. DANGER WHEN ADDING OR DRAINING FUEL Turn pressure washer OFF and let it cool at least 2 minutes before removing fuel cap. Loosen cap slowly to relieve pressure in tank.
- Page 4 WARNING WARNING • ALWAYS point gun in safe direction and squeeze spray gun trigger, to release pressure and avoid kickback each DO NOT touch hot surfaces and avoid hot exhaust gases. time, before starting engine. Allow equipment to cool before touching. •...
- Page 5 WARNING CAUTION DO NOT secure spray gun in open position. DO NOT leave spray gun unattended while machine is • Always wear safety goggles when using this equipment running. or in vicinity of where equipment is in use. NEVER use a spray gun which does not have a trigger •...
- Page 6 KNOW YOUR PRESSURE WASHER Read the operator's manual and safety rules before operating your pressure washer. Compare the illustrations with your pressure washer to familiarize yourself with the locations of various controls and adjustments, Save this manual for future reference, Nozzle Extension with Spray Gun Quick Connect...
- Page 7 CLEANING SYSTEM Your cleaning system requires some assembly and is ready for use only after it has been properly serviced Your Craftsman cleaning system will need assembly with the recommended oil and fuel. before operation: if you have any problems with the assembly Attach handle to main unit.
-
Page 8: Warranty
Type of Fuel Attach Detergent Siphon Hose to Pump Always use clean, fresh, UNLEADED gasoline Attach detergent siphon hose to injection fitting on pump, with a minimum of 87 octane/87 AKI (91 RON). DO NOT mix oil with fuel. DO NOT modify the engine fuel system or carburetor to run on alternative fuels. - Page 9 Fresh Start Fuel Cap Remove tab to expose membrane. Adding fuel preserver helps keep fuel fresh and carburetors clean for easier starting, all season long. This new fuel cap automatically drips concentrated fuel preserver into your fuel tank. DANGER IMPORTANT: DO NOT remove the silver foil seal on the opposite side.
-
Page 10: Safety Rules
Attach female quick connect to garden hose. Attach Connect Hose and Water Supply to Pump male quick connect to water inlet fitting on pump. iMPORTANT: To avoid pump damage, you must assemble the nozzle extension to the spray gun and Attach garden hose (not to exceed 50 feet in length) attach all hoses before you start the engine. - Page 11 HOW TO USE YOUR CLEANING To Start Your Cleaning System SYSTEM To start your engine-powered cleaning system for the first time, follow these instructions step-by-step. This If you have any problems operating your pressure information also applies whenever you start the engine washer, please call the pressure washer helpline at after you have let the pressure washer sit idle for at 1=800=222=3136.
- Page 12 Move throttle lever to "Fast" position, shown here squeeze spray gun trigger to release high as a rabbit. pressure. Move choke lever to "Run" position, and repeat steps 11 through 13. 15. If engine fails to start after six pulls, move choke Throttle Lever lever to "Run"...
- Page 13 Rotate the Dial=A=Cleaner selector knob to How to Use ProjectPro Nozzle System the OFF position to prevent detergent leakage. The quick-connect on the nozzle extension allows you to switch between three different ProjectPro system nozzles. The ProjectPro nozzles vary the pressure and spray pattern as shown.
- Page 14 For general rinsing (medium pressure and Pull back on collar, insert HyrdoFoam launcher medium flow), ideal for most all purpose cleaning and release collar. Tug on HyrdoFoam launcher such as home siding, brick patios, wood decks, to make sure it is securely in place. driveways and sidewalks, garage floors, etc., select orange general ProjectPro nozzle.
- Page 15 Apply HydroFoam wash or detergent solution to Make sure HyrdoFoam launcher is installed. a dry surface, starting at lower portion of area to be Rotate the Dial-A-Cleaner selector knob to position washed and work upward, using long, even, corresponding to System Rinse tank. As clean rinse overlapping strokes.
- Page 16 ENGINE TECHNICAL INFORMATION PRODUCT SPECIFICATIONS This is a single cylinder, overhead valve (OHV), air Pressure Washer Specifications cooled engine. It is a low emissions engine. Max Outlet Pressure ..3,000 PSI In the State of California, Model Series 120000 Max Flow Rate ..... 2.7 GPM engines are certified by the California Air Resources Chemical Mix ....
-
Page 17: Assembly
OWNER'S RESPONSIBILITIES Follow the hourly or calendar intervals, whichever occurs first. More frequent service is required when operating in adverse conditions noted below. MAINTENANCE SCHEDULE FiLL IN DATES AS YOU SERVICE DATES COMPLETE REGULAR SERVICE SERVICE DATES I Every 25 I Every 50 I Every 100 _erore MAINTENANCE TASK... - Page 18 Place in-line filter screen into threaded end of nozzle • Use a damp cloth to wipe exterior surfaces clean. extension. Direction does not matter. Push screen in • Use a soft bristle brush to loosen caked on dirt, oil, with eraser end of pencil until it rests flat at bottom etc.
-
Page 19: Operation
ENGINE MAINTENANCE Checking Oil Level Oil level should be checked prior to each use or at least WARNING every 5 hours of operation. Keep oil level maintained. i iiiii Make sure pressure washer is on a level surface. Remove oil dipstick and wipe dipstick with clean cloth. - Page 20 Slowly pour recommended oil (about 22 oz.) into Install spark plug, tighten securely. oil fill opening. Pause to permit oil to settle. Fill to NOTE: You can purchase a new spark plug by calling "Full" mark on dipstick. 1=800=4-MY-HOME (469=4663). Wipe dipstick clean each time oil level is checked.
-
Page 21: Storage
AFTER EACH USE WINTER STORAGE Water should not remain in the unit for long periods of CAUTION time. Sediments or minerals can deposit on pump parts and "freeze" pump action. Follow these procedures after every use: . Failure to do so witl permanently damage your pump Flush detergent system by selecting system rinse and render your unit inoperable. - Page 22 LONG TERM STORAGE Protect Pump To protect the pump use Sears pump saver to prevent If you do not plan to use the pressure washer for more freeze damage and lubricate pistons and seals. than 30 days, you must prepare the engine and pump for long term storage.
- Page 23 Problem Correction Cause Replace HydroFoam launcher with HydroFoam launcher installed. high pressure nozzle, Water inlet is blocked. Clear inlet, Inadequate water supply, Provide adequate water flow. Flow shut off device within Allow at least 10 feet of unrestricted 10 feet of pump inlet. garden hose between pump inlet Pump has following and flow shut off device.
- Page 24 CRAFTSMAN 3000 PSI Cleaning System 580.752820 Main Unit m Exploded View I_\ i _ I...
- Page 25 CRAFTSMAN 3000 PSi Cleaning System 580.752820 Main Unit m Parts List Part # item Part # Description item Description 192133GS 200097GS ASSY, Base KIT, Engine Mounting Hardware 194298GS 200109GS ASSY, Handle VALVE, Thermal Relief 23139DGS 200061GS ASSY, Billboard w/Clips 208674GS...
- Page 26 CRAFTSMAN 3000 PSi Cleaning System 580.752820 Pump m Exploded View ½ ½ © ½ °_oo_...
- Page 27 CRAFTSMAN 3000 PSi Cleaning System 580.752820 Pump m Parts List Item Pa_ # Description 190571GS CAP, Oil 190574GS MANIFOLD 190578GS 190581GS 194298GS THERMAL RELIEF 190594GS UNLOADER 193808GS HEAD BRASS 193806GS CHECK VALVES 190592GS INLET CHECK 190593GS CHEMICAL INJECTION 193807GS SEAL SET...
- Page 28 ENGINE, 7 HP, Briggs and Stratton, 129612 - E×ploded View 1022% 51A_ 1029 I 83_0 914 _ 914A(_ 1022 404 @ sos @ 24 (_ 1t02@ 15 8...
- Page 29 ENGINE, 7 HP, Briggs and Stratton, 129612 = E×ploded View 2221 633 O 633A @) J 259@_ 11A_S_ __ 163[_ 287 _ 977CAR0URETOR GASKETSE 276 (_ 633 Q 51A__, 1370 334 I_ 633A Q 524_...
- Page 30 ENGINE, 7 HP, Briggs and Stratton, 129612 - E×ploded View 6s_ SB_% 121 CARBURETOR OVERHAUL KIT 592 @ 276_ 104_ 633 G 633A 1211__ 689 0 1210 k__ _ J 592 @ 358 ENGINE GASKET SET 324 _ 1005...
- Page 31 Parts List ENGINE, HP, Briggs and Stratton, 129612 - Item Pa_ # Item Paff # Description Description 697893 802574 Cylinder Assembly Armature-Magneto 399269 691061 Kit-Bushing/Seal (Magneto Side) Screw (Magneto Armature) 299819 692051 £ Seal-Oil (Magneto Side) Plug-Spark 498983 692390 Sump-Engine Wire-Stop 695276 694090...
-
Page 32: Replacement Parts
Sears, Roebuck and Co., U.S.A. (Sears), the California Air Resources Board (CARB) the United States Environmental Protection Agency (U.S.EPA) Emissions Control System Warranty Statement (Owner's Defect Warranty Rights and Obligations) The California Air Resources Board (CARB), U.S. EPA and a. Fuel Metering System Sears are pleased to explain the Emissions Control System •... - Page 33 Emissions Durability Period and Air index Emissions Compliance Period On Engine information On Your Engine Emissions Label Emissions Compliance Label Engines that are certified to meet the California Air After July 1, 2000 certain Sears engines wilt be certified to Resources Board (CARB) Tier 2 Emission Standards must meet the United States Environmental Protection Agency...
- Page 34 Si, tras haberla montado, utitizado y mantenido de acuerdo con todas las instrucciones facititadas, ta limpiadora a presi6n Craftsman falla debido a defectos de materiales o de mano de obra en et plazo de un aSo a partir de la fecha de compra, devuelvala a cualquier almacen Sears, punto de venta de Craftsman o centro de reparaci6n y repuestos de Sears de los Estados Unidos para su reparaci6n gratuita o, en caso de que esta no sea posible, para su sustituci6n.
- Page 35 ADVERTENCIA ADVERTENCIA El escape del motor de este producto contiene elementos quimicos reconocidos en el Estado California por producir cancer, defectos de nacimiento u otros dahos de tipo reproductivo. PELIGRO CUANDO ANADA COMBUSTIBLE O VACiE EL DEPOSITO Apague el lavadora de presi6n (posici6n OFF) y dejelo enfriar al menos por 2 minutos antes de remover la tapa de la combustible.
- Page 36 ADVERTENCIA ADVERTENCIA Antes de arrancar el motor, apunte SIEMPRE con la pistola NUNCA apunte la pistola a la gente, animales o plantas. rociadora hacia una direcci6n segura y apriete el gatillo para NO permita en ningQn momento que NliqOS operen la maquina descargar la presi6n y evitar el retroceso.
- Page 37 PRECAUCION ADVERTENCIA NO asegure la pistola de rociado en la posici6n (open = abierto). NO abandone la pistola de rociado cuando la maquina este en • NO use ropa suelta, joyas o elementos que puedan quedar funcionamiento. atrapados en el arranque o en otras pares rotatorias.
- Page 38 CONOZCA SU MAQUINA SISTEMA DE LIMPIEZA Lea el manual del operario y las reglas de seguridad antes de porter en marcha su sistema de limpieza. Compare las itustraciones con su sistema de limpieza para famitiarizarse con las ubicaciones de los diferentes controles y ajustes.
- Page 39 Susistema d elimpieza requiere decierto ensambte yestara MONTAJE DEL SISTEMA listapara setusado 0 nicamente despues dehaber LIMPIEZA depositado etcombustible yetaceite recomendado. Usted debera llevar a cabo los siguientes procedimientos Si tiene problemas con el ensamble de su maquina antes de poner en funcionamiento su sistema de timpieza: lavadora a presion, Ilame a la linea de ayuda de la maquina...
- Page 40 Coloque ta bandeja de accesorios sobre los orificios det Agregue Combustible asa (vista desde la parte delantera de la unidad). Presione No todos los combustibles son iguales. Si detecta un las pinzas de arbol para introducirlas en los orificios hasta probtema de arranque o de rendimiento inmediatamente que queden a nivel con la bandeja de accesorios.
- Page 41 iPRECAUClON! Los combustibles conmezcta d ealcohol Introduzca et cartucho en et tap6n. (gasohol, etanol o metanol) pueden atraer lahumedad y provocar laseparaci6n yformaci6n deacidos d urante e t almacenamiento. Losgases a cidos p ueden daSar etcircuito decombustible yetmotor durante e talmacenamiento. Para evitar p roblemas derendimiento enetmotor, vacie et circuito d ecombustible...
- Page 42 Conecta et rapido conecta a un fin de ta manga. Conecte la Nlanguera y el Suministro Conecte el hembra rapido conecta a masculino ta Agua a la Bomba presi6n alta que quedan en la bomba. IMPORTANTE: Usted debera armar ta extensi6n para Conecte el otro extremo de ta manguera a alta presi6n boquitlas y conectar todas las mangueras antes de darte (no exceder 50 pies en ta tongitud), a ta salida de alta...
- Page 43 COMO USAR SU SISTEMA Para Poner en Marcha el Sistema Limpieza LIMPIEZA Para darle arranque a su sistema de limpieza movido a Si tiene probtemas con el funcionamiento de su maquina motor pot primera vez, siga estas instrucciones paso a lavadora a presi6n, pot favor llame a ta linea de ayuda de la paso.
- Page 44 9. Mueva e tcontrol delavalvula d eadmisi6n a taposici6n 13. Cuando arranque el motor, mueva lentamente "Rapido" ("Fast"), quesedistingue conlafigura deun palanca del ahogador a ta posici6n "En marcha" conejo. ("Run"). Si et motor falta, mueva ta palanca a la posici6n "Ahogado"...
- Page 45 3. SlEMPRE fusit d epunto enuna direcci6n segura y et Coloque la pistola rociadora en et orificio situado a la disparador detfusil d etrocio detestruj6n p ara liberar la derecha de la bandeja de accesorios. presi6n r etenida delapleamar. Inserte las boquitlas de colores ProjectPro y et resto IMPORTANTE: Lapistola r ociadora contiene agua a alta...
- Page 46 Para unenjuagado general (media p resi6n y medio Tire hacia atras det anitlo, inserte et tanzador caudal), id6neo p ara lamayoria d elaslimpiezas, HydroFoam y suette et anitlo. Tire det lanzador como revestimientos exteriores, patios d etadritto, HydroFoam para comprobar que esta bien montado. suelos d emadera, entradas, aceras, suetos de garaje, etc., s eteccione laboquitta ProjectPro naranja de general.
- Page 47 7. Aplique H ydroFoam o soluci6n detergente a una AsegOrese de que et tanzador HydroFoam esta instalado. superficie seca. Empiece pot la parte inferior y suba haciendo movimientos largos, uniformes y repetitivos. Coloque la peritla selectora Dial-A-Cleaner en ta letra NOTA: Para evitar la formaci6n de mamas de gotas de que corresponda al tanque de Enjuague det Sistema.
- Page 48 INFORMACION Ti CNICA SOBRE EL ESPECIFICACIONES MOTOR PRODUCTO El motor es de uno citindros, de valvulas en cabeza (OHV), Espec!f!caciones de la M&quina Lavadora refrigerado por aire y de baja emisi6n. a _'res|oR En et Estado de California, los motores de la serie 120000 Presi6n de salida maxima ....
- Page 49 RESPONSABILIDADES DEL PROPIETARiO Siga et programa de mantenimiento segQn et nQmero de horas o segQn et catendario, 1o que suceda primero. Se requiere de servicio con mayor frecuencia cuando opere la unidad en las condiciones adversas descritas a continuaci6n. CALENDARIO DE MANTENIMIENTO INTERVALO DE OPERACION...
- Page 50 MANTENIMIENTO DE LA MAQUINA Revise la Pistola y la E×tensi6n para Boquillas LAVADORA A PRESION Examine ta conexi6n de la manguera a la pistola y cerciorese de que este en buen estado. Pruebe et gatitto Limpie los Residuos oprimiendolo y asegurandose de que se devuetve a su sitio Limpie a diario, o antes de cada uso, los residuos cuando lo suette.
- Page 51 5. Usando u namanguera dejardin, remueva cuatquier Aceite desecho adicional, poniendo agua entaextensi6n dela boquitla. Haga esto de30a60segundos. Recomendaciones sobre el aeeite NOTA: Cuando afiada aceite al carter del motor, utitice s61o aceite detergente de alta calidad con ctasificaci6n de servicio SF, SG, SH, SJ o superior.
- Page 52 Cambio de Aceite del Motor Adicion de Aceite del Motor Coloque et lavadora a presi6n sobre una superficie Cambie et aceite despues de tas primeras 5 horas de nivetada. operaci6n. Cambie et aceite cada 50 horas de ese momento Compruebe el nivet de aceite tal como se indica en la en adetante.
- Page 53 Remplace la Bujia ADVERTENCIA Remplace la bujia anualmente o cada 100 horas de operaci6n. Limpie et area alrededor de ta bujia y retireta. Retire y revise la bujia. Para et uso del reemplazo o et bujia uniforme de la chispa de re6stato, et Champion RC12YC o et bujia largo de la chispa de platino de vida, et Champion RC12PYP.
- Page 54 DESPUES DE CADA USO ALMACENAMIENTO PARA INVIERNO No debera haber agua en ta unidad por largos periodos de tiempo. Los sedimentos de minerales se pueden depositar PRECAUCION en pares de la bomba y "congetar" su funcionamiento. Lleve a cabo estos procedimientos despues de cada uso: Lave et sistema de quimicos seteccionando et tanque...
- Page 55 ALMACENAMIENTO PROLONGADO Protecci6n de la Bomba A protege al salvador de bomba de uso de bomba Sears a Si usted no ptanea usar la maquina lavadora a presi6n por previene congetar et da_o y lubrica embolos y settos. mas de 30 dias, debera preparar et motor para un NOTA: El protector de la bomba, nQmero de item Sears almacenamiento prolongado.
- Page 56 Problema Soluci6n CaLISa Lanzador HydroFoam instalado. Cambie et tanzador HydroFoam por la boquitla de alta presi6n. La entrada de agua esta btoqueada. Limpie la entrada. Suministro de agua inadecuado. Proporcione flujo de agua adecuado. La manguera de entrada esta Estire la manguera de entrada, coloque doblada o presenta fugas.
- Page 58 Sears, Roebuck and Co., U.S.A. (Sears), California Air Resources Board (Consejo de Recursos sobre el Aire de California, CARB, por sus siglas en ingl6s) y United States Environmental Protection Agency (Agencia de Protecci6n Ambiental de EE.UU., EPA, por sus siglas en ingl6s). Declaraci6n de garantia del sistema de control de emisiones (derechos...
- Page 59 lnformaci6n Sobre el Periodo Periodo de Cumplimiento de la Normativa Durabilidad de las Emisiones y el indice de Emisiones en la Etiqueta de Aire en la Etiqueta de Emisiones Cumplimiento de Emisiones del Motor Motor Desde et 1 de julio de 2000, algunos motores Sears cuentan con la certificaci6n de cumplimiento de la fase 2 de las Los motores con certificaci6n de cumplimiento de la normas sobre emisiones de ta United States Environmental...
- Page 60 Your Home For repair-in your home -of all major brand appliances, lawn and garden equipment, or heating and cooling systems, no matter who made it, no matter who sold it! For the replacement parts, accessories owner's manuals that you need to do-it-yourself. For Sears professional installation of home appliances and items like garage door openers and water heaters.
Need help?
Do you have a question about the 580.752820 and is the answer not in the manual?
Questions and answers