Table of Contents
Advertisement
Quick Links
Advertisement
Table of Contents

Related Manuals for Yamaha YPT-420


Summary of Contents for Yamaha YPT-420
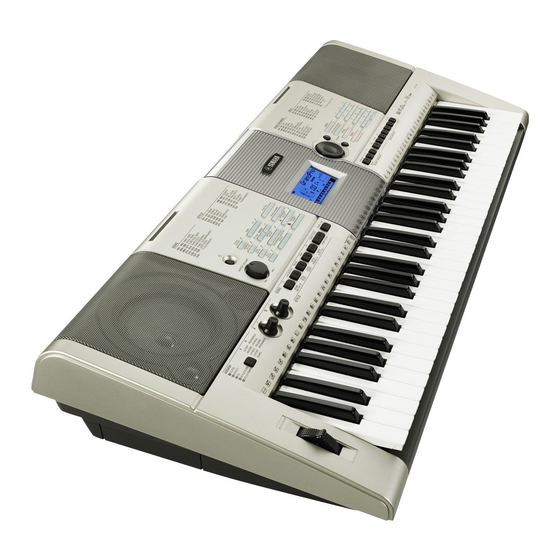
- Page 1 DIGITAL KEYBOARD Owner’s Manual...
-
Page 2: Special Message Section
This product should be used only with the components supplied or; a never mix different types of batteries. Batteries MUST be installed cor- cart, rack, or stand that is recommended by Yamaha. If a cart, etc., is rectly. Mismatches or incorrect installation may result in overheating and used, please observe all safety markings and instructions that accom- battery case rupture. - Page 3 Yamaha Corporation of America or its subsidiaries. of other electronic devices. Compliance with FCC regulations does * This applies only to products distributed by YAMAHA CORPORATION OF AMERICA. (class B) OBSERVERA! COMPLIANCE INFORMATION STATEMENT Apparaten kopplas inte ur växelströmskällan (nätet) så...
- Page 4 AC outlet. Then have • When one of the following problems occur, immediately turn off the power the instrument inspected by qualified Yamaha service personnel. switch and disconnect the electric plug from the outlet. (If you are using •...
-
Page 5: Saving Data
If you experience any hearing loss or ringing in the ears, consult a physician. Yamaha cannot be held responsible for damage caused by improper use or modifications to the instrument, or data that is lost or destroyed. Always turn the power off when the instrument is not in use. -
Page 6: Copyright Notice
STYLE FILE The Style File Format is Yamaha’s original style file format which uses a unique conversion system to pro- vide high-quality automatic accompaniment based on a wide range of chord types. YPT-420 Owner’s Manual... -
Page 7: About The Manuals
● Online Materials (Downloadable from the web) The following instructional materials are available for downloading from the Yamaha Manual Library. Access the Yamaha Manual Library, then enter your model name (YPT-420, for example) in the Model Name area to search the manuals. -
Page 8: Special Features
8-beat to euro-trance ... and much more. Select a style that matches the music you want to play, or exper- iment with new styles to expand your musical horizons. YPT-420 Owner’s Manual... -
Page 9: Table Of Contents
Song Clear—Deleting User Songs ........55 Track Clear—Deleting a Specified Track from a User Song............55 Backup and Initialization Backup ................. 56 Initialization ................56 Basic Operation and Displays Basic Operation ..............57 Display Items ............... 59 YPT-420 Owner’s Manual... -
Page 10: Setting Up
Be sure to do the following operations BEFORE turning on the power. Power Requirements Although the instrument will run either from an optional AC adaptor or batteries, Yamaha recommends use of an AC adaptor whenever possible. An AC adaptor is more environmentally friendly than batteries and does not deplete resources. -
Page 11: Connecting Headphones (Phones/Output Jack)
OFF. The sustain function lets you produce a natural sustain as you play by pressing a footswitch. Plug the Yamaha Backup data in the flash memory is loaded to the instru- FC4 or FC5 footswitch into this jack and use it to switch ment when the power is turned on. -
Page 12: Panel Controls And Terminals
ASSISTANT ON/OFF] button ..page 23 @4 [A] and [B] knobs ......page 21 !2 [FUNCTION] button ......page 82 @5 [ ](REPEAT & LEARN)/ !3 [MUSIC DATABASE] button .... page 49 [ACMP ON/OFF] button ...pages 48, 34 YPT-420 Owner’s Manual... -
Page 13: Rear Panel
[●] (MEMORY/BANK), [EASY SONG ARRANGER] button [1], [2] buttons ......... page 80 [STYLE] button #3 SONG MEMORY [VOICE] button [REC], [1]–[5], [A] buttons....page 52 #4 PITCH BEND wheel ......page 66 #5 Drum Kit icons......... page 32 YPT-420 Owner’s Manual... -
Page 14: Creating Arpeggios
Voice No. Voice Name Voice No. Voice Name Synth Sequence Piano Arpeggio Sawtooth Lead Arpeggio Ballad Electric Piano Analog Sequence Guitar Chord Chord Sequence Guitar Arpeggio Sawtooth Acid Synth Square Pulse Arabic Loop Trance Massive Percussion Synth Echo YPT-420 Owner’s Manual... - Page 15 The arpeggio function cannot be used at the same time as the harmony function. When you have finished playing with the arpeggio func- tion, press the [ARPEGGIO ON/OFF] button to turn it off. YPT-420 Owner’s Manual...
- Page 16 Press the [STYLE] button and the name of the currently selected style will appear in the display. Rotate the dial to select the desired style. For this example we’ll use the “001 8BtModrn” (8 Beat Modern) style. 8BtModrn NOTE • Refer to “Playing Styles” on page 33. YPT-420 Owner’s Manual...
- Page 17 Whenever you’re playing a style as well as a right-hand part, be sure that your left hand plays only to the left of the split point and your right hand plays only to the right of the split point. (page 30) YPT-420 Owner’s Manual...
-
Page 18: Create Original Sounds
The assignable knob effects are pre-programmed in the pairs listed above. It is not possible to assign different effect combinations. z–c affect the main and dual voices only. Split voices will not be affected. Styles and songs will also not be affected. v–b affect styles only. YPT-420 Owner’s Manual... - Page 19 Reverb reproduces the acoustic ambience of a concert hall or club, while chorus produces a layered “multi-instrument” effect. Reverb Send Chorus Send Level Level Knob A adjusts the depth of the reverb effect, and Knob B adjusts the depth of the chorus effect. YPT-420 Owner’s Manual...
-
Page 20: Style Tempo
Style Tempo Tempo –No Effect– Knob A adjusts the tempo of the style and arpeggios. Rotating the knob clockwise increases the tempo while rotating it counterclockwise decreases the tempo. The knob’s center position produces the initial default tempo. YPT-420 Owner’s Manual... -
Page 21: Using The Knobs
Rotate Knob B to its maximum setting (all the way to the right). Filter Filter Cutoff Resonance Rotating the knob to the right while the volume is set to a high level can result in distortion. If this occurs, reduce the volume level. YPT-420 Owner’s Manual... - Page 22 Knob B to about 3 o’clock, and Knob A to about 8 o’clock. The overall sound of the style should be a bit muffled, with the drums emphasized for solid rhythmic impact. STYLE TEMPO Play a style and/or arpeggio (page 14) and use Knob A to adjust the tempo. YPT-420 Owner’s Manual...
-
Page 23: The Easy Way To Play Piano
Press the [SONG] button, and the song number and name will be dis- played. You can use the dial or other selection controls to select a differ- ent song. For this example try selecting the “010 AveMaria”. Song name AveMaria Song number The song displayed here will be played. YPT-420 Owner’s Manual... - Page 24 Keep playing, and performance assistant technology will continue to “correct” the notes that you play. You can stop song playback at any time by pressing the [START/STOP] button. YPT-420 Owner’s Manual...
-
Page 25: Use The Performance Assistant To Play Like A Pro
To use the performance assistant technology feature it is necessary to play a song that includes chord data, or a style with auto accompaniment on. If a song includes the required data, the chords are shown on the right side of the display (page 59). YPT-420 Owner’s Manual... - Page 26 Play Piano” on page 23 and try adding the right-hand part. Press the [PERFORMANCE ASSISTANT ON/OFF] button to turn the performance assistant technology feature off. The complete score for Nocturne is provided in the separate Data List. YPT-420 Owner’s Manual...
-
Page 27: Change The Song Tempo
You can return to the original tempo by simultaneously pressing the [+] and [-] buttons. ● About the Beat Display The arrow marks in the beat display flash in time with the rhythm of the song or style. First beat of measure Third beat Second beat Fourth beat YPT-420 Owner’s Manual... -
Page 28: Try Playing A Variety Of Instrument Voices
] buttons after pressing the [VOICE] button. (page 58) For this example select the “092 Flute” voice. Flute Select 092 Flute Play the keyboard. Try selecting and playing a variety of voices. YPT-420 Owner’s Manual... -
Page 29: Play Two Voices Simultaneously-Dual
Select the desired dual voice. Watch the displayed dual voice and rotate the dial until the voice you want to use is selected. The voice selected here becomes the dual voice. For this example try selecting the “109 Vibraphone” voice. Vibes YPT-420 Owner’s Manual... -
Page 30: Play Different Voices With The Left And Right Hands-Split
Voice display by pressing the [FUNCTION] button and then using the CATEGORY [ ] and S.Voice ] buttons to select the “S.Voice” item. FngrBass Hold for longer The currently selected than a second SPLIT voice YPT-420 Owner’s Manual... -
Page 31: Play The Grand Piano Voice
• When you press the [PORTA- BLE GRAND] button all settings other than touch sensitivity are turned off. The dual and split voices will also be turned off, so only the Grand Piano voice will play over the entire keyboard. YPT-420 Owner’s Manual... -
Page 32: Drum Kits
Drum Kit List in the separate Data List. ● Drum Kit List Standard Kit 1 Electronic Kit Brush Kit Standard Kit 2 Analog Kit Symphony Kit Room Kit Dance Kit SFX Kit 1 Rock Kit Jazz Kit SFX Kit 2 YPT-420 Owner’s Manual... -
Page 33: Playing Styles
For these styles first turn auto accompaniment on as described on page 34, press the [START/STOP] button, and the accompaniment bass and chord parts will begin playing when you play a key to the left of the keyboard split point. YPT-420 Owner’s Manual... -
Page 34: Play Along With A Style
When sync start is on, the bass and chord accompaniment included in a style will start playing as soon as you play a note to left of the keyboard split point. Press the button a second time to turn the sync start function off. YPT-420 Owner’s Manual... - Page 35 Split point Auto accompani- ment region Press the [START/STOP] button to stop style playback when you’re done. You can switch style “sections” to add variety to the accompaniment. Refer to “Pattern Variation (Sections)” on page 70. YPT-420 Owner’s Manual...
-
Page 36: Playing The Chord Progressions
This is a simple-but-effective chord progression. When you play through to the end of the score, start again from the beginning. When you’re ready to stop playing press the [INTRO/ENDING/rit.] button and the auto accompaniment function will create a perfect ending. YPT-420 Owner’s Manual... - Page 37 091 Bossa Nova —Bossa nova with jazz-style chords— Press the [INTRO/ENDING/rit.] button. m7 5 This progression includes jazzy “two-five” (II-V) changes. Try playing it through several times. When you’re ready to stop playing press the [INTRO/ENDING/rit.] button. YPT-420 Owner’s Manual...
-
Page 38: Playing Auto-Accompaniment Chords
Press the root note together with the nearest white and black keys to the left of it (three keys altogether). dim7 7aug 7sus4 sus2 * Notes enclosed in parentheses ( ) are optional; the chords will be recognized without them. YPT-420 Owner’s Manual... -
Page 39: Using Songs
Use the dial to select the song you want to listen to. have recorded yourself (User Songs) or songs that have been transferred to the instrument from a computer in the same ForElise way that you play the internal songs. The song displayed here can be played YPT-420 Owner’s Manual... -
Page 40: Song Fast Forward, Fast Reverse, And Pause
Press the pause but- Press the fast reverse Press the fast forward ton to pause playback. button to rapidly button to rapidly skip return to an earlier ahead to a later point point in the song. in the song. YPT-420 Owner’s Manual... -
Page 41: Song List
CD-ROM. The scores for songs 9–11 are provided in the separate Data List. Some of the classic and/or traditional songs have been edited for length or for ease in learning, and may not be exactly the same as the original. YPT-420 Owner’s Manual... -
Page 42: Types Of Songs
Save to internal ferred from a computer. User into the instru- nal flash memory. flash memory. Cur- songs cannot be directly trans- ment. rently available. ferred to the external song file flash memory area, and vice versa. Play YPT-420 Owner’s Manual... -
Page 43: Select A Song For A Lesson
Press the [SONG] button, and rotate the dial to select the song you want to use for your lesson. As listed on page 42 there are a variety of song types. For this example try selecting the “012 ForElise”. ForElise YPT-420 Owner’s Manual... - Page 44 Lesson 1 → Lesson 2 → Lesson 3 → Off → Lesson 1 …. The currently selected mode is shown in the display. Waiting (Lesson 1) YourTemp (Lesson 2) MinusOne (Lesson 3) ForElise (Song Lesson off) Start the lesson! Song playback will begin automatically when you select Lesson 1. YPT-420 Owner’s Manual...
- Page 45 Good, or Excellent. “Excellent!” is the highest evaluation. ~~~~ Good After the evaluation display has appeared, the lesson will start again NOTE • The evaluation feature can be from the beginning. turned off via the FUNCTION Grade item (page 84). YPT-420 Owner’s Manual...
-
Page 46: Lesson 2-Your Tempo
Right-hand part (In the case of a right-hand lesson) Stop the Lesson mode. You can stop the Lesson mode at any time by pressing the [START/ STOP] button. Once you’ve mastered Lesson 2, move on to Lesson 3. YPT-420 Owner’s Manual... -
Page 47: Lesson 3-Minus One
Play the note shown in the display. Left-hand part Right-hand part (In the case of a right-hand lesson) Stop the Lesson mode. You can stop the Lesson mode at any time by pressing the [START/ STOP] button. YPT-420 Owner’s Manual... -
Page 48: Practice Makes Perfect-Repeat And Learn
] (REPEAT & LEARN) button when you make a mistake in order to repeat practice of that section until you get it right. Jump back 4 measures and repeat playback Song playback direction Press immediately Oops! A mistake! YPT-420 Owner’s Manual... -
Page 49: Play Using The Music Database
The jazz style will start playing when you play a left-hand chord to the left of the split point (page 30). Refer to page 38 for information about playing chords. Split Point Press the [START/STOP] button to stop playback. YPT-420 Owner’s Manual... -
Page 50: Change A Song's Style
The song number and name will be displayed. You can use the dial to select a different song. Halleluj The currently selected song number and name are displayed here. Select a Song. Use the dial to select the song you want to arrange. YPT-420 Owner’s Manual... -
Page 51: Select A Style
Press and hold the [VOICE] button for longer than a second. After SONG MELODY VOICE appears on the display the voice you selected in step 6 becomes the song’s melody voice. SONG MEL Hold for longer than a second YPT-420 Owner’s Manual... -
Page 52: Record Your Own Performance
Recording Procedure Press the [SONG] button, then use the dial to select the user song number (031–035) you want to record to. User 1 Rotate the dial to select a song number between 031 and 035. YPT-420 Owner’s Manual... - Page 53 (page User 1 55) function to delete unwanted data and make more room avail- able for recording, then do the recording again. Recording starts Current measure Stop recording by pressing the [START/STOP] or [REC] button. YPT-420 Owner’s Manual...
- Page 54 • The split voice cannot be recorded. • The following data are recorded at the beginning of the track. Changes made during the song will not be recorded. reverb type, chorus type, time signature, style number, style volume, tempo YPT-420 Owner’s Manual...
-
Page 55: Song Clear-Deleting User Songs
You can cancel the clear operation by pressing the [-] button. tion press the [+] button. Press [-] to cancel the Track Clear operation. Press the [+] button to clear the track. The clear-in-progress message will appear briefly on the display while the track is being cleared. YPT-420 Owner’s Manual... -
Page 56: Backup And Initialization
Clear operation, song data switch while simultaneously holding the highest white key on the keyboard you have purchased will also and the three highest black keys. be cleared. Be sure to save data you want to keep to a computer. YPT-420 Owner’s Manual... -
Page 57: Basic Operation And Displays
Press a button to select a basic function. Select a song you want to listen to or a song you want to use for a lesson. Select an auto-accompaniment style. Select a voice you want to play on the keyboard. YPT-420 Owner’s Manual... -
Page 58: Use The Dial To Select An Item Or Value
[+] and [-] buttons. Press number buttons [0], [0], [3]. Start a function. This is the [START/STOP] button. Press the [START/STOP] button after pressing the [SONG] or [STYLE] button to start playback of the selected song or style (rhythm). YPT-420 Owner’s Manual... -
Page 59: Display Items
Indicates that performance knobs. (see page 18) assistant technology is turned page 23 on. (see ACMP ON Indicates that Accompaniment is turned on. (see page 34) SYNC STOP Indicates that SYNC STOP is turned on. (see page 71) YPT-420 Owner’s Manual... -
Page 60: Adding Effects
Auto Accompaniment is on (page 34). • Harmony type 06 to 12 (Trill) Keep holding down the keys. You can adjust the Harmony Volume in the Hold down two keys. Function Settings (page 69). YPT-420 Owner’s Manual... -
Page 61: Adding Reverb
Data List for information about the available reverb types. ● Adjusting the Reverb Send Level You can individually adjust the amount of reverb that is applied to the main, dual, and split voices. (See page 83.) Reverb Hall2 The currently selected reverb type YPT-420 Owner’s Manual... -
Page 62: Adding Chorus
Data List for information about the available chorus types. ● Adjusting the Chorus Send Level Chorus You can individually adjust the amount of chorus that is applied to the main, dual, and split voices. (See page 83.) Chorus1 The currently selected chorus type YPT-420 Owner’s Manual... -
Page 63: Handy Performance Features
To stop the metronome, press the [METRO- NOME ON/OFF] button again. Tempo GrandPno Current Tempo setting Use the dial to select a tempo from 11 to 280. Indicates the beat number in the measure YPT-420 Owner’s Manual... -
Page 64: Setting The Number Of Beats Per Measure, And The Length Of Each Beat
Adjusting the Metronome Volume Press the [FUNCTION] button. Use the dial to set the metronome vol- ume as required. Use the CATEGORY [ ] and [ ] but- tons to select the Metronome Volume item. MtrVol Metronome volume YPT-420 Owner’s Manual... -
Page 65: Tap Start
Touch Sensitivity item appears. “TouchSns” appears in the display for a few seconds, and the currently selected touch sensi- tivity will be displayed. TouchSns Hold for longer than a second. Medium Touch Sensitivity YPT-420 Owner’s Manual... -
Page 66: Pitch Bend
Use the dial to set the tuning value between -12 and +12 as required. between -100 and +100 as required. NOTE NOTE • The pitch of Drum Kits voices cannot be changed. • The pitch of Drum Kits voices cannot be changed. YPT-420 Owner’s Manual... -
Page 67: Controlling Arpeggio Volume With Keyboard Dynamics
“ARP Velo”. “ARP Velo” will be shown in the display for a few seconds, then the currently selected arpeg- gio velocity setting will appear. ARP Velo Original The currently selected arpeggio velocity. YPT-420 Owner’s Manual... -
Page 68: One Touch Setting
Play the keyboard and remember the the voice being used. sound of the voice. If you have stopped playback at some point during this procedure press the [START/STOP] button to start playback again. YPT-420 Owner’s Manual... -
Page 69: Adjusting The Harmony Volume
Five settings are available: 1–5. Settings 1 and 2 are best for listening via the instrument’s built-in speakers, setting 3 is for headphones, and settings 4 and 5 are ideal for listening via external speakers. YPT-420 Owner’s Manual... -
Page 70: Style (Auto-Accompaniment) Functions
When the synchro start standby mode is engaged, style playback will begin as soon as you play a chord in the accompaniment range of the keyboard. You can disengage the synchro-start standby mode by pressing the [SYNC START] button again. YPT-420 Owner’s Manual... - Page 71 Press the [MAIN/AUTO FILL] button. The style will play while you are playing Style playback will the keys stop when you release the keys FILL A≥B When the fill-in is finished, it leads smoothly into the selected main section A/B. YPT-420 Owner’s Manual...
-
Page 72: Adjusting The Style Volume
• The split point cannot be changed during a song lesson. NOTE • You can also access the Split Point item by pressing the [FUNCTION] button and using the CATEGORY [ ] and [ ] buttons to locate the item (page 82). Split point YPT-420 Owner’s Manual... -
Page 73: Play A Style With Chords But No Rhythm (Stop Accompaniment)
(page 38). Press the [STYLE] button to engage the style function, then press the [ACMP ON/ OFF] button to turn the auto accompani- ment on. PopBossa Appears when auto accompaniment is on Accompaniment range YPT-420 Owner’s Manual... -
Page 74: Loading Style Files
file will appear in the display. If multiple loadable style files have been trans- ferred to the instrument, you can use the dial or the [+] and [-] buttons to select the other files in sequence. YPT-420 Owner’s Manual... -
Page 75: Chord Basics
Flatted 7 Minor chord Major 7 Major chord Minor/major 7 , flatted 5 Minor 7 , flatted 5 , suspended 4 7sus4 Major 7 Minor chord Flatted 5 chord Flatted 5 Minor 7 chord Flatted 7 Suspended chord YPT-420 Owner’s Manual... - Page 76 • Two-note fingerings will produce a chord based on the previously played • The chord fingerings listed are all in “root” position, but other inversions chord. can be used—with the following exceptions: m7, m7 b 5, 6, m6, sus4, aug, dim7, 7 b 5, 6(9), sus2. YPT-420 Owner’s Manual...
-
Page 77: Looking Up Chords Using The Chord Dictionary
Try playing a chord in the auto accom- paniment section of the keyboard, checking the indications in the display. When you’ve played the chord properly, a bell sound signals your success and the chord name in the display flash. YPT-420 Owner’s Manual... -
Page 78: Song Settings
• The current measure number is shown in the display during play- back. • If you want to set the start point “A” at the very beginning of the song press the [A-B REPEAT] button before starting playback of the song. YPT-420 Owner’s Manual... -
Page 79: Muting Independent Song Parts
#2 has replaced the song’s original melody Rotate the dial to select the voice you voice. want to listen to after pressing the [VOICE] button. Hold for longer than Strings a second SONG MEL YPT-420 Owner’s Manual... -
Page 80: Memorize Your Favorite Panel Settings
• Do not turn off the power while saving settings to the registra- tion memory, otherwise the data may be damaged or lost. NOTE • Data cannot be saved to the registration memory during song play- back. YPT-420 Owner’s Manual... -
Page 81: Recalling A Registration Memory
Press the REGIST MEMORY button, [1] or [2], containing the settings you want to recall. The recalled REGIST MEMORY number appears in the display for a few seconds. The panel controls will be instantly set accordingly. REGIST 1 YPT-420 Owner’s Manual... -
Page 82: The Functions
Parameters” on page 56 for information on the function settings that are stored on the instru- ment. To restore all initial factor default set- tings perform the “Backup Clear” procedure described in the “Initialization” section on page YPT-420 Owner’s Manual... - Page 83 Determines how much of the Split voice’s signal is sent to the Reverb Split Voice Reverb Level S.Reverb 000–127 effect. Determines how much of the Split voice’s signal is sent to the Chorus Split Voice Chorus Level S.Chorus 000–127 effect. YPT-420 Owner’s Manual...
- Page 84 ON, the Demo Song will not play, even if the [DEMO] button is pressed. * All these settings can be conveniently reset to their initial default values by pressing the [+] and [-] buttons simultaneously. (The exception to this is Initial Send, which is an operation, not a setting.) YPT-420 Owner’s Manual...
-
Page 85: Connecting To A Computer
MIDI messages can be divided into two groups: received from the keyboard. So then what is the Channel messages and System messages. information from the keyboard that becomes the basis for note production? YPT-420 Owner’s Manual... -
Page 86: Connecting A Personal Computer
(2) when alternately connecting/disconnecting the USB cable. NOTE • The Musicsoft Downloader application may not be able to access the instrument in the following cases: Instrument USB cable • During style playback. • During song playback. YPT-420 Owner’s Manual... -
Page 87: Transferring Performance Data To And From A Computer
• If External Clock is ON and no clock signal is being received from an external device, the song, style, and metronome functions will not start. Press the [FUNCTION] button. Use the dial to select ON or OFF. YPT-420 Owner’s Manual... -
Page 88: Remote Control Of Midi Devices
(shown below). C6: Fast forward B5: Start A5: Stop G5: Rewind F5: Top (move to the beginning of the song) E5: Metronome ON/OFF NOTE • Remote control of MIDI devices will function independently of the PC2 mode. YPT-420 Owner’s Manual... -
Page 89: Initial Send
(Song 036–) on the Accessory CD-ROM from your com- • Data Capacity: Flash memory 373 kb puter to the instrument is given as an example. • Data Format: SMF format 0, style file (extension: .sty), Backup File (06PK61.BUP) YPT-420 Owner’s Manual... - Page 90 [Move] button and a confir- you want to transfer to the instrument, and click “Open”. mation message will appear. Click [OK] and the song will be transferred from the “List of files stored temporarily” to the instrument’s memory. YPT-420 Owner’s Manual...
- Page 91 4 Use the dial to select the channel you want to play back as the specified right- or left-hand part. We recommend that you select channel 1 for the right-hand part and channel 2 for the left-hand part. YPT-420 Owner’s Manual...
-
Page 92: Accessory Cd-Rom Installation Guide
• Yamaha makes no representations or warranties with regard to the use of the software and documentation and can- not be held responsible for the results of the use of this manual and the software. -
Page 93: Cd-Rom Contents
* This instrument does not support Music Database data. 5 Music Database data In order to view PDF scores, you will need to install Adobe Reader in your computer. Adobe Reader can be downloaded free at the Adobe website. YPT-420 Owner’s Manual... -
Page 94: System Requirements
Driver When the “Found New Hardware Wizard” window appears, click [Cancel]. NOTE Follow the steps below to install (or update) the • On some computers, it may take a few minutes before this screen USB-MIDI driver. appears. YPT-420 Owner’s Manual... - Page 95 Windows 2000 “ Yamaha USB-MIDI Driver ” icon. A window appears and the driver version is indicated in the lower left of the window. NOTE • When using Windows XP x64/Vista/7, double-click the “Yamaha USB-MIDI Driver (WDM)” icon. YPT-420 Owner’s Manual...
- Page 96 “Unknown device”. If one appears, select it and click the [Remove] button. Remove the USB cable from the instru- ment, and make the connection again. Install the driver again. (pages 94–95) YPT-420 Owner’s Manual...
- Page 97 Click “Change or Remove Programs” following web site. located in the upper left, then select http://music.yamaha.com/download/ “Yamaha USB-MIDI Driver” or “Yamaha Musicsoft Downloader” from the list in the Playback response is delayed. right panel. • Does your computer satisfy the system Click [Remove].
- Page 98 THIRD PARTY SOFTWARE. lates public policy. • Yamaha is not liable to you or any other person for any damages, including, • You may not initiate services based on the use of the SOFTWARE without without limitation, any direct, indirect, incidental or consequential damages, permission by Yamaha Corporation.
-
Page 99: Troubleshooting
Types 06–26 will function whether style playback is on or off. For types 06–12 you need to play two notes at the same time. YPT-420 Owner’s Manual... -
Page 100: Index
One Touch Setting ....... 68 Filter ............19 PC Mode ..........88 Filter (Style) ..........20 Performance assistant technology ..23 Flash Memory ........42 Pitch Bend Range ......... 83 Foot Switch ...........11 Power Adaptor ........10 Function ..........82–83 Preset Song ....... 39, 41–42 YPT-420 Owner’s Manual... - Page 101 Time Numerator ........64 Time Signature ........63 Touch Response ........65 Touch Sensitivity ......... 65 Track ..........52–55 Track Clear ........... 55 Transfer .......... 89–91 Transpose ..........66 Troubleshooting (Installation) ....96 Troubleshooting (Instrument) ....99 Tuning ..........66 YPT-420 Owner’s Manual...
-
Page 102: Specifications
• 10W (PA-3C) • DUAL Power Supply • SPLIT • Adaptor: Yamaha PA-130, PA-3C, or an equivalent Style • Batteries: Six “D” size, R20P (LR20) or equivalent batteries • 155 Preset Styles + 1 User Style File Dimensions (W x D x H) •... - Page 105 Original Owner, the following Limited Warranty, which applies only to products that have been (1) directly purchased from Yamaha’s authorized dealers in the fifty states of the USA and District of Columbia (the “Warranted Area”) and (2) used exclusively in the Warranted Area.
- Page 106 Pour plus de détails sur les produits, veuillez-vous adresser à Yamaha ou Para obter detalhes de produtos, entre em contato com o represen- au distributeur le plus proche de vous figurant dans la liste suivante.
- Page 107 Yamaha Home Keyboards Home Page http://music.yamaha.com/homekeyboard/ Yamaha Manual Library http://www.yamaha.co.jp/manual/ U.R.G., Pro Audio & Digital Musical Instrument Division, Yamaha Corporation © 2009 Yamaha Corporation WT69320 002POXXX.X-XXC0 Printed in China...
Need help?
Do you have a question about the YPT-420 and is the answer not in the manual?
Questions and answers