Table of Contents
Advertisement
Available languages
Available languages
Operator's M anual
®
6.0 GROSSHORSEPOWER
2500 PSi
2.0 GPM
CLEAN G SYSTEM
Model No. 580.752352
PRESSURE WASHER
CUSTOMER HELPLINE
HOURS: Mon. - Fri. 8 a.m. to 5 p.m. (CT)
WARmG
Before using this product, read this
manual and follow all Safety Rules
and Operating Instructions.
1_-illADVERTEHCIA
Antes de utilizar el producto, lea este
manual y siga todas las Regias de
Seguridad e Instrucciones de Uso.
Sears, Roebuckand Co., RoffmanEstates,IL 60179 U.S.A.
Visit our Craftsman website: www.craftsman.com
Part No. 199576GS Draft - (10/02/2006)
,, Safety
,, Assembly
,, Operation
. Maintenance
,, Parts
,, Espafiol,p. 34
Advertisement
Table of Contents

Related Manuals for Craftsman 580/752352


Summary of Contents for Craftsman 580/752352
- Page 1 Safety Rules manual y siga todas las Regias de and Operating Instructions. Seguridad e Instrucciones de Uso. ,, Espafiol,p. 34 Sears, Roebuckand Co., RoffmanEstates,IL 60179 U.S.A. Visit our Craftsman website: www.craftsman.com Part No. 199576GS Draft - (10/02/2006)
-
Page 2: Table Of Contents
One-Year Full Warranty on Craftsman Pressure Washer When assembled, operated and maintained according to all supplied instructions, if this Craftsman Pressure Washer fails due to a defect in material or workmanship within one year from the date of purchase, return it to any Sears store or Parts &... - Page 3 A WARNING The engine exhaustfrom this productcontains chemicalsknownto the State of California to cause vapors _Fuel and its are extremely flammable and explosive. cancer,birth defects, or otherreproductive harm. death. Fire or explosion can cause severe burns or DANGER Contents are harmful or fatal if swallowed. Avoid WHEN ADDING OR DRAINING FUEL o Turn pressure washer OFFand let it cool at least 2 minutes ontact to eyes, skin or clothing.
- Page 4 WARHIHG Starter cord kickback (rapid retraction) can result The high pressure stream of water that this in bodily injury. Kickback will pull hand and arm equipment produces can cut through skin and its _,1_ toward engine faster than you can let go. )ossible amputation.
- Page 5 NOTICE High pressure spray may damage fragile items including glass. ihands, hair, clothing, or accessories. Starter and other rotating parts can entangle DO NOT point spray gun at glass when using MAX (pin point) nozzle. . NEVER operatepressure washerwithoutprotective housingor NEVERaim spray gun at plants.
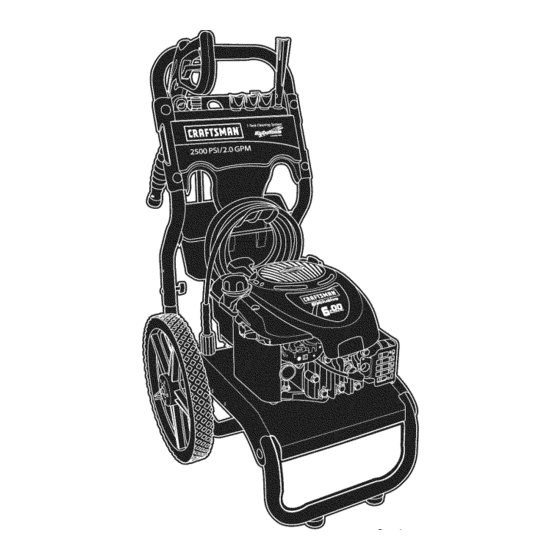
- Page 6 KNOWYOURPRESSURE WASHER _Read the Operator'sManual and safety rules before operatingyour pressurewasher. Compare the illustrations with your pressure washer to familiarize yourself with the locations of various controls and adjustments. Savethis manual for future reference. NozzleExtensionwith Spray Gun Quick Connect ProjectPro Nozzles Cleaning Tank HydroFoam...
- Page 7 Your c leaning system requires some assembly andisready ASSEMBLINGCLEANIHG SYSTEM foruse onlyafter i t hasbeen properly serviced withthe Your Craftsman cleaning system wiil need assembly before recommended oilandfuel. operation: If you have any problemswith the assemblyof your Fill out and send in registration card.
-
Page 8: Warranty
Attach Detergent Siphon Hose to Pump Attach detergent siphon hose to barbed hose fitting on pump. uel and its vapors are extremely flammable and explosive. death. Fire or explosion can cause severe burns or WHENADDING FUEL ° Turnpressure washerOFF and let it coolat least2 minutes beforeremovingfuelcap. - Page 9 FreshStartFuelCap Connect Hose and Water Supply to Pump Adding fuel preserver helps keepfuel fresh and carburetors clean for easier starting, all season long. This new fuel cap automatically drips concentrated fuel preserver into your fuel tank_ DANGER instructionwill voidwarranty. Contents are harmful or fatal if swallowed. Avoid NOTE:Removeand discard the shipping caps from the ontact to eyes, skin or clothing.
- Page 10 Before connecting garden hose to water inlet, inspect Turn ONwater, point gun in a safe direction and squeeze inlet screen•Cleanscreen if it contains debris or have it trigger to purge pump system of air and impurities• replaced if damaged•DO NOT run pressure washer if WARNING inlet screenis damagedor missing.
- Page 11 HOWTO USEYOUR CLEANIHG SYSTEM To Start Your Cleaning System To start your engine-powered cleaning system for the first If you haveany problems operating your pressure washer, time, follow these instructions step-by-step. This information please call the pressure washer helpline at 1-800-222-3136. also applies whenever you start the engine after you have let Pressure Washer Location the pressure washer sit idle for at leasta day.
- Page 12 Move throttle lever to "Fast" position, shown here as a 15. If engine fails to start after six pulls, move choke lever to rabbit. "Run" position, and repeatsteps 11 through 13. NOTE:Always keepthe throttle lever in the "Fast" position when operating the pressure washer. WARNING The high pressure stream of water that this equipment produces can cut through skin and its...
- Page 13 3. ALWAYS point s pray g uninasafe direction and squeeze Howto UseProjectPro HozzleSystem spray g untrigger to release retained high water The quick-connect on the nozzle extension allows you to pressure. switch between three different ProjectPro system nozzles. IMPORTANT: Spray g un traps high water p ressure, even ProjectPro nozzlescan be changed while pressure washer when engine i sstopped and water i s disconnected.
- Page 14 Forgeneralrinsing (medium pressureand medium Pull back on collar, insert selected ProjectPro nozzle flow), idealfor most all purposecleaningsuch as and releasecollar. Tug on ProjectPro nozzleto make home siding, brick patios,wood decks, drivewaysand sure it is securely in place. sidewalks,garagefloors, etc., selectorangegeneral For most effective cleaning, keep ProjectPro nozzle ProjectPro...
- Page 15 Cleaning and Applying Detergent Allow HydroFoam wash to soak in between 3-5 minutes before washing and rinsing. Reapply as CAUTION neededto prevent surface from drying. DO NOT allow HydroFoam wash to dry on (prevents streaking). Chemicals can cause bodily injury, and/or property damage.
- Page 16 EHGINETECHNICALINFORMATIOH PRODUCTSPECIFICATiOHS This is a single cylinder, L-head, air cooled engine. It is a low Pressure Washer Specifications emissions engine. Max Outlet Pressure ....... 2,500 PSI In the State of California, Model Series 120000 engines are Max Flow Rate ......2.3 GPM certified by the California Air Resources Board to meet Chemical Mix......
-
Page 17: Assembly
OWNER'SRESPONSIBILITIES Follow the hourly or calendar intervals,whichever occurs first. More frequent service is required when operating in adverse conditions noted below. MAINTENANCESCHEDULE OPERATINGiNTERVALS SERVICEDATES FILL IN DATESAS YOU COMPLETE REGULARSERVICE Before 100-300 MAINTENANCETASK Hours or Hours or Hours or Each Use Hours I Every 25 Every 50... - Page 18 • Use a damp cloth to wipe exterior surfaces clean. Assemble nozzle extension to spray gun, as described earlier in manual. Nozzle Maintenance NOTICE Improper treatment of pressure washer can damage it and A pulsing sensation felt while squeezing the spray gun trigger |shorten its life.
-
Page 19: Operation
ENGINEMAINTENANCE Checking Oil Level Oil level should be checked prior to each use or at least every 5 hours of operation. Keep oil level maintained. Make sure pressure washer is on a level surface. Remove oil dipstick and wipe dipstick with clean cloth. Unintentional sparking can result in fire or Replaceand tighten dipstick. -
Page 20: Specifications
3. Clean a rea around o ilfill,remove oilfill cap/dipstick. ServiceSpark Plug Wipe dipstick c lean. Service the spark plug every 100 hours of operation or 4. Tip yourpressure washer todrain oilfromoilfillintoa yearly, whichever occurs first. suitable container making s ure youtipyourunit a way Cleanarea around spark plug. - Page 21 AFTEREACHUSE Air Cooling System Overtime debris may accumulatein cylinder cooling fins and Water should not remain in the unit for long periods of time. cannot be observedwithout partial engine disassembly. Forthis Sediments or minerals can deposit on pump parts and reason,we recommendyou havean authorizedSearsservice "freeze"...
- Page 22 WINTERSTORAGE • Checklevel of fuel preserver cartridge. Fuel preserver is dark in color. NOTICE • If cartridge is almost empty or empty, replacewith a new fuel preservercartridge following the instructions in "Fresh You must protect your unit from freezing temperatures. Start FuelCap"...
- Page 23 Problem Correction C_use HydroFoam launcher installed. Replace HydroFoam launcher with high pressure nozzle. Water inlet is blocked. Clearinlet. Inadequate water supply. Provide adequatewater flow. Inlet hose is kinked or leaking. Straighten inlet hose, patch leak. Pump has followingproblems: Checkand clean inlet hose strainer. Clogged inlet hose strainer.
- Page 24 CRAFTSMAH2500 PSi Cleaning System 580.752352 Main Unit -- Exploded View...
- Page 25 CRAFTSMAH2580 PSi Cleaning System 580.752352 Main Unit -- Parts List Item Part # Description 196811GS ASSY, Base M196526GS HANDLE 199944GS ASSY, Billboard 195964GS Clips, Tree 199229GS ASSY,Chemical Tank 192980GS KIT, Valve 199955GS KIT, Chem Capwith Tag 192645GS KIT, Engine/Pump Mounting Hardware 195085GS WIREFORM 192050GS...
- Page 26 CRAFTSMAH2500 PSi CJeaningSystem 580.752352 Pump -- Expl0ded View ½ ..... H...
- Page 27 CRAFTSMAH2500 PSi Cleaning System 580.752352 Pump -- Parts List item Part # Description 190571GS CAP, Oil 190627GS MANIFOLD 190578GS 190581GS CAP, 1/8 194298GS THERMALRELIEF 190594GS KIT, UNLOADERSTEM 190632GS KIT,WATER INLET, ALUM 190634GS KIT, OUTLET,ALUM 199708GS KIT, HEADALUM 193806GS KIT, CHECKVALVES 190592GS KIT, INLETCHECK 190593GS...
- Page 28 EHGIHE, 6.0 HP, BrB!ls and Stratton, 122KI2 - Exploded View =9I_ _o__ 202_ 404 @ 529<_...
- Page 29 EHGIHE, 6.0 HP, BrBggs and Stratton, 122102 - Exploded View 843A IZZ/I IILLJ 27o Q 977 CARBURETOR 121 CARBURETOR GASKETSET OVERHAUL KIT 137 0 633A 633A 65_ 58 1211 12t0 358 ENGINE GASKET SET 1005...
- Page 30 EHGIHE,6.0 HP, Briggs and Stratton, 122K82 - Parts List Part # Description item Part # Description item 690345 Screw (Cylinder Shield) 697322 Cylinder Assembly 690662 Nut (Flywheel) 399269 Kit- Bushing/Seal (Magneto Side) 802574 Armature-Magneto 299819s Seal-Oil (Magneto Side) 691061 Screw (Magneto Armature) 493279 Sump-Engine 802592s...
-
Page 32: Maintenance
Sears, Roebuck and Co., U.S.A. (Sears), the California Air Resources Board (CARD) and the United States Environmental Protection Agency (U.S.EPA} Emissions Control System Warranty Statement (Owner's Defect Warranty Rights and Obligations} The California Air Resources Board (CARB), U.S. EPA and Sears are a. - Page 33 Emissions Durability Period and Air index information Emissions Compliance Period On Engine Emissions On Your Engine Emissions Label Compliance Label Engines that are certified to meet the California Air ResourcesBoard After July 1, 2000 certain Sears engines will be certified to meet the (CARB) Tier 2 Emission Standards must display information United States Environmental Protection Agency (USEPA)Phase 2 regarding the Emissions Durability Period and Air Index.
- Page 34 Sears, punto de venta de Craftsman o centre de reparaci6n y repuestos de Sears de los Estados Unidos para su reparaciOngratuita o, en case de que _sta no sea posible, para su sustituci6n.
- Page 35 A ADVERTENClA EI escape del motor de este producto contiene eiernentos extremadamente qgirnicos reconocidos en el Estado de California gasolina y sus vapores son per producir c_ncer, defectos de nacirniento inflamables y explosives. u otros dafioe de ripe reproductive. severas e inclusive la muerte. El fuego o una explosi6n pueden causar quemaduras PELIGRO...
- Page 36 , ADVERTEHCIA El retroceso (repliegue r_.pido) del cable del arrancador El chorro de agua a alta presi6n que este equipo produce,puede piel tejidos puede producir lesiones. El retroceso impedir_ que el atravesar la y los _41_._'_ usuario suelte el cable a tiempo y tirar_, de su mano y brazo hacia el motor.
- Page 37 AVISO El rociado de alta presi6n puede dafiar elementos fr_giles, El arrancador y otras piezas que rotan pueden enredar incluyendo el vidrio. NO dirija la pistola rociadora hacia un cristal cuando utilice la boquilla pelo, las manos, el la ropa, o los accesorios. MAX (punta de alfiler).
- Page 38 CONOZCA SU MAQUIHASISTEMADE LIMPIEZA !i _!i_!i] Lea el IV]anualdel Operarioy las regias de seguridadantes de poneren marcha su sistema de limpieza. I....Compare las ilustracionescon su sistema de limpiezapara familiarizarse con las ubicaciones de los diferentes controles y ajustes. Guarde este manual para referencias futuras. Extensi6n paraBoquillascon Pistola de Rociado R@ida...
- Page 39 Su sistema de limpieza requiere de cierto ensamble y estar_ lista Conecte el suministro de agua a bomba. para ser usado 8nicamente despu_s de haber depositado el Conecte boquilla la extensi6n al pistola rociadora. combustible y el aceite recomendado. Selecto/conecta r_pido conecta boquilla a la extensi6n de la Si tiene prohlemas conel ensamhle de su m;_quina lavadera a boquilla.
- Page 40 Montaje de Manguera de Sif n del Detergentea la Bomba Conecte la manguera de sifOn de detergente al acoplamiento vapores dentado de la manguera en la bomba. _jLa gasolina sus son extremadamente inflamables y explosivos. severas e inclusive la muerte. El fuego 0 una explosion pueden causar quemaduras CUANDOANADA COMBUSTIBLEEL DEPOSITO .
- Page 41 Tap_nde ComhastJble paraMejorarel Arranqee Conecte Ja Manouera y el Suministro de Agua a la Bomba El usode conservante de combustible mantiene el combustible en buenestado y limpialos carburadores, Io quefacilitael arranque en todaslasestaciones del a_o.El nuevotap6nde combustible gotea automAticamente conservante concentrado en el dep6sitode combustible_ PELIGRO garantia."...
- Page 42 Antes de que conecte la manguera de jardin a la entrada de ABRA el agua, apunte con la pistola hacia una direcci6n segura agua, inspeccioneel colador de la entrada. Limpie el colador si y apriete el gatillo para eliminar el aire y las impurezas del sistema de bombeo.
- Page 43 COM0 USARSU SISTEMA DE LIMPIEZA Para Porter en Marcha el Sistema de Limpieza Para darle arranque a su sistema de limpieza movido a motor por Si tiene problemas con el funcionamiento de su m_.quinalavadoraa primera vez, siga estas instrucciones paso a paso. Esta informaci6n presi6n, por favor Ilamea la Ifneade ayuda de la m_quina lavadora acerca de la puesta en marcha inicial tambi@ es v_.lida para cuando a presi6n al 1-800-222-3136.
- Page 44 13. Cuandoarranque el motor,muevalentamente la palanca del Mueva el control de la v_.lvulade admisiOn a la posiciCn ahogador a la posici6n"Enmarcha" ("Ran").Si el motorfalla, "R_.pido"("Fast"), que se distingue con la figura de un conejo. muevala palanca a la posici6n"Ahogado" ( "Choke"), y despu_s a la posici6n"Enmarcha"...
- Page 45 C_mo Detener su Sistema de Limpieza Suelte el oatillo de la pistola rociadora y deje funcionar el motor al ralenti durante dos minutos. Mueva el acelerador a la posiciCn "Slow" (Lento), luegoa la posiciCn "Stop" (Parada). EI motor podria petardear, incendiarse o da_arse. o NOcoloquela palanca estranguladora en la posiciCn "Choke"...
- Page 46 Elija l aboquilla ProjectPro que desee: Desplacehacia atr_.sel anillo, inserte la boquilla ProjectPro elegiday suelte el anillo. Tire de la boquilla ProjectPro para Para un enjuagado suave (baja presiOny mayor caudal), comprobar que estA bien montada. para una limpieza suave de coches/camiones, barcos, RVs, muebles de jardin, cortac_spedes, etc., seleccione la Para una limpieza mAs efectiva, mantenga la boquilla de boquilla ProjectPro...
- Page 47 Limpieza y Aplicaci_n del Detergente Deje que el HydroFoam detergenteempape la superficie durante 3-5 minutos antes de lavar y aclarar. Vuelva a aplicar la soluci6n cuando sea necesario para evitar que la superficie PRECAUCION se seque. Evite que el HydroFoam detergente se seque Los productos quimicos pueden provocar lesiones de gravedad (impide la formaci6n de vetas).
- Page 48 INFORMACi6HTECHICASOBREEL MOTOR ESPECIFICACIOHES DELPRODUCTO El motor es de uno cilindros, de L-cabeza, refrigerado por aire y de Especificaciones de JaM_quina Lavadora a baja emisi6n. Presi6n En el Estado de California, los motores de la serie 120000 han Presi6n de salida m_xima ......2,500 PSI obtenido la certificaci6n del California Air Resources Board (Consejo Caudal m_ximo ........
- Page 49 RESPONSABILIDADES D ELPROPIETARJO Siga el programa de mantenimiento segOnel nOmerode horas o seg8n el calendario, Io que suceda primero. Se requiere de servicio con mayorfrecuencia cuandooperela unidaden lascondiciones adversas descritas a continuaciOn. CALENDARIODE MANTENIMIENTO INTERVALODE OPERACI[)N POR HORA FECNAS DE SERVIClO ANOTE LAS FECHASCONFORMECUMPLA Antes de Cada 25 Horas o...
- Page 50 Revise el Filtro en Linea MAHTENIMIENTODE LA MAQUIHA LAVADORA A PRESION Consulte la ilustraciOn y suministre servicio al filtro en linea si se tapa siguiendo estos pasos: Limpie los Residuos Filtro en linea Limpie a diario, o antes de cada uso, los residuos acumulados en el lavadoraa presiOn.Mantengalimpiaslas conexiones, los muelles y los mandos.
- Page 51 Mantenimiento de los Anillos 'O' NOTA: Todoaceite sint_tico quecumplalasespecificaciones ILSAC GF-2, c onmarcade certificacbn APIy consimbolodeservicioAPI Compre una O-Juego de Reparaci6n de Anillo en sus Sears locales conSJ/CF ENERGY C ONSERVING o superioresun aceite aceptable a o Ilamando 1-80O-4-1VlY-HOIVlE (469-4663) o en linea en todaslastemperaturas.
- Page 52 Cambiode Aceite deJ Motor Para dar servi¢ioal tiltro de aire, siga los pasosque se detallan a ¢ontinuaci6n: Cambie el aceite despu_s de las primeras 5 horas de operaci6n. Aflojeel tornilloy quitela cubierta. Cambie el aceite y el filtro cada 50 horas de ese momento en adelante.
- Page 53 DESPUESDE CADA USO Si el motor ha estado funcionando, el silenciador estarA bastante caliente. Deje que el silenciador se enfrie para poder darle servicio al No deberA haber agua en la unidad por largos periodos de tiempo. apagachispas. Los sedimentos de minerales se pueden depositar en partes de la bombay "congelar"...
- Page 54 ALMACENAMIEHTO PARAJNVJERNO Compruebe el nivel del cartucho de aditivo para el combustible. El aditivo es de color oscuro. AViSO Si el cartucho est,. vacio o casi vacio, c_.mbielopor otro nuevo conforme alas instrucciones de la secci6n "TapOnde Usted deber_ proteger su unidad de las temperaturas de combustible Fresh StartTM'',en la p_gina 41.
- Page 55 Problema Soluci6n C_usa Lanzador HydroFoam instalado. Cambie el lanzador HydroFoam por la boquilla de alta presi6n. La entrada de agua est_ bloqueada. Limpie la entrada. Suministro de agua inadecuado. Proporcione flujo de agua adecuado. La manguera de entrada est_ doblada o Estire la manguera de entrada, coloque un presenta fugas.
- Page 58 Sears, Roebuck andCo., U.S.A.(Sears),CaliforniaAir Resources B oard (Consejo de Recursos sabreel Aire de California,CARl},per sos siglas en ingles)y United StatesEnvironmental ProtectionAgency(Agenciade Protecci6n A rnhientalde EE.UU., EPA,persos siglas en ingles). Declaraci6n degarantiadel sistema decontrol d e emisiones (derechos y ohligacionesdel propietario p arala garantiacontradeiectos} Sistema de medici6n de combustible California Air Resources Board (CARB), U.S.
- Page 59 Informaci_n Sobre el Periodo de Durabiiidad de Periodo de Cumplimiento de ia Normativa de las Emisiones y el |ndice de Aire en la Etiqueta Emisiones en la Etiqueta de Cumplimiento de de Emisiones del Motor Emisiones del Motor Los motores con certificaci6n de cumplimiento de la normativa Desde el 1 de julio de 2000, algunos motores Sears cuentan con la sobre emisiones de nivel 2 del California Air Resources Board certificaci6n de cumplimiento de la fase 2 de las normas sobre...
- Page 60 _::__________#IIIII_IIIIIIHI_:_I_ _iiiiiH_:_ _HiiiiiHiiH_H#iiiiH_'_ [i_i[[[[ii[[[!![[[ii[[[ii[[[ii[[[ii[[i _:_Uiiiiii[[!!ii!!iiiiiiiiii[[iiii [i_i[[[%[ii[[[ii[[[[i[[! %[[iiiiii_ii[[!!iiii[[ Your Home Forrepair-inyourhome -of all majorbrandappliances, lawn and garden equipment, or heating and cooling systems, nomatterwhomadeit, nomatterwhosoldit! ...... Forthereplacementparts, accessoriesand ..... owner'smanualsthatyou needtodo-it-yourself......For Sears professional installation of home appliances anditemslikegaragedooropenersandwaterheaters. 1-800-4-MY-HOME ®...
Need help?
Do you have a question about the 580/752352 and is the answer not in the manual?
Questions and answers