Table of Contents
Advertisement
Available languages
Available languages
Owner's
Manual
FrSMRN°
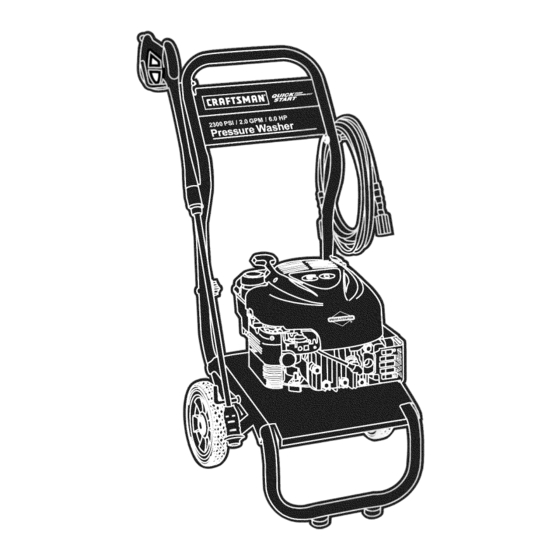
HiGH PRESSURE
6.0 HORSEPOWER
2,300 PSi
2.0 GPM
Model No. 580.752301
ER
HOURS:
Mon.- Fri. 8 a.m. to 5 p.m. (CT)
CAUTION"
Before
using
this product,
read this manual
and follow
all Safety
Rules and Operating
instructions,
SEARS,
ROEBUCK
and CO,,
Hoffman
Estates,
IL
Visit our Craftsman
website: www.sears.com/craftsman
Part No. 193900GS
Draft 0 (09/29/2003)
60179
U,S,A,
•
Safety
•
Assembly
•
Operation
•
Maintenance
•
Parts
•
Espa_ol
Advertisement
Table of Contents

Related Manuals for Craftsman 580.752301


Summary of Contents for Craftsman 580.752301
- Page 1 Maintenance CAUTION" Before using this product, • Parts read this manual and follow all Safety • Espa_ol Rules and Operating instructions, 60179 U,S,A, SEARS, ROEBUCK and CO,, Hoffman Estates, Visit our Craftsman website: www.sears.com/craftsman Part No. 193900GS Draft 0 (09/29/2003)
- Page 2 ON CRAFTSMAN PRESSURE WASHER For one year from the date of purchase, when this Craftsman pressure washer is maintained and operated according to the instructions in the owner's manual, Sears will repair, free of charge, any defect in material and workmanship.
- Page 3 IntheStateofCalifornia a sparkarrester i s required WARNING by law(Section 4 442ofthe California P ublic Resources Code). O therstates mayhavesimilar laws. Federal lawsapplyonfederal l ands.If youequipthe muffler w itha sparkattester, i t mustbemaintained i n effective w orking order.You c anordera sparkarrester through yourauthorized S earsservice dealer.
- Page 4 WARNING CAUTION DO NOT secure spray gun in open position. DO NOT leave spray gun unattended while machine is • DO NOT wear loose clothing, jewelry or anything that running. may be caught in starter or other rotating parts. NEVER use a spray gun which does not have a trigger •...
- Page 5 KNOW YOUR PRESSURE WASHER Read the owner's manual and safety rules before operating your pressure washer. Compare the illustrations with your pressure washer to familiarize yourself with the locations of various controls and adjustments, Save this manual for future reference, Model Data Decal Spray Gun Recoil Starter...
- Page 6 Hold hook in place with pliers and attach Iocknut with 7/16" wrench. WASHER Your Craftsman high pressure washer was mostly assembled at the factory. However, you will need to perform these tasks before you can operate your pressure washer: Attach handle to main unit.
- Page 7 Add Gasoline Add Engine IMPORTANT: Any attempt to crank or start the engine WARNING! NEVER fill fuel tank indoors. before it has been properly serviced with the NEVER fill fuel tank when engine is running or recommended oil may result in an engine failure. hot.
- Page 8 Connect Hose and Water Supply to Pump CAUTION iMPORTANT: To avoid pump damage, you must assemble the nozzle extension to the spray gun and attach all hoses before you start the engine. Uncoil high pressure hose and attach one end of hose to base of spray gun.
- Page 9 HOW TO USE YOUR PRESSURE Move throttle lever to "Fast" position, shown here as a rabbit. WASHER if you have any problems operating your pressure washer, please call the pressure washer helpline at 1=800=222=3136. To Start Your Pressure Washer To start your engine-powered pressure washer for the first time, follow these instructions step-by-step.
- Page 10 Rotating nozzle adjusts spray pattern from a How To Use the Adjustable Nozzle narrow pattern to a fan pattern. You now should know how to START your pressure washer and how to STOP it. The information in this section will tell you how to adjust the spray pattern and apply detergent or other cleaning chemicals, CAUTION •...
- Page 11 6. Applydetergent to a drysurface, s tarting fromthe Apply a high pressure spray to a small area, then bottom andworking up. check surface for damage. If no damage is found, it is okay to continue cleaning. 7. Allowdetergent to "soak in"for3=5minutes before rinsing.
- Page 12 OWNER'S RESPONSiBiLiTiES Follow the hourly or calendar intervals, whichever occurs first. More frequent service is required when operating in adverse conditions noted below. MAINTENANCE SCHEDULE HOURLY OPERATING FiLL iN DATES AS YOU COMPLETE SERVICE DATES REGULAR SERVICE INTERVAL BeBre Every 25 Every 50 Every 100 MAINTENANCE...
- Page 13 To remove contaminants from the pump, follow these Check High Pressure Hose steps: High pressure hoses can develop leaks from wear, Set up pressure washer as described in kinking, or abuse. Inspect hose before each use. "Assembling Your Pressure Washer" section, and Check for cuts, leaks, abrasions, bulging of cover, or connect water supply.
- Page 14 7. Reconnect nozzle extension t o spraygun. ENGINE MAINTENANCE 8. Reconnect watersupply, t urnonwater,andstart Checking Oil Level engine. 9. Testpressure w asher byoperating withnozzle in Oil level should be checked prior to each use or at least highandlowpositions. every 8 hours of operation. Keep oil level maintained. O-Ring Maintenance Changing...
- Page 15 Service Air Cleaner Clean area around spark plug. Remove and inspect spark plug. Your engine will not run properly and may be damaged if you run it with a dirty air cleaner. Replace spark plug with recommended plug if Service the air cleaner once every 25 hours of electrodes are worn or if insulator is cracked or operation or once each year, whichever comes first.
- Page 16 AFTER EACH USE WINTER STORAGE Water should not remain in the unit for long periods of CAUTION time. Sediments or minerals can deposit on pump parts and "freeze" pump action, Follow these procedures after every use: • Failure to do so will permanently damage your pump Flush detergent siphoning tube by placing the filter and render your unit inoperable.
- Page 17 LONG TERM STORAGE Oil Cylinder Bore • Remove spark plug. Squirt about 1 tablespoon of If you do not plan to use the pressure washer for more clean engine oil into the cylinder. Cover spark plug than 30 days, you must prepare the engine and pump hole with rag.
- Page 19 Problem Correction Cause Pull nozzle backward for high Nozzle in low pressure mode. pressure mode. Water inlet is blocked. Clear inlet. Inadequate water supply. Provide adequate water flow. Pump has following Inlet hose is kinked or leaking. Straighten inlet hose, patch leak. problems: failure to Check and clean inlet hose strainer.
- Page 20 CRAFTSMAN 2,300 PSi Pressure Washer 580.752301 Main Unit m Exploded View and Parts List .... _,_. Item Part # Description Item Part # Description 192392GS BASE 192050GS KIT, E-Ring E191886GS HANDLE 188792HGS WAND, Adjustable Nozzle 191909GS BILLBOARD 21760GS ORIFICE 190249GS...
- Page 21 CRAFTSMAN 2,300 PSi Pressure Washer 580.752301 Pump m E×ploded View and Parts List ½ ½ °0_ Item Part # Description Item Part # Description 190571GS CAP, Oil 193806GS KIT, CHECK VALVES 190627GS MANIFOLD 190592GS KIT, INLET CHECK 190578GS 190593G8 KIT, CHEMICAL INJECTION...
- Page 22 ENGINE, 6.0 HP, Briggs and Stratton, 12Q802 = E×ploded View 6849 306_ 307_...
- Page 23 ENGINE, 6.0 HP, Briggs and Stratton, 12Q802 - E×ploded View 843A_ 633 ® 633A _ 334_ 85__ 137_ 505 e 1275 276Q 276 Q CARBURETOR CARBURETOR OVERHAUL GASKET 127_ 617% 1370 633A@ 276Q 65 _' 58_ 633A @ 276 Q 3s6_ 689 O 456 @...
- Page 24 - Parts List ENGINE, HP, Briggs and Stratton, 12Q802 Item Part# Item Part# Description Description 697322 692150 Bracket-Control Cylinder Assembly 293708 690783 Lever-Governor Control Bushing/Seal 299819 Seal-Oil 271716 Sealing Washer 493279 690940 Sump-Engine Screw (Oil Fill Tube) 691160 497838 Muffler Head-Cylinder 692249 493294...
- Page 25 Sears, Roebuck and Co., U.S.A. (Sears), the California Air Resources Board (CARB) the United States Environmental Protection Agency (U.S.EPA) Emission Control System Warranty Statement (Owner's Defect Warranty Rights and Obligations) EMISSION CONTROL WARRANTY COVERAGE a. Fuel Metering System APPLICABLE TO CERTIFIED ENGINES PURCHASED Cold start enrichment system CALIFORNIA...
- Page 26 Durante un afio a partir de ta fecha de compra, Sears reparara, sin cargo alguno, cualquier defecto en material y mano de obra, siempre y cuando esta maquina lavadora de presi6n Craftsman hays sido mantenida y puesta en funcionamiento acuerdo a tas instrucciones suministradas en et manual det propietario.
- Page 27 En et estado de California es obligatorio, segQn ta ley, et uso ADVERTENCIA de apagachispas (Secci6n 4442 det C6digo de Recursos PQblicos de California). Otros estados pueden tener leyes simitares. Las leyes federales se aplican en tierras federales. Si equipa el sitenciador con un apagachispas, este debera ser mantenido en buenas condiciones de trabajo.
- Page 28 PRECAUCION ADVERTENCIA NO asegure la pistola de rociado en la posici6n (open = • NO use ropa suelta, joyas o elementos que puedan quedar abierto). atrapados en el arranque o en otras partes rotatorias. NO abandone la pistola de rociado cuando la maquina este en funcionamiento.
- Page 29 CONOZCA SU MAQUINA LAVADORA DE PRESION Lea el manual del propietario y las reglas de seguridad antes de porter en marcha su maquina lavadora a presi6n. Compare las itustraciones con su m&quina tavadora a presi6n para famitiarizarse con las ubicaciones de los diferentes controles y ajustes.
- Page 30 DE LA MAQUINA una ltave det 7/16". LAVADORA A PRESION La gran mayoria de su maquina lavadora a presi6n Craftsman ha sido ensamblada en ta fabrica. Sin embargo, usted debera ltevar a cabo los siguientes procedimientos antes de poner en funcionamiento...
- Page 31 Agregue Aceite de Motor Agregue Gasolina IMPORTANTE: Cualquier intento de hacer girar o arrancar et motor antes de que se haya depositado et aceite combustible en recintos cerrados. NUNCA llene et ADVERTENClAY NUNCA llene et tanque de recomendado puede resultar en falta det motor. tanque de combustible cuando et motor este NOTA: Cuando agregue aceite al compartimiento det motor, funcionando...
- Page 32 Conecte ta manguera de jardin (no exceder 50 pies en Conecte la Nlanguera y el Suministro la longitud) a la entrada det agua. Apriete con la mano. Agua a la Bomba PRECAUCION IMPORTANTE: Usted debera armar ta extensi6n para boquitlas y conectar todas las mangueras antes de darte arranque al motor.
- Page 33 C0MO USAR SU MAQUINA Mueva et control de la valvula de admisi6n a ta posici6n "Rapido" ("Fast"), que se distingue con la figura de un LAVADORA A PRESION conejo. Si tiene probtemas operando su maquina lavadora a presi6n, por favor ltame a la linea de ayuda para maquinas lavadoras a presi6n al 1-800-222-3136, C6mo Darle Arranque...
- Page 34 Et patr6n de rociado se ajusta de un patr6n angosto a C6mo Usar la Boquilla Ajustable un patr6n en abanico girando la boquitla. Usted ya debe saber como darle ARRANQUE a su maquina lavadora a presi6n y como DETENERLA. La informaci6n de esta secci6n le dira como ajustar et patr6n de rociado y como aplicar detergente u otros quimicos de limpieza.
- Page 35 Mueva la boquitta ajustable hacia adetante para obtener Aplique un rociado de alta presi6n en un area pequefia, et modo de baja presi6n. Et detergente NO puede ser despues revise si la superficie presenta dafios. Si no apticado si tiene ta boquitla en ta posici6n de alta encuentra dafios, puede continuar con et trabajo de presi6n.
- Page 36 RESPONSABILIDADES DEL PROPIETARIO Siga el programa de mantenimiento segOn et nOmero de horas o segOn el calendario, lo que suceda primero. Se requiere de servicio con mayor frecuencia cuando opere la unidad en las condiciones adversas descritas a continuaci6n. CALENDARIO DE IVIANTENIMIENTO INTERVALO DE ANOTE LAS FECHAS CONFORME...
- Page 37 MANTENIMIENTO DE LA MAQUINA 4. Conecte la extensi6n para boquillas a la pistola de rociado de la manera descrita anteriormente en este manual. LAVADORA A PRESION Elimine el Aire y los Contaminantes de la Bomba Revise y Limpie el Colador de Entrada Examine et colador de entrada de ta manguera de jardin.
- Page 38 5. Usando una manguera de jardin, remueva cualquier Incline ta limpiadora a presi6n hacia un lado para que desecho adicional, poniendo agua en la extensi6n de la vaciar completamente ta bomba de aceite, y vierta este en un recipiente homologado. boquilla.
- Page 39 Instale et tap6n det orificio de ttenado y la varitla de Limpie et area alrededor de ta bujia. medici6n, apriete firmemente. Retire y revise ta bujia. Limpie los residuos de aceite. Cambie la bujia si los etectrodos estan desgastados, Conecte de nuevo alambre de bujia al bujia. si et aislador esta roto o partido.
- Page 40 DESPUES DE CADA USO ALMACENAMIENTO PARA INVIERNO No debera haber agua en ta unidad por largos periodos de tiempo. Los sedimentos de minerales se pueden depositar PRECAUCION en pares de la bombay "congetar" su funcionamiento. Lleve a cabo estos procedimientos despues de cada uso: Lave et tubo de succi6n de detergente colocando el fittro en un balde de agua timpia al mismo tiempo que...
- Page 41 ALMACENAMIENTO PROLONGADO Aceite el Di&metro interior del Cilindro Retire la bujia. Rocie aproximadamente 1 onza de aceite Si usted no ptanea usar la maquina lavadora a presi6n por limpio para motor dentro del cilindro. Cubra el orificio de mas de 30 dias, debera preparar et motor para un la bujia con un trapo.
- Page 42 Problema Soluci6n CaLISa La boquitta esta en et modo de baja Mueva la boquitla hacia atras para et presi6n. modo de alta presi6n. La entrada de agua esta btoqueada. Limpie la entrada. Suministro de agua inadecuado. Proporcione flujo de agua adecuado. La manguera de entrada esta Estire la manguera de entrada, coloque doblada o presenta fugas.
- Page 43 Sears, Roebuck and Co., U.S.A. (Sears), California Air Resources Board (Consejo de P,ecursos sobre el Aire de California, CAP, B, pot sus siglas en ingles) y United States Environmental Protection Agency (Agencia de Proteccion Ambiental de EE.UU., EPA, por sus siglas en ingles). Declaration de garantia del sistema de control...
- Page 44 Your Home For repair - in your home - of all major brand appliances, lawn and garden equipment, or heating and cooling systems, no matter made it, no matter sold it! For the replacement parts, accessories owner's manuals that you need to do-it-yourself. For Sears professional installation of home appliances...
Need help?
Do you have a question about the 580.752301 and is the answer not in the manual?
Questions and answers