Advertisement
Quick Links
Operators Manual
I CRRFTSMRN° I
5 H.P,
VAC SYSTEM
Model No. 486.24506
CAUTION:
Before using this product,
read this manual and follow
all Safety Rules and
Operating Instructions.
• Safety
• Assembly
• Operation
• Maintenance
• Parts
Sears, Roebuck
and Co., Hoffman
Estates,
IL 60179 U.S.A.
www.sears.com/craftsman
PRINTED IN U.S.A.
FORM NO. 47763 (8/00)
Advertisement

Related Manuals for Craftsman 486.24506


Summary of Contents for Craftsman 486.24506
- Page 1 • Assembly Before using this product, • Operation read this manual and follow • Maintenance all Safety Rules and • Parts Operating Instructions. Sears, Roebuck and Co., Hoffman Estates, IL 60179 U.S.A. www.sears.com/craftsman PRINTED IN U.S.A. FORM NO. 47763 (8/00)
- Page 2 Warranty service is avail- able free of charge by returning your Craftsman equipment to your nearest Sears Service Center. In-home warranty service is available but a trip charge will apply. This Warranty applies only while this product is in the United States.
- Page 3 Any power equipment can cause injury if operated improperly or if the user does not understand how to operate the equipment. Exercise caution at all times, when using power equipment. • Read and follow all instructions in this manual before •...
- Page 4 TO AVOID SERIOUS INJURY • Read Owner's Manual and all safety labels on machine before starting and using machine. • Do Not remove top cover or attempt to empty contents of cart while engine is running. • Do Not stand behind cart in exhaust discharge area while engine is running.
- Page 5 These accessories were available when the unit was purchased. They are also available at most Sears retail outlets and service centers. Most Sears stores can order repair parts for you when you provide the model numbers of your tractor and Vac System. provides a 15' x 5"...
- Page 6 SHOWN FULL SIZE +/BB +fEE NOT SHOWN FULL SIZE /JJ_/KK...
- Page 7 ATTENTION! Keep contents of each hardware package separate for easier assembly. CONTENTS OF HARDWARE PACKAGES IN CART CARTON Ref. Qty. Description Ref. Qty. Description Bolt, Hex 3/8" x 3" Hex Nut, 1/4" Bolt, Hex 1/4" x 1-3/4" Hex Nut, 5/16" Bolt, Hex 3/8"...
- Page 8 CARTON CONTENTS (Cart Carton) Ref. Qty. Description Ref. Qty. Description Hose Wheel Support Rear Tongue Tailgate Reinforcement Bracket Axle Front Tongue Latch Stand Bracket Hose Hanger Rod Assembly Cart BooT_es Wheels CARTON CONTENTS (Vac Carton) Ref. Qty. Description Ref, Qty. Description Front Panel Deck Adapter...
- Page 9 This unit is shipped WITHOUT GASOLINE or OIL. After • Fit the tailgate reinforcement bracket over the end of assembly, see separate engine manual for proper fuel the cart bed. Position the two door support brackets and engine oil recommendations. on the bottom of the reinforcement bracket as shown in figure 2.
- Page 10 Assemble the wheel support to the bottom of the cart Align the latch stand bracket so that the tab is at the using eight 5/16" x 314"truss head screws, 5/16" lock rear. Fasten the bracket to the rear set of holes at the washers, and 5/16 hex nuts as shown in figure 4.
- Page 11 Assemble a spacer tube onto each end of the axle as • Assemble the hitch bracket to the front tongue using shown in figure 8. two 3/8" x 1-1/4" hex bolts, 3/8" lock washers and 318" Assemble a 1" flat washer, a wheel (valve stem hex lock nuts.
- Page 12 Lower the front of the cart and lock it to the tongue Assemble a 1/4" hex nut, 1/4" lock washer and 1/4" with the latch lock lever. flat washer onto each end of a tie rod. Insert the rod Place a side panel down onto the cart, fitting it Inside ends through the middle hole in each side panel and the front panel.
- Page 13 • Assemble a 1/4" hex nut and then a 1/4" flat washer Place a 3/8" flat washer onto the end of the right prop onto each end of a tie rod. Insert the rod ends through rod and insert the rod into the lower hole in the side of the upper holes in the sides of the hardtop, Assemble the hardtop.
- Page 14 • Assemble a short tie strap to the rear door using one Remove the hex bolts, look washers and hex lock 1/4" x 1-1/4" hex bolt, two 1/4" flat washers, one 1/4" nuts from the two holes in the impeller housing as lock washer and one 1/4"...
- Page 15 Assemble the hose adapter (nozzle) to the front of • Place the hose hanger rod assembly down into the the impeller housing, securing it with the three knobs. hose hanger bracket on the impeller housing assem- Make sure that the switch actuator bracket depresses bly.
- Page 16 ASSEMBLING THE DECK ADAPTER Position the adapter over the deck opening, and check for fit of cutout as shown in figure 29. Trim cutout, if (#62468) TO THE MOWER DECK necessary, to allow tilting of adapter, keeping the fit as close as possible for best vacuum suction.
- Page 17 FOR 1990 AND NEWER MURRAY • Assemble the adapter bracket to the deck using two 5/16" x 1 • hex bolts, 5/16" flat washers and 5/16" hex TRACTORS WITH A 38" OR 40" DECK lock nuts. See figure 31. NOTE: It may be necessary to use extra 5116" flat Cut out two templates and place on deck adapter as washers to shim under the bracket next to the deck shown in figure 33.
- Page 18 FOR 1990 AND NEWER MURRAY TRACTORS WITH A 46" DECK Tape 46" template onto deck adapter. Mark and then cut out adapter. Fasten the angle bracket and the mounting bracket to the mower deck as shown in figure 34. Use two 5/16" x 3/4"...
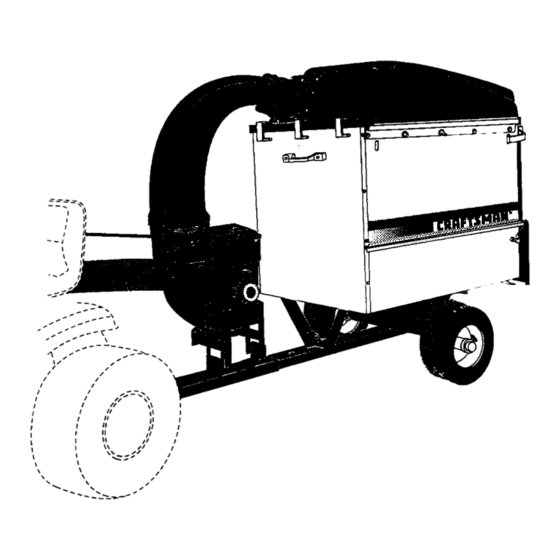
- Page 19 KNOW YOUR MAC SYSTEM Read this owner's manual and safety rules before operating your Vac System. Compare the illustration below with your Vac System to familiadze yourself with the various controls and their locations. HARDTOPBOOT DOOR LATCH DUMP HANDLE LATCH LOCK LEVER HARD TOP BOOT Connects the plastic elbow to the LATCH LOCK LEVER...
- Page 20 HOW TO USE YOUR VAC SYSTEM BEFORE STARTING • Your Vac System engine is shipped without oil or gasoline. Service the engine with oil and gas as CAUTION: Vehicle braking and stability may be affected with the addition of an instructed in the separate engine manual.
- Page 21 CUSTOMER RESPONSIBILITIES Read and follow the maintenancescheduleand the maintenanceprocedureslistedin thissection. MAINTENANCE SCHEDULE _._'_ Fill in dates as you __._"_e_f Service Dates complete regular service. //_z_l_/ Check for loose fasteners Check soft vinyl boot Check tire pressure Check enaine oil level Lubricate Clean Maintain enaine per instructions below and in enaine manual.
- Page 22 PROBLEM POSSIBLE CAUSE(S) CORRECTIVE ACTION Engine fails to start 1. Spark plug wire disconnected. 1. Connect wire to spark plug. 2. Safety switch not contacted. 2. Correctly install hose adapter nozzle. 3. Fuel tank empty, or stale fuel. 3. Fill tank with clean, fresh fuel. 4.
- Page 23 REPAIR PARTS FOR MODEL 486.24506 CART BODY ® REF. PART REF. PART QTY. DESCRIPTION QT¥ DESCRIPTION 23985 63917 Cart Body Tongue Weldment Ass'y. (Rear) 62458 Tailgate Reinforcement Bracket 63155 Tongue Weldment Ass'y. (Front) 23507 Wheel Support 24614 Latch Lock Lever 24497 Latch Stand Bracket 23475...
- Page 24 REPAIR PARTS FOR MODEL 486.24506 VAC SYSTEM ADAPTER #62468 42_, TRACTOR...
- Page 25 REPAIR PARTS FOR MODEL 486.24506 VAC SYSTEM REF. PART QTY. DESCRIPTION REF. PART _TY. DESCRIPTION 24080 Engine Base 43866 Bolt, Hex 1/4-20 x 5/8" 24078 Brace, Housing 43661 Bolt, Hex 1/4-20 x 1" 63226 Hose Hanger Bracket Ass'y. 43088 Washer, 1/4" STD (Ref.
- Page 26 REPAIR PARTS FOR MODEL 486.24506 VAC SYSTEM IMPELLER HOUSING ASSEMBLY REF. PART QTY. DESCRIPTION PART QTY. DESCRIPTION 629-0241A Snap Mount Switch Harness, Wire 725-3166 24634 Housing Ass'y. Inner 726-0272 Clamp 24633 Housing Ass'y. Outer 731-1613 Cover, Switch 43182 Bolt, Hex 5/16-18 x 3/4" 63226 Hose Hanger Bracket.
- Page 27 ..SIGHT AND HOLD THIS LEVEL WITH A VERTICAL't REE ,<: U_ (1) :-_..1__ ..A,_RPoLE -_ "Z ..A CORNER OF A BUILDING !.." ..'-..I_.i..OR_NCE,O_ ..,.." ..-..'. Fo,__ ==-- ..,-.-,-..,, o,,,,.= _ ;..
- Page 28 Get it fixed, at your home or ours! For repair of major brand appliances in your own home... no matter who made it, no matter who sold it! 1-800-4-MY-HOMES M Anytime, day or night (1-800-469-4663) www.sears.com To bring in products such as vacuums, lawn equipment and electronics for repair, call for the location of your nearest Sears Parts &...
Need help?
Do you have a question about the 486.24506 and is the answer not in the manual?
Questions and answers