Table of Contents
Advertisement
Available languages
Available languages
R0
ID105906
#961151050
INVALIDE
COMMERCIALES
MAGASIN.
au
clientèle
la
AVANT
ATTENTIVEMENT
www.hoover.com
réservés.
droits
GARANTIE.
FINS
AU
PRODUIT
(HNE).
h
19
à
h
8
de
à
service
le
appeler
L'ASPIRATEUR.
Tous
Limited.
Technology
PRÉSENTE
DES
À
PRODUIT
CE
RETOURNER
vendredi,
au
lundi
Veuillez
inquiétudes?
D'UTILISER
INSTRUCTIONS
upright
bagless
d'entretien
D'UTILISATION
Care
Floor
LA
CE
DE
L'UTILISATION
PAS
NE
VEUILLEZ
du
9449200
800
1
des
ou
questions
des
CES
LIRE
:
IMPORTANT
et
d'utilisation
Techtronic
©2012
avez
Vous
Instructions
GUIDE
Advertisement
Chapters
Table of Contents

Subscribe to Our Youtube Channel
Related Manuals for Hoover UH70905


Summary of Contents for Hoover UH70905
- Page 1 PRÉSENTE INVALIDE COMMERCIALES FINS À PRODUIT L’UTILISATION MAGASIN. PRODUIT RETOURNER VEUILLEZ (HNE). à vendredi, lundi 9449200 clientèle à service appeler Veuillez inquiétudes? questions avez Vous L’ASPIRATEUR. D’UTILISER AVANT ATTENTIVEMENT INSTRUCTIONS LIRE IMPORTANT upright bagless www.hoover.com d’entretien d’utilisation Instructions D’UTILISATION GUIDE...
- Page 2 OWNER’S MANUAL Operating and Servicing Instructions Español - página E1 hoover.com IMPORTANT: READ CAREFULLY BEFORE ASSEMBLY AND USE. Questions or concerns? For assistance, please call Customer Service at 1-800-944-9200 Mon-Fri 8am-7pm EST. PLEASE DO NOT RETURN THIS PRODUCT TO THE STORE.
-
Page 3: Table Of Contents
Troubleshooting ......................15 Service .........................16 Warranty ........................17 If you need assistance: Visit our website at hoover.com. Follow the authorized dealer locator link to find the Hoover authorized ® dealer nearest you or call 1-800-944-9200 for an automated referral of Hoover authorized dealer ®... - Page 4 MAGASIN. PRODUIT RETOURNER VEUILLEZ vendredi). lundi hne, à clientèle à service représentant à parler pour Seulement) (é.-U. Hoover autorisés marchands adresses indiquant message écouter pour 9200 composez vous, chez près plus marchand trouver pour Hoover autorisés marchands localisateur lien Cliquez www.hoover.ca.
- Page 5 dommages. blessures causer pourrait meuble, escaliers dans l’appareil placer l’escalier. l’appareil placer toujours tomber, l’appareil d’empêcher dommages blessures d’éviter Afin marches. l’aspirateur déposer escaliers. dans l’utilisation pendant prudent très Être • l’appareil. débrancher avant commandes toutes Éteindre • mouvement. pièces ouvertures l’écart à...
-
Page 6: Important Safety Instructions
IMPORTANT SAFETY INSTRUCTIONS SAVE THESE INSTRUCTIONS When using an electrical appliance, basic precautions should always be followed, including the following: READ ALL INSTRUCTIONS BEFORE USING THIS APPLIANCE. WARNING: TO REDUCE THE RISK OF FIRE, ELECTRIC SHOCK OR INJURY: • Fully assemble before operating. •... - Page 7 CAUTION: TO REDUCE THE RISK OF DAMAGE: • Avoid picking up hard, sharp objects with this product, as they may cause damage. • Store appropriately indoors in a dry place. Do not expose machine to freezing temperatures. • Do not use sharp objects to clean out hose as they can cause damage. •...
- Page 8 fiche. modifier jamais appropriée. prise d’installer qualifié électricien à demander pas, toujours s’insère elle l’inverser. faut prise, dans complètement s’insère fiche sens. dans uniquement polarisée courant prise dans insérée être peut fiche Cette l’autre). large plus tige (une polarisée fiche d’une muni appareil...
- Page 9 Insérer 1.3. directive jusqu’à côté mettre l’aspirateur Nota base dans située Retirer modèle) selon (Varient MANCHE FIXER 944-9200. composer Hoover.com à additionnelles pièces Commander manque. illustrées pièces qu’aucune s’assurer d’emballage, matériaux d’éliminer Avant l’emballage. pièces toutes Retirer modèle. selon *Varient Vide-poussière...
-
Page 10: Vacuum Assembly
Make sure all parts are located before disposing of packing materials. Additional parts may be ordered at Hoover.com or call 1-800-944-9200. ATTACH HANDLE Note: Remove the screw located in the vacuum base and set aside until instruction 1.3 1.2 Insert handle section into vacuum base. Push down firmly. -
Page 11: How To Use
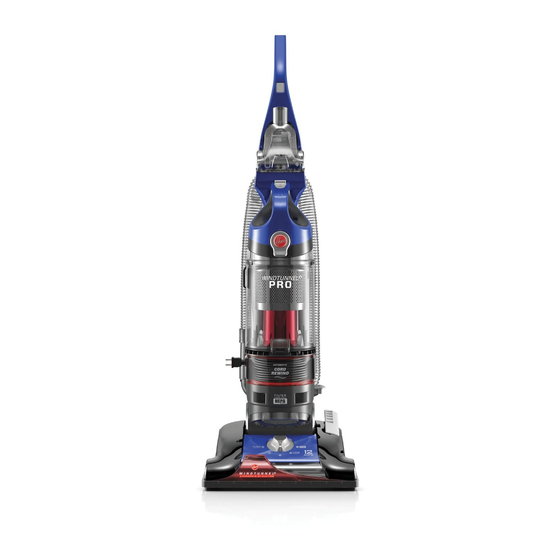
2. HOW TO USE VACUUM DESCRIPTION 1. Handle 2. ON/OFF Switch 3. Air-Powered Hand Tool ** 4. Dirt Cup Release Button 5. Carry Handle 6. Rinsable Filter Access 7. Dirt Cup 8. Cord Rewind 9. Filter made with HEPA media and Carbon Filter* Access 10. - Page 12 illustré. celui varier peut d’aspirateur modèle cordon. davantage tirer moment, À possible. maximale longueur atteint cordon signifie cela visible, rouge ruban Lorsque sorti. entièrement presque où moment indique jaune ruban tiré, cordon Lorsque IMPORTANT atteint. soit rouge ruban jusqu’à cordon l’enrouleur cordon dégager...
- Page 13 illustré. celui varier peut d’aspirateur modèle supérieur. réglage jusqu’au bouton tourner l’aspirateur, pousser difficile vous S’il IMPORTANT performance. bonne maintenant tout désiré moindre effort lorsqu’un • Réglage supérieur : pour les tapis très épais, moquettes. • Réglage inférieur 2 : pour tous les types de dure. surface à planchers les pour inférieur Réglage • recommandés. sont ci-dessous teur hau- réglages...
-
Page 14: Transporting Cleaner
TRANSPORTING CLEANER HANDLE POSITIONS 2.6 The handle of your 2.5 To move your cleaner cleaner from room to positions: 1) Upright for room, put handle in storage and when using upright position, tilt cleaning tools. cleaner back on rear Operating position for wheels push general operation on... -
Page 15: Tools
3. TOOLS Tools allow for cleaning surfaces above the floor and for reaching hard to clean areas. The vacuum is ready for tool use when handle is in upright position. SELECT PROPER TOOL A. Use Dusting/ Upholstery Tool to clean upholstered furniture, draperies, mattresses, (Tools may vary per model) clothing, and carpeted stairs. - Page 16 illustré. celui varier peut d’aspirateur modèle utiliser. avant heures pendant l’air à sécher laisser accessoires Rincer tiède. l’eau dans doux détersif avec lavés être peuvent nettoyage accessoires autres l’eau. dans immerger humide. chiffon avec essuyer comprimé, à portatif l’accessoire tuyau nettoyer Pour NETTOYAGE...
- Page 17 illustré. celui varier peut d’aspirateur modèle s’enroule. cordon pendant fiche tenir fouette, cordon éviter Pour AVERTISSEMENT: cordon. l’enrouleur dessus situé bouton appuyer fiche tenir cordon, rentrer faire Pour murale. prise débrancher cordon, rentrer faire Pour RANGEMENT CORDON ENROULEUR verticale. position manche s’assurer toujours...
-
Page 18: Stair Cleaning
STAIR CLEANING 3.4 Lift vacuum by Stair Cleaning Handle and position on stairs. Clean forward to back. Never leave the vacuum standing on stairs when not cleaning. 3.5 Use the Hose and Air-Powered Hand Tool (Tool varies per model) for stair cleaning. When using tools, always ensure handle is in upright position. -
Page 19: Maintenance
4. MAINTENANCE Familiarize yourself with these home maintenance tasks as proper use and care of your vacuum will ensure continued cleaning effectiveness. If appliance is not working as it should, has been dropped, damaged, left outdoors, or dropped into water, take it to a service center prior to continuing use. 4.1 The System Check Indicator located at (A), alerts you to possible system performance issues. - Page 20 illustré. celui varier peut d’aspirateur modèle souvent. filtres nettoyer sière vide-pous- vider poussières, telles aspirer pour utilisé l’appareil Lorsque l’appareil. rendement nuire filtre boucher peuvent maïs, fécule visage pour poudre comme fines, très matières place. sont filtres videpoussière l’aspirateur utiliser l’entretien.
- Page 21 305687001. Hoover pièce Demander supplémentaires. filtres d’acheter possible besoin, garantie. période pendant remplacé être devra appropriée, façon entretenu utilisé filtre HEPA filtrante substance d’une composé Filtre acheter: Quoi IMPORTANT HEPA. FILTRANTE SUBSTANCE AVEC FILTRE...
-
Page 22: Filters
What to Buy: Filter Made With HEPA Media When used and maintained properly, your Filter should not need replacement within the warranty period. If desired, additional filter is available at Hoover.com Part No. 305687001. or call 1-800-944-9200. Ask for Hoover ®... -
Page 23: Brushroll
Carbon Filter may need to be replaced more Your Carbon Filter is located on the underside of often to maintain optimal odor absorbing the Filter made with HEPA media. effectiveness. Additional filter is available at Hoover.com or call 1-800-944-9200. Ask for IMPORTANT Part 902404001. Hoover ®... - Page 24 Pour AVERTISSEMENT: limpiar Cómo 4.10 ciclónico: filtro Conjunto charbon. Filtre cartouche LAVER RINCER IMPORTANT 902404001. Hoover pièce Demander supplémentaires. filtres d’acheter possible besoin, garantie. période dant HEPA. filtrante substance pen- remplacé être devra appropriée, avec...
- Page 25 -107. 27313 n˚ HOOVER piece ampoule, utilise appareil 1-800-944-9200. composant Hoover.com site visitant supplémentaires L’ampoule d’acheter possible besoin, L’ampoule acheter Quoi vis. l’aide à fixer lentille place Remettre 4.20 lentille Réinstallation 4.20 l’ampoule. tourner faire nécessaire...
-
Page 26: Hose
Headlight Installing Bulb Additional bulbs may 4.19 Pull old bulb straight out of socket. Push new be ordered at Hoover. bulb straight into socket until locked in place. com or call 1-800- 944-9200. Ask for Do not use excessive force when installing bulb. -
Page 27: Belt
4.23 Remove used belt from brushroll (C) then from motor shaft (metal rod) (D) and discard. 4.25 4.26 What to Buy: Belt Use only genuine HOOVER belts with your ® vacuum. When purchasing a new belt for models with Brushroll On/Off (Suction Only Mode), ask for part No. - Page 28 Faire courroie côté l’extérieur vers Placer 4.24 IMPORTANT 800-944-9200. composant Hoover.com site visitant supplémentaires courroies d’acheter possible besoin, 562289001. pièce – HOOVER plate courroie demander seulement), cion suc- (mode rouleau-brosse à...
- Page 29 à difficile – nettoyez vous moquette tion incorrect. moquette L’aspirateur fonc- hauteur réglage bouton Tourner pour hauteur réglage local. Hoover autorisé détaillant votre avec tionne communiquer pour 9449200 Téléphoner lâches. électriques Fils fonc- avant lumière l’ampoule Changer brûlée. L’ampoule complètement.
-
Page 30: Troubleshooting
Headlight not 1. Bulb burnt out. 1. Replace bulb - Pg. 13. working 2. Loose electrical wires. 2. Call 1-800-944-9200 for nearest authorized Hoover dealer. ® Vacuum is 1. Carpet height setting is incorrect. 1. Set Carpet Height Adjustment knob to... - Page 31 • Visit our website at hoover.com (U.S. Customers) or hoover.ca (Canadian customers). Follow the service center link to find the service outlet nearest you. • For an automated referral of authorized service outlet locations call 1-800-944-9200. Do not send your vacuum to Hoover , Inc., Company in Glenwillow for service. This will only result in delay. ® If you need further assistance: To speak with a customer service representative call 1-800-944-9200;...
-
Page 32: Service
Toujours (ON) Scarborough Ave, Progress 755, Toronto à Canada, Hoover avec communiquer Canada, (HNE). à ven. lun. 1-800-944-9200 composer clientèle, à service représentant avec parler Pour renseignements d’autres besoin... - Page 33 être pourrait précédente négli- acte tout à Hoover contrôle l’exclusion conséquent, consécutifs; mages hors acte autre tout à vandalisme, naturelles, dom- l’exclusion permettent États catastrophes fortuits à...
-
Page 34: Warranty
HOW TO MAKE A WARRANTY CLAIM Warranty Period will not be extended by any If this product is not as warranted, take or send replacement or repair performed under this the product to either a Hoover Authorized Warranty. ® Warranty Service Dealer along with proof of... - Page 38 MANUAL DEL PROPIETARIO Instrucciones de Funcionamiento y Servicio www.hoover.com IMPORTANTE: LEA ATENTAMENTE ANTES DE ENSAMBLAR Y USAR. ¿Tiene alguna pregunta o inquietud? Para obtener asistencia, llame al Servicio de atención al cliente al 1-800 944 9200, de lunes a viernes, de 8 a.m. a 7 p.m., hora del ESTE.
- Page 39 Garantía ........................E17 Si necesita ayuda: Visite nuestro sitio web en www.hoover.com. Haga clic en el enlace que permite localizar los vende- dores autorizados hoover para encontrar el vendedor más cercano, o marque el 1-800-944-9200 para escuchar un mensaje indicando la dirección de los vendedores autorizados Hoover (sólo en ee.
-
Page 42: Salvaguardias Importantes
SALVAGUARDIAS IMPORTANTES ! ¡ ¡GUARDE ESTAS INSTRUCCIONES! Al usar un aparato eléctrico, observe siempre las precauciones básicas, incluyendo las siguientes: LEA TODAS LAS INSTRUCCIONES ANTES DE USAR ESTE APARATO ADVERTENCIA: PARA REDUCIR EL RIESGO DE INCENDIOS, CHOqUES ELÉCTRICOS O LESIONES: •... - Page 43 • Sujete el enchufe cuando enrolle el cordón en la bobina. No permita que el enchufe dé latigazos al enrollarlo. • Desenchufe el aparato antes de conectar el accesorio de mano turboaccionado. • No aspire ningún objeto que se esté quemando o que libere humo, como cigar- rillos, fósforos o cenizas calientes.
- Page 44 RECURSO HOOVER ® garantizadas, llévelo a un Concesionario autor- PROPORCIONA. TODAS DEMÁS izado de servicio de garantía de Hoover junto ® GARANTÍAS, EXPRESAS O IMPLÍCITAS, con el comprobante de compra. Para que le infor- INCLUIDAS GARANTÍAS men de manera automática la ubicación de los...
- Page 45 (depositario) más cercano: ® • Consultando las Páginas amarillas en la sección “Aspiradoras – uso” doméstico. • Visite nuestro sitio web en hoover.com (clientes estadounidenses) o hoover.ca (clientes canadienses). Siga el enlace del centro de servicio para encontrar el centro de servicio más cercano. • Para que le informen de manera automática la ubicación de los centros autorizados de servicio, llame al 1-800-944-9200. No envíe su aspiradora a Hoover , Inc., Company en Glenwillow para realizar el ®...
-
Page 46: Ensamblado De La Aspiradora
Asegúrese de ubicar todas las piezas antes de eliminar el embalaje. Para pedir piezas adicionales, visite Hoover.com o llame al 1 800-944-9200. COLOCACIÓN DEL MANGO variar según el modelo) Nota: Retire el tornillo que se encuentra en la base de la aspiradora y apártelo hasta la instrucción 1.3... -
Page 47: Descripción De La Aspiradora
2. FUNCIONAMIENTO DESCRIPCIÓN DE LA ASPIRADORA 1. Mango 2. Botón de encender/apagar 3. Accesorio de mano turboaccionado** 4. Botón para soltar el depósito para polvo 5. Asa para transportar 6. Acceso al filtro lavable 7. Contenedor para polvo 8. Cómo enrollar el cordón 9. -
Page 48: Correa
2. Cables eléctricos sueltos. 2. Llame al 1-800-944-9200 para encontrar el concesion- ario autorizado de Hoover® más cercano. Dificultad para 1. La posición de la altura para moquetas es 1. Coloque la perilla de ajuste de altura de la moqueta en empujar la incorrecta. - Page 49 AH20080. ® LUBRICACIÓN: Si lo desea, puede adquirir correas adicionales en Hoover.com o al 1-800-944-9200 El motor y el rodillo de cepillos están equipados con rodamientos que contienen 4.24 Con la inscripción en la parte exterior de la suficiente lubricación para su vida útil. Agregar correa, deslice la correa nueva sobre el eje del lubricante podría provocar daños.
- Page 50 TRASLADO DE LA ASPIRADORA POSICIONES DEL MANGO 2.6 El mango de su 2.5 Para mover su aspi- aspiradora tiene dos radora de una habit- posiciones: 1) vertical, ación a otra, coloque el para almacenarla o para mango en posición ver- usar los accesorios de tical, incline la aspirado- limpieza;...
-
Page 51: Servicio
3. ACCESORIOS Los accesorios le permiten limpiar superficies que están a mayor altura que el piso y llegar a áreas difíciles de limpiar. La aspiradora está lista para usarse con los accesorios cuando el mango está en posición vertical. SELECCIONE EL ACCESORIO A. - Page 52 1-800-944-9200. Esta aspiradora utiliza una No se requiere demasiada fuerza. lámpara n. ° 27313- No se requiere girar la bombilla. 107 de HOOVER ® Cómo volver a colocar la lente 4.20 Vuelva a colocar la lente y asegúrela con tornillo El modelo real puede no coincidir con las imágenes que se muestran.
- Page 53 Qué comprar: Filtro de carbono: Si lo (Disponible sólo en algunos modelos) desea, hay filtros adicionales disponibles. Solicite la pieza n.° 902404001 de Hoover El filtro de carbón se ubica en la parte inferior ® del filtro hecho con medio filtrante HEPA IMPORTANTE NO ENJUAGUE NI LAVE el cartucho de Filtro de carbono.
- Page 54 LIMPIEZA DE ESCALERAS 3.4 Levante la aspiradora por el mango para limpieza de escaleras y colóquela sobre las escaleras. Limpie de adelante hacia atrás. Nunca deje la aspiradora sobre las escaleras cuando no esté limpiando. 3.5 Use la manguera y el accesorio de mano tur- boaccionado (Los accesorios varían según el modelo) para limpiar escaleras.
- Page 55 4. MANTENIMIENTO Familiarícese con estas tareas de mantenimiento en el hogar, ya que el uso y cuidado apropiados de su aspiradora asegurarán una limpieza continua- mente eficaz. Si el aparato no está funcionando adecuadamente, se dejó caer, se dañó, se dejó...
- Page 56 Siempre que el uso y el mantenimiento se realicen correctamente, su filtro no necesita reemplazarse dentro del período de garantía. Si lo desea, hay filtros adicionales disponibles. Solicite la pieza n.° 305687001 de Hoover ® El modelo real puede no coincidir con...
Need help?
Do you have a question about the UH70905 and is the answer not in the manual?
Questions and answers