
Related Manuals for EdgeStar TBC50S


Summary of Contents for EdgeStar TBC50S
- Page 1 Mini Kegerator TBC50S Owner’s Manual For more information on other great EdgeStar products on the web, go to http://www.edgestar.com...
-
Page 2: Important Safety Information
Important Safety Information Improper handling can cause serious damage to the EdgeStar mini kegerator and/or injury to the user. This mini kegerator is designed for domestic indoor use only. Do not use the unit for industrial or commercial use. Any other use may invalidate the warranty. -
Page 3: Table Of Contents
SPECIFICATIONS ....................14 EDGESTAR LIMITED WARRANTY ..............15 First Time Operating Instructions Before use, make sure all packaging labels and materials are all removed from the unit. Be sure to keep track of all included parts and pieces before discarding packaging materials. -
Page 4: Introduction
Introduction Thank you for purchasing this EdgeStar mini kegerator. We are glad you chose us. We believe that your purchase of this product opens a relationship between you and EdgeStar. We will provide the customer support needed to nurture that relationship. -
Page 5: Parts Identification
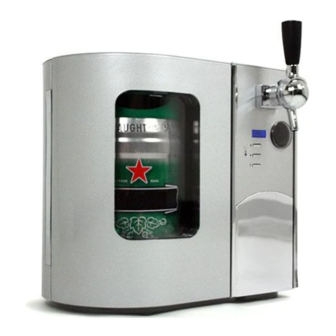
Dispenser Handle Side Access Door See-through window Regulator Window Door Digital Controls Drip tray assembly Optional Accessory Kit (Model: TBC50-ACC) Cleaning Bottle (Sold separately) Cartridge Stand Non-Pressurized Rubber Ring Regulator Releaser Cartridge Adapter (Pierces CO Cartridge) Cartridge Holder EdgeStar Mini Kegerator... -
Page 6: Installing The Mini Kegerator
Installing the Mini kegerator Installation Carefully unpack all parts. Place the unit on a flat and level surface. It will work best in a room temperature environment (70°F), away from the sun and other heat sources, and with 3” of clearance between all sides of the unit and other objects for ventilation. -
Page 7: General Instructions
To turn the light on and off: 1. If the light is off press the light button to turn on the light. 2. If the light is on press the light button to turn the light off. EdgeStar Mini Kegerator... -
Page 8: Heineken Brand Draughtkeg Tapping Instructions
Heineken brand DraughtKeg tapping instructions Heineken brand DraughtKeg™ mini kegs have an internal CO tank. This is the only type of mini keg that you can tap without the optional accessory kit. 1. Chill the mini keg 2. Open the door of the mini kegerator. 3. -
Page 9: Non-Pressurized Accessory Kit Part Descriptions
3. Cleaning Bottle - Used with non-pressurized tap assembly and CO flush out the beer lines with cleaning solution (see pg. 11). EdgeStar recommends using the cleaning bottle that came with your mini-kegerator to conserve CO 4. -
Page 10: Non-Pressurized Mini Keg Tapping Instructions
Non-pressurized Mini Keg Tapping Instructions Note that the following instructions refer to optional accessory kit (sold separately). Visit kegerator.com for more information and/or to place an order for the optional accessories. Most 5 Liter mini kegs are “non-pressurized”- though the kegs are shipped with minimal pressure inside to ensure the freshness of the beer, once they are opened, all the pressure escapes and they must be served with gravity (poured), or by re-pressurizing them (in... -
Page 11: Installing The Beer Line And Connecting The Co 2
Now that you have tapped your non-pressurized mini keg, you need to connect the beer line and CO supply. To connect the beer line: insert the “male” end of the beer line in the mini kegerator to the “female” receptacle on the tap. EdgeStar Mini Kegerator... -
Page 12: Connecting The Co
Connecting the CO Open the compartment located on the right-hand side of the mini kegerator. Make sure that the pressure gauge valve is closed (to close the valve, turn it counter-clockwise). Attach the pressure gauge on the end piece of the 16g adapter. ... -
Page 13: Removing The Co Line And Mini Keg
(water mixed with a bit of beer line cleaner, baking soda, or white vinegar), connect it to the unit as if it were a non-pressurized mini keg, and pour out all of the solution. Make sure to rinse the lines again! EdgeStar Mini Kegerator... -
Page 14: Tips For Best Results
Tips for Best Results 1. For best results, use clean glasses. Rinsing the glasses with cold water prior to pouring can deliver better results (less foam). 2. Hold the glass at an angle under the dispenser. Do not touch the nozzle of the dispenser to the glass. -
Page 15: Important Safeguards
Cartridges contain pressurized CO . Keep them away from heat, in a dry and cool place. Do not dispose of empty CO cartridges in a fire. Clean this appliance prior to use, and after every keg. EdgeStar Mini Kegerator... -
Page 16: Adjusting The Temperature
Adjusting the Temperature This mini kegerator has a temperature range from 38°F to 54°F. Note: Whether your mini kegerator can reach the Press the button on the control panel to lower the temperature by 1 actual set temperature degree increments. depends on the ambient environmental conditions. -
Page 17: Specifications
(Height x Width x Depth ) Weight 13 pounds Note: Technical data and performance information is provided for reference only. Specifications are subject to change. Check the rating label on the mini kegerator for the most accurate information. EdgeStar Mini Kegerator... -
Page 18: Edgestar Limited Warranty
EdgeStar authorized repair facility. PARTS: For a period of ONE (1) YEAR from the date of original purchase, EdgeStar will supply new, rebuilt, or refurbished parts free of charge. EdgeStar may request a defective part be returned in exchange for the replacement part. - Page 19 Register your product, download owner’s manuals, access additional troubleshooting resources, and obtain more information on other great EdgeStar products on the web at: http://www.edgestar.com Product contents and specifications may change without notice. Copyright © 2010 Living Direct, Inc. All rights reserved.
Need help?
Do you have a question about the TBC50S and is the answer not in the manual?
Questions and answers
Need the Wiring diagram