Table of Contents
Advertisement
Quick Links
Advertisement
Table of Contents

Subscribe to Our Youtube Channel
Related Manuals for ZyXEL Communications RS-1612


Summary of Contents for ZyXEL Communications RS-1612
- Page 1 RS-1612 User’s Guide Version 1.0 & I CCESSING NTERNET NTRANET...
-
Page 2: Zyxel Limited Warranty
ZyXEL Limited Warranty ZyXEL warrants to the original end user (purchaser) that this product is free from any defects in materials or workmanship for a period of up to two (2) years from the date of purchase. During the warranty period, and upon proof of purchase, should the product have indications of failure due to faulty workmanship and/or materials, ZyXEL will, at its discretion, repair or replace the defective products or components without charge for either parts... -
Page 3: Fcc Part 15 Information
The contents of this book may not be reproduced (in any part or as a whole) or transmitted in any form or by any means without the written permission of the publisher. Published by ZyXEL Communications Corporation. All rights reserved. Note: ZyXEL does not assume any liability arising out of the application or use of any products, or software described herein. -
Page 4: Information For Canadian Users
and if not installed and used in accordance with the instructions, may cause harmful interference to radio communications. If this equipment does cause harmful interference to radio/television reception, which can be determined by turning the equipment off and on, the user is encouraged to try to correct the interference by one or more of the following measures: Reorient or relocate the receiving antenna. -
Page 5: The Declarations Of Ce Marking
installed using an acceptable method of connection. In some cases, the company’s inside wiring associated with a single line individual service may be extended by means of a certified connector assembly. The customer should be aware that the compliance with the above conditions may not prevent degradation of service in some situations. -
Page 6: Contacting Zyxel
Eletro Magnetic Compatibility. Contacting ZyXEL If you have questions about your ZyXEL product or desire assistance, contact ZyXEL Communications Corporation in one of the following ways: Phone: In North America call between 8:00 AM and 5:00 PM PST at (714) 693-0808 Outside North America, you can dial +886-3-5783942 EXT 252 between 8:00AM and 5:00PM Taiwan time (GMT +8:00). - Page 7 For European versions and related files, use the address: ftp.zyxel.co.at Postal Service: You can send written communications at the following address: ZyXEL Communications Corporation 6, Innovation Road II, Science-Based Industrial Park Hsinchu, Taiwan 300, R.O.C. ZyXEL Communications Inc. 4920 E. La Palma Avenue...
-
Page 8: Table Of Contents
Contents ZyXEL Limited Warranty ii FCC Part 15 Information iii Information for Canadian Users iv The declarations of CE marking: v Contacting ZyXEL vi 1 Introduction 1 What This Manual Covers 1 Other Resources 2 Packing List 2 2 Primary Components 5 Control Panel 5 LCD Panel 6 Menu Key 6... - Page 9 Control Card 10 3 Installation 11 Setting up the RS-1612 Rack 11 Modem Card 11 Phone Lines 12 Connecting to Computers 12 Hooking Up Power 12 NMS Overview 13 Configuring the RS-1612 rack 13 Setting Rack Security 14 Checking the connection 15 NMS related CI commands 15 4 Operation 19 The RS-1612 Menu Tree 19...
-
Page 11: Introduction
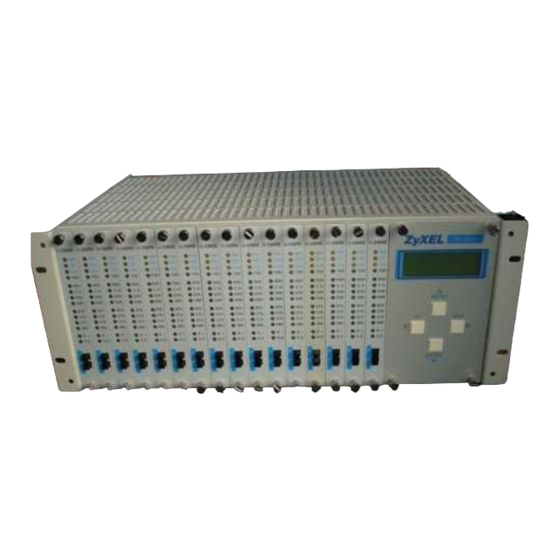
Introduction Congratulations on your purchase of the RS-1612 series rack system, one of ZyXEL’s premier high performance products. The RS-1612 chassis is a 19-inch wide and 4U high metal frame modem chassis. Up to 16 U-336R/RE rack mountable modem cards run at speeds up to 33.6Kbps for data transmission and 14.4Kbps for fax transmission making the RS-1612 rack system the ideal choice for applications requiring multiple modems. -
Page 12: Other Resources
Other Resources For more information about the RS-1612 series rack system check the following sources: U-336R/RE User's Guide The U-336R/RE User's Guide contains complete information about modems used in the RS-1612 rack. In addition to telling how to configure, operate, and troubleshoot modems, it gives detailed background information about general modem operation, AT commands and other information. - Page 13 One Menu Tree Guide One Warranty Registration Card...
-
Page 15: Primary Components
Primary Components Most operations you will perform with your RS-1612 rack system will involve the primary components. This chapter gives you an overview of the primary components and details on the use of their sub-components. Control Panel The control panel is to the right of the modem card slots. It consists of a four-row LCD panel and four control buttons. -
Page 16: Lcd Panel
LCD Panel The LCD panel shows the current operating status for the rack or various configuration menus. Menu Key The Menu Key is used to choose which display or configuration menu appears on the LCD panel. Sometimes, the Menu Key doubles as an Up key for moving about in a particular display. -
Page 17: Fuse
panel. For racks with redundant power supplies, turning both power supplies on ensures the rack remains energized if one power supply fails. Fuse The fuse protects the power supply card from an over current condition. The fuse for the AC power supply is a 250VAC 3A fuse. The DC power supply uses a 250VAC 5A fuse. -
Page 18: Dte Rs-232 Ports
Figure 2-2 RS-1612 Rear Panel DTE RS-232 Ports The RS-1612 rack has sixteen DTE RS-232 ports. Each port corresponds to a modem card slot on the front. Connecting an RS- 232 cable between a modem port and a computer serial port allows two-way data transfer between the modem and the computer. -
Page 19: Rs-232 Port
For use on four-wire leased line systems receiving line (R model only). Transmits for four-wire leased lines, transmits and receives for two-wire leased lines (R model only). Transmits for four-wire leased lines, transmits and receives for two-wire leased lines (R model only). RS-232 port This port is for uploading firmware and configuring the control card. -
Page 20: 10Base2, 10Base5, 10Base-T
10Base2, 10Base5, 10Base-T These connectors are used to connect the RS-1612 to a LAN. ZyView can manage the RS-1612 via the LAN. Only one of the three connectors can be used at any time. Control Card An internal control card is installed to monitor and control the modems. -
Page 21: Installation
Installation This chapter gives detailed instructions for installing one or more modems into the rack. Setting up the RS-1612 Rack Setting up the RS-1612 rack consists of plugging in modem cards, connecting phone lines, connecting to computers, and establishing power. After completing the power on sequence the LCD control panel will display the slot status of each modem. -
Page 22: Phone Lines
2. Holding both screw knobs, pull the card straight out. Phone Lines Sixteen terminal blocks correspond to the sixteen modem card slots in the rack. Each offers you flexibility with respect to the types of phone lines you may be using. Each terminal block has three sections: Section 1 (terminals 1 &... -
Page 23: Nms Overview
2. Replace the control panel. 3. Make sure all other hardware installations are complete. 4. Switch the power source selector on the back panel to AC or DC according to the type of power supply(s) you are using. 5. Plug one end of the power cord into the socket on the back panel. -
Page 24: Setting Rack Security
3. Power on the rack and wait until you see the Press ENTER to continue… prompt. 4. Press Enter and the following message is displayed: Enter Password: 5. Key in the default password 1234, to enter into the CI command mode. 6. -
Page 25: Checking The Connection
nms mask add <IP address> [mask] and press Enter. Mask, as given in this command, is a 16-bit value. Each bit corresponds to a modem slot. The most significant bit corresponds to slot 16, while the least significant bit corresponds to slot 1. If a value of 1 is used in the bit, the corresponding slot can not be managed with NMS software. - Page 26 IP address configuration: Command Description sys ip <addr> [netMask] Defines IP address and subnet mask. sys ip gateway <addr> Defines default gateway. sys ip display Displays IP address. sys ip save Saves IP address. ip ping <addr> Pings a system. Set Modem mask: Command Description...
- Page 27 Command Description <new passwd> sys password save Saves password. Change Baud rate of RS-232: Command Description sys baud x Changes and saves baud rate of RS-232 x 1: 38.4K, 2: 19.2K, 3: 9.6K, 4: 57.6K, 5: 115.2K.
-
Page 29: Operation
Operation This chapter gives information on day to day use of the RS-1612 rack system. Most of what you will do with the rack involves configuring or setting modems or network administration. These topics are covered in detail in the U-336R/RE and ZyViewII User's Guides. -
Page 30: Rack Slot Menu
Contrast Menu - The Contrast menu lets you adjust the contrast of the LCD display. Modem Reset Menu - This menu allows you to reset the modem without interrupting power to the rack or unplugging the modem. Rack Slot Menu The Rack Slot Menu shows the status of each slot in the rack and lets you choose which modem to configure using the control panel. -
Page 31: Main Display
modem you are about to configure occupies, some key modem settings, major configuration categories, and the type of modem. Refer to the Menu Tree Guide for further details. [SLOT= 7]----------- MULTI-AUTO V42b M D R O A 115200 AS -------------[U336R] Figure 4-2 Modem Menu Pressing the Menu (Up Arrow) key will switch the menu between the modem menu and configuration menu. -
Page 32: Message Display
ZyXEL RS-1612 >> VER : 1.0 IP = 203.66.113.10 Figure 4-3 Main Display Message Display The message display shows brief messages sent by the supervisor to the rack. Pressing the Right Arrow Key from the Main Display accesses the Message Display. The Message Display is read-only. <<... -
Page 33: Modem Reset Menu
<< LCD CONTRAST >> 0 1 2 3 4 5 6 7 Figure 4-5 Contrast Menu Modem Reset Menu The Modem Reset Menu lets you reset the modem without interrupting power to the rack. To reset the modem: 1. From the Main Display press the Left Arrow Key. 2. -
Page 34: Setting The Display Contrast
Setting the Display Contrast Changing the display contrast makes it easier to read the display. 1. From the Main Display, press the Right Arrow Key twice. 2. The Contrast Menu appears. Press the Left or Right Arrow Keys to set the contrast to the desired level. 3. -
Page 35: Setting Modems
1 stop bit 3. Turn on the RS-1612 rack to reboot the system. Type in any character to enter debug mode. 4. Change the data rate to 115200 bps using the atba5 command. 5. Type atur and press Enter to upload the firmware. 6. -
Page 36: Setting Modems With The Control Panel
Setting Modems with the Control Panel Each modem card in the RS-1612 series chassis can be configured through the control panel. To access the modem control screens follow the steps listed below: 1. From the Main Display, press the Menu Key. 2. -
Page 37: Changing Modem Cards
Changing Modem Cards When the rack is powered up, the control card reads each modem card's settings in the rack and stores the modem settings, It also stores all setting changes afterward. After changing a card the rack automatically recalls the previous settings and configures the new card accordingly.
Need help?
Do you have a question about the RS-1612 and is the answer not in the manual?
Questions and answers