DANE-ELEC SO SMART User Manual
Wifi 802.11 mimo or b/g high definition multimedia hard disk drive
Hide thumbs
Also See for SO SMART:
- User manual (56 pages) ,
- Quick start manual (21 pages) ,
- Datasheet (2 pages)
Table of Contents
Advertisement
Quick Links
Download this manual
See also:
User Manual
Advertisement
Table of Contents

Related Manuals for DANE-ELEC SO SMART


Summary of Contents for DANE-ELEC SO SMART
- Page 1 Wifi 802.11 MIMO or b/g...
- Page 2 eáÖÜ=aÉÑáåáíáçå jìäíáãÉÇá~ e~êÇ=aáëâ aêáîÉ rëÉê=dìáÇÉ www.danedigital.com www.dane-elec.com © 2007 Dane-Elec copyright...
- Page 3 Congratulations On your purchase of So Smart HDMI, Wifi Hi-Definition Multimedia Player and Welcome to the So Smart HDMI Family ! The So Smart HDMI HD Multimedia Player is a portable player that allows vivid and crisp playback of dozens of multimedia files.
-
Page 4: Table Of Contents
Table of Contents Chapter 1 Safety & Precautions 1.1 Do’s and Dont’s Page.5 1.2 Limitations and Usage Precautions Page.6 Chapter 2 Introduction 2.1 Introducing the Wireless so smart Hi-Def Multimedia Player Page.7 2.2 Technical Specifications Page.8 2.3 Package Contents Page.9 2.4 Getting Familiar with your Unit Page.10 Chapter 3... -
Page 5: Chapter 1 Safety & Precautions
Chapter 1: Safety & Precautions 1.1 Do’s and Dont’s Do’s ◈Unplug the player during lightning storms or when unused for long periods of time. ◈ Do not defeat the safety purpose of the polarized or grounding-type plug. A polarized plug has two blades with one wider than the other. -
Page 6: Limitations And Usage Precautions Page.6
Chapter 1: Safety & Precautions 1.2 Limitations and Usage Precautions Please read the following Limitations and Usage Precautions before using your so smart player. ◈ While so smart players support dozens of file formats and codec, they are not intended to work with every codec-variation. so smart players provide limited support to standardized versions of codec as stated in the Technical Specifications of this manual. -
Page 7: Chapter 2 Introduction
Chapter 2: Introduction 2.1 Introducing the So Smart HDMI Multimedia Player ◈ HD Playback: The so smart player supports a max resolution of 1920 x 1080 Progressive Scan video output providing Hi-Definition display of clear and crisp picture quality. ◈ Video / Movie File Player: Supports various video file formats, including DivX® (3/4/5/6), Xvid, MPEG, WMV-9, ASF(WMV9), DAT, DVD(IFO, VOB), ISO as well as HD-level TP, TS, TRP etc. -
Page 8: Technical Specifications Page.8
Chapter 2: Introduction 2.2 Technical Specifications Product Name So Smart HDMI Wireless Hi-Definition Media Player Processor SEM8621L (By Sigma Designs) Memory 64MB (RAM), 8MB (Flash) Operating System ucLinux DivX® (3/4/5/6), AVI, Xvid, MPEG, MPG, VCD(DAT), DVD(VOB, IFO), WMV(WMV-9), Video ASF(WMV-9), TP, TS, TRP Supported Files &... -
Page 9: Package Contents Page.9
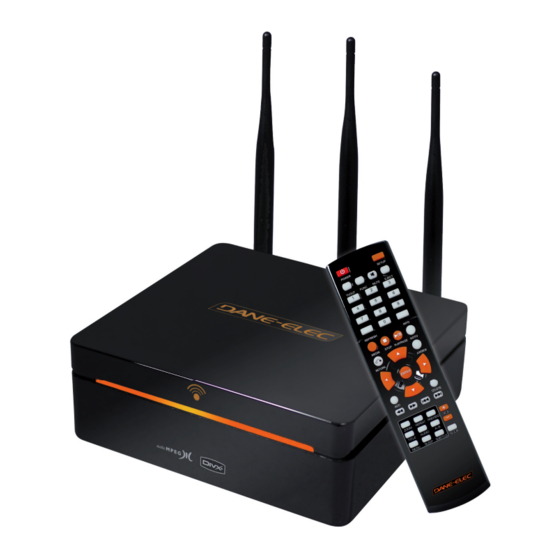
Chapter 2: Introduction 2.3 Package Contents Remote Control SO SMART HDMI WIFI N 5dBi Antenna A/V Cable Power Adaptor Power Cable USB Cable User Manual Driver CD HDMI Cable... -
Page 10: Getting Familiar With Your Unit Page.10
Chapter 2: Introduction 2.3 Getting Familiar with your unit Front View Power LED... - Page 11 Chapter 2: Introduction Rear View ③ ① ⑪ ⑧ ⑦ ⑤ ⑬ ⑫ ⑩ ⑨ ⑥ ④ ② Wireless Antenna Jack video Port Optical (Audio) Port Coaxial Cable Jack 10/100 Mbps (RJ45) LAN S-video Port USB 2.0 Host A-Type 2 HDMI Port Video Component Port High Velocity Fan...
- Page 12 Chapter 2: Introduction So Smart Remote Control POWER Toggle Unit Power (ON / OFF) SETUP Enter Setup Menu, Apply/Confirm Setup Settings TVOUT Toggle Video Output Modes FUNC Display Control Options (Vol, Contrast, Subtitle etc..) MUTE Stop Audio Output from the Player (ARROW) Cursor Navigation Arrow Buttons REFRESH...
-
Page 13: Audio And Video Connection Setup
Chapter 3: Basic Setup 3.1 Connection 3.11 Audio & Video Connection Setup So Smart to TV : Video Connections Audio Connection Options So Smart Y/Pb/Pr Y/Pb/Pr Video Video Video Connection Options S-Video S-Video HDMI HDMI So Smart to Home Theater : Audio Connections So Smart Home Theater... - Page 14 Chapter 3: Basic Setup 3.22 Formatting the Hard Disk Formatting and Partitioning the HDD using Windows 2000/XP The drive is initially not visible in Windows Explorer. For the drive to been seen in Windows Explorer it needs to be configured via the disk management Utility.
- Page 15 Chapter 3: Basic Setup 4. Select the appropriate Partition Type. Choose Primary partition. Primary –Normal selection for less than 4 partitions. Extended – Used for 4 or more partitions. 5. Select the Partition Size. If you want one partition, simply click “Next”.
- Page 16 Chapter 3: Basic Setup 7. Select the Partition Format. NTFS is the default format type in Windows XP, but FAT32 is popular for users that dual boot between XP and 9X. There is a limit that Windows XP cannot create a partition larger than 32 GB using FAT32.If you want the FAT32, Partition Size is limited to 32GB.
-
Page 17: Transferring Files To The Hard Disk Drive Through Usb Page.14
Chapter 3: Basic Setup 3.23 Transferring files to the Hard Disk Drive through USB When connected to your PC, the So Smart works exactly like an external storage device (e.g. USB Flash drive). 1. Power OFF the So Smart Media Player 2. -
Page 18: Wireless Network
Chapter 3: Basic Setup 3.3 The SETUP Menu Before using the So Smart player, you may need to configure the So Smart player to work with your Display (TV) and Network Setup. Press SETUP menu on the So Smart Remote to view the setup options on the main panel. - Page 19 Chapter 3: Basic Setup If Wireless Network is selected in the previous step, the Wireless Network Setup screen is displayed in this step. (Use navigation arrow button on So Smart Remote to select each setup options, Use ENTER button to display options) ESSID: (Manually enter the Wireless Signal Name or SSID of your network router).
- Page 20 Chapter 3: Basic Setup PASSWORD FUNCTIONS: In order to password-protect folders, you will first need to setup Admin Password. Default Admin Password: 0000 (4-zeros) Recommended: Change Admin Password when installing the So Smart Unit. ADMIN PASSWORD: _________________ (Use this space to write/safekeep new admin password) Admin Password is also required for Factory Reset operation.
- Page 21 Chapter 3: Basic Setup To access a password-protected folder: 1. Using the arrow-buttons on the So Smart Remote, navigate to the folder and press ENTER / SELECT. 2. An Enter-Password prompt will popup. Enter the folder password to access the folder contents. 3.Inputting an incorrect password displays the warning as shown.
- Page 22 Chapter 3: Basic Setup CAUTION: Avoid Choosing a “bright” image as the Background Wallpaper. Menu items may not be visible on a bright background. If a bright image is accidentally chosen, perform a Hardware Reset to revert to original, Factory-Default Background. FACTORY RESET FUNCTION: The Factory Reset function is provided under the MISC setup menu to revert setup settings to Factory-Default condition.
- Page 23 Chapter 3: Basic Setup 3.4 How to setup NDAS in So Smart What is NDAS (Network Direct Attached Storage)? It is useful technology that makes your PC recognize Internal HDD inside So Smart which is connected to your wired or wireless home network. >>...
- Page 24 Chapter 3: Basic Setup 3.42. Install NDAS in PC 3.43. Register NDAS 1) Run setup.exe. 1) In the bottom right icon tray, click the NDAS icon and select “Register a New Device…” 2) Follow the procedure from NDAS software setup wizard. 2) Click [Next] in NDAS Device Registration wizard.
- Page 25 Chapter 3: Basic Setup 4) Enter NDAS ID and Write key, and click [Next]. 7) After the installation, So Smart’s HDD is recognized. >> Caution << Backup NDAS ID and Write key. It will not be issued again. 5) If ID and key are correct, you will be asked the following after 3.44.
- Page 26 Chapter 3: Basic Setup B. Dismount 3.45. Confirm NDAS device in Device Manager 1) Use “ Remove NDAS SCSI Controller safely……” You can check to see if your NDAS device has been installed as in the figure below. in “Disk Drive” and “SCSI and RAID controller” under Device Manager.
-
Page 27: Setting Up Network Sharing Using Windows Xp On Your Pc Page.24
Chapter 4: Connecting So Smart to a Network 4.1 Setting Network Sharing using Windows XP on your PC In order to connect your So Smart Player to your local area network or to an individual PC, we need to configure the Internet Protocol on your PC: ◈... - Page 28 Chapter 4: Connecting So Smart to a Network Click / Select PROTOCOL and Select ADD Select Network Protocol Window opens up as shown here. Click the NWLink IPX/SPX/NetBIOS Compatible Transport Protocol and click OK. Two NWLink items are added to the connection's Properties As shown, two NWLink items are added to the connection's Properties.
- Page 29 Chapter 4: Connecting So Smart to a Network Setting Up Folder / Drive Sharing on Win-XP PC: ◈ Right-click the folder or drive that you want to share, and then click SHARING AND SECURITY. Tip: If you want to share your entire My Documents folder, open My Documents, and then click the UP button on the toolbar.
- Page 30 Chapter 4: Connecting So Smart to a Network Under the Sharing tab, as shown in the picture, you can do one of the following: ◈ Share this folder on the network - This allows you to share the contents of the drive or folder available to other users on the network.
- Page 31 Chapter 4: Connecting So Smart to a Network Disabling Windows Firewall: Network Sharing makes it possible for home and small office users to share the Local Area Network (LAN). In order to prevent unsolicited network traffic on this LAN, Windows XP protects the connections via the Internet Connection Firewall (ICF).
- Page 32 Chapter 4: Connecting So Smart to a Network Installing NETBEUI Protocol As in the previous Protocol installation procedure, open the NETWORK COMPONENT TYPE window. (START -> Right Click on MY NETWORK PLACES, Select PROPERTIES. In LOCAL AREA CONNECTIONS window, Select INTERNET PROTOCOL (TCP/IP) and click INSTALL). ◈...
- Page 33 Chapter 4: Connecting So Smart to a Network 4.2 Wired (via 10/100 LAN, RJ45 port) Network Connections For Sharing and Accessing media files / folders and drives residing on your PC NOTE: If using Win-XP, turn-off your Firewall Setting before initiating this setup.
-
Page 34: Wireless Network Page.31
Chapter 4: Connecting So Smart to a Network 4.3 Wireless Network So Smart player is equipped to be connected to your Wireless Network and is capable of streaming media files directly from your PC. Upon completing the setup as described below, the So Smart player will acquire the IP address automatically from your router. - Page 35 Chapter 4: Connecting So Smart to a Network ENTERING SSID: Using the So Smart Remote, navigate to ESSID and press ENTER/SELECT. ◈ A Key-Panel Window pops up on the TV Screen. On the ◈ Panel Window, navigate and SELECT each alphanumeric character to manually enter the SSID.
-
Page 36: Chapter 5 Media Playback
Chapter 5: Media Playback 5.1 Video Playback When the So Smart player boots up, a list of all recently-played video files is displayed on the main panel. The displayed list (icons) consists of the last SIX recently-played video files. Using the Remote, navigate to one of these files and press ENTER / SELECT. - Page 37 Chapter 5: Media Playback During Video playback, Press VOLUME button on the Remote to display the video settings float box. Use UP/DOWN arrow keys to select Volume, Brightness, Contrast, Saturation, Subtitle settings options, ENTER / SELECT to change settings. Changing Volume Modifying Brightness Settings Modifying Display Contrast Changing Saturation Settings...
- Page 38 Chapter 5: Media Playback Changing Subtitle Display Position Choosing Subtitle Language Choosing Subtitle File INFO BUTTON: Display Basic File Information GOTO BUTTON: Jump to desired time stamp.
-
Page 39: Audio Playback Page.36
Chapter 5: Media Playback 5.2 Audio Playback So smart provides playback of audio files residing on your PC (via network streaming), external storage device (via USB-Host) or local IDE-HDD (installed inside the So Smart player) A list of available devices is as depicted in this image. If the device or folder does not appear or cannot be located, navigate to the left menu (see screen), select REFRESH and press ENTER / SELECT. - Page 40 Chapter 5: Media Playback Use the RND / SEQ button on the So Smart Remote Control to toggle between Random vs Sequential playback of Audio files in JUKEBOX list. This feature can also be used for IMAGE playback. Use the REPEAT button on the So Smart Remote Control to play an audio (music) file repeatedly.
-
Page 41: Image Playback Page.38
Chapter 5: Media Playback 5.3 Image Playback So Smart provides playback of digital image files residing on your PC (via network streaming), external storage device (via USB-Host) or local IDE-HDD (installed inside the So Smart player) A list of available devices is as depicted in this image. If the device or folder does not appear or cannot be located, navigate to the left menu (see screen), select REFRESH and press ENTER / SELECT. -
Page 42: Mixed-Media Playback Page.39
Chapter 5: Media Playback 5.4 Mixed-Media Playback When the So Smart player boots up, a list of all recently-played media files is displayed on the main panel. In case of video files, you can resume playback (from the point it was last stopped). The list contains six files of each media type: video, audio and image i.e. -
Page 43: Using My List For Media Playback Page.40
Chapter 5: Media Playback 5.5 Using MY LIST for Media Playback The MY LIST feature allows the creation of a list of your favorite files and folders. This feature enables you to bookmark and keep a list of commonly-used media files separately for easy and quick access and playback. - Page 44 Chapter 6: How to setup NDAS What is NDAS (Network Direct Attached Storage)? It is useful technology that makes your PC recognize Internal HDD inside So Smart which is connected to your wired or wireless home network. >> For use of NDAS, you should << 1.
- Page 45 Chapter 6: How to setup NDAS 2. Install NDAS in PC 3. Register NDAS 1) Run setup.exe. 1) In the bottom right icon tray, click the NDAS icon and select “Register a New Device…” 2) Follow the procedure from NDAS software setup wizard. 2) Click [Next] in NDAS Device Registration wizard.
- Page 46 Chapter 6: How to setup NDAS 4) Enter NDAS ID and Write key, and click [Next]. 7) After the installation, So Smart’s HDD is recognized. >> Caution << Backup NDAS ID and Write key. It will not be issued again. 3.
- Page 47 Chapter 6: How to setup NDAS B. Dismount 1) Use “ Remove NDAS SCSI Controller safely……” 4. Confirm NDAS device in Device Manager as in the figure below. You can check to see if your NDAS device has been installed in “Disk Drive”...
-
Page 48: How Do I
Chapter 7: How do I… 6.1 … play music files randomly or in Shuffle Mode? → Using the So Smart Remote, navigate to the folder containing music files. → Using the So Smart Remote, navigate, and Press ENTER button to select and add all audio files that you intend to randomize. - Page 49 Chapter 8: Firmware Upgrade Firmware version check 1) Connect your So Smart Hi-Def Multimedia Player to your TV and power-on the player. 2) Press the SETUP button on the Remote Control. Using the So Smart Remote, navigate (arrow buttons), scroll down and Select ‘MISC’.
-
Page 50: Troubleshooting
Troubleshooting Under no circumstances should you try to repair the system yourself, as this will invalidate the warranty. Do not open the system as there is a risk of electric shock. If a fault occurs, first check the points listed below before taking the system for repair. 1. -
Page 51: Limited Warranty
Limited Warranty Your So Smart Wireless Hi-Definition Multimedia Player comes with LIMITATION OF LIABILITY AND REMEDY... a full 1-yr manufacturer’s warranty on parts and labor. DANE-ELEC or ITS DISTRIBUTORS ARE NOT LIABLE UNDER AN The Warranty coverage on this player begins the day you buy Y CIRCUMSTANCES FOR ANY DIRECT, INDIRECT, SPECIAL, your product. - Page 52 Copyright and Legal Attributions All textual references, brands, logos or product names are the copyrights, trademarks or registered trademarks of their respective owners /holders. Use of these trademarks on our website, products, literature, communications, manuals, advertising material, press releases, etc. do not represent endorsements by the respective companies for Dane-Elec's products, services or brand, but merely reflect their possible compatibility with our products.
- Page 53 Glossary Aspect Ratio Used to describe the distribution of pixels in a digital Also known as MPEG-1 Audio Layer 3. A popular digital image. Increasing the aspect ratio of an image lowers audio format that was designed to reduce the amount of the efficiency of the use of the pixels.
Need help?
Do you have a question about the SO SMART and is the answer not in the manual?
Questions and answers