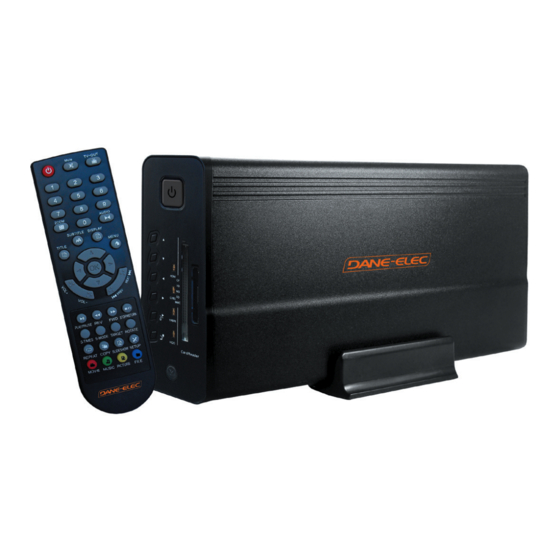
DANE-ELEC SO SPEAKY HDMI PLUS User Manual
Hdmi media player hard disk
Hide thumbs
Also See for SO SPEAKY HDMI PLUS:
- Datasheet (2 pages) ,
- Quick start manual (17 pages) ,
- Manual (16 pages)
Advertisement
Advertisement
Table of Contents

Related Manuals for DANE-ELEC SO SPEAKY HDMI PLUS


Summary of Contents for DANE-ELEC SO SPEAKY HDMI PLUS
- Page 1 HDMI Media Player Hard Disk User Manual PC/MAC...
-
Page 2: Table Of Contents
CONTENTS 1. WarNiNgS 2. iNTrODUCTiON 3. DEviCE PErfOrmaNCE 4. aCCESSOriES 5. USiNg ThE DEviCE 6. iNSTrUCTiONS fOr ThE SOfTWarE SYSTEm 7. PLaY fUNCTiON 8. DigiTaL COmPaNiON fUNCTiON 9. hOST OUTPUT 10. faQs... - Page 3 Thank you for choosing the So Speaky hDmi + multimedia player. for better use of this product, please carefully read this user’s manual. a national patent has been filed for the So Speaky hDmi +. any imitation will be considered as counterfeit, and the person responsible will have to assume the legal consequences.
-
Page 4: Warnings
1. WarNiNgS 1. Thanks for using So Speaky hDmi + ! Please read this manual carefully before you start to use it. in addition, please keep this manual well. 2. The actual operations, controls and menu items might be different from this manual. The manufacturer is not responsible for updating this manual immediately after a product change. -
Page 5: Device Performance
3. DEviCE PErfOrmaNCE 3.1 Characteristics : 1. The So Speaky hDmi + can store large quantities of video, music and photo data. 2. The So Speaky hDmi + can be connected to a home Theatre. The So Speaky hDmi + can be used as a peripheral storage device. - Page 6 3.2 Technical Specifications : Specification 3.5" hard disk hard disk faT32 read-write faT32 Storage devices memory Card Compatible with SD/mS/mmC card reader Compatible with U-disk/mP3/hDD enclosure/card host reader. Power adaptor aC power adapter USB interface USB 2.0 high speed. Compatible for USB1.1 interface audio output analog Stereo output, Digital Optical SPDif...
-
Page 7: Accessories
4. aCCESSOriES Name Quantity So Speaky hDmi + aC Power adaptor remote Control av Cable Progressive scan video component cable (YPbPr) USB Cable Quick Startup guide Batteries CD rOm Remote control’s functions : Button function Turns the device On / Off Power Plays / mutes the sound mute... - Page 8 Change r / L audio Channels audio Show Playlist for iSO fi les or video_TS fi les Title a. When playing music and movie fi les, press “Display” to show “Previous chapter”, “Next chapter”. Press once more for “Off” Subtitle b.
- Page 9 One-key copy the external memory fi les to the COPY fi rst faT32 format partition 1. Press the button to directly play the pictures and music in the hard disk’s music and picture root directory menu. 2. a) Press the “slideshow” and “OK” or “Play/ Pause”...
-
Page 10: Using The Device
5. USiNg ThE DEviCE The default language setting on your So Speaky hDmi + is English. To change the language, please follow the instructions below: 1) Turn on the So Speaky hDmi + 2) access the main menu 3) Press the SETUP button on the remote control 4) go to “OSD language”. - Page 11 5.1 Connecting the device Connect the unit to an aC power supply using the power adaptor. When the blue led turns on, the device is ready to operate.
- Page 12 av Output mode To use the av output mode: select av as the output mode for the television. Press the viDEO key on the So Speaky hDmi + remote to select av (CvBS) OUT mode. The menu will appear on the television screen. YPbPr OUTPUT mODE (Progressive scan video component) To use the YPbPr output mode: select YPbPr as the output mode for the television.
-
Page 13: Instructions For The Software System
hDmi Output mode To connect to a television and use the hDmi output: select hDmi mode, then press the viDEO key on the remote to switch to hDmi mode. The menu will appear on the television screen. You must also connect the av cable (white and red) for sound since the YPbPr cable only transmits the image. - Page 14 2. Press «set up» button on the remote controller, setup menu appears on screen as below: press directional keys (up,down,left,right) to select item, then press «enter» key to confi rm highlighted selection. Press «exit or setup» key to exit setup menu display. 6.
- Page 15 6. 6. resolution: NTSC (480i, 480p), PaL (576i, 576p), 720p,1080i are available for your video outputs. 6. 7. Subtitle: select your preferred subtitle language. 6. 8. SPDif Output: select SPDif Off, SPDif/raW or SPDif/PCm to work 16...
- Page 16 6. 9. auto Play mode: auto Play ON and Off to play fi les in the file menu directly when the unit is powered up. 6. 10. Screen Saver: Screen Saver ON and Off options. 6. 11.1 System information: to view fi rmware version. 6.
- Page 17 b. Connect the USB flash Drive to the unit via USB hOST. Enter the Setup menu. Select “System information”, press the “right” directional button on the remote control, and Press “OK” to start upgrading. c. Once the upgrade is complete, the unit will restart automatically. Please note: when upgrading, please do not cut off the power supply, as this could damage the unit.
-
Page 18: Play Function
7. PLaY fUNCTiON Select the hard disk or external memory in the fi rst screen menu to enter a second screen menu as in the picture below. Select the movie, music, photo or fi le you wish to start playing. 7. - Page 19 7. 2. music menu By choosing music, the music list appears and starts to play. if you select one song and press the “S-mo- de” key on the remote control, the Equalizer menu will appear. The subtitle fi le with the same name as the song will play automatically.
- Page 20 7. 4. file menu Select fiLE in the menu. Enter the target hard disk’s fi le list and select the fi le you wish to play. You can press Display on the remote control to complete “copy”, “paste”, “delete”, “rename”, “create new folder”, “show properties”, and “cancel”...
- Page 21 7. 4.3.Delete :delete fi les 7. 4. 4.rename: rename fi le’s name. 7. 4. 5.New folder: create new folder...
- Page 22 7. 4. 6.Properties : show properties 7. 4. 7.Cancel : cancel the operation or push the Display button to exit...
-
Page 23: Digital Companion Function
8. DigiTaL COmPaNiON fUNCTiON Copy function 8. 1. One Button Copy function The unit supports SD/mmC/mS card with optional capacity. it is able to reciprocally one-key copy between SD/mmC/mS and hard disk. if it is to copy the whole memory card content to hard disk, there are two ways as below: a. -
Page 24: Faqs
10. faQS Q1: The unit gets hot when in operation. is this normal? a: it is quite normal for the unit to release heat. Please make sure nothing is covering the unit, preventing it from releasing heat normally. Q2: i have connected my device to a power supply but the indicator light remains off and the unit is not working. - Page 25 degrees in the remote Control section]. iv. The remote control will not operate correctly unless it is being pointed at the unit. v. There is an obstacle between the controller and unit. Please remove the obstacle and operate again. Q8. my computer can’t read the hard disk a: i.
- Page 26 www.dane-elec.com...
Need help?
Do you have a question about the SO SPEAKY HDMI PLUS and is the answer not in the manual?
Questions and answers