
Subscribe to Our Youtube Channel
Related Manuals for Emerson CKD3630


Summary of Contents for Emerson CKD3630
- Page 1 AM/FM STEREO CLOCK RADIO COMPACT DISC PLAYER with DUAL ALARMS and NAP TIMER OWNER'S MANUAL CKD3630 Visit our web site at www.emersonradio.com CKD3630_060404.p65 4/6/2004, 15:19...
-
Page 2: Important Safety Nstructions
TO PREVENT FIRE OR SHOCK HAZARD, DO NOT USE THIS PLUG WITH AN EXTENSION CORD, RECEPTACLE OR OTHER OUTLET UNLESS THE BLADES CAN BE FULLY INSERTED TO PREVENT BLADE EXPOSURE. TO PREVENT FIRE OR SHOCK HAZARD, DO NOT EXPOSE THIS APPLIANCE TO RAIN OR MOISTURE. The lightning flash with arrow- WARNING: TO REDUCE THE head symbol, within an equi-... - Page 3 Thank you… … … … … … … for purchasing this Emerson Dual Alarm Stereo Clock Radio with CD Player, and Nap Timer. This compact sized unit has been designed to fit comfortably on any desk or bedside table. The CD Player has a 20-track programmable memory plus one-track/all tracks automatic repeat playback.
-
Page 4: Important Notes
IMPORTANT NOTES • Avoid installing this unit in places exposed to direct sunlight or close to heat radiating appliances such as electric heaters, on top of other stereo equipment that radiates too much heat, places lacking ventilation or dusty areas, places subject to constant vibration and/ or humid or moist areas. -
Page 5: Preparation For Use
PREPARATION FOR USE UNPACKING AND SET UP • Carefully remove the unit from the display carton. Remove all the packing material from the unit and remove any small strips of tape that may have been used to prevent the CD door from opening in transit. •... -
Page 6: Battery Back Up System
BATTERY BACK UP SYSTEM This model includes a battery back up circuit that will maintain the clock and alarm settings in the event of a temporary power interruption. The battery back up system requires one 9-Volt battery, not included. The battery compartment is located on the back of the cabinet. -
Page 7: Power Source
POWER SOURCE This radio is designed to operate on 120V 60Hz AC only. Attempting to operate this radio on any other power source could cause damage to the unit and such damage is not covered by your warranty. Make sure the radio is connected to an AC outlet that is always “live”. Do not connect the radio to an outlet that is controlled by a wall switch. -
Page 8: Location Of Controls And Indicators
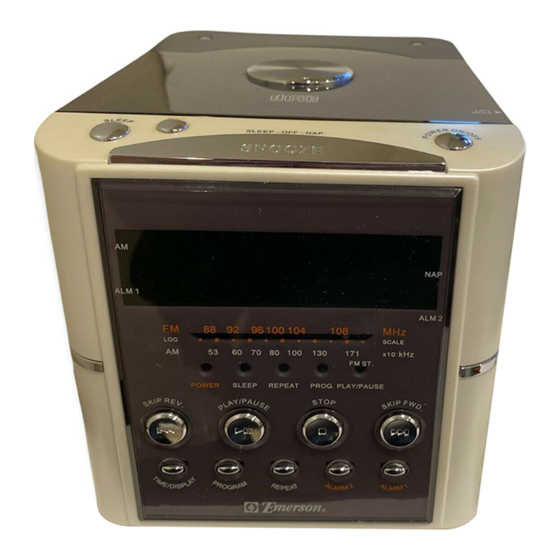
LOCATION OF CONTROLS AND INDICATORS FRONT PANEL 1.) PLAY/PAUSE Button. 2.) SKIP REV. Button. 3.) REPEAT Indicator. 4.) POWER ‘ On’ Indicator. 5.) SLEEP Indicator. 6.) Radio Dial Scale. 7.) ALM (Alarm) 1 Indicator. 8.) AM Indicator. 9.) SLEEP Button. 10.) NAP Button. -
Page 9: Right Side Panel
RIGHT SIDE PANEL LEFT SIDE PANEL 26.) VOLUME Control. 27.) Function Selector Switch. (CD/FM AUTO/AM) 28.) TUNING Control. 29.) CD Door LIFT HERE tab. 30.) Right Speaker. 31.) FM Lead Wire Antenna. 32.) AC Power Cord. CKD3630_060404.p65 33.) Back Up Battery Compartment. 34.) Left Speaker. -
Page 10: Setting The Clock
OPERATING INSTRUCTIONS • Make sure you have installed the back-up battery in the battery compartment. • Make sure you have extended the FM Lead Wire Antenna to its full length. • Connect the AC power cord plug to a 120V 60Hz AC outlet. SETTING THE CLOCK When the radio is connected to the AC outlet for the first time the display will show flashing “12:00”. - Page 11 SETTING THE WAKE-UP TIMES The procedure for setting the Alarm 1 and Alarm 2 wake up times is the same. 1.) First depress and hold the ALARM 1 button, then press the SKIP FWD. button or the SKIP REV. Alarm 1 wake-up time. The display will move slowly at first, and then begin to move rapidly.
-
Page 12: Listening To The Radio
LISTENING TO THE RADIO 1.) Slide the function CD/FM AUTO/AM selector switch, located on the right side cabinet, to the FM AUTO or AM position. 2.) Press the POWER ON/OFF button on the top panel to turn the system ‘ On’ . The POWER indicator comes ‘... -
Page 13: Playing Compact Discs
PLAYING COMPACT DISCS IMPORTANT: This CD player can play normal CDs plus CD Recordable (CD-R) and CD Rewriteable (CD-RW) discs. However the playability of CD-R/RW discs may be affected by the type of software that was used in ‘ ripping’ the tracks from the original discs and ‘... - Page 14 5.) Press the PLAY/PAUSE panel to begin playback on track 1. Track number “1” appears in the display and the PLAY/ PAUSE indicator comes ‘ On’ . After 5 seconds the display returns to the correct time. 6.) Adjust the VOLUME control to the desired level. 7.) Playback will continue until the last track has played then the disc stops and the PLAY/PAUSE indicator goes ‘...
- Page 15 SKIP/Search ( ) Controls During playback press the SKIP FWD. or SKIP REV. buttons on the front panel repeatedly to skip forward or back to higher or lower numbered tracks. Playback will start at the beginning of the selected track. To search within a track for a specific musical passage depress and hold the SKIP FWD.
- Page 16 SPECIAL PLAYBACK MODES REPEAT PLAYBACK You can program the player to continuously repeat a single track or the entire disc. The Repeat mode can be selected while the disc is playing or while the disc is stopped. Single Track Repeat Select the track to be repeated and then press the REPEAT button on the front panel once.
-
Page 17: Programmed Playback
PROGRAMMED PLAYBACK Use the Programmed Playback feature to play up to 20 tracks on a disc in any desired order. You may also program a particular track to play several times within a programmed sequence if desired. Note: You cannot program a disc while it is playing. Press the STOP to stop playback and then follow the programming steps below. - Page 18 5.) When you have completed programming the desired tracks press the PLAY/ PAUSE button to begin programmed playback. The PLAY/PAUSE indicator comes ‘ On’ and the PROG. indicator continues flashing. Playback will begin on the first track you programmed and will continue until the last programmed track has played.
-
Page 19: Alarm Function
ALARM FUNCTION You can use the alarm function to wake you to an electronic buzzer tone, the radio, or your favorite CD. First press the ALARM 1 or ALARM 2 buttons on the front panel to check the Wake Up time settings. Adjust the Wake Up times if necessary. Wake To Buzzer (Crescendo Alarm) Slide the ALARM 1 and/or ALARM 2 selector switches on the left side panel to the BUZZER position. -
Page 20: Snooze Function
Wake To CD IMPORTANT: This model includes an automatic default to the Buzzer alarm if the player cannot read the disc that you selected for wake-up. If the player cannot read the disc's Table of Contents (TOC) within 8 seconds, it assumes that the disc is either defective or inserted incorrectly, and the system automatically defaults to the Buzzer alarm to make sure that you wake up on time. -
Page 21: Sleep Timer
SLEEP Timer You can fall asleep to the radio or CD player and the sleep timer will shut the system off automatically after up to 99 minutes of music. Sleep To Radio Set the function selector switch (CD/FM AUTO/AM) to the FM AUTO or AM position. Press the SLEEP button on the top panel. - Page 22 Adjusting The Length of The Sleep Timer The sleep timer default setting is 30 minutes but it can be adjusted downward or upward to a maximum of 99 minutes. Depress and hold the SLEEP button. The display will show “L:30” indicating that the power will shut off after 30 minutes.
-
Page 23: Display Dimmer
NAP Timer (Buzzer Alarm Only) This model features a programmable 99-minute Nap Timer that can be used to wake you after naps of up to 99 minutes without disturbing your regular alarm settings. Depress and hold the NAP button on the top panel. The display shows “n:30”, indicating that the buzzer alarm will sound in 30 minutes, and the NAP indicator appears in the display. -
Page 24: Limited Warranty
For repair or replacement, pack your unit in a padded box, enclose your check or money order payable to Emerson Radio Corp. in the amount of $9.00 (not required by California residents) to cover shipping and handling costs, and enclose a copy of your proof of purchase. - Page 25 EMERSON Part No. 16-2958 Printed in China 406-01 CKD3630_060404.p65 4/6/2004, 15:19...
Need help?
Do you have a question about the CKD3630 and is the answer not in the manual?
Questions and answers