Panasonic WJ-HD716/1000 Operating Instructions Manual
Digital disk recorder
Hide thumbs
Also See for WJ-HD716/1000:
- Installation manual (156 pages) ,
- Product catalog (125 pages) ,
- Manual (9 pages)
Table of Contents
Advertisement
Quick Links
ERR OR
ALA RM
ALA RM
MO NIT OR
SUS PEN D
1
2
3
TIM ER
SEQ
5
6
7
OS D
OPE RAT E
9
0/1 0
11
MU LTI SC RE
EN
13
14
15
Before attempting to connect or operate this product,
please read these instructions carefully and save this manual for future use.
No model number suffix is shown in this manual.
Operating Instructions
Digital Disk Recorder
Model No.
ST OP
4
PLA Y
PA US E
RE C REC
STO P
RE V
GO TO LAS
FW D
8
T
GO TO DA TE
SE AR CH
CO PY
12
SE TU P
ESC
SU B
ME NU
16
SE T
HO LD
WJ-HD616K
WJ-HD716K
WJ-HD616K/G
WJ-HD716K/G
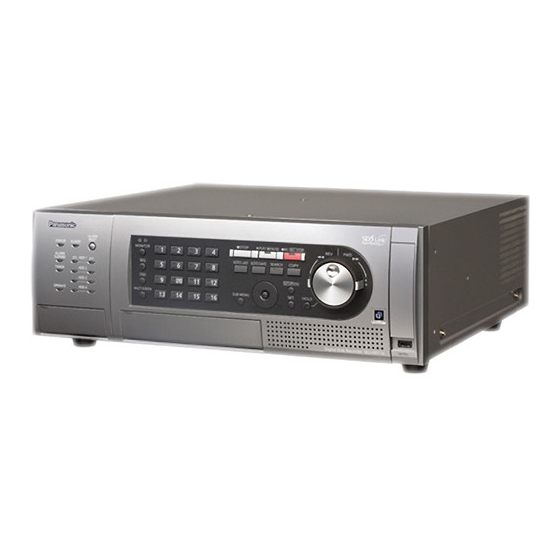
This illustration represents WJ-HD616K.
Advertisement
Table of Contents

Subscribe to Our Youtube Channel
Related Manuals for Panasonic WJ-HD716/1000


Summary of Contents for Panasonic WJ-HD716/1000
-
Page 1: Operating Instructions
Operating Instructions Digital Disk Recorder WJ-HD616K Model No. WJ-HD716K WJ-HD616K/G WJ-HD716K/G ERR OR ALA RM ALA RM MO NIT OR SUS PEN D ST OP TIM ER PLA Y PA US E RE C REC STO P RE V GO TO LAS FW D GO TO DA TE OS D... -
Page 2: Table Of Contents
CONTENTS Preface ............... 4 Event function ............56 About the user manuals ......... 4 Event action ............56 System requirements for a PC ....... 4 Cancel the alarm action ........57 Trademarks and registered trademarks ....5 Suspend the alarm action ........58 Abbreviations ............ - Page 3 Search and play ............93 Search and play recording events (recording event search) ............93 Search for time and date when a motion was detected from recorded images and play (VMD search) ..............96 Check a list of copied recorded images ....98 Event function ............
-
Page 4: Preface
Preface The digital disk recorder WJ-HD616K, WJ-HD716K, WJ-HD616K/G and WJ-HD716K/G (hereinafter WJ-HD616K or WJ-HD716K), are designed for use within a surveillance system, and record images from up to 16 cameras on the hard disk drives. This product supports HDMI (High-Definition Multimedia Interface) standard which allows displaying playback/ live images with superior quality when connecting to a high-definition monitor using an optional HDMI cable. -
Page 5: Trademarks And Registered Trademarks
Other: CD-ROM drive: It is necessary to refer to the operating instructions on the provided CD-ROM. ® DirectX 9.0c or later ® ® Adobe Reader : It is necessary to refer to the operating instructions on the provided CD-ROM. ® ®... -
Page 6: Restrictions Upon Display Of Images
Restrictions upon display of images When displaying images using this product, some functions have restrictions as follows. Before using this prod- uct, keep the following in mind. When displaying live images from the camera on a web browser • Black screen may be displayed for the first few seconds (*) when the following operations are performed while displaying live images. -
Page 7: Before Using This Product
Before using this product Video Motion Detection (VMD) function The VMD function of this product detects motions referring to changes of brightness in the areas set in advance. The VMD function will not effectively work in the following situations or may sometimes be malfunctioning. • When there is a very little difference in luminance (brightness) between a background and a subject • When brightness of images is low such as at night • When a subject moves very slow... -
Page 8: Recording Mode
Recording mode It is possible to directly connect up to 16 cameras to the recorder and record images from them on the hard disk drives. The following recording modes are available. Emergency recording: Recording that is performed manually using an external switch, etc. when an emergen- cy occurs Manual rec. -
Page 9: Major Operating Controls And Their Functions
Major operating controls and their functions Front view ALARM RESET PLAY PAUSE REC REC STOP STOP ERROR ALARM MONITOR ALARM GOTO LAST GOTO DATE SEARCH COPY SUSPEND HDD 1 TIMER HDD 2 SETUP /ESC 0/10 HDD 3 MAINTENANCE MULTI SCREEN MENU HOLD OPERATE... - Page 10 Shuttle ring: The following functions are provided. • Fast forward/reverse playback can be per- Important: formed during playback. • When operating in the RAID5/RAID6 mode and the HDD indicator lights red, replace the faulty y Hold button [HOLD] hard disk drive promptly. Contact your dealer for Press this button during fast forward/reverse play- replacement of hard disk drives.
- Page 11 !2 Menu operation button Arrows button: Use this button to move the cur- sor on the setup menu, the search menu, etc. [SETUP/ESC] button: Hold down this button for 2 seconds or more to display the setup menu. When the setup menu is being displayed, press this button to go back to the previous page.
- Page 12 Insert an optional SDHC/SD memory card Insert a DVD disc (commercially available) Step 1 Step 1 Open the SDHC/SD memory card slot. Open the DVD drive cover. Pull the tab down. Pull the tab down. SDHC/SD memory card slot Step 2 Step 2 After confirming that the power of the recorder is on, Insert an SDHC/SD memory card to the slot until it...
- Page 13 Step 3 Place a disc with the label side up and fit the hole of the disc to the center (spindle) of the tray. Then, push the tray gently. Click sound will be heard and the inserted disk will be set. Spindle Step 4 Push the tray to the end.
-
Page 14: About The Operation Window
About the operation window Monitor 1 (Monitor to display live images only) The default positions are indicated by the circled e Event display numbers. (Broken lined circles are not the default The event display will be display at the opposite positions.) side of the time and date display. -
Page 15: Monitor 2
Monitor 2 (Monitor to display live images, recorded images and the setup menu) Normal display Minimum display Camera Playback Time and date Minimum display/ control search Normal display El-zoom Latest recorded image Minimum display/Normal display: When the triangle is clicked, display of the shortcut launcher will be The default positions are indicated by the circled switched between the normal display and the numbers. - Page 16 Description of the status bar q Submenu button [S.Menu] The submenu window will be displayed. In the submenu window, the following menu buttons are provided. Camera control Go to last The camera control panel and the camera menu The latest recorded image will be played. Playback panel will be displayed.
- Page 17 w Status display area Indication Description Indication Live Indicates that live images are currently being : Currently live images are displayed. The sequence display function is being displayed (No indica- tion) the function that can automatically switch and : Currently live images are display images from multiple cameras being displayed in sequence sequentially.
- Page 18 t Alarm display area Indication Description Indication Alarm Indicates that an alarm occurred. "*" indicates the camera channel (1 - 16). "#" indicates the alarm number. VMD-*: Displayed when a motion is detected Indicates an event occurrence. LOSS-*: Displayed when a video loss occurred Alarm icon COM-#: Displayed when a command alarm occurred...
- Page 19 Indication Description Indication Error 1DOWN: A single hard disk drive in RAID (RAID 5/RAID 6) is faulty (which can be recovered by replacing the hard disk drive) 2DOWN: 2 hard disk drives in RAID (RAID 5/ RAID 6) are faulty (which can be recovered by replacing the hard disk drives when operating in the RAID 6 mode)
-
Page 20: Basic Operation
Basic operation To directly operate the recorder, there are 2 ways of how to operate it: operations using the buttons on the front panel and operations using a mouse connected to the recorder. The following are descriptions of how to perform the basic operation in these 2 ways. Important: • The instructions in this manual are mainly using the buttons on the front panel. Instructions for both are pro- vided for operations only when different procedures are to be made depending on whether using the but-... - Page 21 Move the position of a panel • Enlarge images from the camera using the elec- It is possible to move a panel to the other corner of tronic zoom the screen by rotating the jog dial (inside). When Each time the [SET] button is pressed, the zoom rotating the jog dial (inside) clockwise, the panel will factor will change between x2, x4 and x1.
- Page 22 Operations of the software keyboard for character entry When it is necessary to enter characters such as when setting the camera titles on the setup menu, use the software keyboard for character entry that can be displayed by pressing the [SET] button after moving the cur- sor onto the entry field.
-
Page 23: Operations Using A Mouse
Operations using a mouse The recorder can be operated using a mouse connected to the mouse port (☞ page 11) on the front panel. Move the mouse cursor onto a button or a tab on the screen, and then click on it. Note: • When no operation is made for 10 seconds or more, the mouse cursor will be hidden. The mouse cursor will be displayed when the mouse is moved. - Page 24 Operations of the submenu The submenu will be displayed by clicking the [S.Menu] button (☞ page 16) on the status bar. The submenu window is the same window that can be displayed when operating the buttons on the front panel. Refer to page 16 for further information about the functions operable on the submenu and the descriptions about them.
- Page 25 Operations of the software keyboard for time and date entry When it is necessary to designate time and date such as when searching for images recorded at the specified time and date, use the software keyboard for time and date entry that can be displayed by clicking the icon on the right of the console.
- Page 26 The software keyboard for character entry can be operated as follows. Up to 255 characters can be entered. Step 1 Select a desired character by clicking it. → The selected character will be displayed in the console and the cursor will move to the right. Step 2 Repeat step 1 to continue entering characters.
-
Page 27: Login Operation At Startup
Login operation at startup When "Off" is selected for "Auto login", the login window will be displayed by pressing any button on the front panel after completing the system check. Enter a user name and password as follows when the login window is displayed. Step 1 Step 2 Enter a user name and password. -
Page 28: Monitor Live Images From Cameras
Monitor live images from cameras When the recorder started up, live images from cameras will be displayed according to the configured settings. Live images from cameras are displayed via the recorder. Image data Camera Monitor 1 Recorder Monitor 2 It is possible to display live images on a 1-screen or on a multiscreen. It is also possible to display live images from multiple cameras sequentially by switching the camera channels in order (sequence display). -
Page 29: Select A Monitor (Monitor 1/Monitor 2)
Select a monitor (monitor 1/monitor 2) Live images can be displayed on both monitor 1 and monitor 2. When switching between a 1-screen and a mul- tiscreen or when changing the camera channels for live images, it is firstly necessary to select a monitor (moni- tor 1 or monitor 2) to operate. -
Page 30: Display Images On A 1-Screen
Display images on a 1-screen To display live images on a 1-screen, take the following procedures. Operation using the buttons on the front panel Operations using a mouse Step 1 Step 1 Select a monitor to display images. (☞ Page 29) Select a monitor to display images. - Page 31 When monitor 2 is being selected When monitor 2 is being selected Each time the [OSD] button is pressed, display of Each time the [OSD] button is clicked, display of the camera title and the status bar will change as the camera title and the status bar will change as follows.
-
Page 32: Display Images On A Multiscreen
Display images on a multiscreen To display live images on a multiscreen (4-, 7-, 8-, 9-, 12-, 16-screen), take the following procedures. Images will be displayed on a multiscreen with the screen pattern selected on the setup menu ("Camera setup" under "Multi screen setup"... - Page 33 Operation using the buttons on the front panel Operations using a mouse Step 1 Step 1 Select a monitor to display images. Select a monitor to display images. (☞ Page 29) (☞ Page 29) Step 2 Step 2 Press the [MULTI SCREEN] button. Display the operation panel by right-click, and then →...
-
Page 34: Display Images From Multiple Cameras Sequentially (Sequence Display)
Display images from multiple cameras sequentially (sequence display) The sequence display function is the function that can automatically switch and display images from multiple cameras sequentially. The sequence display will be performed according to the settings configured in advance. The setting for the sequence display can be configured on "Live sequence" on the "Monitor 1" tab (or "Monitor 2"... -
Page 35: Record Images
Record images Live images can be recorded on the recorder. Images from up to 16 cameras can be recorded on a single recorder. Camera Image data Hard disk drive Recorder Recording areas on the hard disk drive The hard disk drives in the recorder are managed as the following 3 recording areas configured virtually. The settings of the recording areas can be configured on the "Disk config."... -
Page 36: Record Images (Manual Recording)
Record images (Manual recording) Recording can be started and stopped manually. Operation using the buttons on the front panel Operations using a mouse Step 1 Step 1 Press the [REC] button. Click the [S.Menu] button. → The [REC] button will light and recording will start. →... -
Page 37: Emergency Recording
Note: • When a recording with higher priority than manual recording is being performed, manual recording will be suspended until that recording finishes. Refer to the "Recording mode and its priority level" section below for further information about the priority of the recording mode. • When trying to stop manual recording by holding down the [REC] button for 2 seconds or more while anoth- er recording with a different recording mode (emergency recording, event recording and schedule recording) is being performed, the [REC] indicator (on the [REC] button) will remain lit and the other recording will con- tinue. -
Page 38: Play Recorded Images
Play recorded images Images recorded on the recorder will be displayed on monitor 2. Playback images will be displayed on monitor 2. Playback operation can be made while recording. Image data Monitor 2 Hard disk drive Recorder Operation using the buttons on the front panel Operations using a mouse Step 1 Step 1... - Page 39 Operation using the buttons on the front panel Operations using a mouse Step 2 Step 3 To stop the playback, press the [STOP] button. Click the [Play] button. → The [PLAY/PAUSE] button will go off and playback will stop. Playback on monitor 2 will be switched to live image display. →...
- Page 40 Functions during playback (when using the buttons on the front panel) Function Button Operation Pause [PLAY/PAUSE] • Playback will resume when this button is pressed during pause. button • The [PLAY/PAUSE] button will blink during pausing. Frame by frame play- Jog dial (Inside) • When rotating the jog dial (inside) during pausing, frame by back/Reverse frame by frame playback will be performed. frame playback • When rotating the jog dial clockwise, the next frame will be dis- played.
- Page 41 Functions during playback (when using the mouse) Function Operation Pause Select "REC & Playback" from the submenu, and then operate the displayed "REC & Frame by frame play- Playback" panel. back/Reverse frame by frame playback Fast forward/Fast rewind Skip Skip to the latest record- Select "Go to last"...
- Page 42 Note: • When using the mouse, the playback speed will change each time the [Rew] button or the [FF] button is clicked. When the [Rew] button or the [FF] button is clicked during pausing, the playback speed will be 1/2. • When displaying images on a 1-screen, audio assigned to the camera channel from which images are cur- rently being displayed will be heard. • When displaying images on a multiscreen, audio assigned to the camera channel from which images are currently being displayed at the upper left corner will be heard. When no audio is assigned to the camera (from which images are displayed on the segment at upper left corner), audio to be output will be deter- mined in order of priority.
-
Page 43: Play Images From A Designated Point
Play images from a designated point It is possible to start playback from a designated time and date or the latest recorded image. Playback operation can be made while recording. Playback images will be displayed on monitor 2. Play image recorded at a designated time and date Start playback by designating the desired time and date of a recorded image. -
Page 44: Play The Latest Recorded Image
Play the latest recorded image Start playback of the latest recorded image. The playback start point can be set on the setup menu ("Latest image position" on the "Basic" tab under "Basic") (☞ Installation Guide). "30 seconds before the latest" is selected at the default. Operation using the buttons on the front panel Operations using a mouse Step 1... -
Page 45: Search And Play
Search and play Search a desired recorded image and play it. There are the following 3 searching methods. • Search for recording events and play (recording event search) • Search for time and date when a motion was detected from recorded images and play (VMD search) • Search for copied recorded images and play (copy data search) Playback images will be displayed on a 1-screen on monitor 2. To play recorded images on a multiscreen, switch to a multiscreen after starting playback. -
Page 46: How To Operate
Time & date Time and date range of the listed data Displays the start time and date of the recording. Displays a time and date range of the listed data. Number of the listed data (Total) Displays the camera channel used for recording. Displays the total number of listed data. - Page 47 Step 3 Step 4 Specify the search conditions (filters). Move the cursor onto [OK] after specifying the search conditions (filters), and then press the [SET] button on the front panel. → Recording events matched the search conditions will be displayed in the recording event list. Step 5 Select the desired recording event to play.
-
Page 48: Search For Copied Recorded Images And Play (Copy Data Search)
Search for copied recorded images and play (copy data search) Display a list of copied data (copied recorded images) on an SDHC/SD memory card or a DVD, and then select a desired recorded image to play from the list. It is possible to search for copied data using the filters. Available filters are "Time & date" and "Ch". Refer to page 59 for how to copy recorded images. - Page 49 How to operate Step 3 Select the media to be searched. Select "DVD Drive" Step 1 or "SD memory card" by pressing the [SET] button, Press the [SEARCH] button on the front panel. and then press the [SET] button again after moving →...
- Page 50 Step 6 Step 8 After specifying the search conditions (filters), press Move the cursor onto the [B] (play) button, and then the [SET] button after moving the cursor onto the [OK] press the [SET] button. button. → Copied data matched the search conditions (fil- ters) will be displayed on the copied data list win- dow.
-
Page 51: Search For Time And Date When A Motion Was Detected From Recorded Images And Play (Vmd Search)
Search for time and date when a motion was detected from recorded images and play (VMD search) Display a list of time and date when a motion was detected (by the VMD function) from images recorded by all the recording modes (☞ page 37), and then select a desired recorded image to play from the list. Camera channels, time and date when a motion was detected, detection area and detection sensitivity can be used as the filters for the VMD search. -
Page 52: Step 1
How to operate Step 1 Step 3 Press the [SEARCH] button on the front panel. Designate the search filters. → The recording event list window will be displayed. Move the cursor onto the [VMD search] button, and then press the [SET] button on the front panel. →... -
Page 53: The Cursor Onto The [Ok] Button
Specify the time range 1. Move the cursor onto the [Area] button of any of Move the cursor onto the [Time & date] button, and the detection area (A - D), and then press the then press the [SET] button. [SET] button. -
Page 54: Step 5
Step 5 Note: After specifying the search conditions (filters), press • To delete the set detection area, take the following the [SET] button after moving the cursor onto the [B] procedures. button. 1. Move the cursor onto the [Area delete] button → Data matched the search conditions (filters) will be on the search filter window, and then press the displayed on the VMD search list window. - Page 55 Step 7 Move the cursor onto the [B] (play) button, and then press the [SET] button. (Or press the [PLAY] button on the front panel.) → Playback of the selected recorded data (in which motion was detected) will be displayed. Note: • When selected time and date is too close to the current time and date, playback may sometimes not start.
-
Page 56: Event Function
Event function The recorder will take an event action when any of the following events occur. • Terminal alarm: Regarded as an event when an alarm input signal is supplied from an external device such as a door sensor to the alarm input terminal on the rear of the recorder. • Video Motion Detection (VMD): Regard as an event when a motion is detected in images by the video motion detection function. (See below about the VMD function.) • Video loss: Regard as an event when the video input signal is lost, such as by the camera cable disconnec- tion, malfunction of the camera, etc. -
Page 57: Cancel The Alarm Action
Send recorded images to an FTP server Provide an alarm notification to a PC according to the Panasonic alarm protocol setting Cancel the alarm action The recorder will take an alarm action according to the settings configured in advance when an event occurs in the alarm mode (ALM). -
Page 58: Suspend The Alarm Action
Suspend the alarm action Configure the settings to not to perform the alarm action even when an event occurs. It is useful to suspend the alarm action for a certain period such as when configuring the settings of the record- However, recording filing of event logs, preset position function and alarm occurrence indication (on monitor) will be performed even though the alarm action is being suspended. -
Page 59: Copy Recorded Images
Copy recorded images It is possible to manually copy images recorded in the recorder onto a DVD (DVD–R, DVD+R) or an SDHC/SD memory card. It is recommended to make back-up copies on a regular basis for unexpected situations such as malfunction of the hard disk drives. - Page 60 Step 3 Step 4 Specify the detailed conditions of recorded images to Move the cursor onto [OK], and then press the [SET] be copied. button. Date and time range: Designate the start time and → The copy data list will be displayed and the date and the end time and date of recorded imag- recorded images matched the set conditions will es to be copied by rotating the jog dial (inside).
- Page 61 Step 5 Note: After checking the size of the data to be copied and • It is impossible to play copied data if the copied the remaining capacity, press the [SET] button after data is finalized by the copy completion process moving the cursor onto the [Copy] button. even when copying onto a DVD is complete. →...
-
Page 62: Operation And Configuration When Connecting The Recorders In Cascading Connection
Operation and configuration when connecting the recorders in cascading connection When connecting the recorders (up to 5 recorders) in cascading connection, all images managed by the con- nected recorders can be monitored on a single monitor. The following are descriptions of how to operate when the recorders are connected in cascading connection. To operate the recorders connected in cascading connection, it is necessary to configure the settings in advance. -
Page 63: Operation Using The Buttons On The Front Panel
Example of video output (analog) connection PS·Data compatible system controller Monitor 2 (Unit address: 001) Monitor 1 Unit address (system): 001 First recorder 0/10 Digital Disc Recorder WJ-HD616 MOUSE Monitor 1 Unit address (system): 002 (Unit address: 002) 0/10 Second recorder Digital Disc Recorder WJ-HD616 MOUSE Monitor 1... -
Page 64: Operate The Camera
Operate the camera It is possible to operate the following camera operations when displaying live images from a camera with the panning/tilting and zooming function. • Panning/Tilting Adjust the horizontal/vertical position of images from the camera • Zoom Zoom in/out images from the camera • Focus Adjust the focus of the camera • Iris Adjust the lens iris of the camera • Preset position function R egister preset positions and move the camera direction to the registered pre- set positio. -
Page 65: Panning/Tilting
Panning/Tilting Adjust the horizontal/vertical position of images from the camera. Step 1 Step 2 Display the camera control panel. (☞ Page 64) Adjust the horizontal/vertical position of images from the camera using the arrows button (C, D, A, B). The camera direction will move to the direction com- manded by the arrows button. -
Page 66: Focus Adjustment
Focus adjustment Adjust the focus of the camera. The auto focus function is available. Step 1 Step 2 Press the arrows button (A B). When pressing A, Display the camera control panel (☞ page 64), and then press the camera selection button [2] on the the focal point will move to the near side. -
Page 67: Preset Position Function
Preset position function Move the camera to the preset position registered in advance. It is necessary in advance to register preset posi- tions to perform the preset position function. Registration of preset positions Register the preset positions for the camera. Up to 256 preset positions can be registered. The maximum num- ber of preset position registration varies depending on the model of the camera. -
Page 68: Move A Camera To The Preset Position
Move a camera to the preset position Move the camera to the preset position registered in advance. Step 1 Display the "Preset/Auto" window. (☞ Page 67) Step 2 Enter the preset position number to move the camera direction. The preset position number can be entered in the same manner as of the preset number registration (☞... -
Page 69: Auto Functions (Auto Panning, Etc.)
Auto functions (Auto panning, etc.) Activate the auto function of the camera according to the settings of the camera. Step 1 Step 5 Display the "Preset/Auto" window. (☞ Page 67) To close the "Preset/Auto" window, press the [SET] button after moving the cursor onto the [Cancel] but- ton or press the [SETUP/ESC] button on the front panel. -
Page 70: Operate The Setup Menu Of The Camera
Operate the setup menu of the camera To control the camera connected to the recorder, it is necessary in advance to configure the settings of the camera function. The settings of the camera function can be configured on the setup menu of the camera. It is possible to call the setup menu of the camera from the submenu. -
Page 71: Disk Management
Disk management On the [Disk] tab of "Maintenance" of the setup menu, it is possible to perform operation relating to the hard disk drives in the recorder or in an optional extension unit and SDHC/SD memory card. The following are descriptions of how to delete images recorded on the hard disk drives and of how to format (initialize) an SDHC/SD memory card. - Page 72 Step 4 Step 7 Move the cursor onto "Disk", and then press the Move the cursor onto [OK], and then press the [SET] [SET] button. button. → The [Disk] tab will be displayed. → Images recorded until the day before the set date will be deleted.
-
Page 73: Format (Initialize) An Sdhc/Sd Memory Card
Format (initialize) an SDHC/SD memory card To copy recorded images onto an SDHC/SD memory card, it is necessary in advance to insert an SDHC/SD memory card into the card slot of the recorder and format it. To delete recorded images on the SDHC/SD mem- ory card, format the SDHC/SD memory card again. -
Page 74: Configure The Network Settings
Configure the network settings From this page to the "Disk management" chapter (☞ page 121), the instructions of how to operate the record- er using a web browser are provided. When operating the recorder using a web browser, it is necessary in advance to configure the network settings of the recorder and a PC. - Page 75 Step 3 Step 5 Click "Network Connections". Click "Properties". → The "Local Area Connection Properties" window → The "Network Connections" window will be dis- will be displayed. played. Step 6 Step 4 Click "Internet Protocol (TCP/IP)", and then click Double-click "Local Area Connection". "Properties".
-
Page 76: Network Security Of The Recorder
Network security of the recorder The security function of the recorder q Access restriction by the user authentication and the host authentication It is possible to restrict users to access the recorder by selecting "On" for "User authentication/Host authen- tication". (☞ Installation Guide) w Access restriction by changing the HTTP port number By changing the HTTP port number, it is possible to prevent illegal access such as a port scanning, etc. -
Page 77: Display The Operation Window
Important: Follow the instructions of the wizard to complete • Refer to a system administrator for the set user the installation. name and password. • When any ActiveX for Panasonic’s digital disk • Refer to the Installation Guide for how to register recorder other than this product is already users. installed, uninstall "WebVideo ActiveX" from "Add • The default administrator name and password are or Remove Programs"... -
Page 78: About The Operation Window
About the operation window Top Page Current time and date/Recording [Setup] button Status display area time and date display area [Control] button Image display area Download operation area [CAM] tab [HDD] tab Image display area [Control] button (☞ page 79) Live images or recorded images will be displayed. -
Page 79: [Control] Button
[Control] button The following operation panels will be displayed when this button is clicked. [Sequence] box Images from different cameras will sequentially be displayed according to the settings configured in advance by clicking the button. The indicator on the button will light green during the sequence display. (☞... - Page 80 [Ch]: A camera channel used for recording will be displayed. [Evt]: Event type will be displayed. (☞ Page 8) [HDD]: The hard disk drive number in which the cor- responding recorded images are stored will be displayed. [Audio]: When audio is attached to recorded images, the audio icon will be displayed.
-
Page 81: Status Display Area
Status display area q The status of image (live image/recorded w [REC] indicator image) display operation will be displayed. Indicates the status of recording. : Indicates that live images are being dis- : Indicates that recording is being performed. played. : Indicates that recording is not being per- : Indicates that playback images are being formed. -
Page 82: Download Operation Area
Download operation area q The start and end time and date of recorded images to be downloaded will be displayed. (☞ Page 106) [Start]: Designate the start time and date of recorded images to be downloaded. [End]: Designate the end time and date of recorded images to be downloaded. w [Download] button Downloading of recorded images from the specified start and end time and date will start by clicking this button. -
Page 83: [Cam] Tab
• When the [Time slip] button or the [Reverse time [Go to date] button: slip] button is clicked, the start point after the The "Go to date" window will be displayed by clicking jump may sometimes be at a point several sec- this button. It is possible to designate the desired onds later than the supposed point. - Page 84 Brightness The brightness (lens aperture) can be adjusted by Note: clicking the [–] (darker) button or the [+] (brighter) but- • Each function of the auto mode is available only ton. for combination cameras. Refer to the operating It is possible to reset the adjusted brightness by click- instructions of the camera for further information ing the [Reset] button.
-
Page 85: Monitor Live Images From Cameras
Monitor live images from cameras Live images from cameras will be displayed in the image display area. It is possible to display live images on a 1-screen or on a multiscreen. It is also possible to display live images from multiple cameras sequentially by switching the camera channels in order (sequence display). Display images on a 1-screen To display live images on a 1-screen, take the following procedures. - Page 86 Use the electronic zoom When displaying live images on a 1-screen, it is possible to enlarge live images using the electronic zoom and to move the area of the enlarged image to be displayed. Step 1 Note: Click any of the [x1], [x2] and [x4] buttons to change • Clicking a point in the zoomed image moves the the zoom factor of the electronic zoom.
-
Page 87: Display Images On A Multiscreen
Display images on a multiscreen Live images from cameras can be displayed on a multiscreen (4-, 9-, 16-screen). Step 1 Step 3 Display the top page of the operation window. To display images on a 1-screen again, click any of (☞... -
Page 88: Display Images From Multiple Cameras Sequentially (Sequence Display)
Display images from multiple cameras sequentially (sequence display) The sequence display function is the function that can automatically switch and display images from multiple cameras sequentially. The sequence display will be performed according to the settings configured in advance. The settings of the sequence display can be configured on the [Network] tab of "Display" of the setup menu (☞... -
Page 89: Record Images
Record images Live images can be recorded on the recorder. Images from up to 16 cameras can be recorded on a single recorder. Record images (Manual recording) Recording can be started and stopped manually. Step 1 Step 4 Display the top page of the operation window. Click the recording button to start recording. -
Page 90: Play Recorded Images
Play recorded images Images recorded on the recorder will be displayed on a PC monitor. Playback operation can be made while recording. Step 1 Note: Display the top page of the operation window. • It is possible to change the camera channel by (☞ Page 77) clicking the camera selection button during play- back. -
Page 91: Playback Operation
Playback operation Function Button Operation Pause • Playback will be paused when this button is clicked during play- back. • Playback will resume when this button is pressed during pause. Fast playback/Fast • Playback speed of fast playback will change in the following reverse playback order each time the fast playback button is clicked: Step2 (Approx. 2x) → Step3 (Approx. 5x) → Step4 (Approx. 10x) → Step5 (Approx. 20x) → Step6 (Approx. 50x) → Step7 (Approx. 100x) • Playback speed of fast reverse playback will change in the fol- lowing order each time the fast reverse playback button is... -
Page 92: Play Image Recorded At A Designated Time And Date
Play image recorded at a designated time and date Start playback by designating the desired time and date of a recorded image. Playback operation can be made while recording. Step 1 Step 5 Display the top page of the operation window. Click the [Play] button. -
Page 93: Search And Play
Search and play Search a desired recorded image and play it. There are the following 2 searching methods. • Search for recording events and play (recording event search) • Search for time and date when a motion was detected from recorded images and play (VMD search) To play recorded images on a multiscreen, switch to a multiscreen after starting playback. Search and play recording events (recording event search) Display a list of recording events, and then select a desired recording event to play from the list. - Page 94 [Refresh] button The displayed contents will be updated to the latest. Displays the hard disk drive number on which images were recorded. [Prev page] button Displays the previous page. Audio Displays the icon to indicate whether audio is [Next page] button attached to the data or not.
- Page 95 REC event: Select an event type of recorded images Step 6 to be searched for from the following. The check- To stop playback, press the [STOP] button. box respective to the selected event type will be → Playback will stop. Playback in the image display checked.
-
Page 96: Search For Time And Date When A Motion Was Detected From Recorded Images And Play (Vmd Search)
Search for time and date when a motion was detected from recorded images and play (VMD search) Display a list of time and date when a motion was detected (by the VMD function) from images recorded by all the recording modes (☞ page 37), and then select a desired recorded image to play from the list. Camera channels, time and date, detection area and detection sensitivity can be used as the filters for the VMD search. - Page 97 Specify the mask duration Step 5 Click the [C] button, and then select the mask dura- Click the time and date of the desired data in the tion from the following. result list. 1 s, 1 min, 1 h, 24h →...
-
Page 98: Check A List Of Copied Recorded Images
Check a list of copied recorded images Display a list of copied data (copied recorded images) on an SDHC/SD memory card or a DVD, and then select a desired recorded image to play from the list. It is possible to search for copied data using the filters. Available filters are "Time & date" and "Ch". Copied data list window Number of the listed data Displays the total number of listed copied data. - Page 99 How to operate Step 1 Step 5 Insert an SDHC/SD memory card on which recording Click the [OK] button after completing the settings. data is copied into the SDHC/SD memory card slot. → Copied data matched the search conditions (fil- When recording data was copied on a DVD, insert it ters) will be displayed on the copied data list win- in the DVD drive.
-
Page 100: Event Function
Event function The recorder will take an event action when any of the following events occur. Terminal alarm: Regarded as an event when an alarm input signal is supplied from an external device such as a door sensor to the alarm input terminal on the rear of the recorder. Video Motion Detection (VMD): Regard as an event when a motion is detected in the set detection area by the video motion detection function. - Page 101 Display the [ALM] button in the status display area Send a mail that notifies of an event occurrence A mail that notifies of the event occurrence with the time and date of the event occurrence will be sent (Alarm mail). Up to 4 destination addresses for the alarm mail can be registered.
-
Page 102: Cancel The Alarm Action
Cancel the alarm action The recorder will take an alarm action according to the settings configured in advance when an event occurs in the alarm mode (ALM). To manually cancel the alarm action, perform the following operation. Step 1 Note: Click the [ALM] button displayed in the status display • When the alarm action is canceled, the event area. -
Page 103: Cancel An Error Action
Cancel an error action When an error occurred, this recorder will take an error action. To manually cancel an error action, perform the following operation. Step 1 When an error occurs, the [ERR] button will be dis- played in the status display area. Step 2 Click the [ERR] button. -
Page 104: Copy Recorded Images
Copy recorded images It is possible to manually copy images recorded in the recorder onto a DVD or an SDHC/SD memory card. It is recommended to make back-up copies on a regular basis for unexpected situations such as malfunction of the hard disk drives. - Page 105 Important: • Do not remove the SDHC/SD memory card during copying on the SDHC/SD memory card. It may damage data on the SDHC/SD memory card. • In the following cases, copying will not start even when the [COPY] button is clicked. • When the end time is set earlier than the start time • Copying will be performed even when the remain- ing capacity of the destination media is not enough for copying. • When clicking the button in the [COPY] box during copying, the confirmation window for cancellation of the current copying will be displayed.
-
Page 106: Download Recorded Images Currently Being Played
Download recorded images currently being played Designate the start point and the end point of recorded images currently being played and download images to a PC. When downloading recorded images, recorded images and audio will be downloaded as an image data file (file- name.n3r) and an audio data file (filename.n3a) respectively. - Page 107 Step 5 Click the [OK] button after selecting "With audio" or "Without audio" to determine whether or not to down- load images with audio and "ON" or "OFF" for "Alter detect" to determine whether or not to attach an alteration detection code to recorded images to be downloaded.
-
Page 108: Play The Copied/Downloaded Recorded Images
Play the copied/downloaded recorded images When recorded images are copied/downloaded, recorded images and audio will be copied/downloaded as an image data file (filename.n3r) and an audio data file (filename.n3a) respectively into the copy/download destina- tion. It is possible to play, save and print the copied/downloaded data files using the dedicated viewer software. Viewer software to play recorded images copied on an SDHC/ SD memory card or a DVD Double-click the executable file (HD_Viewer.exe) to launch the viewer software. -
Page 109: Install The Viewer Software
Step 3 Create a new folder in the desired directory and click the [Save] button. → The viewer software will be downloaded. Install the viewer software When the older version of the viewer software is installed on a PC, uninstall it before installing the newer ver- sion. -
Page 110: Uninstall The Viewer Software
Step 5 Step 6 Click the [Install] button. Click the [Complete] button. → When the installation is complete, the installation → Installation of the viewer software is complete. completion window will be displayed. Uninstall the viewer software For Windows XP For Windows Vista Step 1 Step 1... -
Page 111: Play The Downloaded Recorded Images
Step 1 Step 4 Select "HD_Viewer" from the start menu ("Start" – "All Click the [Open] button. programs" – "Panasonic" – "HD_Viewer") or double- → The image data will be displayed. click the HD_Viewer icon on the desktop. Step 5 Step 2 Click the [PLAY] button. -
Page 112: Save The Displayed Image
Save the displayed image The currently displayed image can be saved on a PC as a JPEG file. Step 1 Step 3 Start operation when playing images using the viewer Click the [SAVE] button. software. → The "Save As" window will be displayed. Step 4 Enter the file name, and then select "JPEG (*.jpg)"... -
Page 113: Alteration Detection
Alteration detection It is possible to detect the alteration of the data if a code for the alteration detection has been attached to the downloaded data. Refer to the Installation Guide for how to attach the alteration detection code to data. Step 1 Step 4 Launch the viewer software and display the following... -
Page 114: Operate The Camera
Operate the camera It is possible to operate the following camera operations when displaying live images from a combination cam- era. Panning/Tilting: Adjust the horizontal/vertical position of images from the camera. Zoom: Zoom in/out images from the camera Focus: Adjust the focus of the camera. Iris: Adjust the lens iris of the camera Preset position function:... -
Page 115: Zooming
Zooming Zoom in/out images from the camera. Depending on the models of the connected cameras, the available zoom- ing factors may be different. Refer to the operating instructions of the camera for further information. Step 1 Note: Display the [CAM] tab. (☞ Page 114) • It is possible to adjust zooming using the mouse wheel. -
Page 116: Iris Adjustment
Iris adjustment Adjust the lens iris of the camera Step 1 Display the [CAM] tab. (☞ Page 114) Step 2 The brightness (lens aperture) can be adjusted by clicking the [–] (darker) button or the [+] (brighter) but- ton in the [Brightness] box. It is possible to reset the adjusted brightness by clicking the [Reset] button. -
Page 117: Auto Functions (Auto Panning, Etc.)
Auto functions (Auto panning, etc.) Activate the auto function of the camera according to the settings of the camera. Step 1 Step 4 Display the [CAM] tab. (☞ Page 114) Click the [Stop] button to turn off the auto mode func- tion. -
Page 118: Operate The Setup Menu Of The Camera
Operate the setup menu of the camera To control the camera connected to the recorder, it is necessary in advance to configure the settings of the camera function. The settings of the camera function can be configured on the setup menu of the camera. It is possible to call the setup menu of the camera from a PC. -
Page 119: Disk Management
Disk management On the [Disk] tab of "Maintenance" of the setup menu, it is possible to perform operation relating to the hard disk drives in the recorder or in an optional extension unit, DVD and SDHC/SD memory card. The following are descriptions of how to delete images recorded on the hard disk drives and of how to format (initialize) a DVD or an SDHC/SD memory card from a PC. - Page 120 Step 5 Set time and date after selecting "NML rec." or "EVT rec." for "Data delete". Images recorded until the day before the set date are subject to deletion. Step 6 Click the [Execute] button. → The confirmation window will be displayed. Step 7 Click the [OK] button.
-
Page 121: Format (Initialize) An Sdhc/Sd Memory Card
Format (initialize) an SDHC/SD memory card To copy recorded images onto an SDHC/SD memory card, it is necessary in advance to insert an SDHC/SD memory card into the card slot of the recorder and format it. To delete recorded images on the SDHC/SD mem- ory card, format the SDHC/SD memory card again. -
Page 122: Notification By E-Mail
Notification by e-mail Alarm mail A link address to the alarm image that is saved in the recorder contained in an alarm mail as follows. Contents of the alarm mail: In HD600 (192.168.0.250), alarm was occurred. Alarm date: xx-xxx-xxxx xx:xx:xx GMT xx:xx (Example: 01-JAN-2009 GMT +0:00) Cause of alarm: Displays an event type and a camera channel or an alarm number (Example: VMD ALARM 5ch) -
Page 123: Warning Mail
Warning mail The following mail will be sent to notify of a trouble occurrence to a registered address when the trouble occurs. HD600 (192.168.0.250) STATUS REPORT DATE: 2009-1-1 12:00:00 STATUS: The description of the trouble will be displayed. (Example: MAIN THERMAL ERROR) Indication Description... -
Page 124: Troubleshooting
Troubleshooting Before asking for repairs, check the symptoms with the following table. Contact your dealer if a problem cannot be solved even after checking and trying the solution in the table or a problem is not described below. Reference Symptom Cause/solution pages • Is the Ethernet cable firmly connected to the 10BASE-... - Page 125 Reference Symptom Cause/solution pages The image displayed on • Depending on the traffic of the network, there might be the browser is not being difficulties in displaying images. Press the [F5] button refreshed. on the keyboard to request images. Image refresh of the • Isn't the network traffic heavy? browser is slow. These symptoms may occur when the network traffic is Response of the heavy.
- Page 126 Reference Symptom Cause/solution pages • This may occur due to the display adapter and driver combination. When this occurred, update the driver of the display adapter to the latest version first. If updating the driver does not solve the problem, adjust the hardware acceleration as follows. The following are descriptions when using Windows XP. 1.
- Page 127 The following message • Click the information bar and select "Install ActiveX is displayed on the Control...". information bar. Click the "Install" button on the displayed "Security "This site might require Warning" window. the following Active X – control: 'wvasetup2.exe' from 'Panasonic Corpora tion'. Click here to install..."...
- Page 128 Reference Symptom Cause/solution pages • Click the information bar and select "Download File...". The following message When downloading fails even though you selected is displayed on the "Download File...", perform the following operation. information bar. Click "Internet Options" on the Tools menu of Internet "To help protect your Explorer, and then click the [Security] tab.
-
Page 129: Glossary
Internet. Internet or intranet, to Internet Explorer. The recorder uses it to display video. PS·Data Stands for Panasonic Security Data. When PS·Data DDNS (Dynamic DNS) compatible devices are connected using a RS485 cable, A technology for dynamically translating DNS server... - Page 130 SMTP authentication (Simple Mail Transfer Event recording Recording automatically performed at an event occur- Protocol authentication) rence. SMTP mail transfer protocol appended with a user Event recording includes the pre-event recording authentication function. It authenticates passwords and (records images before an event occurs) and post-event user accounts between SMTP servers and clients.
- Page 131 Default gateway Multiscreen display Network device used as a gateway for networks, such This product can display images from multiple camera as a local network, to access PCs on an external net- channels simultaneously while displaying live images or work. Data is sent using the default gateway if a gate- playback images.
- Page 132 Protocol A set of rules that allows the exchange of data amongst different types PCs with information. The Internet uses the TCP/IP protocol as its base and information is transferred following http and ftp proto- cols depending on the application. Port number A sub address set below the IP address to connect mul- tiple parties simultaneously for communication (TCP,...
- Page 133 For U.S., Canadian and Puerto Rican fields: For European and other fields: Panasonic System Solutions Company, Unit Company of Panasonic Corporation of North America http://panasonic.net www.panasonic.com/business/ For customer support, call 1.800.528.6747 Importer's name and address to follow EU rules: Three Panasonic Way 2H-2, Secaucus, New Jersey 07094 Panasonic Testing Centre Panasonic Canada Inc.
Need help?
Do you have a question about the WJ-HD716/1000 and is the answer not in the manual?
Questions and answers