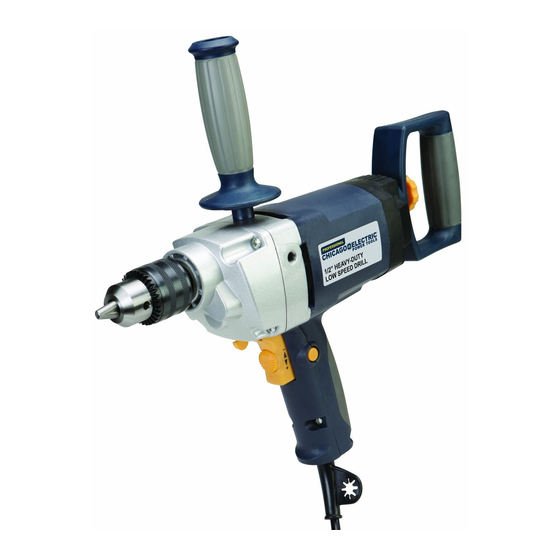
Chicago Electric 93632 Owners Manual & Safety Manual
1/2 heavy-duty low speed vsr drill professional series
Hide thumbs
Also See for 93632:
- Assembly and operating instructions manual (24 pages) ,
- Set up and operating instructions manual (17 pages) ,
- Owner's manual & safety instructions (16 pages)
Table of Contents
Advertisement
Advertisement
Table of Contents

Subscribe to Our Youtube Channel
Summary of Contents for Chicago Electric 93632
-
Page 2: Table Of Contents
Table of contents Safety ............2 Maintenance ..........12 Specifications ..........8 Parts List and Diagram ......14 Setup ............9 Warranty ............ 16 Operation ........... 10 WARNING SYMBOLS AND DEFINITIONS This is the safety alert symbol. It is used to alert you to potential personal injury hazards. Obey all safety messages that follow this symbol to avoid possible injury or death. -
Page 3: Electrical Safety
Electrical safety 1. power tool plugs must match the outlet. 4. Do not abuse the cord. Never use the cord for Never modify the plug in any way. carrying, pulling or unplugging the power tool. Do not use any adapter plugs with grounded Keep cord away from heat, oil, sharp edges power tools. -
Page 4: Drill Safety Warnings
7. Use the power tool, accessories and tool bits etc. in accordance with these instructions, taking into account the working conditions and the work to be performed. Use of the power tool for operations different from those intended could result in a hazardous situation. Service Have your power tool serviced by a qualified repair person using only identical replacement parts. -
Page 5: Vibration Safety
Vibration Safety This tool vibrates during use. 2. Do not smoke during use. Nicotine reduces Repeated or long-term exposure to vibration may the blood supply to the hands and fingers, cause temporary or permanent physical injury, increasing the risk of vibration-related injury. particularly to the hands, arms and shoulders. - Page 6 Grounding TO pREVENT ELEcTRIc SHOcK AND DEATH FROM INcORREcT GROUNDING WIRE cONNEcTION: check with a qualified electrician if you are in doubt as to whether the outlet is properly grounded. Do not modify the power cord plug provided with the tool. Never remove the grounding prong from the plug.
-
Page 7: Extension Cords
Extension cords 1. Grounded tools require a three wire extension cord. 7. Make sure the extension cord is properly wired Double Insulated tools can use either and in good electrical condition. Always replace a two or three wire extension cord. a damaged extension cord or have it repaired by a qualified electrician before using it. -
Page 8: Specifications
Specifications Electrical Rating 120 V~ / 60 Hz / 7.5 A Motor No Load Speed 0 - 550 RPM Chuck Capacity 1/16″ to 1/2″ 95GA E194601 REV 09l Page 8 For technical questions, please call 1-800-444-3353. Item 93632... -
Page 9: Setup
Setup - Before Use: Read the ENTIRE IMpORTANT SAFETY INFORMATION section at the beginning of this manual including all text under subheadings therein before set up or use of this product. TO pREVENT SERIOUS INJURY FROM AccIDENTAL OpERATION: Make sure that the Trigger is in the off-position and unplug the tool from its electrical outlet before performing any procedure in this section. -
Page 10: Important Safety Information
Operating Instructions Read the ENTIRE IMpORTANT SAFETY INFORMATION section at the beginning of this manual including all text under subheadings therein before set up or use of this product. Tool Set Up TO pREVENT SERIOUS INJURY FROM AccIDENTAL OpERATION: Make sure that the Trigger is in the off-position and unplug the tool from its electrical outlet before performing any procedure in this section. -
Page 11: General Operating Instructions
General Operating Instructions 1. Make sure that the Trigger is in the 4. Squeeze the Trigger to start the tool. The Trigger off-position, then plug in the tool. has a variable speed feature. Pressing it lightly will make the tool operate slowly; pressing 2. -
Page 12: Maintenance
Maintenance and Servicing procedures not specifically explained in this manual must be performed only by a qualified technician. TO pREVENT SERIOUS INJURY FROM AccIDENTAL OpERATION: Make sure that the Trigger is in the off-position and unplug the tool from its electrical outlet before performing any procedure in this section. -
Page 13: Troubleshooting
Troubleshooting problem possible causes Likely Solutions Tool will not start. 1. Cord not connected. 1. Check that cord is plugged in. 2. No power at outlet. 2. Check power at outlet. If outlet is unpowered, turn off tool and check circuit breaker. If breaker is tripped, make sure circuit is right capacity for tool and circuit has no other loads. -
Page 14: Parts List And Diagram
parts List and Diagram pLEASE READ THE FOLLOWING cAREFULLY THE MANUFACTURER AND/OR DISTRIBUTOR HAS PROVIDED THE PARTS LIST AND ASSEMBLY DIAGRAM IN THIS MANUAL AS A REFERENCE TOOL ONLY. NEITHER THE MANUFACTURER OR DISTRIBUTOR MAKES ANY REPRESENTATION OR WARRANTY OF ANY KIND TO THE BUYER THAT HE OR SHE IS QUALIFIED TO MAKE ANY REPAIRS TO THE PRODUCT, OR THAT HE OR SHE IS QUALIFIED TO REPLACE ANY PARTS OF THE PRODUCT. -
Page 15: Assembly Diagram
Assembly Diagram Item 93632 For technical questions, please call 1-800-444-3353. Page 15... -
Page 16: Warranty
Limited 90 Day Warranty Harbor Freight Tools Co. makes every effort to assure that its products meet high quality and durability standards, and warrants to the original purchaser that this product is free from defects in materials and workmanship for the period of 90 days from the date of purchase.


Need help?
Do you have a question about the 93632 and is the answer not in the manual?
Questions and answers