Tascam DA-88 Owner's Manual
Digital multitrack recorder
Hide thumbs
Also See for DA-88:
- Owner's manual (26 pages) ,
- Supplemental sheet (3 pages) ,
- Setup manual (12 pages)

Related Manuals for Tascam DA-88


Summary of Contents for Tascam DA-88
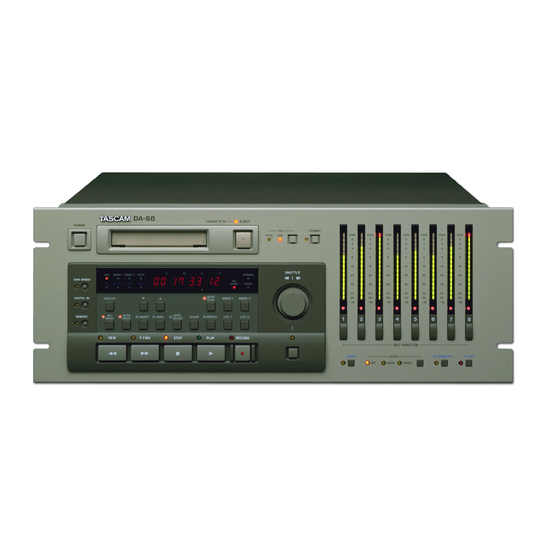
- Page 1 DA-88 Digital Multitrack Recorder OWNER’S MANUAL...
- Page 2 T A S C A M D A - 8 8 a u d i o m u l t i t r a c k r O F C a u d i o ....... . . v i d e o t a p e .
- Page 3 I I I lllllllll lllll 26 20 27 21 28 22 29 23 30 24 251716...
- Page 4 Skim through this section of the manual to get a bird&eye- FORMAT view of the DA-88, that way you will be able locate To fommt a tape is m record it with subcode da@, of which information whenever ~0” need. It is not XC~SSIU~ to ABS (absolute) time is one.
-
Page 5: Warning Led
0 Preroll time (p.17). another tape is loaded and the indicator does not turn off, The following can be trimmed or tine tuned with the V and consult TASCAM or your nearest TASCAM dealer. I keys See also the 3rd paragraph under the heading. - Page 6 0 When you press F.FWD or REW for the first time after 19. AUTO INPUT switch powering up ok replacing the tape, this will mn at an When this switch and INSERT are both previously activated, the channel inputs selected by REC FUNCTION intermediate speed for a few seconds before starting are automatically switched to directly feed the outputs running at the expected high speed.
- Page 7 34. CHASE Lets the slave DA-88(s) chase and lock to the same ABS time point as the master. Once locked op. they will play, 38. REMOTE IN/SYNC IN and SYNC OUT jacks record, or fast-wind in sync in response to the commands When two or more DA-88s are hooked up, a sync signal from the master.
- Page 8 TASCAM The wire which is coloured GWEN-and-YELLOW must be o IF-88AE for connection to machines with AES/ connected to the terminal in the plug which is marked by EBU digital L’O or SPDIF port.
- Page 9 Hookup RG3OP Footswiich FtG848 Full-Fuxtion Rswte Control Unit ---e-s--, PW-88M PW-88DB8DL Dub4ing Cable Meter Cable (54 IFXtAE AES/ESU InterfaCe Unit Mu-8824 24Ch Meter Unit Mixer .SY-88 Sync Board Formattinq a Tape Before starting to record any audio program on a new tape, it should be formatted, i.e.
-
Page 10: Audio Recording
starts, cannot Once formatting change the sampling rate. If you notice G’ that L wrong rate was selected after formatting starts, stop and rewind the tape to the beginning and selecf the correct rate before i-e-starting formatting. Hold formatting start. RECORD and press PLAY to let When the tape reaches the end and formatting is complete, it will automatically rewind, stopping at the beginning. - Page 11 Check to see that VARI is NOT activated. If its LED is on, turn it off by pressing the switch. Select the track or tracks to record on by pressing their REC switch. If you intend to record analog audio, let the soon% start playing, and adjust its until the DA-Ws meter peaks at the reference level of “0”.
- Page 12 First check to see that the source is connected to the correct input jack. If you’re punching into a track just recorded, there is no need of repatching. t REHEARSAL FOR AUTO PUNCH IN AND OUT During rehearsal, what you hear in the monitor mix and read cm the level meters will be the same as during recording, but any signal won’t be recorded con tape.
- Page 13 Preroll time : It defaults to 5 seconds. If you want longer prerolls, hold 1 or V and press the other. The display will read “Pr. 00 05 00.” Then, each time you press A, the display will increment by 1 second, up to 59 minutes, 59 seconds.
- Page 14 Punch-in Rehearsal 13. Praaice the pafonnance until you are sure that you will get it right when acmally recording. Remember, once you punch-in over existing material, that original signal is erased ! AcWal, Auto Punch In and Out Once you’re sure yew performance and the in/out points selected are correct, you’re ready to acwally punch into record.
- Page 15 5. At the desired punch-in point, hit The REC FUNCTION indicator RECORD. which was blinking will turn cm solid. punch mt of record. The tape will resume playing and the REC PLAY to FUNCTION indicator will start blinking as before. REC FUNCTION-triggered punch-in Check to see that aI1 the...
-
Page 16: Rec Function
punch out of record, press the footswitch again. To stop the tape, press STOP. In tbis example, we. will “bounce” or combine material from tracks 1-4 onto etnpty track 8. Connect outputs 1.4 of the DA-88 to inputs I-4 of your mixer, and connect group out I of the mixer to input 8 of the DA-88. -
Page 17: Variable Speed Playback
You can let the cutput of a specific track lag behind that of others by a maximum of 7200 samples (Fs). This is like a.n offset you may want to enter so that one transport will sync to the master with a distance maintained between them. 1 sample corresponds to 22.7 microseconds at 44.1 kHz, and to 20.8 microseconds at 48 kHz. -
Page 18: Autolocation Controls
Autolocation Controls Two locating points (MEMO I and MEMO 2) can be established en a given tape. Setting Locating Points To set MEMO points : F’ress MEMO (1 or 2) at the desired point during Play, or during Stop if the tape is at the point you want to specify as a locating point To check MEMO points : Press the... - Page 19 o Pressing any transport control button during repeat pltiy activates the function pressed, and repeat play will start again if you -: Press then (whether I or 2) when the tape is at AUTO PLAY any point. Press LOC when the tape is at any point, and, when the tape stops at the beginning or end of loop, press PLAY.
- Page 20 TASCAM cables. If the use of non TASCAM cables causes or results damaged this will void the Warranty. Allotting ID (Identification) numbers the termination ulw into the last DA+%% SYNC OUT connector. This 2.
- Page 21 Digital dubbing With digital recording, how many times dubbing is repeated, no hiss or dismrtion is added ; you can copy important muldtiack tapes as many times as you need to creatz work tapes or copies for d&rib&x without having to worry about any deterioradon.
-
Page 22: Error Messages
In the Analog output mode, the analog outputs are timed to compensate for the DIA conversion time as well as the anticipatory A/D conversion time (42 samples in total as shown). But this in turn disturbs the digital output timing. On the other hand, in the Digital output mode, the analog outputs will lag because this mode disables the compensation circuit so that the digital outputs are timed as it should.
Need help?
Do you have a question about the DA-88 and is the answer not in the manual?
Questions and answers