Table of Contents
Advertisement
Quick Links
Advertisement
Table of Contents

Related Manuals for Electrolux U28190


Summary of Contents for Electrolux U28190
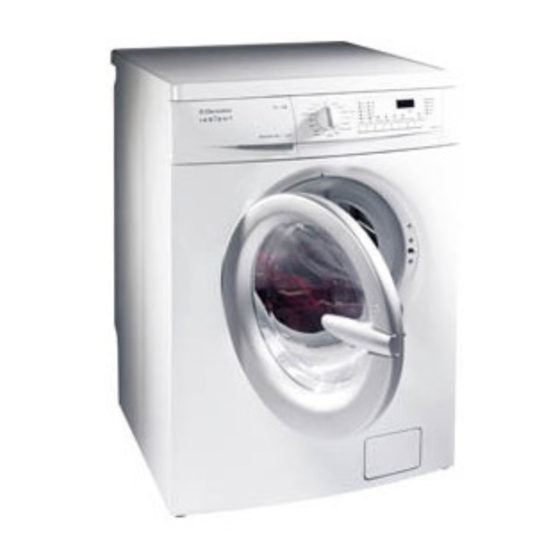
- Page 1 EWF 12108W EWF 14108W...
-
Page 2: Important Safety Information
• Under no circumstances should you attempt to repair the machine yourself. Repairs carried out by inexperienced persons may cause injury or serious malfunctioning. Contact your local Service Force Centre. Always insist on genuine Electrolux spare parts. -
Page 3: Table Of Contents
Contents For the User Important Safety Information Child safety Your New Washing Machine Description of the Appliance Detergent dispenser drawer The Control Panel Programme information Operating Sequence Place the laundry in the drum Measure out the detergent Measure out the additive Switch the machine ON and OFF Select the required programme Select the temperature... -
Page 4: Your New Washing Machine
Your New Washing Machine Your new washing machine meets all modern requirements for effective treatment of laundry with low water, energy and detergent consumption. • The programme selector dial combines the function of programme and temperature selection, making it easier to set the programme. •... -
Page 5: Description Of The Appliance
Description of the appliance 1. Detergent dispenser drawer 2. Control panel 3. Door handle 4. Drain pump 5. Adjustable feet 6. Door lock Indicator Detergent dispenser drawer Pre-wash Main wash Fabric softener, starch... -
Page 6: Programme Selector Dial
Control panel 1. Detergent Dispenser Drawer 2. Programme selector dial The programme selector dial is divided into three sections : 1. Cotton,Xpress60,Cottons Economy (Blue section) 2. Synthetics (Green section) 3. Delicates, Wool, Handwash, Silk, Minipr.30, Rinse, Delicate Rinse, Drain, Spin, Delicate Spin, Soak.(Grey section) The selector dial can be turned either clockwise or anti-clockwise. -
Page 7: Delay Start Button
There are two possibilities to drain out the water. • Select the programme “Drain” The water is drained out without spinning • Select programme “Spin” or “Delicate Spin” Select the spin speed by means of the relevent button and press the “Start” button. The water is emptied out and the laundry is spun at the selected speed. - Page 8 7. Display The display shows the following information: Duration of the programme - Delayed start - Incorrect option selection - Alarm code - End of programme. Duration of the selected programme After selecting a programme, the duration is displayed in hours and minutes ( for example 2.05). The duration is calculated automatically on the basis of the maximum recommended load for each type of fabric.
-
Page 9: Start Button
8. Start Button This button has two functions: Start / Pause. Start: After having selected the required programme, press this button to start the machine; the corresponding LED stops flashing. If you have selected the delayed start, the machine begins its countdown. The duration of the programme or the delay appears on the display. -
Page 10: Operating Sequence
Operating sequence Before the first wash we recommend that you pour 2 litres of water into the main wash compartment of the detergent drawer. Then run a cotton cycle at 60°C, with the machine empty, in order to remove any manufacturing residue from the drum and tub. -
Page 11: Select The Spin Speed Or Rinse Hold Option
7.Select the spin speed or Rinse Hold Option Press the “Spin” button repeatedly, in order to select the desired spin speed or the Rinse Hold The relevant LED will light up. If you select the Rinse Hold will stop at the end of the programme with the water still in the tub. -
Page 12: Cancelling A Programme
13. Cancelling a programme Turn the selector dial to position «Off» to cancel a programme which is running. Now you can select a new programme. 14.How to open the door during the cycle of a programme You can open the door, after having set the washing machine to PAUSE phase, by pressing “Start”... -
Page 13: Washing Hints
Washing Hints Do NOT overload the machine. Weigh the laundry the first few times you use the appliance. The average weights of the most common items are listed below as a guide: 1000g = 1 kg Sheet Pillow case Tablecloth Serviette Tea towel Linen hand towel... -
Page 14: Which Detergent
Which detergent?... To ensure you obtain the best wash results from your appliance, it is important to use the right detergent in your everyday wash, and only detergents recommended for use in automatic machines. To maintain the appearance of your clothes and household textiles and to make them last longer you should use different types of detergent for different washes, whether for whites, colours or delicates. -
Page 15: Wash Care Symbols
Wash Care Symbols Wash care labels inside garments recommend how to launder your clothes with the best results. The care labelling code is in line with care labelling used in the rest of Europe. The symbols used make it easy to select the correct programme on your washing machine. -
Page 16: Programme Table
Programme table Washing Programmes Wash programmes Type of Laundry Fabrics Cottons White and coloured cotton e.g Sheets, tablecloths, household linen Xpress60° Coloured cotton e.g. shirts, blouses, towels and undergarments Economy wash for Cotton whites or fast Economy* coloured cotton or linen fabircs, normally soiled shirts Synthetics... - Page 17 Programme table Special Programmes Wash programmes Type of Laundry Fabrics Silk fabrics Rinse Special Programme Delicate Rinse for extremly delicate items Seperate rinse cycle Drain for handwashed cotton or linen items Seperate Spin for Spin Cottons Seperate spin for Delicate Spin delicate items Soak Seperate Soak...
-
Page 18: Maintenance And Cleaning
Maintenance and Cleaning Before any maintenance or cleaning is carried out you must DISCONNECT the appliance from the electricity supply. Descaling The water we use normally contains lime. It is a good idea to periodically use a water softening powder in the machine. -
Page 19: Cleaning The Water Inlet Filter
• When no more water comes out, unscrew the pump cover and remove it. Always keep a rag nearby to dry up spillage of water when removing the cover. • Remove any objects from the pump impeller by rotating it. •... -
Page 20: Something Not Working
Something not working? Certain problems are due to lack of simple maintenance or oversights, which can be solved easily without calling out an engineer. Before contacting your local Service Force Centre, please carry out the checks listed below. IMPORTANT: if you call out an engineer to a fault listed below, or to repair a fault caused by incorrect use or installation, a charge will be made even if the appliance is under guarantee. -
Page 21: Unsatisfactory Washing Results
Problem Unsatisfactory washing results: The machine vibrates or is noisy: The door will not open: Spinning starts late or the machine does not spin: Possible causes • Too little detergent or unsuitable detergent has been used. • Stubborn stains have not been treated prior to washing. -
Page 22: Service And Spare Parts
0870 5 929929 Your telephone call will be automatically routed to the Service Force Centre covering your post code area. For the address of your local Electrolux Service Force Centre and further information about Service Force, please visit the website at www.serviceforce.co.uk. -
Page 23: Guarantee Conditions
Guarantee Conditions Standard guarantee conditions We, Electrolux, undertake that if, within 12 months of the date of the purchase, this ELECTROLUX appliance or any part thereof is proved to be defective by reason only of faulty workmanship or materials, we will, at our option repair or replace the... -
Page 24: Installation Instructions
Installation Instructions It is dangerous to alter the specifications or attempt to modify this product in any way. Care must be taken to ensure that the appliance does not stand on the electrical supply cable. Any electrical work required to install this appliance should be carried out by a qualified electrician or competent person. -
Page 25: Unpacking
Unpacking All transit bolts and packing must be removed before using the appliance. You are advised to keep all transit devices so that they can be refitted if the machine ever has to be transported again. 1. Using a spanner, unscrew and remove the two rear bottom screws. -
Page 26: Water Inlet
Water inlet Connect the hose to a tap with a 3/4” thread. Do not use previously used hoses for water connection. Installation should comply with local water authority and building regulations’ requirements. The appliance must be connected to a cold water supply. -
Page 27: Levelling
. Onto a sink outlet spigot. If the outlet spigot has not been used before, remove any blanking plug that may be in place. Push the drain hose onto the spigot and secure with a clip if required, ensure a loop is formed in the drain hose (see diagram) to prevent waste from the sink entering the washing machine. -
Page 28: Electrical Connection
Electrical connection Any electrical work required to install this appliance should be carried out by a qualified electrician or competent person. WARNING: THIS APPLIANCE MUST BE EARTHED. The manufacturer declines any liability should this safety measure not be observed. Before switching on, make sure the electricity supply voltage is the same as that indicated on the appliance’s rating plate. - Page 29 The Electrolux Group. The world’s No. 1 choice The Electrolux Group is the world’s largest producer of powered appliances for kitchen, cleaning and outdoor use. More than 55 million Electrolux Group products (such as refrigerators, cookers, washing machines, vacuum cleaners, chain saws and lawn mowers) are sold each year to a value of approx. USD 14...
Need help?
Do you have a question about the U28190 and is the answer not in the manual?
Questions and answers