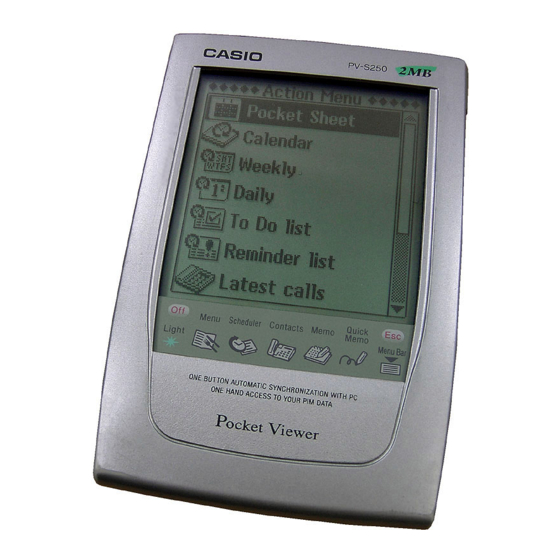
Casio PV-S250 User Manual
7. quick-memo mode
Hide thumbs
Also See for PV-S250:
- User manual (25 pages) ,
- Read this first manual (13 pages) ,
- User manual (5 pages)
Table of Contents
Advertisement
Chapter
7
Quick-Memo
Quick-Memo is like having a digital memo pad on which you can sketch simple
line drawings or jot down reminders.
Entering the Quick-Memo Mode
Tap the Quick-Memo icon below the PV Unit screen to enter the Quick-Memo
Mode.
1
•
This is the Quick-Memo input screen, which appears first whenever you
enter the Quick-Memo Mode.
•
Tap
Mode and return to the screen from which you originally entered it.
Quick-Memo Categories
There are three Quick-Memo categories. As with categories in other modes, Quick-
Memo categories let you group your memos for easier management.
To select a Quick-Memo category
Tap the Quick-Memo category button to cycle through the Quick-Memo
categories in the following sequence:
etc.
The display shows the Quick-Memos that are stored under the currently
selected category.
in the upper right corner of the screen to exit the Quick-Memo
1 Draw toolbar
2
2 Input toolbar
3
3 Quick-Memo category
button
fi
fi
7
,
fi
79
Advertisement
Table of Contents

Related Manuals for Casio PV-S250


Summary of Contents for Casio PV-S250
- Page 1 Chapter Quick-Memo Quick-Memo is like having a digital memo pad on which you can sketch simple line drawings or jot down reminders. Entering the Quick-Memo Mode Tap the Quick-Memo icon below the PV Unit screen to enter the Quick-Memo Mode. 1 Draw toolbar 2 Input toolbar 3 Quick-Memo category...
-
Page 2: Using The Quick-Memo Drawing Tools
Using the Quick-Memo Drawing Tools The following describes the functions of the Quick-Memo Drawing tools when inputting Quick-Memo data. Tap a drawing tool with the stylus to select it. The currently selected drawing tool is highlighted on the toolbar. Tapping some of the drawing tools also cycles through a number of optional settings. -
Page 3: Chapter 7 Quick-Memo
Chapter 7 Quick-Memo Line Tool • Tap this tool to cycle through the type of line or eraser path produced when dragging the stylus on the display while the line tool or eraser tool is selected. Each tap of this tool cycles through the line type in the sequence: freehand fi... -
Page 4: Recalling A Quick-Memo
2. Drag the stylus on the display to draw the figure. Recalling a Quick-Memo Use the following procedure to scroll through a list of Quick-Memos and find the one you want. Then you can select a Quick-Memo in the list to view it. 1. -
Page 5: Screen Copy
Chapter 7 Quick-Memo 5. Tap the selected Quick-Memo to change to its data display. 1 Scroll buttons 2 Category of displayed Quick-Memo 3 Creation date 6. In the Quick-Memo data display, you can use the scroll buttons to scroll back and forward to the data display of other memos. 7. -
Page 6: To Record A Screen Copy
To record a screen copy 1. Display the data for which you want to record a screen copy. 2. Tap the Menu Bar icon to display the menu bar, and then tap Option – Screen copy. • The PV Unit switches to the Quick-Memo Mode, with the new screen copy on the display. -
Page 7: Entering The Pocket Sheet Mode
Chapter Pocket Sheet Pocket Sheet gives you access to basic spreadsheet capabilities while on the go. You can build your own spreadsheets from scratch, and even synchronize with ® Microsoft Excel data on your computer. Entering the Pocket Sheet Mode 1. -
Page 8: Creating A New Sheet From Scratch
Creating a New Sheet from Scratch 1. Display the Pocket Sheet list screen. 2. Tap the New button. 1 Row numbers 2 Keyboard 3 Input field 4 Current cell 5 Column names 6 Cells • Columns are named using the letters of the alphabet from A to Z, while rows are numbered sequentially from 1 to 999. -
Page 9: Making A Cell The Active Cell
Chapter 8 Pocket Sheet Making a Cell the Active Cell You can make a cell active by tapping it with the stylus so it becomes highlighted. You can also move the highlighting around the display using the scroll bar as described below. Tap here on the Scroll To do this: Bar:... -
Page 10: Inputting Data Into A Cell
1. While a sheet is on the display, tap the Menu Bar icon to display the menu bar, and then tap Edit – Go To to display the Go To screen. 2. Use the on-screen keyboard to type in the cell reference (column and row) of the cell to which you want to jump. - Page 11 Chapter 8 Pocket Sheet Cell References The term cell reference means calling the contents of one cell into another cell. Pocket Sheet supports three types of cell references: relative, absolute, and mixed. Whether a cell references is relative, absolute, or mixed does not make affect the results it normally produces.
- Page 12 Mixed Cell References A mixed cell reference is one in which one component (column name or row number) is relative, and the other component is absolute. Note the following examples. Mixed Cell Meaning Reference Contents of cell A1. The column reference ($A) is absolute, and the row reference (1) is relative.
- Page 13 Chapter 8 Pocket Sheet Inputting Mathematical Expressions You can set up a cell to perform arithmetic operations (addition, subtraction, multiplication, division), and other useful functions like SUM (sum of a series of values), MIN (extracts the lowest value), and COUNT (counts the number of values).
- Page 14 Examples The following are some examples of mathematical expressions you can input into sheet cells. Cell Contents Displayed Result =1+2-3 =(1+2)*(3+4) =(A1+B5)*2 Result of expression using contents of cells A1 and B5 =$A$1+B2 Contents of cell A1 + Contents of cell B2 =2^3 8 (Raises left value to power specified by right value.)
-
Page 15: Inputting Text
Chapter 8 Pocket Sheet Inputting Text Text (letters and numbers) can be input into the active cell using the on- screen text input keyboard. • Input make up entirely of numbers (including decimal point) is treated as a numeric value. Inclusion of even a single non-numeric character (alpha-character or symbol) causes the input to be treated as text. -
Page 16: Input Example
Input Example This section contains an example that illustrates a number of Pocket Sheet input techniques. Example Data All of the operations in this section are performed using the data shown below. Example: To input the function below into cell C5. =SUM(A2:B5)*C2 •... -
Page 17: Controlling The Appearance Of A Cell
Chapter 8 Pocket Sheet 6. Type * into the input field. 7. Tap cell C2. 8. Tap any cell or the NEXT button to display the calculation result. • The value in cell C5 shows the result of the function. Controlling the Appearance of a Cell This section explains how to make cell format settings that control the format of data inside individual cells or a range of cells. - Page 18 3. Make the format settings you want. • See the following sections for information about the settings you can make on the Formats tab. 4. After making the settings you want, tap Set to apply them. • Tapping Esc exits the Formats tab without applying any changes you have made in the settings.
- Page 19 Chapter 8 Pocket Sheet Edit • Tap this button to display the euro currency symbol editing screen shown below. • Note that you can edit the euro currency symbol only. The symbols for the other currencies are fixed. • Use the on-screen keyboard to type up to three letters for the currency to which you want to change.
- Page 20 Decimal Places Tap the L arrow next to the Decimal Places box to display a list of • decimal place settings. You can specify anywhere from 0 to four decimal places. Selecting Free specifies a free-floating decimal place, which means the decimal point is located wherever you input it. Alignment Tap the L arrow next to the Alignment box to display a list of alignment •...
- Page 21 Chapter 8 Pocket Sheet Lock • Tap the check box to toggle cell lock on (checked) and off (unchecked). • Note that the sheet where the locked cell is located must be a protected sheet (page 112) for the cell’s locked status to be enforced. The content of a cell can always be edited whenever the sheet where it is located is unprotected, even if the cell is locked.
-
Page 22: Row And Column Operations
3. Tap the borderline option you want to select. To select this type of border line: Tap this button: Bold outer lines only Normal outer lines only Normal outer lines and inner lines Borderlines off 4. When the borderlines are the way you want, tap Exe to apply them and to close the Border screen. - Page 23 Chapter 8 Pocket Sheet To change the width of a column by specifying a value 1. Make a cell in the column whose width you want to change the active cell (page 87). 2. Tap the Menu Bar icon to display the menu bar, and then tap Option – Width to display the Width dialog box.
- Page 24 To freeze columns only Example: The following procedure describes how to freeze column A. 1. In the top row of the displayed sheet, tap cell in the column to the right of the column you want to freeze. • To freeze column A, for example, you would tap cell B in the top row. To freeze both column A and column B, tap cell C.
-
Page 25: Inserting Rows
Chapter 8 Pocket Sheet To freeze a row and column at the same time 1. Tap the cell below the row and to the right of the column you want to freeze. • To freeze column A and row 1, for example, you would tap cell B2. 2. -
Page 26: Inserting Columns
Inserting Columns 1. Select the location in the sheet where you want to input the columns. • The number of cells you select determines the number of columns that are inserted. Selecting C1 inserts a single column at column C. Selecting C1 and D1 inserts two columns at columns C and D. -
Page 27: Sheet Operations
Chapter 8 Pocket Sheet Sheet Operations This section contains information about the procedures you need to perform when working with sheets. Opening a Sheet 1. Display the Pocket Sheet list screen. 2. Double-tap the title of a sheet to open it. Displaying the Input Screen You can use any one of the following two operations to change from a sheet screen to the input screen. -
Page 28: Saving An Existing Sheet Under A New Name
Saving an Existing Sheet Under a New Name 1. Tap the Menu Bar icon to display the menu bar, and then tap Edit – Save As. 2. Type in up to 32 characters for the name you want to assign to the sheet. 3. -
Page 29: Cut, Copy, Paste, Clear
Chapter 8 Pocket Sheet Cut, Copy, Paste, Clear The cut, copy, and paste operations in the Pocket Sheet Mode are somewhat different from those in other modes. Cutting Cell Data 1. Select the cell or range of cells that contains the data you want to cut. •... - Page 30 Pasting Cell Data Important! • Pasting data into a cell or range of cells that already contains data causes the current data to be replaced with the pasted data. 1. Select the cell or range of cells to which you want to paste the data currently on the clipboard.
-
Page 31: Copying A Relative Cell Reference
Chapter 8 Pocket Sheet Copying a Relative Cell Reference With relative cell reference, the cell reference changes automatically to maintain the same relationship between the calling cell and the cell being called. Note the following example. =A2+B2+C2+D2 PASTE =B5+C5+D5+E5 Copying an Absolute or Mixed Cell Reference Since absolute cell references are “absolute,”... -
Page 32: Searching For Data In A Sheet
3. On the dialog box that appears, tap the option you want to execute it. • All clears both cell format settings (page 95) and contents. • Formats clears the format settings of the cell without affecting the contents. The borders of the cell are not cleared. •... - Page 33 Chapter 8 Pocket Sheet 3. Tap the Menu Bar icon to display the menu bar, and then tap Edit - Search. • If you previously performed a search operation since opening the current sheet, the text you searched for will be shown on the above screen. 4.
-
Page 34: Setting Sheet Calculation, Gridline, And Protect Options
Setting Sheet Calculation, Gridline, and Protect Options 1. Display the sheet whose options you want to set. 2. Tap the Menu Bar icon to display the menu bar, and then tap Option – Sheet to display the option setting dialog box. 3. -
Page 35: Pocket Sheet Sync
Chapter 8 Pocket Sheet 3. Tap the Menu Bar icon to display the menu bar, and then tap Option – Date/Size. • The date format (M/D/Y, D/M/Y, Y/M/D) is in accordance with the system settings you make under “Setting the Date, Time, Calendar, and Keyboard Formats”... -
Page 36: Pocket Sheet Errors
Pocket Sheet Errors The message #ERR appears inside of a cell any time one of the following operations is attempted with the cell. • Division by zero • Any mathematical operation that produces a value that exceeds the calculation limit •...
Need help?
Do you have a question about the PV-S250 and is the answer not in the manual?
Questions and answers