Bunn OL Installation & Operating Manual
S/n rl00006929 & up
Hide thumbs
Also See for OL:
- Illustrated parts catalog (47 pages) ,
- Operating & service manual (34 pages) ,
- Specification (2 pages)
Table of Contents
Advertisement
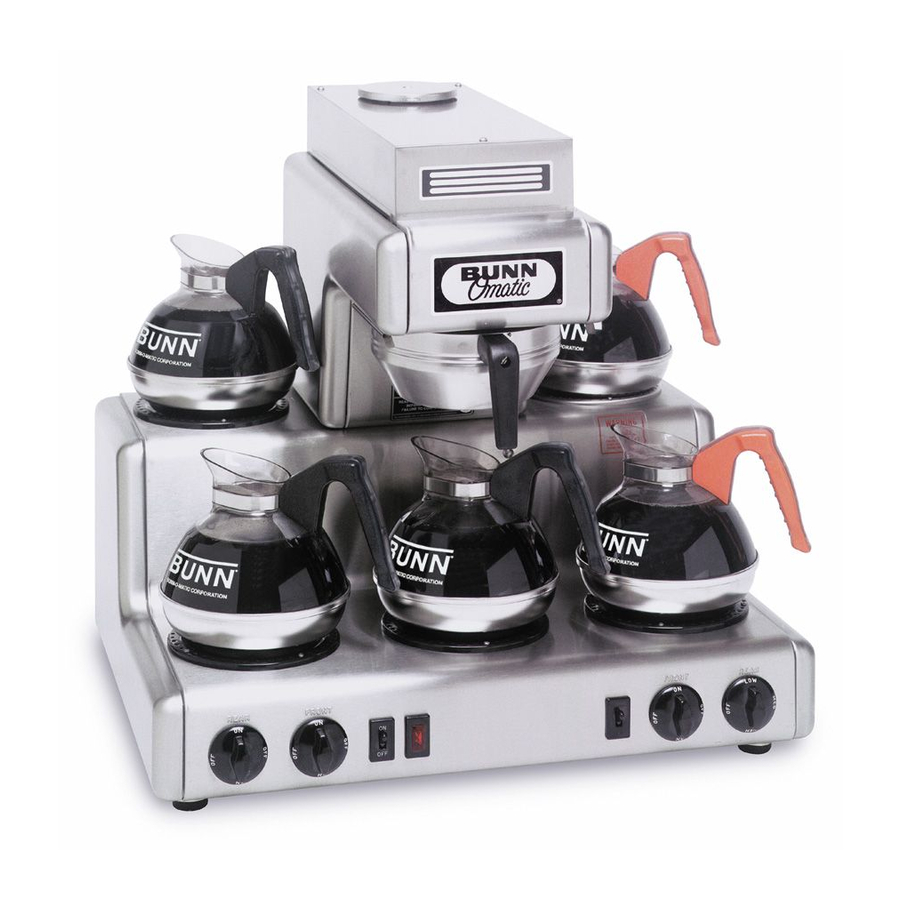
OL & RL
(S/N RL00006929 & up)
INSTALLATION & OPERATING GUIDE
BUNN-O-MATIC CORPORATION
POST OFFICE BOX 3227
SPRINGFIELD, ILLINOIS 62708-3227
PHONE: (217) 529-6601
FAX: (217) 529-6644
To ensure you have the latest revision of the Operating Manual, or to view the Illustrated Parts
Catalog, Programming Manual, or Service Manual, please visit the Bunn-O-Matic website, at
www.bunn.com. This is absolutely FREE, and the quickest way to obtain the latest catalog and
manual updates. For Technical Service, contact Bunn-O-Matic Corporation at 1-800-286-6070.
32430.0000D 05/12 © 1999 BUNN-O-MATIC CORPORATION
Advertisement
Chapters
Table of Contents

Related Manuals for Bunn OL


Summary of Contents for Bunn OL
- Page 1 To ensure you have the latest revision of the Operating Manual, or to view the Illustrated Parts Catalog, Programming Manual, or Service Manual, please visit the Bunn-O-Matic website, at www.bunn.com. This is absolutely FREE, and the quickest way to obtain the latest catalog and manual updates. For Technical Service, contact Bunn-O-Matic Corporation at 1-800-286-6070.
- Page 2 AS SPECIFIED HEREIN, TO REPAIR, REPLACEMENT OR REFUND. In no event shall BUNN be liable for any other damage or loss, including, but not limited to, lost profits, lost sales, loss of use of equipment, claims of Buyer’s customers, cost of capital, cost of down time, cost of substitute equipment, facilities or services, or any other special, incidental or consequential damages.
-
Page 3: Table Of Contents
FAILURE TO COMPLY RISKS EQUIPMENT DAMAGE, FIRE, OR SHOCK HAZARD READ THE ENTIRE OPERATING MANUAL BEFORE BUYING OR USING THIS PRODUCT PN: 00658.0000G 02/08 © 1985 BUNN-O-MATIC CORPORATION THIS APPLIANCE IS HEATED WHENEVER 00658.0000 CONNECTED TO A POWER SOURCE 00831.0000F 3/98 ©1998 BUNN-O-MATIC CORPORATION 00831.0000... -
Page 4: Electrical Requirements
ELECTRICAL REQUIREMENTS CAUTION - Do not connect the brewer to the power source until specified in Initial Set-Up. L2 RED 200, 230 or 240V A.C. L1 BLACK MODELS OL15 & 20 require MODELS OLA, RLA, OL35B & MODEL OL25B requires MODELS OL35 &... -
Page 5: Plumbing Requirements
25 feet from the 1/2” water supply line. A tight coil of copper tubing in the water line will facilitate moving the brewer to clean the counter top. Bunn-O-Matic does not recommend the use of a saddle valve to install the brewer. -
Page 6: Initial Setup
INITIAL SETUP CAUTION - The brewer must be disconnected from the power source throughout the initial setup, except when specified in the instructions. Remove the top panel. Rotate the control thermostat knob fully counterclockwise to the “OFF” position and replace the panel. Insert an empty funnel into the funnel rails. -
Page 7: Operating Controls
OPERATING CONTROLS A. On/Off Brew Station Warmer Switch Placing the switch in the upper position supplies power to the brew station warmer and enables brewing. Placing the switch in the lower position cuts power to the brew station warmer and stops brewing. Stopping a brew cycle after it has been started will not stop the flow of water into the funnel until the tank syphons down to its proper level. -
Page 8: Coffee Brewing
COFFEE BREWING Start each brew cycle with an empty, clean, half-gallon decanter. Insert a BUNN® filter into the funnel. Pour the fresh coffee into the filter and level the bed of grounds by gently shaking. Slide the funnel into the funnel rails. -
Page 9: Troubleshooting
TROUBLESHOOTING A troubleshooting guide is provided to suggest probable causes and remedies for the most likely problems encoun- tered. If the problem remains after exhausting the troubleshooting steps, contact the Bunn-O-Matic Technical Service Department. • Inspection, testing, and repair of electrical equipment should be performed only by qualified service personnel. - Page 10 TROUBLESHOOTING (cont.) Remedy Problem Probable Cause Brew cycle will not start. (cont.) 4. On/Off Brew Station Warmer Refer to Service - On/Off Brew Switch Station Warmer Switch for testing procedures. See page 15. 5. Start Switch Refer to Service - Start Switch for testing procedures.
- Page 11 TROUBLESHOOTING (cont.) Problem Probable Cause Remedy Spitting or unusual steaming from 1. Control Thermostat Refer to Service - Control Thermo- sprayhead. stat for testing procedures. See page 13. 2. Lime build-up Inspect the tank assembly for ex- cessive lime deposits. Delime as CAUTION required.
- Page 12 The brew cycle should be started only with an empty decanter under the funnel. Weak beverage. 1. Type of paper filters BUNN® paper filters should be used for proper extraction. 2. Coffee A sufficient quantity of fine or drip grind coffee should be used for proper extraction.
-
Page 13: Service
SERVICE This section provides procedures for testing and replacing various major components used in this brewer should service become necessary. Refer to Troubleshooting for assistance in determining the cause of any problem. Component Access WARNING - Inspection, testing, and repair of electri- cal equipment should be performed only by qualified WARNING - Disconnect the brewer from the power service personnel. -
Page 14: Control Thermostat
SERVICE (cont.) source. The indication must be as described in step 2. Voltage must not be indicated across Control Thermostat these terminals when the thermostat is turned “OFF” (fully counterclockwise). Disconnect the brewer from the power source. If voltage is present as described, the control thermo- stat is operating properly. -
Page 15: Ol: Brew Station & Upper
SERVICE (cont.) Warmer(s) Check for continuity from the wire terminal of the Brew Station & Upper white or red wire to the splice or indicator lamp Left Rear, Left Front, Brew Station, Right Rear & Right using the chart below. Front If continuity is present as described, proceed to #6. -
Page 16: Warmer Switch(Es)
SERVICE (cont.) Warmer Switch(es) If voltage is present as described, proceed to #4. If voltage is not present as described, refer to the Wir- On/Off Brew Station & Upper ing Diagrams and check the brewer wiring harness. On/Off Brew Station Check the voltage across the other switch ter- minal and the terminal on the indicator lamp with white or red wires with a voltmeter when... -
Page 17: Rl: Left Rear, Left Front, Right Rear
SERVICE (cont.) Disconnect the brewer from the power source. Warmer Switch(es) RL: Left Rear, Left Front, Right Rear & Right Front If voltage is present as described, the switch is operat- ing properly. If voltage is not present as described, replace the switch. -
Page 18: Start Switch
SERVICE (cont.) If continuity is present as described, reconnect the wires, the switch is operating properly. Start Switch If continuity is not present as described, replace the switch. Removal and Replacement: Remove all wires from the switch terminals. Compress the clips inside the housing and gently push the switch through the opening. -
Page 19: Indicator Lamp(S)
SERVICE (cont.) Indicator Lamp(s) Disconnect the brewer from the power source. If voltage is present, the indicator lamp is operating properly. If voltage is not present, replace the indicator lamp. Removal and Replacement: Compress the clips inside the housing and gently push the indicator lamp through the opening. -
Page 20: Limit Thermostat
SERVICE (cont.) Check for continuity across the limit thermostat Limit Thermostat terminals. If continuity is present as described, the limit thermo- stat is operating properly. If continuity is not present as described, replace the limit thermostat. Removal and Replacement: Remove both wires from the limit thermostat terminals. -
Page 21: Solenoid Valve
Check the solenoid valve for coil action. Connect SERVICE (cont.) the brewer to the power source, place the On/Off brew station warmer switch in the upper posi- Solenoid Valve tion, press and release the start switch. Listen carefully in the vicinity of the solenoid valve for a “clicking”... -
Page 22: Relay
SERVICE (cont.) Relay Disconnect the plug terminal from the relay to the solenoid jumper wire. Check the voltage across the pins of the black wire (P3) and white wire (P2) on the relay with a voltmeter when the On/ Off brew station warmer switch is in the upper “ON”... -
Page 23: Tank Heater
SERVICE (cont.) Removal and Replacement: Disconnect the brewer from the power source. Tank Heater Remove the top cover or top warmer housing and the rear access panel. Disconnect the wires to the tank heater. Gently pull the thermostat bulb with grommet out of the tank lid. -
Page 24: Over Flow Safety Switch
SERVICE (cont.) If continuity is present as described, reconnect the wires as shown in FIG. 30, the switches are operating Water Level and Overflow Safety Switch properly. If continuity is not present as described, replace the failed switch. Removal and Replacement: Disconnect the brewer from the power source. -
Page 25: Master On/Off Switch
SERVICE (cont.) Master ON/OFF Switch Check for continuity across the two terminals on the switch at L1 BLK and BLK to Main Harness when it is held in the lower position, Fig. 29. Check for continuity across the two terminals on the switch at L2 RED and RED to Main Harness when it is held in the lower position. -
Page 26: Wiring Schematics
K1 N.O. P1,P2 & P3 ARE PINS OF A POLARIZED THREE-PIN OPTIONAL LOW WATER PRESSURE VALVE CONNECTOR. BR. RECT WHI/VIO 120/240 VOLTS AC 3 WIRE + GND SINGLE PHASE 60 HZ 10007.0000E 01/07 © 1990 BUNN-O-MATIC CORPORATION Page 26 32430 010308... -
Page 27: Wiring Diagrams
SAFETY SW K1 N.O. P1,P2 & P3 ARE PINS OF A POLARIZED THREE-PIN OPTIONAL LOW WATER PRESSURE VALVE CONNECTOR. 220-240 VOLTS AC BR. RECT WHI/VIO 2 WIRE SINGLE PHASE 50-60 HZ 10651.0000C 10/98 © 1990 BUNN-O-MATIC CORPORATION Page 27 32430 121699... - Page 28 P1, P2, & P3 ARE PINS OF A POLARIZED THREE-PIN CONNECTOR. P2 & P3 ARE PINS OF A POLARIZED THREE-PIN CONNECTOR. UPPER WARMER 100 VOLTS AC 2 WIRE SINGLE PHASE 50/60 HZ 10639.0000C 10/98 © 1991 Bunn-O-Matic Corporation Page 28 32430 121699...
- Page 29 P1, P2, & P3 ARE PINS OF A POLARIZED THREE-PIN OPTIONAL LOW WATER PRESSURE VALVE CONNECTOR. BR. RECT WHI/VIO 200 VOLTS AC 2 WIRE + GND SINGLE PHASE 60 HZ 10641.0000C 01/07 © 1994 BUNN-O-MATIC CORPORATION NOT A PURCHASED SCHEMATIC FOR REFERENCE ONLY Page 29 32430 121699...
- Page 30 OPTIONAL LOW WATER PRESSURE VALVE CONNECTOR. BR. RECT WHI/VIO LEFT REAR WARMER LEFT FRONT WARMER RIGHT FRONT WARMER RIGHT REAR WARMER 120/240 VOLTS AC 3 WIRE + GND SINGLE PHASE 60 HZ 32424.0000B 01/07 © 2007 BUNN-O-MATIC CORPORATION Page 30 32430 010308...
- Page 31 P1, P2, & P3 ARE PINS OF A POLARIZED THREE-PIN BR. RECT WHI/VIO CONNECTOR. LEFT REAR WARMER LEFT FRONT WARMER RIGHT FRONT WARMER RIGHT REAR WARMER 220-240 VOLTS AC 2 WIRE SINGLE PHASE 32422.0000A 10/99 © 1999 BUNN-O-MATIC CORPORATION Page 31 32430 121699...
- Page 32 OPTIONAL LOW WATER PRESSURE VALVE CONNECTOR. BR. RECT WHI/VIO LEFT REAR WARMER LEFT FRONT WARMER RIGHT FRONT WARMER RIGHT REAR WARMER 200 VOLTS AC 2 WIRE SINGLE PHASE 60 HZ 32421.0000A 10/99 © 1999 BUNN-O-MATIC CORPORATION Page 32 32430 121699...
Need help?
Do you have a question about the OL and is the answer not in the manual?
Questions and answers
Keep a few of these ones aside for me please and thank you