Breville the YouBrew BDC600XL Instruction Book
Hide thumbs
Also See for the YouBrew BDC600XL:
- Instruction book (36 pages) ,
- Quick start manual (2 pages) ,
- User manual

Related Manuals for Breville the YouBrew BDC600XL


Summary of Contents for Breville the YouBrew BDC600XL
- Page 1 the YouBrew™ Instruction Book - Livret d’instructions BDC600XL BDC600XL_IB_B11.indd 2 25/05/11 1:34 PM...
- Page 2 CONGRATULATIONS on the purchase of your new Breville YouBrew™ BDC600XL_IB_B11.indd 2 25/05/11 1:34 PM...
-
Page 3: Table Of Contents
CONTENTS Breville recommends safety first Know your Breville YouBrew™ Operating your Breville YouBrew™ Before first use Using the YouBrew™ - Carafe Mode Using the YouBrew™ - Single Cup Mode Programming the Clock (Optional) Programming Auto-Start (Optional) Changing the ‘Ready’ Signal Volume 22 Helpful Tips 24 Care & cleaning 28 Troubleshooting One Year Limited Warranty 36 French BDC600XL_IB_B11.indd 3... -
Page 4: Breville Recommends Safety First
BREvILLE RECOMMENDS SAFETY FIRST At Breville we are very safety conscious. We design and manufacture consumer products with the safety of you, our valued customer, foremost in mind. In addition we ask that you exercise a degree of care when using any electrical appliance and adhere to the following precautions. - Page 5 For any maintenance other than • Do not use cleaners, steel wool pads or cleaning, visit www.Breville.com other abrasive materials when cleaning or call Breville Customer Service on any part of this appliance. 1-866-273-8455. • This appliance is not intended to be •...
- Page 6 BREvILLE RECOMMENDS SAFETY FIRST SHORT CORD INSTRUCTIONS BREvILLE ASSIST™ PLUG Your Breville appliance is fitted with a short Your Breville appliance comes with a unique power supply cord as a safety precaution to Assist™ Plug, conveniently designed with prevent personal injury or property damage a finger hole in the power plug for easy resulting from pulling, tripping or becoming and safe removal from the wall outlet.
- Page 7 BDC600XL_IB_B11.indd 7 25/05/11 1:34 PM...
- Page 8 KNOW your Breville YouBrew™ BDC600XL_IB_B11.indd 8 25/05/11 1:34 PM...
-
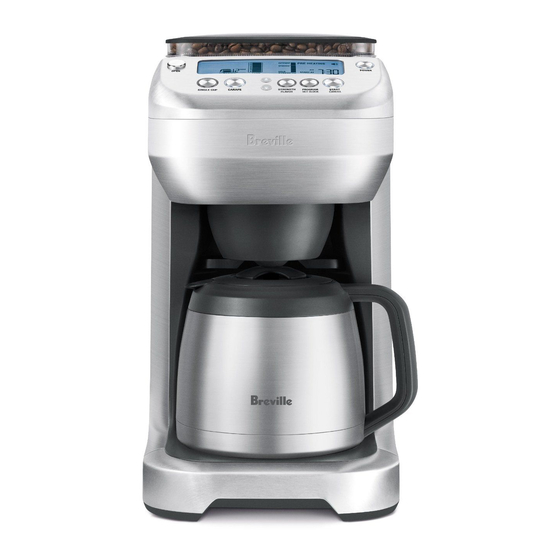
Page 9: Know Your Breville Youbrew
KNOW YOUR BREvILLE YOUBREW™ Pick how you want your coffee. The YouBrew’s intelligent features take care of the rest The YouBrew’s integrated burr grinder grinds your choice of beans You pick your just prior to brewing for maximum freshness, flavor and aroma. beans & roast… The grind is preset to the optimal size and can be turned off when using pre-ground coffee. - Page 10 KNOW YOUR BREvILLE YOUBREW™ All parts of the YouBrew™ that come into contact with coffee and water and BPA Free. Bean Hopper Lid Removable Grinds Catcher catches loose grinds from the coffee grinds chute. 0.5lb Bean Hopper 10. Carafe Lid. Bean Hopper Locking System seals the base of the bean hopper for easy removal, 11.
- Page 11 KNOW YOUR BREvILLE YOUBREW™ 20 21 22 18. OPEN button • Use in conjunction with the STRENGTH | FLAVOR button to • Press to open the swing-out door. decrease the brew strength and flavor. 19. SINGLE CUP button • Use in conjunction with the •...
-
Page 12: Operating Your Breville Youbrew
OPERATING your Breville YouBrew™ BDC600XL_IB_B11.indd 12 25/05/11 1:34 PM... -
Page 13: Before First Use
BEFORE FIRST USE BEFORE FIRST USE NOTE • Before using the YouBrew™ for the first The coffee machine will enter POWER time, ensure you have unpacked all SAVE mode after remaining idle for parts and accessories before removing 10 minutes. Press the POWER button and safely discarding all packaging to exit POWER SAVE mode and material and promotional labels. -
Page 14: Using The Youbrew™ - Carafe Mode
USING THE YOUBREW™ - CARAFE MODE USING THE YOUBREW™ Paper filter (8-12 cup, flat base basket style with ~ 3¼"/8.25cm base). Ensure - CARAFE MODE that the paper filter is completely open and touching the side walls and bottom First Time Use Only of the coffee basket. We recommend flushing the machine Close the coffee basket lid. Press the to remove any dust particles or residues OPEN button to open the swing-out door. - Page 15 USING THE YOUBREW™ - CARAFE MODE 3. Select ‘Carafe’ Mode NOTE Press the CARAFE button. The LCD screen Never fill the water tank once the will display a carafe symbol and the current coffee machine has started a brewing number of cups selected. Continue pressing cycle. This will affect the volume the CARAFE button to select the desired dispensed into the carafe.
- Page 16 USING THE YOUBREW™ - CARAFE MODE 5. Start the Brew Cycle 7. Empty the Coffee Basket Press the START | CANCEL button. The Once the brewing cycle is complete, the grinder will commence grinding the ready signal will sound and a winding noise correct amount of coffee for the selected will be heard. This is normal. The coffee brew size and strength.
-
Page 17: Using The Youbrew™ - Single Cup Mode
USING THE YOUBREW™ - SINGLE CUP MODE USING THE YOUBREW™ NOTE - SINGLE CUP MODE Never pour water into the bean hopper or grinding chamber area. First Time Use Only Doing so can cause the grinder to We recommend flushing the machine to clog. Only re-commence use when remove any dust particles or residues from the grinding chamber and grinding the manufacturing process. - Page 18 USING THE YOUBREW™ - SINGLE CUP MODE 3. Select ‘Single Cup’ Mode 4. Select the Brew Strength or ‘PRE-GROUND’ Coffee Setting Press the SINGLE CUP button. The LCD screen will display a cup symbol and the Press the STRENGTH | FLAVOR button. current cup size selected. Continue pressing The LCD screen will flash the current the SINGLE CUP button to select the strength setting and the buttons...
-
Page 19: Programming The Clock (Optional)
PROGRAMMING THE CLOCK (OPTIONAL) 6. Start the Brew Cycle 7. Empty the Coffee Basket Press the START | CANCEL button. Once the brewing cycle is complete, the The grinder will commence grinding ready signal will sound and a winding noise the correct amount of coffee for the will be heard. This is normal. The coffee selected brew size and strength. -
Page 20: Programming Auto-Start (Optional)
PROGRAMMING THE CLOCK / AUTO-START (OPTIONAL) PROGRAMMING THE CLOCK PROGRAMMING AUTO-START (OPTIONAL) (OPTIONAL) The Auto-Start feature allows you to You must set the clock to use the Auto-Start program the specific time when the coffee feature. Always remember to reset the clock machine will automatically turn on and start for time changes, power outages and when the preheating and grinding cycle. -
Page 21: Changing The 'Ready' Signal Volume
CHANGING THE ‘READY’ SIGNAL vOLUME NOTE Always remember to reset the clock and Auto-Start time when there is a time change, power outage or after you unplug the machine. START CHANGING THE ‘READY’ CANCEL SIGNAL vOLUME Ensure that the coffee machine The volume of the ‘Ready’ signal can is correctly assembled and be changed to suit your preference. -
Page 22: Helpful Tips
HELPFUL TIPS for your Breville YouBrew™ BDC600XL_IB_B11.indd 22 25/05/11 1:34 PM... - Page 23 HELPFUL TIPS WHOLE BEANS GENERAL TIPS • Coffee flavor and strength is a personal • For best coffee flavor, coffee can be held in preference. Vary the type of coffee beans a glass carafe for up to 30 minutes or in a and the strength and flavor settings to thermal carafe for about 2 hours.
-
Page 24: Care & Cleaning
CARE & CLEANING for your Breville YouBrew™ BDC600XL_IB_B11.indd 24 25/05/11 1:34 PM... - Page 25 (one can be purchased from Breville if you do not have a suitable one). Do not use abrasive cleansers, pads or cloths which can scratch the surface.
- Page 26 CARE & CLEANING Press the POWER button to turn the Replace the upper burr by aligning machine off and remove the plug the three notches around the upper from the power outlet. burr with the three notches in the grinding chamber. The upper burr Remove any beans that remain in the should sit flush.
- Page 27 • Press the CARAFE button to select of your water and the frequency of use. ‘12 CUPS’. For best results, Breville recommends de-scaling once per month in soft water • Press the STRENGTH button and environments and more frequently in hard buttons to select the water environments.
-
Page 28: Troubleshooting
TROUBLESHOOTING BDC600XL_IB_B11.indd 28 25/05/11 1:34 PM... - Page 29 TROUBLESHOOTING PROBLEM POSSIBLE CAUSES WHAT TO DO ‘LOCK BEAN Hopper not locked Turn the locking knob clockwise in place. in the direction of the LOCK arrow HOPPER’ on LCD until it clicks. screen Unable to lock Coffee beans Remove bean hopper. Clear coffee obstructing bean hopper beans from the grinding chamber bean hopper locking device.
- Page 30 TROUBLESHOOTING PROBLEM POSSIBLE CAUSES WHAT TO DO Coffee grinds in Using the gold tone filter. The gold tone filter will allow some coffee fine coffee grinds to fall into the coffee. This is normal. Switch to using a paper filter (8-12 cup, flat base basket style with ~ 3¼”/8.25cm base) if you wish to eliminate all grinds.
- Page 31 TROUBLESHOOTING PROBLEM POSSIBLE CAUSES WHAT TO DO No coffee The coffee basket Never open the swing-out door comes out is clogged. and remove the coffee basket while brewing. Hot water and coffee can cause injury. Turn the POWER button off and remove the plug from the power outlet.
- Page 32 TROUBLESHOOTING PROBLEM POSSIBLE CAUSES WHAT TO DO Machine takes a The BrewIQ™ System will If you would like to reduce the long time to brew intelligently pre-heat and overall brewing time and are using dose grinds for optimum SINGLE CUP mode, select a lower temperature and taste. flavor setting. The ‘LITE’ setting will This may result in longer steep for less time, however this will grinding, pre-heating and...
- Page 33 TROUBLESHOOTING PROBLEM POSSIBLE CAUSES WHAT TO DO I cannot select The minimum carafe Press open the flip-top water tank a certain carafe amount is 2 cups, while lid. Pour the desired amount of cold, amount the maximum is the preferably filter water. number of cups of water in the tank, up to 12 cups.
- Page 34 Wipe the disc clean then dry thoroughly. If the problem persists, call Breville Customer Service on 1-866-273-8455. Machine beeps Water tank is overfilled. Call Breville Customer Service on 20 times in fast 1-866-273-8455. succession and ‘2’ is displayed on the LCD screen BDC600XL_IB_B11.indd 34...
-
Page 35: One Year Limited Warranty
USA: 1-866-BREVILLE (1-866-273-8455) the original product. CANADA: 1-866-BREVILLE (1-866-273-8455) Please contact our Customer Service Center at www.Breville.com or call the toll Email: free number below for instructions on the USA: AskUs@BrevilleUSA.com repair and/or replacement of the appliance CANADA: AskUs@Breville.ca... - Page 36 FÉLICITATIONS pour l’achat de votre nouvelle YouBrew de Breville BDC600XL_IB_B11.indd 36 25/05/11 1:34 PM...
- Page 37 TABLE DES MATIÈRES 38 Breville vous recommande la sécurité avant tout 42 Faites la connaissance de votre YouBrew de Breville 46 Fonctionnement de votre YouBrew de Breville Avant la première utilisation Utilisation de la YouBrew - Mode carafe Utilisation de la YouBrew - Mode une tasse à la fois Programmation de l’horloge (optionnel) Programmation du démarrage...
-
Page 38: Breville Vous Recommande La Sécurité Avant Tout
BREvILLE vOUS RECOMMANDE LA SÉCURITÉ AvANT TOUT Chez Breville, la sécurité occupe une place de choix. Nous concevons et fabriquons des produits destinés au consommateur sans jamais perdre de vue la sécurité de notre précieuse clientèle. De plus, nous vous demandons d’être très vigilant lorsque vous utilisez un appareil électrique et de respecter les mesures de sécurité... - Page 39 Cet appareil n’est pas conçu pour soit. Cessez immédiatement l’utilisation fonctionner à l’aide d’une minuterie et visitez www.Breville.com ou appelez externe ou un système de commande le Service à la clientèle de Breville au à distance. 1-866-273-8455 pour le faire examiner, réparer ou ajuster. •...
- Page 40 DE BREvILLE • Ne tentez en aucune circonstance de couper ou de retirer la troisième broche Votre appareil Breville est muni d’une (mise à la terre) du cordon d’alimentation fiche exclusive AssistMC conçue de ou d’utiliser un adaptateur. façon à laisser passer un doigt pour un •...
- Page 41 BDC600XL_IB_B11.indd 41 25/05/11 1:34 PM...
- Page 42 FAITES LA CONNAISSANCE de votre YouBrew de Breville BDC600XL_IB_B11.indd 42 25/05/11 1:34 PM...
-
Page 43: Faites La Connaissance De Votre Youbrew
FAITES LA CONNAISSANCE DE vOTRE YOUBREW DE BREvILLE Choisissez comment vous voulez votre café Les fonctions intelligentes de la YouBrew feront le reste Le moulin à meules intégré de la YouBrew moud les grains Vous choisissez de votre choix juste avant l'infusion, pour un maximum de les grains et la fraîcheur, de saveur et d'arôme. La mouture est préréglée torréfaction…... - Page 44 FAITES LA CONNAISSANCE DE vOTRE YOUBREW DE BREvILLE Toutes les pièces de la YouBrew qui entrent en contact avec le café et l’eau sont sans BPA. Couvercle de la trémie 10. Couvercle de la carafe Trémie de 0,5lb (225g) 11. Carafe thermique de 12 tasses à double paroi en acier inoxydable Système de verrouillage de la trémie scelle la base de la trémie pour retirer, 12.
- Page 45 FAITES LA CONNAISSANCE DE vOTRE YOUBREW DE BREvILLE 20 21 22 18. Touche OPEN 23. Touche STRENGTH | FLAVOR • Appuyez pour ouvrir la porte pivotante. • Appuyez pour ajuster la force d’infusion. Les 7 réglages plus le réglage 19. Touche SINGLE CUP ‘PRE-GROUND’ varient la quantité...
-
Page 46: De Breville
FONCTIONNEMENT de votre YouBrew de Breville BDC600XL_IB_B11.indd 46 25/05/11 1:34 PM... -
Page 47: Avant La Première Utilisation
AvANT LA PREMIÈRE UTILISATION AvANT LA PREMIÈRE UTILISATION 2. Branchez la machine Déroulez complètement le cordon • Avant d’utiliser votre YouBrew pour d’alimentation et branchez-le dans une la première fois, assurez-vous d’avoir prise murale reliée à la terre de 110-120V. déballé toutes les pièces et accessoires Appuyez sur la touche POWER. L’écran ACL avant de retirer et disposer de tout s’illuminera. -
Page 48: Utilisation De La Youbrew
UTILISATION DE LA YOUBREW - MODE CARAFE Filtre en papier (8-12 tasses, de style ‘12 TASSES’ (Étape 3) et le réglage pour panier à base plate de ~ 3¼"/8.25cm). café prémoulu (‘PRE-GROUND’) (Étape 4). Voyez à ce que le filtre en papier soit Cependant, ne mettez pas de café dans complètement ouvert et tapisse les le panier. Une fois le cycle terminé, jetez côtés et le fond du panier à... -
Page 49: Utilisation De La Youbrew
UTILISATION DE LA YOUBREW - MODE CARAFE 2. Préchauffer la carafe la touche enfoncée pour choisir le nombre de tasses voulu. Vous pouvez sélectionner Une carafe préchauffée maintiendra la moins que le niveau actuel du réservoir température optimale du café et le gardera (2 tasses minimum), alors que le maximum chaud plus longtemps. - Page 50 UTILISATION DE LA YOUBREW - MODE CARAFE 5. Amorcez le cycle d’infusion 7. vider le panier à café Appuyez sur la touche START | CANCEL. Une fois le cycle d’infusion complété, le Le moulin commencera à moudre la signal sonore se fera entendre de même quantité exacte de café pour le format et la qu’un son de frottement.
-
Page 51: Mode Une
UTILISATION DE LA YOUBREW - MODE UNE TASSE À LA FOIS UTILISATION DE LA YOUBREW NOTE - MODE UNE TASSE À LA FOIS Ne versez jamais d’eau dans la trémie ou la chambre d’infusion, car cela Première utilisation seulement peut obstruer le moulin. Ne reprenez Nous vous recommandons de vidanger la l’opération que lorsque la chambre machine pour retirer toute particule ou tout d’infusion et les meules seront résidu de poussière provenant lu processus complètement asséchées. - Page 52 UTILISATION DE LA YOUBREW - MODE UNE TASSE À LA FOIS 3. Sélectionner le mode ‘Single Cup’ ‘INTENSE’ (Doux, fort ou intense) ou pour le réglage de café prémoulu ‘PRE-GROUND’. (Une tasse à la fois) Appuyez sur la touche STRENGTH | Appuyez sur la touche SINGLE CUP. L’écran FLAVOR pour faire votre choix. Le réglage ACL affichera le symbole ‘une tasse’ et le actuel de saveur clignotera sur l’écran ACL.
-
Page 53: Programmation De L'horloge (Optionnel)
PROGRAMMATION DE L’HORLOGE (OPTIONNEL) 6. Débutez le cycle d’infusion 7. vider le panier à café Appuyez sur la touche START | CANCEL. Une fois le cycle d’infusion terminé, le signal Le moulin commencera à moudre la sonore se fera entendre, de même qu’un son quantité voulue de café pour le format et de frottement. -
Page 54: Programmation Du Démarrage Automatique (Optionnel)
PROGRAMMATION DU DÉMARRAGE AUTOMATIQUE (OPTIONNEL) PROGRAMMATION DE L’HORLOGE PROGRAMMATION DU DÉMARRAGE (OPTIONNEL) AUTOMATIQUE (OPTIONNEL) Vous devrez régler l’heure pour utiliser La fonction de démarrage automatique la fonction de démarrage automatique. vous permet de programmer l’heure N’oubliez pas de de réinitialiser l’horloge spécifique où vous désirez que la machine en cas de changement horaire, de panne démarre et débute le cycle de préchauffage de courant ou lorsque vous débranchez et de moulage. -
Page 55: Changement De Volume Du Signal 'Ready
CHANGER LE vOLUME DU SIGNAL ‘READY’ NOTE N’oubliez pas de réinitialiser l’horloge en cas de changement horaire, de panne de courant ou lorsque vous débranchez la machine. START CHANGEMENT DE vOLUME CANCEL DU SIGNAL ‘READY’ Le volume du signal ‘Ready’ peut être Assurez-vous que la machine à café changé selon vos goûts. Voici les 3 options: est correctement assemblée et prête à... -
Page 56: Trucs Utiles
TRUCS UTILES pour votre YouBrew de Breville BDC600XL_IB_B11.indd 56 25/05/11 1:34 PM... - Page 57 TRUCS UTILES GRAINS ENTIERS grains plus fins peuvent faire déborder le panier-filtre. • La saveur et la force du café sont un choix personnel. Varier le type de grains de café et les réglages de force et de saveur pour TRUCS GÉNÉRAUX obtenir le goût que vous préférez. •...
-
Page 58: Entretien & Nettoyage
ENTRETIEN & NETTOYAGE de votre YouBrew de Breville BDC600XL_IB_B11.indd 58 25/05/11 1:34 PM... - Page 59 à l’eau courante. S'OUVRE Pour un nettoyage plus approfondi, nous recommandons de laver régulièrement la carafe à l’eau chaude savonneuse, à l’aide d’une brosse à poils doux (que vous pouvez vous procurer chez Breville, si vous ne BDC600XL_IB_B11.indd 59 25/05/11 1:34 PM...
- Page 60 ENTRETIEN & NETTOYAGE Appuyez sur la touche POWER Replacez la meule supérieure en pour éteindre la machine, puis alignant les trois encoches avec les trois encoches de la chambre débranchez-la de la prise murale. d’infusion. La meule supérieure doit Retirez les grains qui restent dans la reposer à...
- Page 61 Pour de ‘PRE-GROUND’, mais n’ajoutez pas meilleurs résultats, Breville recommande de café dans le panier. détartrer une fois par mois, si votre eau est douce, et plus souvent si l’eau est plus dure.
-
Page 62: Guide De Dépannage
GUIDE DE DÉPANNAGE BDC600XL_IB_B11.indd 62 25/05/11 1:34 PM... - Page 63 GUIDE DE DÉPANNAGE PROBLÈME CAUSES POSSIBLES QUE FAIRE ‘LOCK BEAN La trémie n’est pas Tournez le bouton de verrouillage HOPPER’ sur verrouillée en place. en sens horaire en direction de l’écran ACL la flèche LOCK jusqu’à ce qu’il s’enclenche. Incapable de Des grains de café Retirez la trémie. Enlevez les grains verrouiller la obstruent le dispositif de de café...
- Page 64 GUIDE DE DÉPANNAGE PROBLÈME CAUSES POSSIBLES QUE FAIRE Il y a des grains Vous utilisez le filtre gold Le filtre gold tone peut laisser dans le café tone. s’achapper de fins grains de café dans la tasse. Cela est normal. Remplacez-le par un filtre en papier (8-12 tasses, de style panier à base plate de ~ 3¼"/8.25cm) si vous voulez éliminer les grains.
- Page 65 GUIDE DE DÉPANNAGE PROBLÈME CAUSES POSSIBLES QUE FAIRE Aucun café ne Le panier à café N’ouvrez jamais la porte s’écoule est obstrué. pivotante et ne retirez le panier durant l’infusion. L’eau chaude et le café peuvent causer des blessures. Éteignez la machine en appuyant sur la touche POWER et débranchez-la de la prise murale.
- Page 66 GUIDE DE DÉPANNAGE PROBLÈME CAUSES POSSIBLES QUE FAIRE La machine prend Le système intelligent Si vous désirez réduire la durée du temps à infuser BrewIQ préchauffe et totale d’infusion et que vous utilisez dose les grains, pour une le mode SINGLE CUP, sélectionnez température et un goût un réglage de saveur plus bas. Le optimaux.
- Page 67 GUIDE DE DÉPANNAGE PROBLÈME CAUSES POSSIBLES QUE FAIRE La quantité infusée Beaucoup de dépôts Détartrez la machine. Conslutez est trop petite / minéraux affectent le ‘Enlever les dépôts calcaires’ en trop grande rendement de la machine. page 60. Le calibrage de quantité Recalibrez la machine en la doit être remis à zéro. vidangeant deux fois.
- Page 68 GUIDE DE DÉPANNAGE PROBLÈME CAUSES POSSIBLES QUE FAIRE Je ne peux insérer La dimension maximale Retirez le plateau d’égouttement ma tasse sous la pour tasses ou tasses de à la base de la machine. Appuyez sortie anti-goutte voyage est de 20cm (7,5") sur la touche OPEN pour ouvrir la de haut et de 7cm (2¾") porte pivotante Insérez la tasse/ de diamètre.
- Page 69 Essuyez le disque puis asséchez- le correctement. Si le problème persiste, appelez le Service à la clientèle de Breville au 1-866-273-8455. La machine bipe Le réservoir est trop plein. Appelez le Service à la clientèle de 20 fois très...
-
Page 70: Garantie Limitée D'un An
HWI Breville®. Si applicable, de cet appareil. Certains États ou Provinces cette garantie couvrira la réparation et/ou le ne permettent pas cette exclusion ou remplacement d’un produit défectueux, à... - Page 71 NOTES BDC600XL_IB_B11.indd 71 25/05/11 1:34 PM...
- Page 72 Breville is a registered trademark of Breville Pty. Ltd. A.B.N. 98 000 092 928. Copyright Breville Pty. Ltd. 2011. Due to continued product improvement, the products illustrated/photographed in this booklet may vary slightly from the actual product.
Need help?
Do you have a question about the the YouBrew BDC600XL and is the answer not in the manual?
Questions and answers
Getting the 001 on the screen. I’ve remove and cleaned the plate in the grinder chute, but still getting the 001 code on screen after placing it back.
The 001 error code on the Breville YouBrew BDC600XL indicates an issue with the coffee grinds chute disc. This disc may have a build-up of coffee grinds, which can affect the machine's performance. To resolve the issue, open the swing-out door, clean the stainless steel disc thoroughly, and dry it completely. If the problem continues, contact Breville Customer Service.
This answer is automatically generated
I cleaned/descaled my BDC600XL/A coffee maker. Now I cannot lock the grinder without the grinder running continously. I never use the grinder but I cannot reset the coffee maker to make coffee with grinds.