
Related Manuals for Krups XP2010


Summary of Contents for Krups XP2010
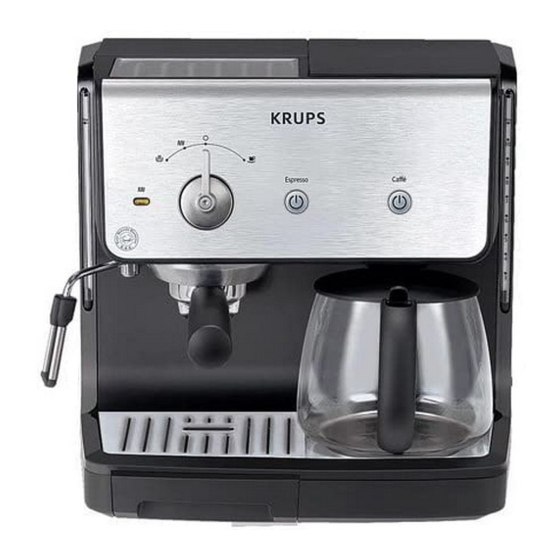
- Page 1 Espresso Caffé XS1000 F088 Espresso Caffé 1 cup...
- Page 2 Espresso XP2000/ 2010 English Instructions for Use Limited Warranty Français Mode d’emploi Garantie Español Español Instrucciones de uso Garantía...
-
Page 3: Important Safeguards
Return appliance to your nearest authorized KRUPS Service Center for examination, repair or adjustment (see Limited Warranty). The use of accessory attachments not recommended by KRUPS may result in fire, electric shock or injury to persons. Do not use outdoors. -
Page 4: Short Cord Instructions
CAUTION • This appliance is for household use only. Any servicing other than routine cleaning and user maintenance should be performed by authorized KRUPS service personnel only (see Limited Warranty). • Do not immerse base in water. • To reduce the risk of fire or electric shock, do not remove the base of the machine. - Page 5 If the plug does not fit fully in the outlet, reverse the plug. If it still does not fit, contact a qualified electrician. Do not attempt to modify the plug in any way. KRUPS...
-
Page 6: Espresso Coffee
In addition to the coffee you use, the other three factors that determine perfect espresso results are water, temperature and pressure. Your Krups machine ensures all three are pre- cision-controlled by expertly designed technology. What you must ensure is that the water you use is freshly-drawn (so that it has not had time to stagnate in the air), without any chlorine odor and at a fairly cold temperature. -
Page 7: Before First Use
: Coffee power button Getting Started To successfully enjoy the full benefits of your new Krups espresso machine, please careful- ly read these instructions in their entirety before using this product. • Place your espresso machine on a stable, heat resistant surface away from water splashes and sources of heat such as, an electrical heating plate or near a flame. - Page 8 45 degree angle (6), place the filter holder flat against the brewing head, then turn the handle towards the right (7) as far as it can go. KRUPS...
-
Page 9: Making Espresso
The appliance will pre-brew the espresso before making each cup in order to bring out the full flavor for a satisfying cup of coffee. The pump will work for 3 seconds, stop for 3 seconds, then continue with the cycle until the end of the process. KRUPS... - Page 10 After making your first espresso and the machine is warmed, the espresso cups can then be pre-heated on the cup warming plate. . Preparing an espresso: • Fill the water container (1) (2) (3) and turn on the machine (4). Espresso Caffé Espresso Espresso KRUPS...
- Page 11 • Place one or two espresso cups beneath the filter holder’s coffee outlets. As soon as the appliance reaches the right temperature, the orange temperature control light switches off. • Turn the selector knob (O) to espresso mode (9). Take the pre-brewing into account. Espresso KRUPS...
- Page 12 We do not intend, or recommend, that the E.S.E. servings be used for making more then one single serving or a “long espresso”. We recommend that you take care when handling and storing the E.S.E. pre-portioned pods so that they do not become deformed. KRUPS...
- Page 13 Place the filter holder inside the brewing head and firmly turn the handle as far right as possible (6) (7) (8). Espresso Espresso As soon as the appliance reaches the right temperature, the orange temperature control light switches off. • Turn the selector knob (O) to espresso mode (9). Take the pre-brewing into account. Espresso KRUPS...
-
Page 14: Steam Function
• Place a cup under the cappuccino accessory. • Pour about 30 oz (1/2 cup or 100 ml) of cold milk into a container. • When your appliance is ready to make an espresso, turn the selector knob (O) to preheat mode (15). KRUPS... - Page 15 • Place a cup under the auto cappuccino accessory (F). Repeat the procedure for preparing frothy milk, but this time with water, for approximate- ly 1 minute. • Turn the selector knob (O) to the central position (10). Espresso KRUPS...
-
Page 16: Recipes
4 vanilla ice cubes, 2 cups of cold sugared espresso, 1/8 litre milk, fresh cream, grated chocolate. • Mix the cold espresso with milk. • Distribute the ice cubes among the glasses, pour the coffee over them and decorate with fresh cream and grated chocolate. KRUPS... -
Page 17: Cleaning The Machine
When your espresso machine is not being used, do not leave the filter holder on the machine as it will cause unnecessary wear of the gasket. . The cup warming plate: remove this to clean it with water and a little non-abrasive dish soap, rinse and dry. KRUPS... -
Page 18: Descaling
• Unscrew the grid from the brewing head of the appliance and clean it (21). • Dissolve a sachet of KRUPS descaling accessory, reference F054, in half a litre of luke warm water and pour the whole lot into the empty water tank. -
Page 19: Troubleshooting
(Consult the “Cleaning the Machine” section). Troubleshooting Problems Probable causes Corrective actions Espresso not hot enough. Cups, filter and filter holder are Preheat the accessories (cups, cold. filter, filter holder) .See paragraph "Preparing an espresso". KRUPS... - Page 20 The brewing head gasket is. Clean the gasket with a damp dirty. cloth. The brewing head gasket is. Contact an approved Krups defective. service center. ESE pod not positionned Be sure that the paper edges are correctly. inside the basket.
-
Page 21: Making Coffee
We recommend that you filter your water using a Krups Duo Filter cartridge, reference XS 1000 (sold separately). • Follow the illustrations from 23 to 29. -
Page 22: In The Event Of A Problem
• Check if the water tank has been filled above the maximum level. - The time taken for the water to run through is too long and the appliance is very noisy: • descale your coffee maker. Your appliance still does not work? Contact a Krups approved service center. KRUPS... -
Page 23: Limited Warranty
LIMITED WARRANTY This Krups product is warranted for 1 year from the date of purchase against defects in material and workmanship. During this period, the Krups’ product that, upon inspection by Krups, is proved defective, will be repaired or replaced, at Krups’ option, without charge to the customer. - Page 24 Canada: 1-800-418-3325; Mon – Fri 8:30 a.m. – 4:30 p.m. (EST) www.Krups.ca Please note hours are subject to change. Before calling the Consumer Service Department, please have the product code located on the bottom of the unit available. This will assist us in answering your questions. It is helpful if you have the appliance available at the time of your call.
Need help?
Do you have a question about the XP2010 and is the answer not in the manual?
Questions and answers