Table of Contents
Advertisement
Quick Links
Advertisement
Table of Contents

Related Manuals for Olivetti Fax-Lab 115


Summary of Contents for Olivetti Fax-Lab 115
- Page 1 Ink Jet Fax Fax-Lab 115 INSTRUCTIONS...
- Page 2 EDITED/PUBLISHED/PRODUCED BY: Printed in Thailand. Olivetti Tecnost, S.p.A. con unico azionista Code of user manual: 256605R Gruppo Telecom Italia Direzione e coordinamento di Telecom Italia S.p.A. Date of publication: March 2005. Via Jervis, 77 - 10015 IVREA (TO) ITALY Copyright © 2005, Olivetti All rights reserved.
-
Page 3: Table Of Contents
ABLE OF CONTENTS FIRST SECTION RECEPTION EFORE YOU START TO CHOOSE THE RECEPTION MODE ........13 MANUAL RECEPTION ..............14 CONSULTING THE MANUAL ............3 AUTOMATIC RECEPTION ............14 ENVIRONMENTAL RECYCLING ........... 3 RECEPTION WITH TELEPHONE ANSWERING DEVICE .... 14 SAFETY PRECAUTIONS .............. -
Page 5: Before You Start
EFORE YOU START ISK OF SUFFOCATION ONSULTING THE MANUAL • The fax machine and its accessories are wrapped in plastic This manual is divided into two sections: the first section so do not let children play with the packaging material. "... -
Page 6: About The Installation And Setup Parameters
BOUT THE INSTALLATION AND SETUP PARAMETERS As the country default values for each installation and setup parameter may change due to certification requirements or specific customers’ needs, these values do not always corre- spond to those indicated in the manual: it is therefore advis- able to print them before changing them. -
Page 7: About The Fax Machine
BOUT THE FAX MACHINE ONSOLE "Error" LED indicator On, indicates that there are messages or memos in Signals an operating fault during transmission or the memory that have already been played. reception. Blinking, indicates that the memory contains docu- ments that have not been printed, messages or memos that have not been played. - Page 8 • Adjusts the resolution of the documents to be sent and • After two numeric keys (01-50) • Inserts a pause during the dialling of the telephone copied (only with the document inserted in the ADF). have been pressed, automati- or fax number.
-
Page 9: Components
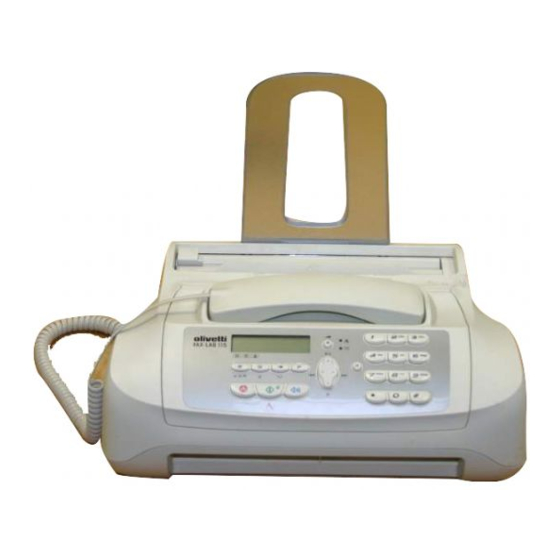
OMPONENTS The figure shows the external and internal parts of fax machine. APER SUPPORT EXTENSION ONNECTION SOCKETS LAIN PAPER FEED COMPARTMENT Maximum capacity: 40 sheets (80gr/m UTOMATIC FEEDER FOR DOCUMENTS TO BE SENT AND COPIED AXIMUM CAPACITY SHEETS OF A UILT IN TELEPHONE HANDSET... -
Page 10: How To Get Started Quickly
OW TO GET STARTED QUICKLY This section provides a basic description of the fax ma- chine, explaining how to install it and get started quickly, us- The fax machine is set up to be connected to the public ing its basic functions only. For a more comprehensive use telephone line. -
Page 11: Setting Some Parameters
COUNTRY COUNTRY TO BE SELECTED ONNECT THE FAX MACHINE TO THE POWER SUPPLY Argentina AMERICA LATINA Australia NZL/AUSTRALIA Austria ÖSTERREICH 1. A. Insert the female connector at one end of the power ca- Belgium BELGIUM ble into the male connector Brazil BRASIL on the rear of the fax ma-... -
Page 12: To Set The Date And Time
O SET THE DATE AND TIME If you have chosen the 12-hour time format, the display will show the letter "p" (post meridiem) or the letter "a" (ante The first time you connect the fax machine to the meridiem). To switch from one format to the other: power supply or whenever there is a power failure 1. -
Page 13: Setting Up The Fax Machine
8. If there are any wrong characters, move the cursor to To change the position: the wrong character, by pressing the keys: 1. Press the key until the display shows: 9. Then overwrite the character with the correct one, by pressing the keys: 2. - Page 14 Once the print head has been inserted, the operator NSERT THE PRINT HEAD console closed and the handset replaced, the fax ma- chine starts the nozzle cleaning and checking procedure, which is completed by: • the printing, on the sheet loaded automatically, of a diagnos- tic test sheet containing: Once the print head provided with the machine is worn, re- - a numbered scale, for checking the flow of ink and the...
-
Page 15: Transmission
O HEAR THE DIALLING TONE WHEN SENDING A DOCUMENT RANSMISSION If you follow the procedures described below, you can imme- 1. If these diagrams are not diately use the fax machine to carry out simple trans- enough, see "To send a docu- mission operations. -
Page 16: Manual Reception
3. To view the other available options, "MANUAL" and " " ECEPTION IN PHONE MODE "PHONE/FAX", press the keys: The behaviour of the fax machine in this mode depends on 4. To confirm the setting, press the key: who is calling and whether you are in or not when the fax is received. -
Page 17: Using The Telephone
O TELEPHONE BY RUNNING A SEARCH IN THE PHONE BOOK SING THE TELEPHONE Do not place the document in the ADF. When you engage the line by lifting the telephone hand- 1. Lift the handset to engage the line. set, you may use all the telephone functions available on ordinary telephones sold on the market. -
Page 18: Making Copies
9. To confirm your choice, press the key: AKING COPIES The display shows: HAT DOCUMENTS CAN BE COPIED 10. To display the other two types of contrast available, "CONTRAST: LIGHT" or "CONTRAST: DARK", press the keys: As for transmission, copying requires the document to be inserted in the automatic document feeder (ADF). - Page 19 ABLE OF CONTENTS SECOND SECTION TO SET IT UP FOR THE TELEPHONE LINE TROUBLESHOOTING GUIDE TO CONNECT IT TO A PUBLIC LINE ......... 19 WHAT HAPPENS IF THERE IS A POWER FAILURE ....45 TO CONNECT IT TO A PRIVATE LINE (PBX) ......19 WHAT HAPPENS IF THE PAPER OR INK HAS RUN OUT ..
- Page 21 O SET IT UP FOR THE TELEPHONE LINE O CONNECT IT TO A PUBLIC LINE O CONNECT IT TO A PRIVATE LINE The fax machine is set up to be connected to a public To connect the fax machine to a private line and be able to use it also on a public line, proceed as follows: line.
- Page 22 12. To confirm the setting, press the key: 13. To return the fax machine to its initial stand-by mode, press the key: n o t E Having confirmed the "EXT.LINE:FLASH" dialling mode to connect to the public line, simply press the key before dialling the correspondent’s fax or telephone number.
- Page 23 RANSMISSION AND RECEPTION OPERATIONS O SEND A DOCUMENT O PLACE THE DOCUMENT IN THE ADF 1. Push the paper support exten- HAT DOCUMENTS MAY BE USED sion in the slot until it clicks into position. Dimensions • Width 210 mm •...
- Page 24 O ADJUST THE CONTRAST AND RESOLUTION O SEND A DOCUMENT Before sending a document you can make some ad- 1. Insert the document in the automatic document feeder justments so as to optimize the printing quality. (ADF). The display shows on the top line: O ADJUST THE CONTRAST 1.
- Page 25 2. To hear the dialling tones, press the key: UTOMATIC REDIAL The display shows: If no connection is established due to line errors or because the correspondent’s number is busy, the fax machine auto- and the length of the transmission in minutes and sec- matically redials the number of times laid down by the legis- onds in the top right-hand corner.
- Page 26 7. Press the key: O RECEIVE A DOCUMENT The fax machine prompts you to enter another number: You can set up the fax machine to receive the documents sent by your correspondents in four separate modes: If you want to send the document to more than one •...
- Page 27 2. As soon as you hear the fax machine signal or if the TOUCH DIALLING correspondent asks you to receive a document, press the key: You can assign each of the 10 numeric keys (0 - 9) a The display shows: fax number or a telephone number and a name which will be dialled automatically when you press this key for more than a second.
- Page 28 12. Enter the correspondent's name (max. 16 characters) as you did for your name (see "All that is missing If you want, you can print the information saved on the 10 now is your name and fax number", chapter "How one-touch dialling keys and 50 speed dialling codes to get started quickly").
- Page 29 4. To start sending, press the key: The display shows the digits of the fax number that you associated with it. If the name has also been saved, the display shows this, too. Once the number has been dialled, transmission con- tinues in the ordinary way.
- Page 30 • Activity report: contains information about the last 42 trans- O ENABLE DISABLE THE AUTOMATIC PRINTING OF THE actions carried out (transmission and reception operations), TRANSMISSION AND FAILED TRANSMISSION REPORT which the fax machine keeps in its memory and is printed automatically after the thirty-second transaction or on re- quest.
- Page 31 5. To view the other available option, "BROADC. REP.: 2. Press the key: OFF", press the keys: The display shows: 6. To confirm your choice, press the key: 3. Press the key until the display shows: 7. To return the fax machine to its initial stand-by mode, press the key: 4.
- Page 32 HE TELEPHONE ANSWERING DEVICE If you have purchased one of the models of fax equipped with HE TAD CONSOLE a built-in telephone answering device you can perform the same functions as those performed by external telephone answering devices. Keys only present on model with a telephone an- You can therefore: swering device: •...
- Page 33 6. To confirm the deleting, press the key: O CHANGE THE TAD ACCESS CODE The display shows: 1. Press the key 7. To return the fax machine to the initial stand-by mode, until the display shows: press the key: 2. To confirm the setting, press the key: The display shows: The TAD access code may also be used to: •...
- Page 34 • CALL TRANSFER MESSAGE, which has a maximum length O LISTEN TO OUTGOING MESSAGE of 10 seconds, to inform you on a remote telephone that there are new messages for you on the telephone answer- 1. Press the key ing device. To actually transfer the new messages, you must: until the display shows: •...
- Page 35 O LISTEN TO INCOMING MESSAGES AND O RECORD MEMOS MEMOS As mentioned previously, the telephone answering de- vice may be used to record one or more memos, which If there is one or more incoming messages or memos in are handled in the same way as incoming messages. the memory of the telephone answering device that have 1.
- Page 36 O TRANSFER MESSAGES AND MEMOS TO A O DELETE THE MESSAGE OR MEMO YOU ARE LISTENING TO REMOTE TELEPHONE 1. To start listening to the messages or memos, press the key: If you wish, you can program the TAD to call you on a remote telephone at a given time to let you know The display shows: that there are new messages on the telephone answer-...
- Page 37 n o t E Typing 0 after an operating sequence from 1 to 5 aborts the function in progress. If you have already recorded a transfer message, the display Typing 0 after a programming sequence from #1 to #6 aborts will show the message "PLAYING"...
- Page 38 3. Press the key 7. To change the outgoing message recorded previously or to record a new one. until the display shows: The display shows: 4. To confirm the setting, press the key: 8. To start recording, press the key: The display shows: The display shows: 5.
- Page 39 5. If the display shows: "PRINT OUT:EXIT", to display the option: "PRINT OUT: <|>", press the keys: 6. To start printing, press the key: Once this operation has been completed, the fax ma- chine automatically returns to its initial stand-by status.
- Page 40 ORE SOPHISTICATED OPERATIONS 5. To choose one of the other available settings, THER USEFUL RECEPTION SETTINGS "SURPLUS:OFF" or "SURPLUS:ON", press the keys: 6. To confirm your choice, press the key: O REDUCE THE PRINTING AREA OF A DOCUMENT RECEIVED 1. Press the key 7.
- Page 41 3. Press the key: 6. To confirm your choice, press the key: The display shows: 7. To return the fax machine to its initial stand-by mode, 4. Press the key press the key: until the display shows: n o t e 5.
- Page 42 4. Press the key O CHANGE THE RING VOLUME until the display shows: 1. Press the key until the display shows: 5. Press the keys until the display shows: 2. Press the key: The display shows: 6. To confirm your choice, press the key: The display shows: 3.
- Page 43 O CHANGE THE REMOTE CONTROL CODE THER USEFUL TRANSMISSION SETTINGS If the fax machine is connected to an extension that operates in tone dialling mode and is set up for manual O CHANGE THE POSITION OF YOUR NAME AND FAX reception, whenever there is a call from a corre- NUMBER spondent wishing to send you a document, you can set...
- Page 44 4. Press the key O REGULATE THE BUZZER VOLUME until the display shows: The buzzer indicates particular operating conditions and faults or errors. 5. To view the other available option, "RETRANS.DOC.: The volume of the buzzer may be set to three levels, ON", press the keys: "High", "Medium"...
- Page 45 6. To confirm your choice, press the key: ECEIVING A DOCUMENT IN POLLING MODE 7. To return the fax machine to its initial stand-by mode, press the key: IRST OF ALL WHAT POLLING IS It is a transmission request that a fax machine makes to an- other fax machine so that the latter sends the document re- quested automatically.
- Page 46 n o t e You can cancel the polling reception setting by pressing the button. O CHANGE DELETE A POLLING RECEPTION THAT HAS BEEN SET 1. Press the key until the display shows: 2. Press the key: The display shows: 3.
- Page 47 ROUBLESHOOTING GUIDE • if it is printing a report, the fax machine displays HAT HAPPENS IF THERE IS A POWER FAILURE some messages to prompt you to abort the printing proc- ess and return to its initial stand-by mode; • if it is receiving a document: If there is a power failure, the fax machine keeps the it stops printing and starts to save the document.
- Page 48 RROR CODES The error codes printed both on the transmission report and the activity report consist of two digits indicating the cause of the error. To save space, the two-digit code without any message is printed on the activity report. CODE MESSAGE CAUSE OF ERROR...
- Page 49 IGNALS AND MESSAGES • You aborted the copy operation by pressing the key. • An error occurred during the document copying phase, pre- Any problems that may arise are generally indicated by venting it from being printed: check the type of fault on the acoustic signals (accompanied, in some cases, by visual display and correct it.
- Page 50 Reception continues in the memory because an error occurred You have installed a disposable print head for the first time or during the reception of a document, preventing it from being you have removed and reinstalled it: select the relevant an- printed: check the type of fault on the bottom line of the display swer.
- Page 51 AINTENANCE OPERATIONS Warning! O REPLACE THE PRINT HEAD 7. Avoid touching the nozzles. 1. Lower the handset and place it on a stable surface. 8. Insert the new print head in its compartment with the electrical contacts facing towards the print head compartment.
- Page 52 LEANING THE PRINT HEAD AND TESTING O CLEAN THE ELECTRICAL CONTACTS OF THE NOZZLES THE PRINT HEAD If you notice a deterioration in print quality, you can With the fax machine disconnected from the power socket: quickly clean the print head and test the nozzles by following a procedure that ends by printing out the di- 1.
- Page 53 7. Place one end of the roller on O CLEAN THE OPTICAL READER the pin situated on the left-hand side of the fax machine, as indi- cated by the arrow. Dust accumulating on the glass surface of the optical reader may cause problems in the scanning of documents.
- Page 54 N O T E O REMOVE JAMMED DOCUMENTS If you cannot manage to remove the jammed document or sheet of paper after performing the removal operations, it may be trapped inside the fax machine. If this is the case, proceed During transmission or copying, a document could get as follows: jammed (this condition is signalled by the display showing...
- Page 55 ANUFACTURER AND CUSTOMER SERVICE ANUFACTURER Olivetti Tecnost, S.p.A. con unico azionista Gruppo Telecom Italia Direzione e coordinamento di Telecom Italia S.p.A. Via Jervis, 77 - 10015 IVREA (TO) ITALY USTOMER SERVICE If the fax machine is not working as it should, or you want to ask the manufacturers something, call the number indicated on the "Warranty Card".
- Page 56 ECHNICAL DATA ENERAL CHARACTERISTICS ECEPTION CHARACTERISTICS Model ......Desktop transceiver Printing system ..... Printing on plain paper, bubble ink jet printer Display ......LCD 16 + 16 char. Max. printing width ......... 204 mm Capacity memory ..360 Kbyte Max. printing length ........ 282 mm Dimensions Printing paper .........
- Page 57 NDEX Acoustic signals 48 Installation and setup parameters Automatic document feeder (ADF) 7 , 13 , 21 about the installation and setup parameters 4 Automatic redial 23 printing the setup parameters 29 setting some parameters 9 Buzzer volume 42 Line characteristics private line 19 public line 19 Casing...
- Page 58 Reports activity report 28 automatic printing 28 One-touch dialling failed transmission report 28 to change 26 how to read the reports 28 to send a document with one-touch dialling 26 last broadcast transmission report 28 to set 25 last transmission report 28 to telephone with one-touch dialling 15 power failure report 27 Optical reader...
- Page 59 Telephone to redial the last numbers 15 to telephone by running a search in the phone book 15 to telephone with one-touch dialling 15 to telephone with speed dialling 15 using the telephone 15 Telephone answering device 30 , 54 length of memos and incoming messages 33 outgoing messages and memos 31 special functions 35...
- Page 61 DIRECTIVE 2002/96/CE ON THE TREATMENT, COLLECTION, RECYCLING AND DISPOSAL OF ELECTRIC AND ELECTRONIC DEVICES AND THEIR COMPONENTS INFORMATION 1. FOR COUNTRIES IN THE EUROPEAN UNION (EU) The disposal of electric and electronic devices as solid urban waste is strictly prohibited: it must be collected separately. The dumping of these devices at unequipped and unauthorized places may have hazardous effects on health and the environment.
- Page 63 Monochrome print head part number Single-block print head: P/N B0336F...
- Page 64 256605R...
Need help?
Do you have a question about the Fax-Lab 115 and is the answer not in the manual?
Questions and answers