
Related Manuals for Miele W 866


Summary of Contents for Miele W 866
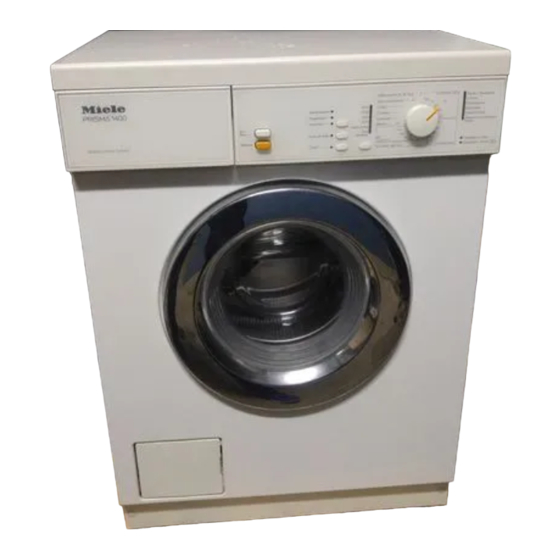
- Page 1 Operating instructions for Washing machine W 866 It is to read these operating instructions before installing or using the machine, to avoid the risk of accidents, or damage to the machine. M.-Nr. 05 684 270...
- Page 2 Old appliances contain materials which can be recycled. Please contact your The transport and protective packing dealer, your local waste collection cen- has been selected from materials which tre or scrap merchant about potential are environmentally friendly for disposal recycling schemes. and can normally be recycled.
- Page 3 ......... . 2 Disposal of the packing material .
-
Page 4: Table Of Contents
........... . . 22 Programme selection . - Page 5 ..........44 The programme does not start.
- Page 6 a Electric supply cable e Facia panel with controls b Inlet hose (able to withstand pres- f Door sures of at least 70 bar) g Access panel for drain pump, drain c Flexible drain hose (with detachable filter and emergency door release swivel elbow) h Four height adjustable feet d Detergent dispenser drawer...
- Page 7 For spin speed, Rinse hold and With- To switch the machine ON or OFF or to interrupt a programme. out final spin Opens the machine door. Showing the selected spin speed. Starts the wash programme Can be turned clockwise and anti-clockwise.
- Page 8 Any other applications may be danger- Repairs should only be undertaken by a ous. The manufacturer is not liable for Miele approved engineer. damage resulting from improper use or Ensure current is not supplied to the operation.
- Page 9 Faulty components must only be exchanged for Miele original spare Turn off the stopcock if the ma- parts. Only when these parts are fitted chine is to be left for any length of can the safety standards of the ma- time (e.g.
- Page 10 If in Accessory parts may only be fitted doubt, contact the Miele Customer Ser- when expressly approved by Miele. vice Dept. or your Miele Dealer. If other parts are used, guarantee, per-...
- Page 11 – Use the Short wash option for nor- – Water consumption and energy us- age are determined by the size of the mally or very lightly soiled laundry. load. Load to the maximum recom- – Do not exceed the amounts of deter- mended for the programme selected.
- Page 12 Before using the machine for the first Several factors including the water time ensure that it is correctly in- hardness level in your area will affect stalled and connected. See the rele- how much detergent you should use. vant section under "Installation". The small dial in the detergent dis- Also check that the fluff filter is se- penser drawer can be set purely as a...
-
Page 13: Brief Guide
^ Sort the washing by colour and by care label symbols. Most garments The headings numbered (A,B,C,...) have a textile care label in the collar show the operating sequence and can or side seam. be used as a brief guide. Dark textiles often contain excess dye and should be washed separately sev- eral times before being included in a... -
Page 14: Programme
Door Unfold washing and load loosely in the – The programme selector should be drum. To achieve best results it is ad- pointing to Finish, the indicator light Anti crease/Finish is lit up in the visable to make up mixed loads con- sisting of both large and small items. - Page 15 A maximum of two additional options can be chosen, provided they are com- patible with the programme selected, (see the Programme survey in the Sec- tion on programmes). Only one option out of Soak , Pre-wash and Short wash can be selected. ^ Press the "Spin"...
- Page 16 When the Finish indicator light comes on the laundry can be removed from Otherwise there is a danger of objects the drum: being placed inadvertently in the drum. Door If these remained unnoticed and were washed in the next load, they could damage the washing.
- Page 17 The door opened when: Washing can be added or removed af- – the suds temperature is above ter the programme has already started, – the additional option Water plus has when using the following programmes. been selected, – COTTONS – programme locking is switched on, –...
- Page 18 To select a different programme pro- ceed as follows: ^ With the I-ON/0-OFF button switch off ^ Press the I-ON/0-OFF button. the appliance. ^ To continue with the same ^ Turn the programme selector to Fin- ish . programme press the I-ON/0-OFF button again.
- Page 19 All modern detergents produced for automatic washing machines are suit- Hardness Type of Hardness °dH range water level in German able, including liquid, compact (con- (hardness) mmol / l centrated), tablets, liquid tablets and soft 0 - 1.3 0 - 7 special application detergents.
-
Page 20: Water Softeners
First add detergent and then the water softener. Dispense detergent as specified for soft water areas. Miele do not recommend connecting the machine to a household water soft- ener. If you wash using several components (e.g. special application detergents), i = Compartment for pre-wash. - Page 21 ^ Open the lid of compartment p. ^ Add fabric conditioner or texturiser to the compartment p. ^ Turn the programme selector to Starch . ^ Select a spin speed. ^ Press the START button. ^ Measure and prepare starch in ac- cordance with the manufacturer’s in- structions.
- Page 22 Cottons and linen fabrics, e.g. bed linen, table 95°C to 30°C 1400 linen, towelling, jeans, underwear, T-shirts, nap- pies. Wash load as for standard tests 60°C 1400 (60°C) white nylon, white polyester fabrics (50°C), 60°C to 30°C coloured nylon, polyester, cotton and viscose fab- rics with special finishes, acrylic, cotton fabrics, coloured polyester / cotton fabrics, (40°/30°C) min- imum iron fabrics not washable at higher tempera-...
- Page 23 – 5 kg Soak With heavily soiled items select Soak or Pre-wash . Wash – Pre-wash dark colours in liquid detergent. – Short For normally soiled items select Short . – Water plus (Option 1,2,3,4) 5 kg For test institutes: Programme setting for tests according to EN 60456 Stan- dard Programme –...
- Page 24 Soak optional optional optional – Pre-wash optional optional optional – ß ß ß ß Main wash Top-up rinse from 75°C programmable – – – Graduated rinsing – from 50°C – – No. of rinses – normal 3 or 4 – part load –...
- Page 25 high cotton high polyester content content – – – – optional optional ß – – – optional optional ß ß ß – – – – – – – – – ß – – – – – – – 3 or 4 –...
- Page 26 (select the appropriate temperature ac- cording to the temperature on the care label symbol) Cottons Normal (maxi- Cottons, Minimum iron, Quick wash no bar mum) machine action and nor- mal spinning Synthetics Reduced (me- Delicates single bar dium) machine action and re- *If the gentle action option has been duced spinning programmed into your machine via the...
- Page 27 Hand wash (if a temperature is not specified, use the low- est temperature or cold) Do not wash Dry clean Do not dry clean Suitable for chlorine bleach- Do not use chlorine bleach At normal temperature At low temperature Do not tumble dry Hot iron Medium hot iron Cool iron...
-
Page 28: Programme Selection
To select an additional option to the ba- sic programme press the button for that option. The indicator light for the option Add the total amount into compart- comes on. ment j or directly on to the laundry If an additional option is chosen which in the drum. - Page 29 The water level increases in soak , A final spin is carried out at the end pre-wash , main wash and/or rinses , of each of the basic programmes, if a and / or an extra rinse can be carried spin speed had been selected.
-
Page 30: Sequence
Programme locking prevents the ma- ^ Press the START button for at least 5 chine from being opened or the seconds. programme cancelled during a wash programme. Exception: The indicator light Anti-crease/Finish in the Sequence display flashes. ^ Select a programme, (see Brief guide ^ Turn the programme selector to the to washing correctly). - Page 31 Programmable functions enable the To select the "Maximum water level" user to introduce further features as programmable function: turn the required. They remain stored in programme selector to - memory until they are cancelled by Poly/Cottons the user. To activate "Maximum water level" press the START button once.
- Page 32 programme, e.g. when rinse results are particularly important. The Water plus button offers four op- Before the "Water plus system" pro- tions, increasing water level and / or grammable function can be selected bringing in an extra rinse cycle. To you must first select programming activate the option press the Water mode.
- Page 33 By pressing the START button you can When you have selected the Option you select the other options. To confirm a require, SWITCH the machine OFF with new selection another indicator light co- the I-ON/0-OFF button. The Option is mes on and the previous one goes out. stored in the machine’s memory.
- Page 34 To select the "Activating the i com- partment" programmable function turn This function should be activated if the programme selector to - Spin ***. traditional "big box" detergents are used. For the first 10 seconds of the Cottons main wash cycle water flows To activate "Activating the i compart- in through compartment i.
-
Page 35: Soak
To select the "Soak time" programmable This is accessed for a programme by function turn the programme selector to pressing the SOAK button on the fa- Cold. cia. The Rinse indicator light comes on in the sequence display. This shows that You can programme a soak time of: a "Soak time"... -
Page 36: Water Plus
To select the "Gentle action" program- For gentle washing of slightly soiled mable function turn the programme se- items. Drum action is reduced. lector to - ***. Gentle action can be used with the COTTONS, MINIMUM IRON, QUICK WASCH, MIXED WASH - Poly/Cottons and Starch programmes. - Page 37 To select the "Top-up rinse for Cottons" At the end of the main wash addi- programmable function turn the tional water flows into the drum to programme selector to - cool the suds down. cold ***. Hot suds can damage plastic drainage pipes.
-
Page 38: Spin
As this programmable function is active when the machine is first delivered, the If an additional option is selected for Rinses indicator light will come on in a programme, and / or the spin op- the sequence display as soon as the tion is altered, the machine stores programme selector is turned to these changes in memory at the start... - Page 39 The washing machine must not be hosed down. A microfibre "E-Cloth" is available from the Miele UK Spare Parts Department, Part Number 98013530, which is suit- able for cleaning surfaces such as stainless steel, glass, plastic and...
- Page 40 ^ Pull out the detergent dispenser drawer until a resistance is felt. ^ Remove the siphon from compart- ment p. Wash under running warm water and replace. ^ Press down the red release catch and at the same time pull the drawer right out of the machine.
- Page 41 Check the fluff (drain) filter initially after 3-4 washes to ascertain how often it is likely to require cleaning. With normal cleaning approx. 2 litres of water run out. If the drain outlet is clogged, more wa- ter will be retained in the machine Caution: If laundry has been washed ^ Open the flap.
- Page 42 ^ Once the flow of water ceases, re- ^ Clean the inside of the fluff filter hous- move the fluff filter completely. ing. ^ Clean the fluff filter thoroughly. Remove any deposits of limescale and detergent or foreign objects from the ^ Remove any foreign objects (e.g.
- Page 43 If replacing the inlet hose only use a hose able to withstand pressure of at least 70 bar. Miele’s own hoses meet this requirement. ^ First turn off the stopcock. ^ Unscrew the threaded union connect-...
- Page 44 With the help of the following notes minor faults in the performance of the appli- ance, some of which may result from incorrect operation, can be put right without contacting the Service Department. Repair work to electrical appliances should only be carried out by a suit- ably qualified person in accordance with local and national safety regulations.
- Page 45 Check drain The water outlet is Clean the fluff (drain) filter blocked. and drain pump. The drain hose has The maximum drain height been fixed too high. is 1 m. Check inlet The water inlet is – Open the stopcock. blocked –...
- Page 46 Check drain The drain outlet is Clean the fluff (drain) filter restricted. and drain pump. Check inlet The water inlet is re- – make sure the stopcock is stricted or the water opened wide enough. pressure is too low. – make sure the inlet hose is not kinked.
- Page 47 The four feet are not Level the machine. See advice resting evenly on the on installation. floor. The spin speed se- Select a higher spin speed lected was too low. next time. The machine is not Put the plug in the socket and connected to the elec- switch on.
- Page 48 These do not indicate a fault. They occur at the begin- ning and end of a pumping sequence as a normal part of the operation. The water supply pres- – Clean the filter in the water sure is too low. inlet system.
-
Page 49: Extra Cleaning
Insufficient amounts of – Add more detergent. detergent were used to – Before washing the next load break down the particles run a COTTONS programme of grease, e.g. from oils at 70°C or above with pow- and lotions, in heavily der detergent but without a soiled laundry. - Page 50 ^ Place a bucket under the stopcock. ^ Switch off the washing machine. ^ Turn on the stopcock. ^ Open the fluff (drain) filter flap and If 5 litres of water flow into the bucket in drain the water as described in 15 seconds the water pressure is cor- "Cleaning and care", (fluff (drain) filter rect.
- Page 51 1 year. – Your Miele Dealer or See the guarantee card supplied with the machine for further details. – Your nearest Miele Service depart- ment (see back cover for the ad- dress). The indicator light or check light...
-
Page 52: Installation
The most stable part of the floor is usually in the corner. If the machine is installed on a raised plinth, it secured against slippage during spin using A Turn the left-hand transit bar 90°. retaining clips (available from the Miele Spare Parts Dept). - Page 53 B Turn the right-hand transit bar 90°. D Plug the two holes with the plastic caps supplied. The washing machine must not be moved without the transit bars in place. Store the transit bars in a safe place for future use. They must be re-fitted if the machine is to be moved again (e.g.when moving house).
- Page 54 The machine must stand perfectly level on all four feet to ensure safe and proper operation. ^ With a screwdriver loosen and turn the foot together with the counternut to the left, (see illustra- tion below) and screw out. ^ Put the machine back on all four feet. ^ Use a spirit level to check the ma- Incorrect installation may increase elec- chine is standing level.
- Page 55 ^ Fitting instructions are supplied with * All parts marked with a * are available the conversion kit. from the Miele Spare Parts or Sales De- N.B. Cover plate partment, and must be fitted by a suit- The cover plate must be fitted in place ably competent person according to of the machine’s lid to ensure electrical...
- Page 56 Longer hoses 2.5 or 4 metres in length are available as optional extras. The machine should be connected to a mains water supply in accordance with The machine is designed to operate standard regulations. In Germany the with a water flow pressure of 1 bar mini- washing machine is not required to mum up to 10 bar maximum.
- Page 57 If required, the drain hose can be ex- tended to a length of 5 m. The neces- sary parts can be purchased from the Miele Spare Parts Department, or your Miele dealer. For a delivery head of more than 1 m (up to a maximum of 1.8 m) a second...
- Page 58 All electrical work should be carried out only by a suitably qualified and compe- If this machine is fitted with a tent person, in strict accordance with non-rewireable plug and the socket out- national and local safety regulations. lets are not suitable for the plug sup- plied or if the existing plug needs to be Ensure power is not supplied to the ap- replaced by a new one, the old plug will...
- Page 59 The wires in the mains lead are col- oured in accordance with the following code: Green/yellow = earth Blue = neutral Brown = live If the colours of the wires in the mains lead of this appliance do not corre- spond with the coloured markings iden- tifying the terminals of your plug, pro- ceed as follows:...
- Page 60 (without any additional op- tions or in kWh litres normal short programmable functions) 95°C 5.0 kg 1.70 1 h 54 mins 1 h 26 mins 60°C* 5.0 kg 0.95 1 h 58 mins 1 h 16 mins 40°C 5.0 kg 0.55 1 h 58 mins 1 h 06 mins...
- Page 61 Height 85.0 cm Width 59.5 cm Depth 60.0 cm Depth with door open 97.0 cm Weight 92 kg Max. floor load 1600 Newton (ca. 160 kg) Capacity 5 kg Dry laundry Voltage see Data plate Rated load see Data plate Fuse rating see Data plate Water flow pressure min.
- Page 64 Alteration rights reserved/3702 M.-Nr. 05 684 270 / V03 This paper consists of cellulose which has been bleached without the use of chlorine.
Need help?
Do you have a question about the W 866 and is the answer not in the manual?
Questions and answers