Table of Contents
Advertisement
Quick Links
Manual Rev.
2008+
1.01
Lancer
9/28/2007
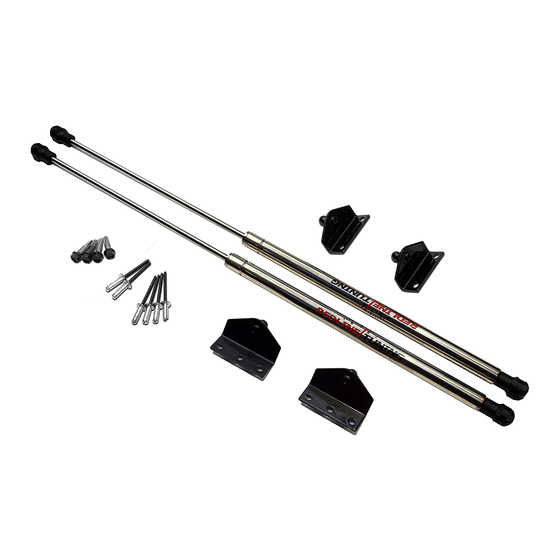
Step 1 - Unpack QuickLIFT system and verify contents.
Remove all items from the packing tube. You should have the following before beginning:
* (2) Gas springs (RT-QL-170-A6A) - Be sure to cycle them a few times before installing.
* (4) #2-3/16" Multi-grip rivets (used on hood brackets)
* (2) ball-studs and washers each with a locking nut.
* (2) mounting brackets
* Printed Color Instructions
* Gas Spring locking clips - (Already installed in the gas spring ball-ends -
Remove before assembly)
Step 2 - Gather the required tools.
Please gather the following tools before you begin the installation:
* Power Drill
* 3/16", indexed #11 & 5/16" drill bits
* Fine permanent marker or felt tip pen
* Tape measure or ruler
* Masking tape
* Hammer & center punch
* Rivet gun, capable of 3/16" rivets (most brands can handle this
size)
Note: Only use the rivets supplied in the QuickLIFT system.
Step 3 - Mark centerline of fender bracket location.
A. Open and prop your hood.
B. Standing on the driver's side in the middle of the engine compartment, examine the area on the inner fender lip.
Note the overhanging fender mounting bolt. The centerline of this bolt should be used to align the ball-stud
mounting bracket (offset 3/8" to the left or front of the vehicle). Back of bracket up against lip.
C. Place the bracket on the flat surface aligning either the left edge of the bracket with the metal shown below, or
using the measurement shown to the right (centerlines offset by 3/8").
This manual is property of Redline Tuning LLC. Any unauthorized duplication or use
without written permission from Redline Tuning LLC, violates Copyright laws.
Copyright © 2003 Redline Tuning LLC. All Rights Reserved.
QuickLIFT Installation Guide
Recommended: Craftsman standard or
Swivel Riveter (shown - 974749) - $9.99 to $17.99
2008+ Mitsubishi Lancer
(4 rivets)
(QTY 2)
(QTY 2)
Advertisement
Table of Contents

Related Manuals for Redline Tuning Lancer


Summary of Contents for Redline Tuning Lancer
- Page 1 Lancer Copyright © 2003 Redline Tuning LLC. All Rights Reserved. 9/28/2007 2008+ Mitsubishi Lancer QuickLIFT Installation Guide Step 1 - Unpack QuickLIFT system and verify contents. Remove all items from the packing tube. You should have the following before beginning: (4 rivets) * (2) Gas springs (RT-QL-170-A6A) - Be sure to cycle them a few times before installing.
- Page 2 Step 4 - Align bracket and mark hole for drilling. Figure 4A A. Verifying the measurement from Step 3, centerline of bracket should be 3/8” to left of the fender bolt. You will need to view the mounting location directly from the top as shown in Figure 4A.
- Page 3 Step 8 - Repeat steps 3-7 and install the passenger side fender bracket. A. The vehicle fender has a symmetrical structure. Repeat Steps 3-7 to install the passenger fender bracket. Take your time. Step 9 - Position and mark hole for hood ball-stud. On the hood hinge, locate the center end of the location shown to the right.
- Page 4 Step 12 - Repeat steps 9-11 to attach the passenger side hood ball-stud. A. Repeat Steps 9-11 to attach the passenger side ball-stud. The vehicle is symmetrical so the same locators can be used to make both sides the same. Step 13 - Cycle both gas springs a few times.
Need help?
Do you have a question about the Lancer and is the answer not in the manual?
Questions and answers