Table of Contents
Advertisement
Quick Links
Advertisement
Table of Contents

Related Manuals for AEG C41029G


Summary of Contents for AEG C41029G
-
Page 1: User Instructions
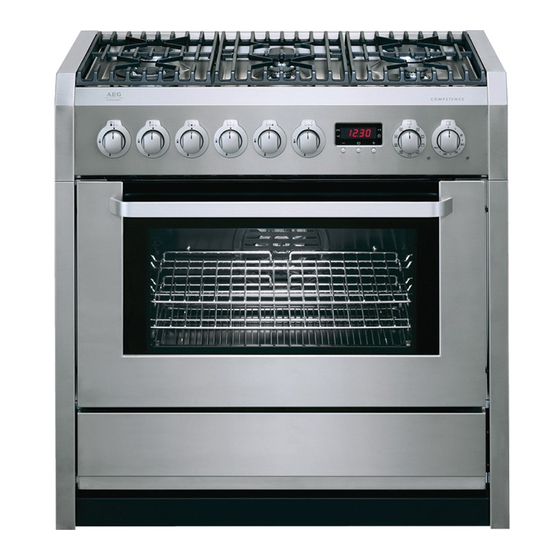
C41029G C41029V Range Cooker User Instructions PERFECT IN FORM AND FUNCTION... - Page 2 Thank you for choosing our product. From now on, cooking will always be pleasantly creative with your new cooker. We recommend carefully reading all the instructions in this manual, which includes detailed information about the most suitable conditions for using the cooker correctly and safely.
-
Page 3: Table Of Contents
Contents 1. Warnings for safety and use ________________________________ 5 2. General information ______________________________________ 6 Technical service __________________________________________________________ 6 3. Description of controls_____________________________________ 7 The front panel ____________________________________________________________ 7 4. Using the cooking hob ___________________________________ 12 Switching on the burners ___________________________________________________ 12 Switching off the burners ___________________________________________________ 12 5. - Page 4 11. Guarantee Conditions ___________________________________ 23 11.1 Standard guarantee conditions ______________________________________________ 23 11.2 Exclusions ______________________________________________________________ 23 11.3 European Guarantee ______________________________________________________ 23 12. Installation ____________________________________________ 24 12.1 General warnings _________________________________________________________ 24 12.2 Electric connection ________________________________________________________ 24 12.3 Power consumption of the ceramic hob________________________________________ 26 12.4 Ventilation requirements ___________________________________________________ 26 12.5 Gas connection __________________________________________________________ 27 12.6 Stability chain ____________________________________________________________ 28...
-
Page 5: Warnings For Safety And Use
Warnings 1. Warnings for safety and use THIS MANUAL IS AN INTEGRAL PART OF THE APPLIANCE. IT SHOULD BE KEPT IN GOOD CONDITION AND CLOSE TO THE APPLIANCE FOR THE WHOLE LIFECYCLE OF THE COOKER. WE RECOMMEND READING THIS MANUAL VERY CAREFULLY BEFORE USING THE COOKER. -
Page 6: General Information
DO NOT USE ANY PAN OR ACCESSORY THAT EXCEEDS THE OUTER PERIMETER OF THE HOB. THE RATING PLATE WITH THE TECHNICAL DATA, SERIAL NUMBER AND THE BRAND IS CLEARLY VISIBLE ON THE BACK OF THE APPLIANCE. THE PLATE MUST NEVER BE REMOVED. THE APPLIANCE SHOULD ONLY BE USED BY ADULTS. -
Page 7: Description Of Controls
Instructions for the user 3. Description of controls The front panel All the commands and controls for the cooking hob and oven are on the front panel. DESCRIPTION OF HOB CONTROL KNOB The flame is ignited by simultaneously pressing and turning the knob anticlockwise to the low flame symbol . -
Page 8: Instructions For The User
DESCRIPTION OF CERAMIC HOB CONTROL KNOBS Besides the normal knobs that regulate the energy, the ceramic hob is equipped with knobs for differentiated heating. Settings from 1 to 11 control the heating of the internal element, setting the knob to the symbol outer element also operates. - Page 9 Instructions for the user COOK TIME END TIME COUNTDOWN TIME DECREASE CONTROL SELECTOR CONTROL INCREASE CONTROL The time of day must be set before the main oven will operate manually. SET THE TIME OF DAY The oven has a 24 hour clock. When the electricity supply is first switched ON, the display will show 12.00 and the 'Time' ( ) indicator neon will flash as Fig.
- Page 10 TO CANCEL THE COUNTDOWN If you change your mind and want to cancel the 'Countdown', press the Selector Control button until the 'Countdown' indicator ( control (-) until 0.00 shows in the display as Fig. 5. The 'Countdown' indicator ( seconds and then return to the time of day.
- Page 11 Instructions for the user B) TO SET THE TIMER TO SWITCH OFF ONLY i) Ensure the electricity supply is switched ON and that the correct time of day is displayed, e.g. 10.00 a.m. as Fig. 9. ii) Place food in oven. iii) To set the length of cooking time, press the Selector Control button until the 'Cook Time' ( illuminated.
-
Page 12: Using The Cooking Hob
4. Using the cooking hob Make sure that the flame caps, the burner caps and the pan supports are fitted correctly. During normal operations, the appliance heats up considerably. Caution should therefore be used. Do not allow children to approach the appliance. Do not leave the cooking hob unattended while it is on. -
Page 13: Using The Ceramic Hob
Instructions for the user 5. Using the ceramic hob During normal operations, the appliance heats up considerably. Caution should therefore be used. Do not allow children to approach the appliance. Do not leave the ceramic hob unattended while it is on. General warnings The first time it is heated, the ceramic hob may develop an acrid or burnt smell caused by oily residue from manufacturing, which disappears completely after repeated use. -
Page 14: Using The Electric Oven
6. Using the electric oven When the oven or grill is operating, the outer surface and oven door can become very hot. Keep children away from the appliance. Do not allow children to sit on the oven door or play with it. Do not use the door as a stool. -
Page 15: Cooking With The Grill + Spit
Instructions for the user Cooking with the grill + spit Turn the function switch knob to position (MAX). The grill and spit operate at the same time. Cooking with the spit Proceed as follows: • insert the spit supports A into the appropriate holes B on the sides on the dripping pan, taking care that the support including the rod C is on the left hand side of the dripping pan;... -
Page 16: Cooking Suggestions
7. Cooking suggestions Suggestions for using the hob burners correctly The diameter of the base of cooking utensils should fit the diameter of the burner used (see adjacent table). The burner flame must never be wider than the diameter of the utensils. Use utensils with a flat base. - Page 17 Instructions for the user 7.3.3 Cooking with the grill The heat comes from the top. Almost all meat can be grilled, with the exception of lean game and dishes such as meat-loaf. Meat and fish to be grilled should be lightly drizzled with oil and placed on the grid bars, which should be placed in the guides closest to or furthest away from the grill element, depending on the thickness of the meat, so as to avoid burning the surface and cooking too little inside.
- Page 18 7.3.7 Recommended cooking tables Cooking times vary according to the nature, type and quantity of the food. We recommend monitoring your first attempts and checking the results, as similar results are obtained by cooking the same dishes in the same conditions. The following three tables (I, II and III) provide guidelines. TABLE OF CONVECTION AND TRADITIONAL COOKING TIMES (I) TYPE OF COOKING BAKING...
-
Page 19: Cleaning And Maintenance
Instructions for the user 8. Cleaning and maintenance Before cleaning or carrying out maintenance, switch off the power supply to the appliance and close the gas tap. Do not clean the surfaces of the appliance when they are still hot. Cleaning stainless steel surfaces To clean and preserve the stainless steel surfaces and remove the toughest stains, always use specific products, provided they do not contain chlorine-based abrasives or acid substances,... -
Page 20: Cleaning The Igniter Plugs And Thermocouples
Cleaning the igniter plugs and thermocouples In order for the igniter plugs and thermocouples to operate correctly, they must be kept clean at all times. Check them frequently and, if necessary, clean them with a damp cloth. Any dry residue should be removed with a toothpick or needle, taking care not to damage the insulating ceramic part. -
Page 21: Special Maintenance
Instructions for the user 9. Special maintenance Periodically, it is necessary to maintain or replace some parts that are subject to wear and tear. Specific instructions are given below for each type of maintenance. Before carrying out maintenance, switch off the power supply to the appliance and close the gas tap. -
Page 22: Service And Spare Parts
10. Service and Spare Parts If you wish to purchase spare parts or require an engineer, contact your local AEG Service Force Centre by telephoning: 08705 929 929 Your telephone call will be automatically routed to the Service Force Centre covering your post code area. -
Page 23: Guarantee Conditions
• The guarantee is for the same period and to the same extent for labour and parts as exists in the new country of use for this brand or range of products. • This guarantee relates to you and cannot be transferred to another user. -
Page 24: Installation
12. Installation 12.1 General warnings It is the law that a competent person installs all gas appliances. In the UK Corgi gas installers are approved to work to safe and satisfactory standards. The cooker must be installed in accordance with BS 6172. Failure to install the cooker correctly could invalidate the warranty liability claims could and could lead to prosecution. -
Page 25: Instructions For The Installer
Instructions for the installer Before making the electric connection, make sure of the safety of the earth. Make sure that the fuse and the home wiring system are able to withstand the appliance load. The yellow/green earth cable must not be interrupted at any point. The electric cable must not come into contact with parts whose temperature is more than 50°C higher than room temperature. -
Page 26: Power Consumption Of The Ceramic Hob
12.2.3 Replacing the electric cable To replace the electric cable, it is necessary to access the terminal board. It is located on the back of the appliance, at the top left, as shown in the figure. To replace the cable, proceed as follows: •... -
Page 27: Gas Connection
Instructions for the installer Windows and permanent vents should therefore not be blocked or removed without first consulting a Corgi gas installer. Failure to install appliances correctly is dangerous and could lead to prosecution. L.P.G. cookers MUST NOT be installed below ground level i.e. in a basement or aboard any boat, yacht or other vessel. -
Page 28: Stability Chain
Instructions for the installer 12.6 Stability chain The cooker is fitted with a stability device such as a proprietary stability chain as shown and firmly secured to the fabric of the building. Whatever the position, remember to leave enough room for the cooker to be pulled out for cleaning and service. -
Page 29: Gas Regulations
Instructions for the installer 12.7 Gas regulations If the cooking appliance is set up for a different type of gas than that available, its injectors must be replaced, the minimum flow regulated. In order to replace the injectors in the cooking hob, it is necessary to carry out the following operations: •... -
Page 30: Final Operations
13. Final operations Make sure that the gas pipes and electric cables are not crushed or obstructed. 13.1 Positioning and levelling the cooker After connecting the gas pipes and electric cables, level the cooker using the four adjustable feet. Instructions for the installer... - Page 31 Notes ______________________________________________________________________ ______________________________________________________________________ ______________________________________________________________________ ______________________________________________________________________ ______________________________________________________________________ ______________________________________________________________________ ______________________________________________________________________ ______________________________________________________________________ ______________________________________________________________________ ______________________________________________________________________...
- Page 32 From the Electrolux Group. The world’s No. 1 choice. The Electrolux Group is the world's largest producer of powered appliances for kitchen, cleaning and outdoor use. More than 55 million Electrolux Group products (such as refrigerators, cookers, washing machines, vacuum cleaners, chain saws and lawn mowers) are sold each year to a value of approx.
Need help?
Do you have a question about the C41029G and is the answer not in the manual?
Questions and answers