Table of Contents
Advertisement
Advertisement
Table of Contents

Related Manuals for Samsung iPolis SND-460V


Summary of Contents for Samsung iPolis SND-460V
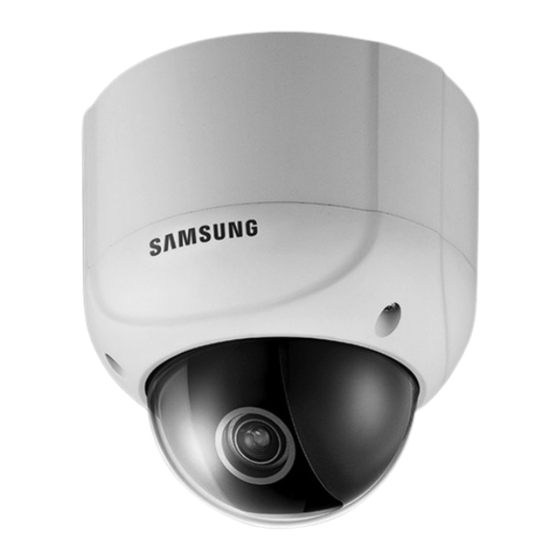
- Page 1 1/3" High Performance Network Dome Camera SND-460V User’ s Manual Thank you for purchasing a SAMSUNG Ipolis Network CAMERA. Before attempting to connect or operate this product, please read these instructions carefully and save this manual for future use. ENGLISH...
-
Page 2: Preface
A brand that is integrated into Samsung's network products, stands for a convenient world (Polis) made safe (Police) through Samsung's superior network performance(Internet protocol). With products ' clear digital images transmitted over the internet, real-time monitoring is possible anywhere with an internet connection. -
Page 3: Table Of Contents
Precautions ……………………………………………………………………… 7 5.1. Setup MENU ………………………………………………………………………… …58… Ch1. Overview …………………………………………………………………… 8 5.2. How to Set Up Functions ………………………………………………………… …59… 1.1. SND-460V Network Camera Introduction 5.2.1. LENS …………………………………… …8… … … … ……………………………………………………………………… …60… 1.2. Features 5.2.2. EXPOSURE ……………………………………………………………………………… …9… …... -
Page 4: Product Warranty And Limitations
Precautions Samsung Techwin cares for the environment at all product manufacturing stages to preserve the environment, and is taking a number of steps to provide customers with more environment-friendly products.The Eco mark represents Samsung Techwin’s will to create environment-friendly products, and indicates... -
Page 5: Ch1. Overview
1.1. SND-460V Network Camera Introduction SD Memory function Privacy function The SND-460V is a high-tech network camera that uses MPEG-4 codec technology to allow high compression rates and clear picture quality by Privacy function is to determine surveillance area not SD Memory function is to memorize an event at the to display on the monitor for privacy protection. -
Page 6: Ch2. Production Description
Installation Video Output Cable Installation Template ➎ ➏ • When you connect SND-460V network camera to the PoE apparatus, the voltage transferred via LAN cable may be abnormally high. Please contact to our distributor for RJ-45 JACK Connector Wrench installation or dismantling PoE system. -
Page 7: Recommended Pc Specifications
Network 10/100 Base-T Ethernet DirectX 9.0C or higher SND-460V Network Camera Monitor • As the connecting method varies with the instruments, refer to the manual supplied with the instrument. • If necessary, you can connect the monitor to the REMOTE jack on the body of your camera. -
Page 8: Connecting To Power
Ch3. Installation and Network Setup 3.2. Connecting to Power When the resistance value of copper wire is at [20°C(68°F)] Copper wire size (AWG) #24(0.22mm #22(0.33mm #20(0.52mm #18(0.83mm ■ AC/DC Power Resistance (Ω/m) 0.078 0.050 0.030 0.018 Both of AC24V and DC12V can be used for the input power of this product. Voltage Drop (V/m) 0.028 0.018... - Page 9 Ch3. Installation and Network Setup ■ Connecting Alarm Input ■ Connecting Alarm output This is the input terminal for external alarm signal, use it by connecting as following. This is the output terminal for external alarm signal, use it by connecting as following. 3.3V Alarm Out 5.1K...
-
Page 10: Network Configuration And Connection Method Using Web Page
2. Please launch a Web browser on user’s PC and enter [192.168.1.100] in the URL address field and push <Enter> button. Connect to Webviewer login window of SND-460V network Use when there is one SND-460V network camera to be installed. - Page 11 Ch3. Installation and Network Setup LAN / xDSL/ DHCP Configuration ① 4. Please configure according to the network environment where SND-460V network camera will be installed and push <Save> button to save the configuration. Item Description When network product is connected to normal local LAN or when...
-
Page 12: Ch4. How To Use Web Viewer
To connect the login page, enter IP address of the camera on a internet Web browser and push enter key. SND-460V ■ Controls Video Analytics (Convert to Video Analytics mode) This button is activated when the Video Analytics Enable option is selected on the Enter user ID and password and push <Login>... - Page 13 RESET (Displayed when the Video Analytics mode is on) Flip Image This sets the current screen image to the background. Turns the screen upside down. SND-460V SND-460V SND-460V Stretch Image Expands the screen to the size of D1 when selecting CIF and QCIF for resolution.
-
Page 14: How To Use The Camera
<Set> button : Displays camera OSD or moves to upper/lower menu of selected field. <Exit> button : Terminates camera OSD. * For configuring the function and detail operating method of SND-460V network camera, refer ‘ch5. How to Operate Camera’. Removes the title Camera Setup : Displays OSD control button of camera. -
Page 15: Using Administration Page
4.2. Using Administration page 4.2.2. Live Please Move to Web Viewer page 4.2.1. Initialization Screen after Connecting (Basic Screen) When connection is successful, the below screen will be displayed. SND-460V [Web Viewer live screen] NETWORK CAMERA User’s Manual NETWORK CAMERA... -
Page 16: Basic
Ch4. How to Use Web Viewer ■ Video/Audio Setup 4.2.3. Basic Setup menu for basic configuration. Item Description If you select the type of camera installed (NTSC or PAL), you can Video Format choose the size of the view on the camera. Item Description Video compression type (This defines how the video is... -
Page 17: Network
Ch4. How to Use Web Viewer ■ Network Configuration 4.2.4. Network You can select LAN interface for static IP configuration, xDSL modem and DHCP for cable Network Configuration menu. modem. Item Description Configure network assignment information of a camera connected to the local area network or to the static IP of xDSL modem. - Page 18 Ch4. How to Use Web Viewer ■ Continuous Jpeg Image Transmission ■ DDNS Usage Registration process of DDNS is as following Item Description RTSP/TCP Enable Determines whether to use RTSP/TCP. ❍ … Step1) Complete the registration form in iPOLiS website. RTP/UDP Enable Determines whether to use RTP/UDP.
- Page 19 Ch4. How to Use Web Viewer Figure 5. The list of registered equipment. Figure 3. Membership Registration: Input your information. ❍ … Step2) Register the equipment after login. Figure 6. Product Registration. (Confirm repetition certainly at domain registration.) Figure 4. Login NETWORK CAMERA User’s Manual NETWORK CAMERA...
- Page 20 (Default: www.samsungipolis.com ) • Enter the ID and Password that is written when register product is in iPOLiS website. Figure 7. The list of registered equipment. The Configuration of DDNS in SND-460V is Completed. NETWORK CAMERA User’s Manual NETWORK CAMERA...
- Page 21 Ch4. How to Use Web Viewer Click the <View> button under ‘View’ to move to the login page. To modify or delete ❍ … Step4) Confirm the connection status of relevant product in product list of information for a registered device in the product list, click the <Edit >or <Delete> button iPOLiS website.
- Page 22 Ch4. How to Use Web Viewer • RTP Multicast connection Enter ‘rtsp://[serverip]/mpeg4unicast’ in the RTSP URL to connect to multicast. • RTP/TCP connection Select ‘Settings’ in the menu and click ‘Preferences...’ then check the ‘Advanced options’ box at the bottom of right side of the monitor, below options will appear. * TCP configuration should be cleared again to execute RTP Multicast.
-
Page 23: Video Analytics
Ch4. How to Use Web Viewer 4.2.5. Video Analytics 4.2.6. Privacy The Analytics feature compares the current screen against the one at the time of clicking on Set For privacy protection, you can specify areas to hide. button and marks changed areas. It can detect up to 5 areas. Item Description Video Analytics Enable... -
Page 24: Record (Using The Sd Memory)
Ch4. How to Use Web Viewer 4.2.7. Record (Using the SD Memory) Item Description When Motion Detection, Video Analytics or Sensor is detected, you can save them. Then, if an In the event of memory overflow, it erases record files Overwrite Event is occurred, you can also watch them. - Page 25 • Example 1) In case control function is limited (Do not check Controls box) 4.2.8. User This describes password change for administrator or user registration. SND-460V * audio output, alarm output function icon is inactivated • Example 2) In case video function is limited (Do not check Video)
-
Page 26: Alarm/Sensor
Ch4. How to Use Web Viewer 4.2.9. Motion Detection 4.2.10. Alarm/Sensor This sets up motion detection function of camera. This sets up necessary information when using alarm function by attaching sensor to camera. Item Description Grid Display Basic grid, used to choose area on the screen, is displayed or hidden. When selecting motion detection area, click <Select All>... - Page 27 Ch4. How to Use Web Viewer ■ Alarm/Sensor Setup Item Description Recipient E-mail ◊ Digital In Setup Address 1 You can designate up to two e-mail address receiving data Item Description Recipient E-mail when alarm occurs. Sensor No. Shows the sensor number (Sensor1). Address 2 Types of sensors are ‘Normal open’...
-
Page 28: Time
Ch4. How to Use Web Viewer 4.2.11. Time 4.2.12. LOG Recent activities made for camera are displayed as log. ■ Current Time Item Description Date Current setup date displayed Item Description Time Current setup time displayed Lines Set up number of lines of the list. View Log is viewed with number of lines you set up most recently. -
Page 29: Upgrade
Description • Pressing the <Reset> button next to the SD card for more than 3 seconds returns settings to SND-460V Firmware Upgrades the firmware of the SND-460V network camera. their factory defaults. ■ Factory Mode Setup Clicking the <Reset> button makes an administrator check the settings, then returns them to their factory defaults. -
Page 30: Ch5. How To Operate Camera
Ch5. How to Operate Camera 5.1. Setup MENU 5.2. How to Set Up Functions Use OSD button displayed on Web Viewer screen to set up functions. Setup Menu • : OSD button is popped up in Web Viewer. LENS ●DC ●SHUTTER ●AGC ●SENS-UP... - Page 31 Ch5. How to Operate Camera 5.2.1. LENS Notes Using this function, you can control screen brightness. • When the SHUTTER is set to A.FLK mode, SENS-UP will be disabled. MAIN SETUP 1.LENS • AGC (AUTO GAIN CONTROL) : The higher the gain level, the brighter the screen - but 2.EXPOSURE the higher the noise.
-
Page 32: White Balalace (White Bal.)
Ch5. How to Operate Camera 5.2.3. WHITE BALALACE (WHITE BAL.) 5.2.4. BACKLIGHT Use the White Balance function to adjust the screen color. This camera is designed so that it delivers a distinctive subject and background at the same time, even when the subject is in backlight, unlike conventional cameras, by 1. -
Page 33: Day/Night
Ch5. How to Operate Camera OFF : Not being used 5.2.5. SSNR Select ‘BLC‘ to adjust the area to be HLC : Enable a user to select a mask color This function reduces the background noise in a low luminance environment. enhanced and enhancement level. -
Page 34: Image Adj
Ch5. How to Operate Camera Notes MAIN SETUP 1.LENS • You cannot control the DAY/NIGHT menu when AGC in the EXPOSURE menu is ‘OFF’. At this time, the 2.EXPOSURE exchange between DAY mode and NIGHT mode operates as like selecting ‘COLOR’ mode. 3.WHITE BAL 4.BACKLIGHT 5.SSNR... -
Page 35: Exit
Ch5. How to Operate Camera V-REV : You can flip the picture vertically on the screen. 2. Select a desired mode using the Up and Down buttons. H-REV : You can flip the picture horizontally on the screen. D-ZOOM : You can use a digital zoom of x2 ~ x10. SPECIAL SHARPNESS : As you increase this value, the picture outline 1. - Page 36 Ch5. How to Operate Camera • MOTION DET 3) Press the <SET> button. CAM TITLE SETUP If you connect an alarm device to this camera, you can 4) Use the 4 direction buttons to move to a A B C D E F G H I J K L M N O P Q R S T U V W X Y Z monitor activity more efficiently, because a signal is desired letter and select the letter by pressing...
-
Page 37: Ch6. Troubleshooting
Ch5. How to Operate Camera Ch6. Troubleshooting - AREA MODE : Determines whether to use the area If there are problems in operation, please refer to the items below. If the problem persists, please contact the agent you purchased this product from. selected in the AREA SEL, and the size and position of the area. -
Page 38: Specifications
In case user uses hub or IP router, check whether these network equipments are working properly. ▶ ▶ Open MS-DOS window and check whether SND-460V network camera is connected to network. Frequency H:15.734 KHz / V:59.94 Hz H: 15.625 KHz / V : 50.00 Hz •... -
Page 39: Dimension
Specifications Dimension 85mm Model Name SND-460VN SND-460VP NETWORK 704x480(D1), 352x240(CIF), 704x576(D1), 352x288(CIF), Resolution 176x120(QCIF) 176x144(QCIF) Video Encoding Compression MPEG-4/JPEG Dual CODEC with transcoder Encode Rate Up to 30fps @ 704x480 Up to 25fps @ 704x576 Audio Compression ADPCM, 8KHz Encoding Transmission speed Up to 100Mbps Remote users... - Page 40 MEMO MEMO NETWORK CAMERA User’s Manual NETWORK CAMERA User’s Manual...
- Page 41 SAMSUNG TECHWIN EUROPE CO., LTD. • • 1480 Charles Willard St, Carson, CA 90746, UNITED STATES Samsung House, 1000 Hillswood Drive, Hillswood Business Tol Free : +1-877-213-1222 FAX : +1-310-632-2195 Park Chertsey, Surrey, UNITED KINGDOM KT16 OPS www.samsungcctvusa.com TEL : +44-1932-45-5300 FAX : +44-1932-45-5325 www.samsungtechwin.com...
Need help?
Do you have a question about the iPolis SND-460V and is the answer not in the manual?
Questions and answers