Table of Contents
Advertisement
Quick Links
ASSEMBLY, CARE & USE MANUAL
WARNING & SAFETY INFORMATION
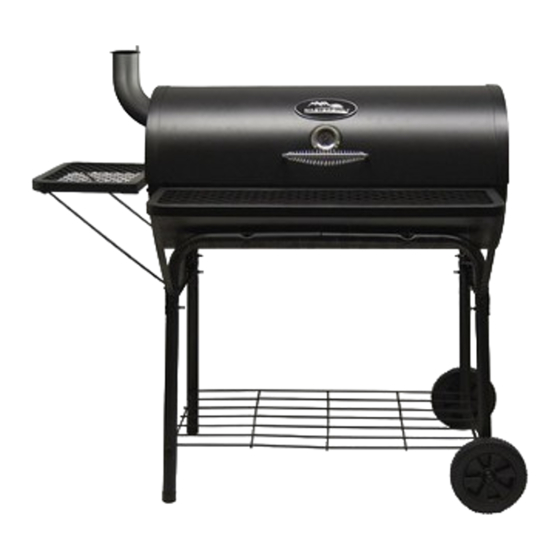
MODELS 20043011, 20043111 CLASSIC BARREL GRILL
THIS PRODUCT IS FOR OUTDOOR USE ONLY
Masterbuilt Manufacturing, Inc.
1 Masterbuilt Court
Columbus, Georgia 31907
Customer Service 1-800-489-1581
Tools required for assembly: Adjustable Wrench, Phillips Head Screwdriver.
CARBON MONOXIDE HAZARD
WARNING
Burning charcoal gives off carbon
This manual contains important
monoxide, which has no odor and can
information necessary for the proper and
cause death.
safe use of this grill.
DO NOT burn charcoal inside homes,
Read and follow all warnings and
vehicles, tents, garages or any enclosed
instructions before using grill and
areas.
during use.
Use only outdoors where it is well
Keep it for future reference.
ventilated.
Failure to follow these warnings and instructions properly could result in fire or explosion, which could cause
property damage, personal injury, or death.
Advertisement
Table of Contents

Related Manuals for Masterbuilt 20043011


Summary of Contents for Masterbuilt 20043011
- Page 1 ASSEMBLY, CARE & USE MANUAL WARNING & SAFETY INFORMATION MODELS 20043011, 20043111 CLASSIC BARREL GRILL THIS PRODUCT IS FOR OUTDOOR USE ONLY Masterbuilt Manufacturing, Inc. 1 Masterbuilt Court Columbus, Georgia 31907 Customer Service 1-800-489-1581 Tools required for assembly: Adjustable Wrench, Phillips Head Screwdriver.
-
Page 2: General Warning And Safety Information
• Keep area clear of all combustible materials such as wood, dry plants, grass, brush, paper or canvas. This expressed warranty is the sole warranty given by Masterbuilt and is in lieu of all other warranties, expressed or • Never operate this grill within 25 ft. (7.5m) of flammable liquids. -
Page 3: Approximate Grilling Times
PARTS LIST APPROXIMATE GRILLING TIMES BEEF SIZE GRILLING TIME INTERNAL TEMP Steaks ” (2cm) thick 3 to 4 min. /side med rare 145°F (62°C) 4 to 5 min. /side med 160°F (71°C) Kabobs 1” (2.5cm) cubes 3 to 4 min. /side 145°-160°F (62-71°C) Hamburger patties ”... -
Page 4: Hardware List
CHARCOAL LIGHTING INSTRUCTIONS HARDWARE LIST Read all instructions and warnings on charcoal bag and in manual before using. BLISTER PACK CONTENTS 1. Stack briquets in a pyramid. 2. Add lighter fluid following directions on fluid container. Before lighting, place lighter fluid at least 25 ft. -
Page 5: Replacement Parts List
For Assembly Assistance, Missing or Damaged Parts • This grill has an open flame. Be careful of loose hair and clothing during operation. They may Call: MASTERBUILT Customer Service at 1-800-489-1581 catch fire. • Use protective gloves when handling this grill or working with fire. Use protective gloves or long, sturdy fireplace tools when adding wood or charcoal. -
Page 6: Frequently Asked Questions
ASSEMBLY INSTRUCTIONS FREQUENTLY ASKED QUESTIONS Before assembly read instructions carefully. This unit is heavy. Do not Q: The paint finish inside my lid is peeling. What can I do? assemble without assistance. You are seeing a deposit of grease and smoke that collects during normal use that resembles paint. - Page 7 STEP 17. Secure warming rack (5) to rack sup- STEP 3. port bolt (C) using lock nut (E) as Attach leg bracket (10) to right short shown. legs (8) as shown using phillips head screws (B) and hex flange nuts (D). Note: Be sure not to overtighten lock nut, as rack is to mover freely.
- Page 8 STEP 15. STEP 5. Secure handle (22) to grill lid (1) Note: Attach only using hardware shown. using flat washers (G) lock washers (H) and hex flange nuts (D). Use phillips head screws (B) and hex flange nuts (D) on second hole in leg bracket (10) to attach left long leg (9).
- Page 9 STEP 13a. Carefully reposition grill as shown. Insert temperature gauge (20) stem through hole in grill lid. Secure with STEP 7. wing nut (K). Note: Do not over tighten. Air dampers should move freely. STEP 13b. Insert alignment pins on back of logo Attach air damper (4) to body (2) plate (21) through two holes above using phillips head screw (A) and...
- Page 10 STEP 9. STEP 11. Align holes on assembled side shelf Align holes on assembled front shelf (18) with holes on grill body (2) and leg (6) with holes on grill body (2) and bracket (10) as shown. legs as shown. Insert phillips head screw (A) through Insert phillips head screw (A) from holes on body (2) into side shelf (18).
Need help?
Do you have a question about the 20043011 and is the answer not in the manual?
Questions and answers