
Related Manuals for Brother T-8420B


Summary of Contents for Brother T-8420B
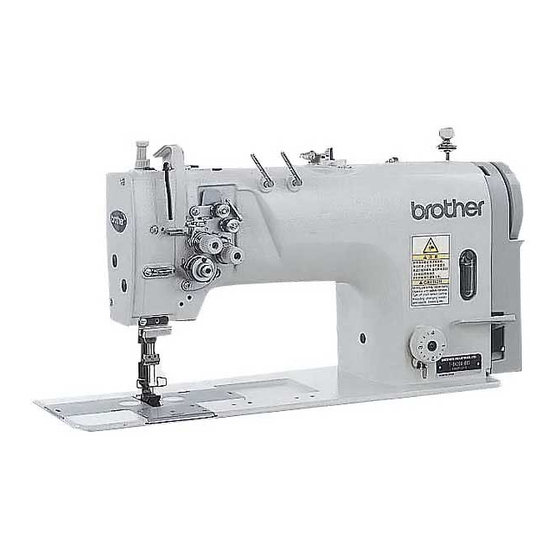
- Page 1 T-8420B TWIN NEEDLE LOCK STITCHER T-8450B TWIN NEEDLE SPLIT NEEDLE BAR LOCK STITCHER T-8720B TWIN NEEDLE LOCK STITCHER WITH LARGE HOOK T-8750B TWIN NEEDLE SPLIT NEEDLE BAR LOCK STITCHER WITH LARGE HOOK...
-
Page 2: Safety Instructions
) indicates something that you must do. The picture inside the circle indicates the · · · · · nature of the thing that must be done. (For example, the symbol at left means “you must make the ground connection”.) T-8420B, 8450B, 8720B, 8750B... - Page 3 Furthermore, do not drink the oil or eat the grease under any circumstances, as they can cause vomiting and diarrhea. Keep the oil out of the reach of children. T-8420B, 8450B, 8720B, 8750B...
- Page 4 If Use only the proper replacement parts as specified only one hand is used, the weight of the machine by Brother. head may cause your hand to slip, and your hand may get caught. T-8420B, 8450B, 8720B, 8750B...
-
Page 5: Warning Labels
Direction of operation Safety devices: (A) Finger guard (B) Thread take-up cover (C) Belt cover 2955M Oil pan 2956M 2954M T-8420B, 8450B, 8720B, 8750B... -
Page 6: Table Of Contents
5-6. Adjusting the stitch length ......21 5-7. Using the knee lifter ........21 10. TROUBLESHOOTING ....... 5-8. Corner sewing method (T-8450B, 8750B)..22 5-8-1. To stop the needle bars (right and left) ........22 5-8-2. Number of stitches: quick-reference guide............ 22 T-8420B, 8450B, 8720B, 8750B... -
Page 7: Names Of Major Parts
Knee lifter assembly Stitch length dial Reverse lever Oil gauge window Machine pulley Alarm display (semi dry type) (10) Cotton stand (11) Stop lever (T-8450B, 8750B) Safety devices (12) Thread take-up cover (13) Finger guard (14) Belt cover T-8420B, 8450B, 8720B, 8750B... -
Page 8: Machine Specifications
Needle (DP×5) #11–#16 #14–#22 T-8450B -003 -005 Max. sewing speed 3,000 rpm Max. stitch length 5 mm Presser foot Lifting lever 7 mm height Knee lifter 13 mm Feed dog height 1 mm #11–#16 #14–#22 Needle (DP×5) T-8420B, 8450B, 8720B, 8750B... -
Page 9: Table And Motor
50 Hz Motor pulley 100 4,000 rpm 60 Hz Motor pulley 85 50 Hz Motor pulley 90 3,500 rpm 60 Hz Motor pulley 70 50 Hz Motor pulley 75 3,000 rpm 60 Hz Motor pulley 65 T-8420B, 8450B, 8720B, 8750B... -
Page 10: Installation
1. Clear away any tools, etc. which may be near the table holes. 2. While holding the face plate with your left hand, gently return the machine head to the upright position with your right hand. 2872M T-8420B, 8450B, 8720B, 8750B... -
Page 11: Installation
Tap the head rest (3) securely into the table hole. If the head rest (3) is not pushed in as far as it will go, the machine head will not be sufficiently stable when it is tilted back. 2960M T-8420B, 8450B, 8720B, 8750B... - Page 12 (5) is at the desired position within a distance of 13 mm of the needle plate when the knee liter plate (1) is fully pressed. 9. After adjustment is completed, securely tighten the nut (9). Within 13 mm 2963M T-8420B, 8450B, 8720B, 8750B...
- Page 13 10-14 mm of deflection in the V-belt (1) when it is pressed at the midway point with a force of 5 N. 2966M 9. Belt cover bracket (1) Belt cover bracket (2) Screws [2 pcs] Ground wire 2967M T-8420B, 8450B, 8720B, 8750B...
- Page 14 2968M (1) Belt cover U (2) Screws [4 pcs] Insert the projecting part underneath the machine pulley. 2969M 11. Belt cover D (1) Belt cover D (2) Wood screws [2 pcs] (3) Washers [2 pcs] 2970M T-8420B, 8450B, 8720B, 8750B...
- Page 15 (1) Belt cover D lid 2972M Pull belt cover D (2) forward to adjust so that there is no gap between belt cover U (3) and the belt cover D lid (1). 2973M Re-tighten the wood screws. 2974M T-8420B, 8450B, 8720B, 8750B...
-
Page 16: Cotton Stand
14. Cotton stand (1) Cotton stand NOTE: Securely tighten the nut (4) so that the two rubber cushions (2) and the washer (3) are securely clamped and so that the cotton stand (1) does not move. 2878M T-8420B, 8450B, 8720B, 8750B... -
Page 17: Lubrication
(4) of the oil gauge window (3). 3. Replace the rubber cap (1). * If the lubricating oil level drops below the bottom reference line (5), be sure to add more oil. 2978M T-8420B, 8450B, 8720B, 8750B... - Page 18 Apply 1 - 2 drops of oil to the places indicated by the arrows. <Minimum lubrication type only> * Do not apply oil for semi dry types. <T-8450B, 8750B> 2885M <Semi dry type and minimum lubrication type> Rotary hook race (left and right) 2979M T-8420B, 8450B, 8720B, 8750B...
-
Page 19: Checking The Machine Pulley Rotating Direction
(2) GREASE indicator (red) If the GREASE indicator (2) illuminates and the buzzer sounds each time the treadle is depressed, it is time to apply 2981M grease. (See P. 30.) T-8420B, 8450B, 8720B, 8750B... -
Page 20: Preparation Before Sewing
3. Insert the needle (2) straight in as far as it will go so that the long groove is facing inward, and then securely tighten the screws (1). Long groove 2894M <T-8450B, 8750B> Long groove 3125M T-8420B, 8450B, 8720B, 8750B... -
Page 21: Removing The Bobbin
1. Open the slide plates (1) by moving them to the right and left. 2. Lift up the latch (2) of the rotary hook, and then remove the bobbin case (3). 3. Remove the bobbin. 3001M T-8420B, 8450B, 8720B, 8750B... -
Page 22: Winding The Lower Thread
* Loosen the screw (5) and move the bobbin presser (6) to adjust the amount of thread wound onto the bobbin. NOTE: More thread The amount of thread wound onto the bobbin should be a maximum of 80 % of the bobbin capacity. Less thread 2123M 2124M T-8420B, 8450B, 8720B, 8750B... -
Page 23: Installing The Bobbin
5. Pull out the thread to a length of approximately 50 mm. 6. Close the slide plates. Use bobbins (1) made of light alloy as specified by BROTHER. 2983M 2900M T-8420B, 8450B, 8720B, 8750B... - Page 24 3. Insert the bobbin case (2) into the rotary hook. 4. Push latch (9) of the rotary hook flat. 5. Close the slide plates. Use bobbins (1) made of light alloy as specified by BROTHER. 3126M <C> 3127M 2999M T-8420B, 8450B, 8720B, 8750B...
-
Page 25: Threading The Upper Thread
・ Turn the machine pulley and raise the thread take-up (1) before threading the upper thread. This will make threading easier and it will prevent the thread from coming out at the sewing start. ・ Thread the left-side thread first. T-8420B, 8450B, 8720B, 8750B... - Page 26 ・ Operate the lifting lever or the knee lifter to raise the presser foot. The thread can be passed securely in between the tension discs. <T-8420B, 8720B> <T-8450B, 8750B> Pass the thread on the inside of the tab (3). T-8420B, 8450B, 8720B, 8750B...
-
Page 27: Adjusting The Stitch Length
(2). * Check that the stitch length dial (2) does not rotate. Locked Unlocked 2985M 5-7. Using the knee lifter The presser foot (2) can be raised by pressing the knee lifter plate (1). 2907M 2908M T-8420B, 8450B, 8720B, 8750B... -
Page 28: Corner Sewing Method (T-8450B, 8750B)
The number of stitches of the outer needle varies according to the combination of sewing angle and stitch length. [Example] For a sewing angle of 40° and a stitch length of 2.9 mm, the number of stitches becomes 6. T-8420B, 8450B, 8720B, 8750B... -
Page 29: Sewing
4. Depress the treadle to start sewing. Lower thread Lower thread 2915M 6- 2. Backtacking When the reverse lever (1) is pressed during sewing, the feed direction will be reversed. When it is released, the feed direction will return to normal. 2986M T-8420B, 8450B, 8720B, 8750B... -
Page 30: Sewing Condensed Stitches
(Condensed stitches are sewn while the reverse lever (1) is being pressed.) * To stop sewing condense stitches and return to using the backtack function, lower the stopper (5) so that it does not touch the reverse stitching lever plate (6). 2989M T-8420B, 8450B, 8720B, 8750B... -
Page 31: Thread Tension
After the lower thread tension has been adjusted, adjust the upper thread tension so that a good, even stitch is obtained. 1. Lower the presser foot. 2. Adjust by turning the tension nut (2). Becomes stronger Becomes weaker Becomes weaker Becomes stronger 2924M T-8420B, 8450B, 8720B, 8750B... -
Page 32: Adjusting The Presser Foot Pressure
2. Turn the presser adjusting screw (2) to adjust the presser foot pressure. 3. Tighten the adjusting nut (1). Reference values Adjusting screw height For foundation Approx. 34mm For light-weight and medium- weight Approx. 34mm materials For heavy-weight Approx. 29mm materials 2925M T-8420B, 8450B, 8720B, 8750B... -
Page 33: Adjusting The Thread Take-Up Amount
・ When sewing with a stitch length of 2 mm or less ・ When sewing under any of the above three conditions and you would like to prevent skipped stitches, thread 2929M tightening problems such as looping, or thread breakages T-8420B, 8450B, 8720B, 8750B... -
Page 34: Cleaning
<Checking> 1. Replace the needle if it is bent or if the tip is broken. 2. Check that the upper threads have been threaded correctly. (Refer to page 19.) 3. Carry out a test sewing. 2992M T-8420B, 8450B, 8720B, 8750B... -
Page 35: Lubricating Via The Oil Cover (Every 6 Months)
1. Tilt back the machine head. 2. Pour lubricating oil into the oil cover (1) until the oil level reaches the reference line (2). (Refer to p.11.) 3. Return the machine head to its normal position. 2993M T-8420B, 8450B, 8720B, 8750B... -
Page 36: Applying Grease - When The Grease Indicator Illuminates (Semi Dry Type)
If this happens, apply grease and then reset the alarm display by referring to the procedure on the following page. * If you continue to use the sewing machine after carrying out the reset procedure but without applying grease, problems with the sewing machine may result. T-8420B, 8450B, 8720B, 8750B... - Page 37 ・ When using the grease again, remove any old grease from inside the nozzle first. (Store the tube away carefully once the tube has been opened, otherwise the grease remaining inside the tube may deteriorate, and this may affect its lubricating performance.) 2937M T-8420B, 8450B, 8720B, 8750B...
-
Page 38: Resetting The Cumulative Operating Time
30 seconds, and then carry out the reset procedure again. ・ The RESET switch (1) should never be pressed except when carrying out the reset procedure after grease application. T-8420B, 8450B, 8720B, 8750B... -
Page 39: Adjusting The Rotary Hook Lubrication Amount
* Turn the adjusting screw (1) and check the lubrication amount repeatedly until the lubrication amount is correct. 4. Check the lubrication amount again after the sewing machine has been used for approximately two hours. 3000M T-8420B, 8450B, 8720B, 8750B... -
Page 40: Troubleshooting
Pull out the lower thread to check that there is no slackness in the thread tension, or replace the bobbin or bobbin case. Is the thread take-up amount too large? Adjust the thread take-up amount. 0977M T-8420B, 8450B, 8720B, 8750B... - Page 41 If sewing light or medium-weight materials, is a presser foot with slots on the underside or grooved feed dog being used? Use a presser foot without slots. Use a feed dog without grooves. Grooves Slot 2946M 2944M T-8420B, 8450B, 8720B, 8750B...
- Page 42 Is the bobbin turning smoothly? If the bobbin is not turning smoothly, replace the bobbin. Is a bobbin other that the light-alloy bobbins specified by Brother being used? Use only bobbins which are specified by Brother. 17-18 2951M 2124M T-8420B, 8450B, 8720B, 8750B...
- Page 43 0469M The GREASE indicator on This is a notification that it is time to apply grease. alarm display Apply grease to the sewing machine. illuminates and the buzzer sounds when the treadle is depressed. T-8420B, 8450B, 8720B, 8750B...
-
Page 44: Instruction Manual
INSTRUCTION MANUAL http://www.brother.com/ T-8420B, 8450B, 8720B, 8750B SA2762-401 2005.04.B (1)
Need help?
Do you have a question about the T-8420B and is the answer not in the manual?
Questions and answers