Table of Contents
Advertisement
Quick Links
Advertisement
Table of Contents

Related Manuals for Elation 700 II


Summary of Contents for Elation 700 II
-
Page 1: User Manual
POWER SPOT 700 II User Manual Revised 5/14/08 - visage... - Page 2 Power Spot 700 II™ ©Elation Professionals® Los Angeles, Ca. wwww.ElationLighting.com Page...
-
Page 3: Table Of Contents
1. Introduction ...5 Unpacking ...5 Customer Support ...5 Discharge Lamp Precautions ...6 2. Safety Instructions...8 3. Features...9 4. General Guidelines...10 5. Fixture Layout ...12 6. Mounting and Installation ...16 7. Understanding DMX………………………………………………………………………19 7.1 DMX-512 ...19 7.2 DMX Linking ...19 7.3 DMX Cables ...19 7.4 DMX Termination ...20 7.5 DMX Addressing ...21 8. - Page 4 8.9.8 Adjustments and Calibrations (ADJU) ...31 8.9.9 Default Settings (DFSE) ...32 8.9.10 Feedback (FEED) ...32 8.9.11 Fault Corrections (EFLD)...32 8.10 Error and Information Messages ...32 9. Operating Modes...34 9.1 Universal DMX Control...34 9.2 Stand Alone (Sound Active) ...34 9.3 Master-Slave ...35 10.
-
Page 5: Introduction
INTRODUCTION: Congratulations, you have just purchased one of the most innovative and reliable lighting fixtures on the market today! The Power Spot 700 II™, has been designed to perform reliably for years when the guidelines in this booklet are followed. -
Page 6: Discharge Lamp Precautions
limited warranty. Please fill out the enclosed warranty card to validate your purchase. All returned service items whether under warranty or not, must be freight pre-paid and accompany a return authorization (R.A.) number. The R.A. number must be clearly written on the outside of the return package. - Page 7 Power Spot 700 II™ Never open this fixture while in use! During the initial operation of this fixture, a light smoke or smell may emit from the interior of the fixture. This is a normal process and is caused by excess paint in the interior of the casing burning off from the heat associated with the lamp.
-
Page 8: Safety Instructions
2. Never touch the fixture during normal operation. This can cause severe personal injuries and/or damage to the fixture. 3. Be sure to unplug the POWER SPOT 700 II™ from the power outlet before performing any service related issues. 4. Lamp Replacement; Allow at least 30 minutes after disconnecting main power before you open the POWER SPOT 700 II™. -
Page 9: Features
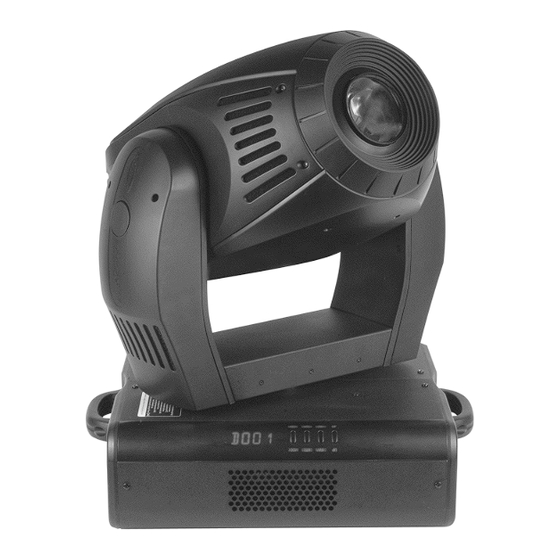
3. FEATURES • Pan 530° / Tilt 280° • 3 operation mode: DMX controlled, stand alone or sound activated • Electronic Power Supply • Control board with 4-digit display • Digital display can be turned 180° to fit different installation position •... -
Page 10: General Guidelines
Power Spot 700 II™ 4. GENERAL GUIDELINES This fixture is a professional lighting effect designed for use on stage, in nightclubs, in theatres, etc. Do not attempt operation or installation without a proper knowledge on how to so. This fixture was designed for indoor use only. - Page 11 The POWER SPOT 700 II™ comes with two carrying handles built into the base. Always transport the fixture by these handles. Never lift or carry the POWER SPOT 700 II™ by the yoke (head assembly) this can seriously damage the unit and will void your manufactures warranty.
-
Page 12: Fixture Layout
5. FIXTURE LAYOUT 10. Build-In Microphone 11. Software-Update Connector 12. 3-Pin DMX Out Connector 13. 3-Pin DMX In Connector 14. Carrying Handle 15. Power On/Off 16. Lamp Fuse 17. Fan (air inlet/outlet) 18. Main Power Supply (Powercon) 19. Electronics Fuse ©Elation Professionals®... - Page 13 20.4-Segment LED Menu Display 21. Mode Button 22. Enter Button 23. Up Button 24. Down Button 1. Head Assembly – The head assembly consist of the main output lens, and either the standard or CMY control module. 2. Carrying Handle – The fixtures includes two built-in carrying handles. Be sure to always handle the fixture by the built-in carrying handles.
- Page 14 7. 5-PIN DMX Output Jack (CMY Version Only) – This 5-Pin XLR jack is used to send an outgoing DMX signal. For best results this jack should be terminated if it is the last fixture in a DMX daisy-chain (see termination on page 20). 8.
- Page 15 17. Internal Cooling Fan – This fixture is equipped with two high-velocity variable speed fans mounted in the base to aid in the cooling process. These fans are designed to vary their velocity at different operating temperatures. When the fixture reaches a predetermined internal operating temperature the fans function at high speeds.
-
Page 16: Mounting And Installation
Mounting The POWER SPOT 700 II™ is fully operational in two different mounting positions, hanging upside or set on a flat level surface. To avoid internal damage to the unit, never mount the unit on its side as illustrated below. Be sure this fixture is kept at least 1.5 feet away from any flammable materials (decoration etc.). -
Page 17: Mounting Points
Clamps The POWER SPOT 700 II™ has been designed to hold multiple clamps to the bottom of the unit in several different orientations. Always use an appropriately rated clamp to mount this unit to truss. Refer to the printed instructions on the bottom of the fixture for proper clamp installation. - Page 18 (each two opposite threads max. M10x20). Secure the POWER SPOT 700 II™ Regardless of the rigging option you choose for your POWER SPOT 700 II™ always be sure to secure your fixture with a safety cable. The fixture provides a built-in rigging point for a safety cable on the underside of the fixture, be sure to use this point and never secure a safety cable to a carrying handle.
-
Page 19: Understanding Dmx
Power Spot 700 II™ 7. UNDERSTANDING DMX DMX-512: DMX is short for Digital Multiplex. This is a universal protocol used by most lighting and controller manufactures as a form of communication between intelligent fixtures and controllers. DMX allows all makes and models of different manufactures to be linked together and operate from a single controller. -
Page 20: Dmx Termination
Power Spot 700 II™ chained and cannot be split, unless using an approved DMX splitter such as the Elation Opto Branch 4™ or DMX Branch/4™. Be sure to follow the above figure when making your own cables. Do not use the ground lug on the XLR connector. -
Page 21: Dmx Addressing
Power Spot 700 II™ DATA -). This fixture is inserted in the female XLR connector of the last fixture in your daisy chain to terminate the line. Using a line terminator (Elation part: DMX T PACK) will decrease the possibilities of erratic behavior. - Page 22 In the case of the Power Spot 700 II™, which is a 21 channel fixture, you should set the starting DMX address of the first unit to 1, the second unit to 22 (21 + 1), the third unit to 43 (21 + 22), and so on.
-
Page 23: Fixture Menu
8. FIXTURE MENU The control panel located on the side of the fixture allows you to access the main menu and make all necessary adjustments to the POWER SPOT 700™. During normal operation, tapping the “MODE” key once will access the fixture’s main menu. Once in the main menu you can navigate through the different functions and access the sub-menus with the Up and Down buttons. -
Page 24: Setting The Dmx - Address (D001)
FANS ADJU COAD DFSE FEED EFLG 8.1 Setting/Changing the DMX Address After applying power to the POWER SPOT 700™ the LED will display the fixture’s current DMX address immediately after the reset sequence. If the fixture is not receiving a DMX signal the display will flash continuously. D001 To set or adjust a DMX address, please follow the procedure below: 1. -
Page 25: Test Program (Test)
2. Press the Mode button to access the main menu. Toggle through the menu by pressing the Up and Down buttons until the display shows D001. Tap the enter button to make changes to the address, the current three digit address will immediately begin to flash. -
Page 26: Lamp On/Off (Lamp)
8.4 Lamp On/Off LAMP This function allows you to manually control the lamp operation. Access the lamp function in the main menu and use the use the Up and Down buttons to toggle between lamp On and lamp Off. Press the Enter button to confirm the operation or the Mode button to cancel and return to the main menu. -
Page 27: Invert Tilt Movement (Rtlt)
Mode button to cancel and return to the main menu. 8.8 Invert Tilt Movement RTLT This function allows you to invert all tilt movements. Use the Up and Down buttons to turn this function On and Off. Press the Enter button to accept the change or the Mode button to cancel and return to the main menu. -
Page 28: Lamp Off Via Dmx
GOB2 000 - 255 GRT2 000 - 255 GOB3 000 - 255 SHUT 000 - 255 DIMR 000 - 255 FOCU 000 - 255 ZOOM 000 - 255 FRST 000 - 255 PRIS 000 - 255 IRIS 000 - 255 SPEC 000 - 255 MOVE... -
Page 29: Led Display (Disp)
This function will display the DMX value of a channel in the LED as the fixture receives it. Use the Up and Down buttons to select desired channel and press Enter to read its value. Function Value 000 - 255 TILT 000 - 255 COL1... -
Page 30: Elation Professionals® Los Angeles, Ca. - Wwww.elationlighting.com
8.9.6 Fixture Temperature TEMP This function allows you to read out the actual fixture operating temperature. Press the Enter button to select this function or the Mode to button to cancel and return to the main menu. Normal operating temperature should range between 85˚C and 95˚C. -
Page 31: Adjustments And Calibrations (Adju)
8.9.8 Adjustments and Calibrations ADJU With this function you can adjust and calibrate the positions of the different wheels and other motors. This feature is reserved for a service technician and is sometimes required after a service or repair work. This function requires a service code only available to authorized service technicians. -
Page 32: Default Settings (Dfse)
8.9.9 Default Settings DFSE This function is used to restore all the factory default settings and presets. Press the Enter button to confirm this operation or the Mode button to cancel and return to the menu. When this operation is selected the LED will briefly readout ok, then return to the previous function. -
Page 33: Error And Information Messages
8.10 Display Error and Information Messages This message appears if you try to switch on the lamp within 5 minutes after having switched off (lamp too hot). The message will appear on HEAt the display if the lamp doesn’t ignite within 20 seconds. The fixture will store this command and automatically ignite the lamp after 5 minutes. -
Page 34: Operation
A DMX controller allows you to create unique programs tailored to your individual needs. The Power Spot 700 II™ uses 21 DMX channels. See page 37 for detailed description of the DMX traits. To control your fixture in DMX mode, follow the set-up procedures beginning on page 19 of this manual as well as the set-up specifications that are included with your DMX controller. -
Page 35: Master-Slave
9.2.2 Access the main menu and select the AUDI function, this will give you access to the audio submenu. See page 25 for the menu breakdown. 9.2.3 In the audio submenu choose the audio chase speed, fast or slow. Slow (ASLW) will trigger the chase sequence to every two beats, while fast (AFST) will trigger the chase impulse every beat. - Page 36 Power Spot 700 II™ With two exceptions; be sure the first unit in the chain is selected as the “master“ (MSTR) is turned on in the audio submenu. All other fixtures must be in “slave“ mode (SVPT) turned on in the audio submenu.
-
Page 37: Dmx Channel Traits (Dmx Protocol)
Power Spot 700 II™ 10. DMX CHANNEL TRAITS (DMX PROTOCOL) Channel Function 1) Pan 0..530° 2) Pan-fine High-Pos ... High-Pos + 2.1° (16 Bit) 3) Tilt 0..285° 4) Tilt-fine High- Pos … High- Pos + 1.1° (16 Bit) 5) Color 1... - Page 38 Power Spot 700 II™ Channel Function Color 2 / Color 3 (slow) Color 3. Purple (slow) Color 3 / Color 4 (slow) Color 4. Blue (slow) Color 4 / Color 5 (slow) Color 5. Green (slow) Color 5 / Color 6 (slow) Color 6.
- Page 39 Power Spot 700 II™ Channel Function Color 4 / Color 5 (fast) Color 5. Yellow (fast) Color 5 / Color 6 (fast) Color 6. Light Green (fast) Color 6 / Color 7 (fast) Color 7. CTO (fast) Color 7 / Color 8 (fast) Color 8.
- Page 40 Power Spot 700 II™ Channel Function Color Rotation STOP Color rotation, slow-fast, CW Color rotation, fast-slow, CCW Audio color chaser slow Audio color chaser fast 7) Gobo 1 Gobo 1 (open. fast) (indexed) Gobo 2 (fast) Gobo 3 (fast) Gobo 4 (fast)
- Page 41 Power Spot 700 II™ Channel Function 8) Gobo 1 Gobo Position 0 ... 540° Posi./Rot Gobo Rotation STOP Gobo Rotation. Slow-fast. CW Gobo Rotation. Fast-slow. CCW Audio Gobo Rotation. Slow Audio Gobo Rotation. Fast 9) Gobo 2 Gobo 1 (open. fast)
- Page 42 Power Spot 700 II™ Channel Function 10) Gobo 2 Gobo Position 0 ... 540° Posi./Rot Gobo Rotation STOP Gobo Rotation. Slow-fast. CW Gobo Rotation. Fast-slow. CCW Audio Gobo Rotation. Slow Audio Gobo Rotation. Fast 11) Gobo 3 Gobo 1 (open. fast)
- Page 43 Power Spot 700 II™ Channel Function Gobo rotation, slow-fast, CW Gobo rotation, fast-slow, CCW Audio gobo chase, slow Audio gobo chase, fast 12) Shutter Shutter closed Random Strobe (different pattern) Strobe Pulse effect, slow - fast Audio Shutter Strobe effect, slow - fast...
- Page 44 Power Spot 700 II™ Channel Function Ascend with Shutter Descend with Shutter Pulse - effect Ascend - descend effect Iris open 19) Special No Function Gobo1-shake +/- 10° slow – fast Gobo1-shake +/- 20° slow – fast Gobo1-shake +/- 30°...
- Page 45 Power Spot 700 II™ Channel Function TILT PAN / TILT PAN / TILT (inverse) Circle Circle (inverse) Lying eight Random movement 21) Speed Pan/Tilt relative movement Pan/Tilt Pan/Tilt slow – fast (Channels 1,3, and 23) ©Elation Professionals® Los Angeles, Ca.
- Page 46 Lamp ON Shutter open Lamp OFF (min. 3 sec.) if Lamp Shutter closed '000' Reset ©Elation Professionals® Los Angeles, Ca. Channel 12 240..25 Channel 19 and 230..24 Channel 12 Channel 19 250..25 wwww.ElationLighting.com F0..F 94..10 6E..9 92..97 FA..F 98..10 Page...
-
Page 47: Lamp Replacement
11. LAMP REPLACEMENT For a proper and safe lamp change, please read this chapter carefully and follow all instructions. Safety Regulations • Pull out the main plug! • Wait min. 20 minutes after the last operation to cool down the fixture. •... -
Page 48: Lamp Optimization
fasteners will remain connected to the lamp socket cover. 5. Gently remove the old lamp from it’s socket. If the old lamp has exploded be sure to remove all of the old lamp fragments to prevent damage to the internal components. - Page 49 2. Move lamp with setscrew “A” upward/downwards until this hotspot is in the center of the beam projection. 3. Use setscrew “B” once again to move the lamp forwards and backwards until you've reached the most even beam projection. Note: A slight hotspot will always remain and is conditional to the optical path.
-
Page 50: Fuse Replacement
Power Spot 700 II™ 12. FUSE REPLACEMENT Caution: Always replace with the exact same type fuse, unless otherwise specified by an authorized Elation® service technician. Replacing with anything other than the specified part can damage your unit and will void your manufactures warranty. -
Page 51: Optical Effects Module
13. OPTICAL EFFECTS MODULE The Power Spot 700 II is equipped with an optical effects module that can be easily removed for cleaning, service, and gobo/color exchange. Please follow the procedures below for proper removal and service of the effects module. - Page 52 4) Loosen the two locking thumbscrews on the left and right side of the optical effects module (please do not attempt to remove the thumbscrews completely). Once the thumbscrews have been loosened push them inwards towards the center of the head while gently pulling the effects module straight out. You may use the metal support plates to grasp and pull the effects module out.
- Page 53 means to grasp the module. 5) To access the internal components of the module loosen the three securing thumbscrews illustrated below. Once these screws are lose you may place the module on a flat and open the unit up as if it were a book. This will allow access the all the gobos and colors so they may be changed or cleaned.
- Page 54 b) Insert the effects module back in to the fixture and the two lateral tracks. Push it carefully down until the two locking thumbscrews snap in place and hand tighten the retaining thumbscrews. c) Connect the "Data Bus" cable into the proper corresponding socket. d) Seal the cover in reverse order.
-
Page 55: Changing/Replacing Gobos/Colors
(section 13) of this manual. The POWER SPOT 700 II includes both Aluminum (thickness = 0.3 mm) and Glass (thickness = 1.1 - 3.0 mm) gobos (outside diameter 26.9 mm, viewable image size 23 mm). - Page 56 Attention: Custom gobos that contain company logos and text must also be orientated properly to ensure proper display of the custom image. The readable side must be mounted towards the lamp. In the illustration below, notice that the text is readable in the example on the left and mirrored in the example on right.
-
Page 57: Changing Gobos
14.2 Changing Gobos 1) Be sure the effects module is removed and opened as detailed in the previous section of this manual. 2) Genteelly lift and pull the gobo holder out of the center part of the wheel hub to remove the individual holder. See the left image below. 3) Once the gobo holder has been removed the Gobo itself can be replaced by remove the centric spring with a small screwdriver or gripping pliers. -
Page 58: Gobo Patterns
Power Spot 700 II™ Power Spot 700 II Gobo Wheels Special Notice: If you use glass gobos, the non-vaporized side must be fitted towards the lamp direction. Gobo wheel 1 with rotating Gobos Gobo wheel 2 with rotating Gobos Fixed Gobo wheel ©Elation Professionals®... -
Page 59: Maintenance And Cleaning
15. MAINTENANCE AND CLEANING It is absolutely essential that the fixture is kept clean and dust, dirt and smoke-fluid residues do not built-up on the surface or within the fixture. Residue build-up may cause the fixture's light output to be significantly reduced. Regular cleaning will not only ensure the maximum light output, but will also allow the fixture to function reliable throughout its life. - Page 60 Inside lens Monthly Fan and air channel Monthly Reflector Never Lamp Never Moveable parts Yearly Caution: 1. Never allow the optical parts to come in contact with oil, dirt, or grime. 2. Allow all parts to dry completely before attempt operation. 3.
-
Page 61: Warranty
Power Spot 700 II™ 16. TWO YEAR (730 DAYS) LIMITED WARRANTY A. Elation Professionals® hereby warrants, to the original purchaser, Elation Professionals® products to be free of manufacturing defects in material and workmanship for a period of two years (730 days) from the date of purchase. This warranty shall be valid only if the product is purchased within the United States of America, including possessions and territories. - Page 62 Power Spot 700 II™ F. No warranty, whether expressed or implied, is given or made with respect to any accessory supplied with products described above. Except to the extent prohibited by applicable law, all implied warranties made by Elation Professionals® in connection with this product, including warranties of merchantability or fitness, are limited in duration to the warranty period set forth above.
-
Page 63: Photometric Data
Power Spot 700 II™ 17. PHOTOMETRIC DATA ©Elation Professionals® Los Angeles, Ca. wwww.ElationLighting.com Page... -
Page 64: Dimensions
Power Spot 700 II™ 18. DIMENSIONS ©Elation Professionals® Los Angeles, Ca. wwww.ElationLighting.com Page... -
Page 65: Technical Specification
19. TECHNICAL SPECIFICATION Power supply Power consumption Fuse protection Lamp Type Live time Color temperature Luminous flux Optical system Dichroic coated glass reflector Beam angel (variable) 14° - 32° Lenses hardened and tempered, anti-reflex coated Colors (16 Bit) Color wheel 1: 8 dichroic filters plus white, 9 half colors Color wheel 2: 8 dichroic filters plus white, 9 half colors, 1x CTC 5500, 1x CTC 3200 Gobos (16 Bit) Gobo-wheel 1: 7 exchangeable rotating gobos plus "open"... - Page 66 Standard DMX-512, 3 pole XLR; [+] = Pin 3 The DMX- addressing starts at the DMX- address [001]. Pan / Tilt Pan - movement Tilt - movement Weights and measures Width of the base Length of the base Height (head vertical) Weight (net) Please Note: Specifications and improvements in the design of this unit and this manual are subject to change without any prior written notice.
-
Page 67: Index
INDEX Adjustments... 23 aspheric lens ... 40 BGV C1 ... 11 Blind current compensation ... 13 Calibrations... 23 Change a Gobo ... 37 Connected load ... 13 Decoration ... 11 Description of Device... 8 DIN VDE 0711-217... 11 DMX... 13 DMX- Address ... - Page 68 Power Spot 700 II™ Elation Professional 6122 S. Eastern Ave. Los Angeles, Ca. 90040 www.ElationLighting.com / info@ElationLighitng.com ©Elation Professionals® Los Angeles, Ca. wwww.ElationLighting.com Page...
Need help?
Do you have a question about the 700 II and is the answer not in the manual?
Questions and answers