Advertisement
Table of Contents
- 1 Product View and Parts
- 2 Battery Installation
- 3 Included in this Package
- 4 Getting Started
- 5 Battery Notice
- 6 Assembly Instructions
- 7 Attaching/Removing Activity Panel
- 8 Product Features
- 9 Modes of Play
- 10 Melody List
- 11 Care and Maintenance
- 12 Troubleshooting
- 13 Important Note
- Download this manual
Advertisement
Table of Contents

Subscribe to Our Youtube Channel
Related Manuals for VTech Sit-to-Stand Learning Walker


Summary of Contents for VTech Sit-to-Stand Learning Walker
-
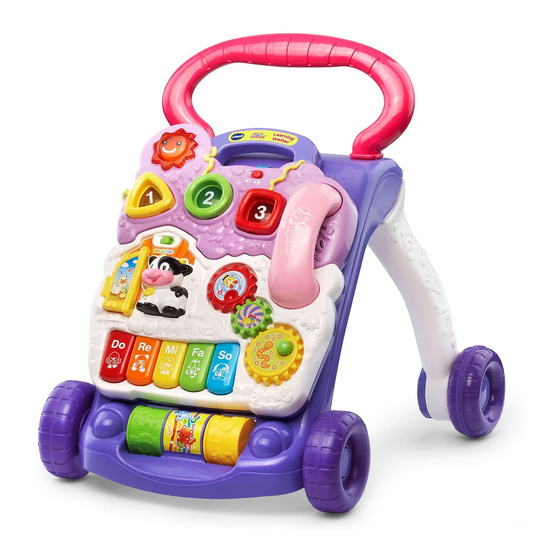
Page 3: Product View And Parts
INTRODUCTION Thank you for purchasing the VTech Sit-to-Stand Learning Walker ® learning toy. The Sit-to-Stand Learning Walker is part of the Sit-to-Stand series of toys developed to grow with baby. Little ones can play with the stand- alone activity panel on the floor while discovering animals, colors, music, shapes and numbers. -
Page 4: Battery Installation
INCLUDED IN THIS PACKAGE • One electronic activity panel • One main walker body • Two legs with wheels • One walker handle • One telephone handset • One user’s manual WARNING: All packing materials, such as tape, plastic sheets, wire ties and tags are not part of this toy, and should be discarded for your child’s safety. -
Page 5: Battery Notice
BATTERY NOTICE • Install batteries correctly observing the polarity (+, -) signs to avoid leakage. • Do not mix old and new batteries. • Do not mix batteries of different types: alkaline, standard (carbon- zinc) or rechargeable (nickel-cadmium). • Remove the batteries from the equipment when the unit will not be used for an extended period of time. -
Page 6: Assembly Instructions
ASSEMBLY INSTRUCTIONS 1. Push in and unscrew the two fasteners at the top of the walker. 2. Insert the legs into the slots with the wheels facing outward, as shown in the diagram. 3. Gently pull the legs back until they click into place. -
Page 7: Attaching/Removing Activity Panel
4. Stand the walker upright and insert the handle into the slots on the top to secure the legs. 5. Push and screw in the fasteners at the top of the walker to secure the handle and legs. Attaching/Removing the Activity Panel 1. -
Page 8: Product Features
) or HIGH VOLUME ) position. To turn the unit OFF, slide the ON/OFF/ VOLUME CONTROL SWITCH to the OFF ) position. 2. AUTOMATIC SHUT-OFF To preserve battery life, the VTech Sit- ® to-Stand Learning Walker TM , s electronic... -
Page 9: Modes Of Play
3. MODES OF PLAY Select from one of the two modes of play, including LEARNING and MUSIC, on the activity panel. ACTIVITIES Slide the on/off/volume control switch from off to either Low or High position to turn the unit on. You will hear a rooster’s call and then an upbeat nursery song. - Page 10 2. In both modes, press the light-up sun button to hear upbeat melodies and fun sound effects. 3. In both modes, pick up the phone to hear animals singing. 4. In Learning Mode, spin the three flowers to hear fun phrases, sound effects and a melody.
- Page 11 6. In Learning Mode, press the piano keys to learn colors, numbers and animal sounds. In Music Mode, press the piano keys to play piano notes. When a melody is playing, pressing the piano keys will activate fun animal sounds on top of the melody.
-
Page 12: Melody List
MELODY LIST 1. Old MacDonald Had a Farm 2. The Glow Worm 3. Pop! Goes the Weasel 4. Oh Susanna! 5. Mary Had a Little Lamb 6. Hey Diddle Diddle 7. Turkey in the Straw 8. Polly Wolly Doodle 9. Alouette 10. -
Page 13: Care And Maintenance
CARE & MAINTENANCE 1. Keep the unit clean by wiping it with a slightly damp cloth. 2. Keep the unit out of direct sunlight and away from any direct heat source. 3. Remove the batteries when the unit is not in use for an extended period of time. -
Page 14: Troubleshooting
If the problem persists, please call our Consumer Services Department at 1-800-521-2010 in the U.S. or 1-877-352-8697 in Canada, and a service representative will be happy to help you. For information on this product’s warranty, please call VTech at 1-800- ®... -
Page 15: Important Note
IMPORTANT NOTE: Creating and developing Infant Learning products is accompanied ® by a responsibility that we at VTech take very seriously. We make ® every effort to ensure the accuracy of the information, which forms the value of our products. However, errors sometimes can occur. - Page 16 THIS DEVICE COMPLIES WITH PART 15 OF THE FCC RULES. OPERATION IS SUBJECT TO THE FOLLOWING TWO CONDITIONS: (1) THIS DEVICE MAY NOT CAUSE HARMFUL INTERFERENCE, AND (2) THIS DEVICE MUST ACCEPT ANY INTERFERENCE RECEIVED, INCLUDING INTERFERENCE THAT MAY CAUSE UNDESIRED OPERATION. THIS CLASS B DIGITAL APPARATUS COMPLIES WITH CANADIAN ICES-003.
Need help?
Do you have a question about the Sit-to-Stand Learning Walker and is the answer not in the manual?
Questions and answers
One of the back wheels will not turn to adjust speed level. How can I fix that?
To fix a back wheel that will not turn on the VTech Sit-to-Stand Learning Walker, follow these steps:
1. Check for Obstructions – Inspect the wheel for any debris, hair, or dust that may be preventing it from turning. Remove any blockage.
2. Ensure Proper Assembly – Make sure the legs and wheels are correctly inserted into the main body. The wheels should be facing outward.
3. Adjust Wheel Locks – Some models have adjustable rear wheels for different resistance levels. Check if the wheel lock is engaged and adjust it if necessary.
4. Tighten or Loosen Screws – If the wheel is too tight or stuck, try loosening the screw slightly. If it is loose, tighten it to ensure proper movement.
5. Test Movement – After making adjustments, push the walker to see if the wheel turns properly.
If the issue persists, refer to the product manual for further troubleshooting.
This answer is automatically generated