Table of Contents
Advertisement
Quick Links
O & M Manual for the Fixed and
Drawout Magnum Transfer Switches
Instruction Booklet
New Information
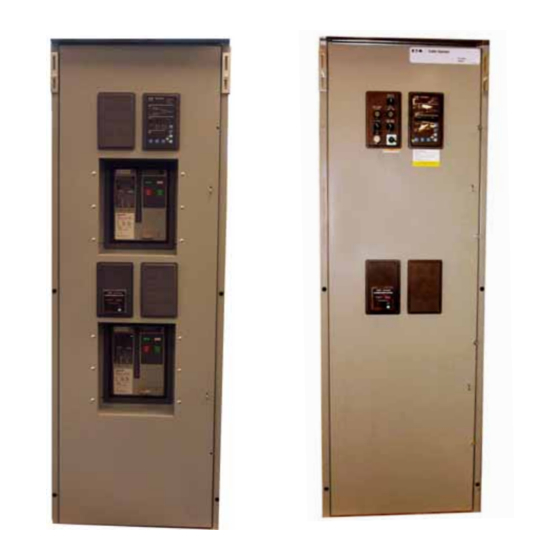
Description
Introduction . . . . . . . . . . . . . . . . . . . . . . . . . . . . . . . . . . . . 3
Receiving, Handling, and Storage . . . . . . . . . . . . . . . . . . . . 10
Equipment Description. . . . . . . . . . . . . . . . . . . . . . . . . . . . 10
Installation and Wiring . . . . . . . . . . . . . . . . . . . . . . . . . . . . 16
Operation . . . . . . . . . . . . . . . . . . . . . . . . . . . . . . . . . . . . 20
Drawout and Fixed Switching Devices . . . . . . . . . . . . . . . . 22
Operation of the Bypass Isolation Transfer Switch . . . . . . . . 25
Testing and Problem Solving . . . . . . . . . . . . . . . . . . . . . . . 29
Maintenance . . . . . . . . . . . . . . . . . . . . . . . . . . . . . . . . . . 31
Renewal Parts Guide . . . . . . . . . . . . . . . . . . . . . . . . . . . . . 33
IB01602011E
Page
For more information visit: www.Eaton.com
Advertisement
Table of Contents

Related Manuals for Eaton Magnum Transfer Switch


Summary of Contents for Eaton Magnum Transfer Switch
-
Page 1: Table Of Contents
O & M Manual for the Fixed and Drawout Magnum Transfer Switches Instruction Booklet New Information Description Introduction ........3 Receiving, Handling, and Storage . -
Page 2: Automatic Transfer Switch
Page 2 Effective: March 2007 WARNING READ AND UNDERSTAND THE INSTRUCTIONS CONTAINED HEREIN- AFTER BEFORE ATTEMPTING TO UNPACK, ASSEMBLE, OPERATE, OR MAINTAIN THIS EQUIPMENT. HAZARDOUS VOLTAGES ARE PRESENT INSIDE TRANSFER SWITCH ENCLOSURES THAT CAN CAUSE DEATH OR SEVERE PERSONAL INJURY. FOLLOW PROPER INSTALLATION, OPERATION, AND MAIN- TENANCE PROCEDURES TO AVOID THESE VOLTAGES. -
Page 3: Section 1: Introduction
Fixed and Drawout Magnum Transfer Switches Section 1: Introduction 1.1 Preliminary Comments and Safety Precautions This technical document is intended to cover most aspects associ- ated with the installation, application, operation, and maintenance of transfer switch equipment with ratings from 800 through 3200 amperes (A), except for the specific logic used to control the equipment. - Page 4 Page 4 Effective: March 2007 Basic Transfer Switch (Power Panel) The basic transfer switch is designed for use with customer fur- nished logic. It is similar in design to the automatic version, except the intelligence circuit (logic panel) and voltage selection panel are omitted.
- Page 5 1000 1200 1600 2000 2500 3200 Tested in accordance with UL1008. Eaton Drawout Magnum Transfer Switch will coordinate with a power switching device short time rating. Contact factory for details. IB01602011E SOURCE 1 BYPASS SOURCE 1 BYPASS SOURCE 2 BYPASS...
- Page 6 They are available in both fixed and drawout versions, both of which are used in the Magnum transfer switch depending on the specific transfer switch ordered. Figure 5. The Magnum Fixed Switching Device.
-
Page 7: Primary Connections
IB01602011E Figure 9. Drawout Switching Device Fully Extended from the Magnum Transfer Switch. 1.3.3 Magnum Fixed Switching Devices The Magnum fixed type switching device differs from the drawout version in that it has no levering device, primary disconnects, and secondary disconnects. - Page 8 Instructional Booklet Page 8 Effective: March 2007 Fixed and Drawout Magnum Transfer Switches In addition, a fixed switching device does not have a standard fea- ture to hold the switching device in a “trip-free” position. Magnum fixed switching device terminals have holes for making bolted horizontal primary bus connections.
- Page 9 Fixed and Drawout Magnum Transfer Switches Table 3. Transfer Switch Catalog Number Explanation. Magnum Bypass, Automatic and Non-automatic Transfer Switches 800-3200 Amperes USING THE STYLE IDENTIFICATION GUIDE The Style Identification Guide provides an overview of the ten basic style/feature categories which generate the 15 digit Genswitch catalog number. A T V I G B 3 3 2 0 0 FRAME...
-
Page 10: Section 2: Receiving, Handling, And Storage
Page 10 Effective: March 2007 Section 2: Receiving, Handling, and Storage 2.1 Receiving Every effort is made to ensure that the transfer switch equipment arrives at its destination undamaged and ready for installation. Crating and packing is designed to protect internal components as well as the enclosure. -
Page 11: Power Panel
Fixed and Drawout Magnum Transfer Switches The components comprising the three panels are installed in accor- dance with the specific requirements of the circuit being controlled. Each transfer switch is, therefore, tailor-made to a specific applica- tion. 3.2 Power Panel The power panel consists of a means for making load, power, and neutral connections. - Page 12 Page 12 Effective: March 2007 3.2.4 TRANSFER MECHANISM The transfer switch uses Eaton Magnum insulated case switching devices and insulated case switches with a stored-energy mecha- nism. An electrical operator automatically recharges the mecha- nism after the switching device has been closed, and an indicator on the switch shows whether it is in the OPEN or CLOSED posi- tion and the status of the stored energy mechanism.
-
Page 13: Logic Panel
Fixed and Drawout Magnum Transfer Switches 3.2.5 Drawout Mechanism The drawout mechanism is described in detail in Section 6 (Figure 14). Figure 14. Drawout Mechanism (Closed Transition Shown) 3.3 Voltage Selection Panel 3.3.1 North American Voltage Selection (120, 208, 240, 480, and 600 V, 60 Hz) The North American market voltage selection panel consists of multi-tap transformers, contained in a steel case mounted in the... - Page 14 Page 14 Effective: March 2007 Figure 17. ATC-800. 3.5 Neutrals All 2-pole and 3-pole transfer switches are equipped with 100% rated neutral connections (Figures 18 and 19). Different lug con- figurations are available (See Option 21A). Load Connections Source Connections Ground Connections Figure 18.
- Page 15 Fixed and Drawout Magnum Transfer Switches 15. Auxiliary Contacts Position indication contacts provide Form “A and “B” position con- tacts. E. Source 1 Position: Provides one Form “A” and one Form “B” contact per customer connection. F. Source 2 Position: Provides one Form “A” and one Form “B” contact for customer connection.
-
Page 16: Section 4: Installation And Wiring
Page 16 Effective: March 2007 3.8 Standards Eaton transfer switch equipment is listed for application by UL and CSA. In addition, Eaton ATSs are listed in File E38116 by UL, Inc., under Standard UL 1008. This standard covers require- ments for ATSs intended for use in ordinary locations to provide for lighting and power as follows: a. -
Page 17: Mounting Procedure
Fixed and Drawout Magnum Transfer Switches 4.3 Unpackaging and Inspection CAUTION SINCE THE ENCLOSED TRANSFER SWITCH MUST BE LIFTED INTO PLACE FOR MOUNTING, BE CERTAIN THAT ADEQUATE RESOURCES ARE AVAILABLE FOR LISTING TO AVOID PERSONNEL INJURIES OR EQUIPMENT DAMAGE. Proceed with the following four steps: Step 1: Carefully uncrate the transfer switch. -
Page 18: Power Cable Connections
Fixed and Drawout Magnum Transfer Switches 4.5 Power Cable Connections WARNING POWER CONDUCTORS MAY HAVE VOLTAGE PRESENT THAT CAN CAUSE SEVERE PERSONAL INJURY OR DEATH. DE-ENERGIZE ALL POWER OR CONTROL CIRCUIT CONDUCTORS TO BE CONNECTED TO THE TRANSFER SWITCH EQUIPMENT BEFORE BEGINNING TO WORK WITH THE CONDUCTORS AND/OR TERMINATING THEM TO THE EQUIPMENT. - Page 19 Fixed and Drawout Magnum Transfer Switches 4.6 Voltage Selection Adjustment Certain devices, such as the voltage selection panel, sensing relays, and timers need to be set and/or calibrated prior to placing the transfer switch equipment into service. Adjustments for logic PRIMARY TERMINALS Figure 21.
-
Page 20: Section 5: Operation
Page 20 Effective: March 2007 CAUTION IT IS IMPORTANT TO TAKE GREAT CARE WHEN PLACING A DRA- WOUT CIRCUIT BREAKER ON ITS EXTENSION RAILS. IF THE CIR- CUIT BREAKER IS NOT PROPERLY SEATED ON THE EXTENSION RAILS, IT COULD FALL FROM THE RAILS CAUSING EQUIPMENT DAMAGE AND/OR BODILY INJURY. - Page 21 Fixed and Drawout Magnum Transfer Switches Figure 24. Close Switch by Pushing Close Button. WARNING OVERLAPPING CONTACTS SOURCE 1 AND SOURCE 2 must be Synchronized 7805C60H04 THIS PRODUCT CONTAINS A SPECIAL CON- TACT ARRANGEMENT (OVERLAPPING CON- TACTS). MISUSE CAN RESULT IN DEATH SEVERE PERSONAL INJURY OR PROPERTY DAMAGE.
-
Page 22: Section 6: Drawout And Fixed Switching Devices
Page 22 Effective: March 2007 Section 6: Drawout and Fixed Switching Devices 6.1 Installing a Drawout Switching Device In transfer switches equipped with drawout switching devices, bolted-in carriages with extendable rails support the switching devices. Figure 26. Switching Device Drawn Out from the Transfer Switch. To install a drawout switching device, the extendable rails must first be pulled all the way out. - Page 23 Fixed and Drawout Magnum Transfer Switches Figure 29. Switching Device in the CONNECT Position. Figure 30. Switching Device in the TEST Position. Figure 31. Switching Device in the DISCONNECT Position. IB01602011E For more information visit: www.Eaton.com Effective: March 2007 Page 23...
- Page 24 Page 24 Effective: March 2007 Yellow Green Figure 32.Carriage Label Showing DISCONNECT, TEST, and CONNECT Positions of the Recessed Cover. 6.1.2 Levering the Switching Device The switching device is now ready to be levered. With the switching device OPEN, the levering device access door can be raised.
-
Page 25: Section 7: Operation Of The Bypass Isolation Transfer Switch
Fixed and Drawout Magnum Transfer Switches The fixed switching device frame has two mounting feet, one on each side, to permit the fixed switching device to be securely mounted. Each mounting foot has two slotted mounting holes which are used to bolt the switching device securely in place. Use either 3/8”... -
Page 26: Automatic Operation
Page 26 Effective: March 2007 Figure 36. Magnum Bypass Lights. The right door control panel has the following standard features: 1. Light to indicate if the Source 1 switching device is isolated (only if the Source 1 switching device is racked out). 2. - Page 27 Fixed and Drawout Magnum Transfer Switches Place Generator In OFF Position Cutler-Hammer Operatio Digitrip 3000 Cutler-Hammer Operational High Digitrip 3000 Time Overcurrent High Load Commun Time Overcurrent Curve Shape Communications Trip Curve Shape Pickup (x In) RMS Amperes Pickup (x In) Time Multiplier Time Multiplier Short Delay...
- Page 28 Page 28 Effective: March 2007 Cutler-Hammer Operatio Cutler-Hammer Digitrip 3000 Operational High Digitrip 3000 Time Overcurrent High Load Commun Time Overcurrent Curve Shape Communications Trip Curve Shape Pickup (x In) RMS Amperes Pickup (x In) Time Multiplier Time Multiplier Short Delay Short Delay Pickup (x In) Amp Demand...
-
Page 29: Section 8: Testing And Problem Solving
Fixed and Drawout Magnum Transfer Switches 7.4 Manual Operation When in Bypass Mode 7.4.1 Source 1 Bypass to Source 2 Bypass When the transfer switch is set to Source 1 bypass, it can be transferred to Source 2 bypass by the following sequence: 1. - Page 30 Page 30 Effective: March 2007 If a problem persists after having completed the problem solving procedure, contact an Eaton representative for further assistance. When calling for assistance, the following is the MINIMUM infor- mation required to properly address the need: 1.
-
Page 31: Section 9: Maintenance
Fixed and Drawout Magnum Transfer Switches Section 9: Maintenance 9.1 Introduction WARNING HIGH VOLTAGES ARE PRESENT IN AND AROUND TRANSFER SWITCH EQUIPMENT. BEFORE INSPECTING OR MAINTAINING THIS EQUIPMENT, DISCONNECT THE LINE POWER FROM THE EQUIP- MENT BEING SERVICED BY OPENING AND LOCKING OUT, IF POSSI- BLE, THE NEXT HIGHEST DISCONNECT DEVICE. -
Page 32: Cover Removal And Replacement
Page 32 Effective: March 2007 9.3 Cover Removal and Replacement Many of the maintenance procedures outlined in Table 6 require the removal and replacement of side and rear covers. For all NEMA 1 and NEMA 3R enclosed transfer switches, see Section 9.3.1 for cover removal and replacement instructions. -
Page 33: Section 10: Renewal Parts Guide
Fixed and Drawout Magnum Transfer Switches Section 10: Renewal Parts Guide 10.1 General Refer to Figure 42 through 45 for assistance with selecting and ordering selected ATS renewal parts. Example: To order Logic Harness for an ATVIMGB33200XRU transfer switch, order Catalog Number T5MGH01 as shown in Figure 42. - Page 34 Page 34 Effective: March 2007 SERVICE ENTRANCE FUSE BLOCK HARNESS - TSMGH16 VOTING HARNESS TSHGH03 Figure 43. TRANSFORMER PACK HARNESS TSMGH16 Figure 44. Fixed and Drawout Magnum Transfer Switches CLOSED TRANSITION HARNESS TSMGH04 For more information visit: www.Eaton.com MAGNUM NON-AUTO TRANSFORMER PACK TSMGT01 MAGNUM...
- Page 35 Fixed and Drawout Magnum Transfer Switches 500 KCMIL NEUTRAL TERMINAL I80C046G02 750 KCMIL NEUTRAL TERMINAL I80C045G01 Figure 45. IB01602011E For more information visit: www.Eaton.com Effective: March 2007 Page 35 SENSING HARNESS TSMGH02...
- Page 36 Page 36 Effective: March 2007 This instruction booklet is published solely for information pur- poses and should not be considered all-inclusive. If further infor- mation is required, you should consult an authorized Eaton sales representative. The sale of the product shown in this literature is subject to the terms and conditions outlined in appropriate Eaton selling policies or other contractual agreement between the parties.
Need help?
Do you have a question about the Magnum Transfer Switch and is the answer not in the manual?
Questions and answers