Epson WorkForce WF-2530 Quick Manual
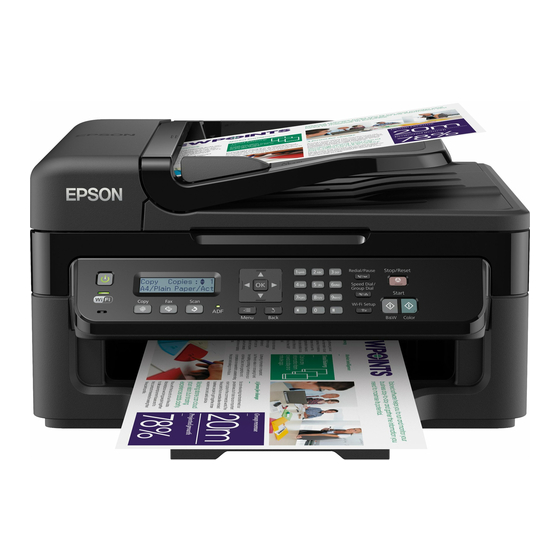
Epson workforce wf-2530 all-in-one printer
Hide thumbs
Also See for WorkForce WF-2530:
- Guía de instalación (4 pages) ,
- Start here (4 pages) ,
- User manual (271 pages)
Table of Contents
Advertisement
WF-2530
Quick Guide
Your WF-2530. . . . . . . . . . . . . . . . . . . . . . . . . . . . . . . . . . . . . . . . . . . . . . . . . . 2
Using Special Papers . . . . . . . . . . . . . . . . . . . . . . . . . . . . . . . . . . . . . . . . . . . . 4
Placing Originals for Copying, Scanning, or Faxing. . . . . . . . . . . . . . . . . . . . . . 6
Copying a Photo or Document . . . . . . . . . . . . . . . . . . . . . . . . . . . . . . . . . . . . . 8
Printing From Your Computer. . . . . . . . . . . . . . . . . . . . . . . . . . . . . . . . . . . . . . 9
Scanning a Document or Photo . . . . . . . . . . . . . . . . . . . . . . . . . . . . . . . . . . . 13
Faxing a Document. . . . . . . . . . . . . . . . . . . . . . . . . . . . . . . . . . . . . . . . . . . . . 16
Maintaining Your Product . . . . . . . . . . . . . . . . . . . . . . . . . . . . . . . . . . . . . . . . 21
Solving Problems . . . . . . . . . . . . . . . . . . . . . . . . . . . . . . . . . . . . . . . . . . . . . . 26
Notices . . . . . . . . . . . . . . . . . . . . . . . . . . . . . . . . . . . . . . . . . . . . . . . . . . . . . . 32
1
Advertisement
Table of Contents

Related Manuals for Epson WorkForce WF-2530


Summary of Contents for Epson WorkForce WF-2530
-
Page 1: Table Of Contents
WF-2530 Quick Guide Your WF-2530..........2 Using Special Papers . -
Page 2: Using The Control Panel
See the online User’s Guide for details. Wireless printing and scanning from mobile See www.epson.com/connect. ™ devices with EPSON Connect Easy Wi-Fi networking See the online User’s Guide. Extra-high capacity ink cartridges See this Quick Guide for installation instructions. - Page 3 Number Description Enter numbers, letters, and symbols Select fax dialing settings Stop printing/copying/scanning/faxing or reset settings View wireless network status Access your product’s Copy mode Access your product’s Fax mode Access your product’s Scan mode Display detailed settings for each mode Cancel/return to the previous menu Select Wi-Fi settings Start printing/copying/scanning/faxing...
-
Page 4: Using Special Papers
Using Special Papers Epson offers a wide array of high quality papers, making it easy to maximize the impact of your photos, presentations, and creative projects. ® ® You can purchase genuine EPSON ink and paper at EPSON Supplies Central www.epson.com/ink3 (U.S. - Page 5 S041271 EPSON Photo Quality Self-adhesive A4 (8.3 × 11.7 inches S041106 Sheets [210 × 297 mm]) EPSON Iron-on Cool Peel Transfer Letter (8.5 × 11 inches S041153 paper [216 × 279 mm]) Note: Media availability varies by country. For detailed paper loading instructions, see the Start Here sheet or online User’s Guide.
-
Page 6: Placing Originals For Copying, Scanning, Or Faxing
Placing Originals for Copying, Scanning, or Faxing Before you copy, scan, or fax, place your documents on the scanner glass or in the Automatic Document Feeder (ADF). Place photos on the scanner glass only and not in the ADF. Using the Scanner Glass You can place a photo or a document up to letter-size (or A4-size) on the scanner glass. -
Page 7: Using The Automatic Document Feeder
Using the Automatic Document Feeder You can place up to 30 sheets of letter- or A4-size paper or 10 sheets of legal-size paper at a time. Load only plain paper in the ADF. Move the edge guide outward. Fan the originals, then tap them on a flat surface to even the edges. Insert the originals faceup, top edge first. -
Page 8: Copying A Photo Or Document
Copying a Photo or Document Follow the steps in this section to copy black-and-white or color documents. If you use the Automatic Document Feeder (ADF), you can copy up to 30 sheets of letter- or A4-size paper or 10 sheets of legal-size paper at a time. Load only plain paper in the ADF. -
Page 9: Printing From Your Computer
Printing in Windows Select the print command in your application. Select your EPSON product Click here to open your printer software Make sure your EPSON product is selected, then click the Preferences button. Properties (If you see a , or button, click it. - Page 10 On the Main tab, select the basic print settings. Make sure you choose the correct setting for the paper you are using (see page 12 for details). Paper Type Select your Document Size Select your Click here Paper Type for quick access to Click here for preselected...
-
Page 11: Printing With A Mac
Follow the steps below to print from Mac OS X. Open the menu and select File Print Select your EPSON product as the setting. Printer Select your EPSON product Click the arrow or to expand the print window, if necessary. -
Page 12: Selecting The Correct Paper Type
EPSON Premium Photo Paper Semi-gloss Premium Photo Paper Semi-Gloss EPSON Premium Presentation Paper Matte Premium Presentation Paper Matte EPSON Premium Presentation Paper Matte Double-sided EPSON Ultra Premium Presentation Paper Matte EPSON Brochure & Flyer Paper Matte Double-sided Envelopes Envelope Selecting the Correct Paper Type... -
Page 13: Scanning A Document Or Photo
Scanning a Document or Photo You can use your product to scan original documents and photos and save them on your computer. Note: For detailed scanning instructions, see the online User’s Guide. Quick Scanning With the Scan Button Use the u button to quickly scan a document or photo and save it on your Scan computer. -
Page 14: Scanning With Epson Scan Software
, and select your product. Import Acquire EPSON Scan opens in Office Mode the first time you use it. (You can change the scan mode using the Mode selector in the upper right corner.) Click here to change the scan mode Note: You cannot use Home mode to scan with the Automatic Document Feeder. -
Page 15: Scanning With Mac Os X
Scan Note: With Mac OS X 10.6 or 10.7, in addition to scanning with Image Capture, you can download and install EPSON Scan scanning software. EPSON Scan provides additional image adjustment and photo correction features for enhancing scanned images, and ®... -
Page 16: Faxing A Document
30 sheets of letter- or A4-size paper or 10 sheets of legal-size paper at a time. Load only plain paper in the ADF. Note: You can also send or receive a fax from your computer using the Epson FAX Utility. For more information, see the online User’s Guide. -
Page 17: Setting Up Fax Features
Note: Any phone or answering machine must be connected to the port for your EXT. product to detect an incoming fax call when the phone is picked up. Epson cannot guarantee compatibility with VoIP, cable phone systems, or fiberoptic digital services such as FiOS™. -
Page 18: Entering Your Phone Number
Use the numeric keypad to enter your sender name or other header information (see “Using the Keypad to Enter Numbers and Characters” on page 18). You can enter up to 40 digits. When you’re done, press to return to the Fax Header screen. Entering Your Phone Number From the Fax Header screen, press u or d to select , then press... -
Page 19: Sending A Fax From The Control Panel
You can send a fax by manually entering a fax number, as described below. Note: To dial the number using a telephone, by redialing, or by selecting from your speed dial list, see the next section. To send a fax from your computer using the Epson FAX Utility, see your online User’s Guide. -
Page 20: Receiving Faxes
■ To use a group dial entry, press the button twice, Speed Dial/Group Dial select or type the number of a group dial entry, and press Note: For more information on setting up group dial entries, see the online User’s Guide. ■... -
Page 21: Maintaining Your Product
Maintaining Your Product Follow the instructions in this chapter to check and clean the print head nozzles, check ink levels, and replace ink cartridges. If you need to align the print head, see the online User’s Guide. Caution: To keep your product looking like new, don’t place anything on top of the cover or use it as a writing surface. -
Page 22: Cleaning The Print Head
If quality does not improve, one of the ink cartridges may need to be replaced. If that doesn’t help, contact Epson as described on page 31. If you do not use your product often, it is a good idea to print a few pages at least once a month to maintain good print quality. -
Page 23: Purchasing Epson Ink Cartridges
In Windows, a window may appear on your computer screen if you try to print when ink is low. This window can optionally display ink offers and other updates from Epson. Note: To disable checking for ink offers or updates from Epson, see the instructions in your online User’s Guide. -
Page 24: Replacing Ink Cartridges
Replacing Ink Cartridges Make sure you have a new ink cartridge before you begin. Caution: Do not open ink cartridge packages until you are ready to install the ink. Cartridges are vacuum packed to maintain reliability. Leave the expended cartridge installed until you have obtained a replacement, or the ink remaining in the print head nozzles may dry out. - Page 25 Before you open the new cartridge package, shake it gently four or five times. Then remove it from the package. Caution: Do not touch the green chip or the small window on the ink cartridge. This can damage the cartridge. Remove the yellow tape from the side of the ink cartridge.
-
Page 26: Troubleshooting
Solving Problems If you have a problem with your EPSON product, check the messages on the LCD screen to diagnose the cause. You can also check the basic troubleshooting suggestions below, or see your online User’s Guide for more detailed help. - Page 27 Connect the Printer to Your Wireless Network If you are unable to connect to your wireless network using the product CD and the Start Here sheet, you can use the control panel on your product. Before you start, make sure you know your network name (SSID) and password. Press the button.
-
Page 28: Print A Network Status Sheet
■ If network communication was interrupted while starting EPSON Scan, exit EPSON Scan, and restart it after a few seconds. If EPSON Scan cannot restart, turn the product off and on, and then try again. Check the in EPSON Scan Timeout Setting Settings. - Page 29 ■ If paper has jammed, follow the steps on the LCD screen. If necessary, follow these steps: Lift the scanner unit. Carefully remove any paper trapped inside, including any torn pieces. Caution: Do not touch the flat white cable inside the product. Lower the scanner unit.
-
Page 30: Faxing Problems
Make sure your paper is loaded printable side up (usually the whiter, brighter, or glossy side). ■ For the best print quality, use EPSON papers (see page 4) and genuine EPSON ink cartridges (see page 23). ■ Make sure the type of paper you loaded matches the paper type setting on the control panel or in your printer software (see page 12). -
Page 31: Where To Get Help
Purchase Supplies and Accessories You can purchase genuine EPSON ink and paper at EPSON Supplies Central at www.epson.com/ink3 (U.S. sales) or www.epson.ca (Canadian sales). You can also purchase supplies from an EPSON authorized reseller. To find the nearest one, call 800-GO-EPSON (800-463-7766). -
Page 32: Notices
Notices Important Safety Instructions Before using your EPSON product, read and follow these safety instructions: ■ Be sure to follow all warnings and instructions marked on the product. ■ Use only the type of power source indicated on the product label. -
Page 33: Lcd Screen Safety
Use only a dry, soft cloth to clean the LCD screen. Do not use liquid or chemical cleansers. ■ If the LCD screen is damaged, contact Epson. Do not touch or attempt to remove any broken pieces. If the liquid crystal solution gets on your hands, wash them thoroughly with soap and water. - Page 34 ■ Do not try to move the print head by hand, or you may damage the product. ■ Before transporting the product, make sure the print head is in the home (far right) position and the ink cartridges are in place. ■...
-
Page 35: Declaration Of Conformity
Declaration of Conformity According to 47CFR, Part 2 and 15 for: Class B Personal Computers and Peripherals; and/or CPU Boards and Power Supplies used with Class B Personal Computers: Epson America, Inc. Located at: MS 3-13 3840 Kilroy Airport Way... - Page 36 If you have problems with this product and require technical or customer support, please visit www.epson.com for more information. This product is not intended to be repaired by the customer. If you experience trouble connecting this equipment to a telephone line, please contact: Name: Epson America, Inc.
-
Page 37: For Canadian Users
Cet appareil numérique de la classe B est conforme à la norme NMB-003 du Canada. Epson America, Inc. Limited Warranty What Is Covered: Epson America, Inc. (“Epson”) warrants to the original retail purchaser that the EPSON printer covered by this limited warranty statement, if purchased and operated only in the United States, Canada, or Puerto Rico, will be free from defects in workmanship and materials for a period of one (1) year from the date of original purchase. - Page 38 If service is needed, Epson will, at its option, exchange or repair the printer without charge for parts or labor. If Epson authorizes an exchange for the defective unit, Epson will ship a replacement printer to you, freight prepaid, so long as you use an address in the United States, Canada, or Puerto Rico.
-
Page 39: Copyright Notice
(excluding the U.S.) failure to strictly comply with Seiko Epson Corporation’s operating and maintenance instructions. Seiko Epson Corporation shall not be liable for any damages or problems arising from the use of any options or any consumable products other than those designated as Original EPSON Products or Epson Approved Products by Seiko Epson Corporation. - Page 40 EPSON Connection is a service mark of Epson America, Inc. General Notice: Other product names used herein are for identification purposes only and may be trademarks of their respective owners. Epson disclaims any and all rights in those marks. This information is subject to change without notice.
Need help?
Do you have a question about the WorkForce WF-2530 and is the answer not in the manual?
Questions and answers