Dymo LabelWriter® 450 Turbo High-Speed Postage and Label Printer for PC and Mac® Getting Started
User guide 1
Hide thumbs
Also See for LabelWriter® 450 Turbo High-Speed Postage and Label Printer for PC and Mac®:
- User manual ,
- Installation manual (4 pages) ,
- Quick start manual (126 pages)
Table of Contents
Advertisement
Quick Links
Advertisement
Table of Contents

Related Manuals for Dymo LabelWriter® 450 Turbo High-Speed Postage and Label Printer for PC and Mac®


Summary of Contents for Dymo LabelWriter® 450 Turbo High-Speed Postage and Label Printer for PC and Mac®
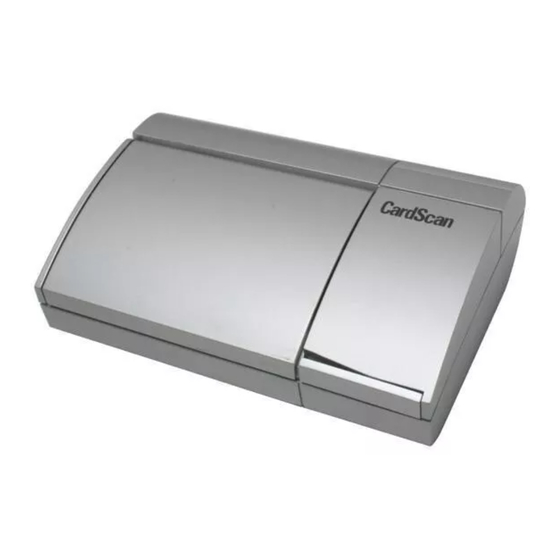
- Page 1 Chapter Getting Started with CardScan...
- Page 2 Copyright © 2006 CardScan, Inc. All rights reserved worldwide. This guide is protected by federal copyright law. No part of this guide may be reproduced or distributed, transcribed, stored in a retrieval system, translated into any spoken or computer language or transmitted in any form or by any means whatsoever without the prior written consent of: CardScan, Inc.
-
Page 3: Table Of Contents
Table of Contents Welcome to CardScan! ..............Summary of Products................Major Features ..............CardScan User Resources .............. Obtaining Technical Support Chapter 1 Creating CardScan Address Book ................First Steps ............Viewing Contacts in List View ..............Verifying Accuracy ............ Reaching Contacts from CardScan Chapter 2 Using CardScan as Your Contact Manager .......... - Page 4 Chapter 5 Copying Contacts to and from ® Windows Mobile Devices ........Choosing Best Option with Data Exchange Wizard ............Synchronizing Selected Files Appendix A: Compliance with FCC and EC CardScan, Inc.
-
Page 5: Welcome To Cardscan
Summary of Products Welcome to CardScan! This book introduces major features of the CardScan family of products. The purpose of this book is to show you the strengths and flexibility of CardScan products, and direct you to the sources of any detailed information and instructions you may need as you learn the products hands-on. -
Page 6: Major Features
Welcome to CardScan! Major Features The following section presents the major features common to all CardScan products: • Scanning • Accuracy Verification • Intuitive Graphical User Interface • Contact Management with Enhanced Navigation • Data-Exchange • Enhanced Ability to Reach Contacts Online Scanning Features •... - Page 7 Major Features Contact Management Features • Use the Navigation Bar for immediate access to groups of contacts based on the same criteria; for example, Categories, Recent Changes, Duplicates, etc. • Use a powerful, sophisticated, and flexible QuickSearch feature to find contacts in multiple open files.
-
Page 8: Cardscan User Resources
Welcome to CardScan! CardScan User Resources Use the online help for instructions, detailed descriptions of Online Help features, and for troubleshooting tips. For help with dialogs, click Help on the dialog. The dialog help is displayed in a tri-pane window, with tabs for Contents, Index, Search, and Glossary. -
Page 9: Chapter 1 Creating Cardscan Address Book
First Steps Chapter 1 Creating CardScan Address Book This chapter illustrates how CardScan creates an address book simply by scanning business cards into a file. It also highlights the features for verifying the information accuracy. It describes: • First steps scanning business cards •... - Page 10 Chapter 1 Creating CardScan Address Book 5. Scan several more cards by inserting them in the scanner, and then use any of the following options: • Click on the blue arrow to expand the dialog and review the saved images before processing.
-
Page 11: Viewing Contacts In List View
Viewing Contacts in List View Viewing Contacts in List View Click the List View tab to view the contacts in your file. The List View tab displays contact information in a multicolumn list. You can customize the List view to include columns representing any type of contact information. Verification Status View All button AtYourService... -
Page 12: Verifying Accuracy
Chapter 1 Creating CardScan Address Book Verifying Accuracy To verify a contact’s accuracy, display the contact in the Edit view, as illustrated on page 1-2. Verify Fields Highlighted by CardScan. CardScan highlights any field it suspects of containing incomplete or inaccurate information. To verify a highlighted field, compare its contents with the information in the card’s image. -
Page 13: Reaching Contacts From Cardscan
Reaching Contacts from CardScan Reaching Contacts from CardScan If the contact information is accurate, you can interact with it in Summary and List view. When moving the cursor around in Summary view, notice that the cursor changes to the “pointing hand.” By pointing and clicking with the mouse you can •... - Page 14 Chapter 1 Creating CardScan Address Book Displaying Address Maps on the Internet You can use the same method to generate a map of your contact’s address on the web. Another way to start this feature is to choose Card→Display Map of Address. Follow these steps: 1.
-
Page 15: Chapter 2 Using Cardscan As Your Contact Manager
Adding Contacts without Business Cards Chapter 2 Using CardScan as Your Contact Manager CardScan includes several powerful features for contact management. These include: • Different ways to add contacts without scanning • Add fields to enter more data • Organize contacts with Categories •... -
Page 16: Use Additional Fields For More Information
Chapter 2 Using CardScan as Your Contact Manager Use Additional Fields for More Information The Edit view displays the information in separate fields for Name, Title, Company, Address, 2nd Address, Phone, Fax, Email, Web Page and Other. It also has fields for up to six additional phone numbers and six additional email addresses—which you can label individually. -
Page 17: Major Features For Finding Contacts
Major Features for Finding Contacts Major Features for Finding Contacts The two most powerful features for finding contacts are the Navigation Bar and QuickSearch Navigation Bar CardScan's Navigation Bar provides immediate access to different collections of contact information. The top part of the navigation bar contains panels that provide immediate access to different collections of contacts. -
Page 18: Finding And Removing Duplicates
Chapter 2 Using CardScan as Your Contact Manager QuickSearch allows you to search by: • simply typing words from the contact you are looking for • specifying fields to be searched • combining words and fields To refine your search, click the QuickSearch button, and use this dialog: Type words in this box. -
Page 19: Safeguarding Your Contacts
Safeguarding Your Contacts Safeguarding Your Contacts To make sure your valuable information is safe and available when you need it, use the Backup Wizard. To start the Backup Wizard, choose File→Maintenance→Backup. The Backup Wizard allows you to save CardScan files locally, to a separate medium, and—most significantly—to your personal, secure account on the AtYourService website (www.cardscan.net). -
Page 20: Updating Contacts By Scanning
Chapter 2 Using CardScan as Your Contact Manager Updating Contacts by Scanning If you have a contact’s new card, you can update the contact’s front image and the information in the corresponding fields by scanning the new card into the existing contact. To do so, select the contact and choose Card→Replace. -
Page 21: Chapter 3 Using Cardscan Data In Microsoft Outlook
Choosing Best Option with Data Exchange Wizard Chapter 3 Using CardScan Data in Microsoft Outlook and other Desktop Applications CardScan enables you to copy contacts to and from your favorite contact manager or personal information manager (PIM). CardScan provides several data-exchange options. To choose the optimal option for your contact manager, use the Data Exchange Wizard. - Page 22 Chapter 3 Using CardScan Data in Microsoft Outlook and other Desktop Applications 4. Click Continue. The CardScan Synchronization dialog appears. 5. Click Configure. The Configure Synchronization dialog appears. 6. Browse for the CardScan file to synchronize. Then, click Select to select an Outlook folder. The dialog Select Outlook Folder appears: 7.
-
Page 23: Synchronizing Cardscan And Outlook
Synchronizing CardScan and Outlook 10.Click OK to save the configuration and to return to the CardScan Synchronization dialog: Click to change the current configuration. Click to synchronize the files shown in the Status window. Click to set up automatic synchronization. Synchronizing CardScan and Outlook You can perform synchronization manually, at any time, or choose automatic synchronization. - Page 24 Chapter 3 Using CardScan Data in Microsoft Outlook and other Desktop Applications This page is left blank intentionally. CardScan, Inc.
-
Page 25: Chapter 4 Copying Contacts To And From Palm Os™ Handheld Devices
Choosing Best Option with Data Exchange Wizard Chapter 4 Copying Contacts to and from Palm OS™ Handheld Devices CardScan provides several options for copying contacts to and from your Palm OS handheld. NOTE: These options become available only when the CardScan installer finds the Palm Desktop software on your PC. -
Page 26: Synchronizing
Chapter 4 Copying Contacts to and from Palm OS™ Handheld Devices NOTE: The first option on this screen is preselected, because HotSyncing CardScan and your Palm Address Book is the best way to keep identical contacts in both places. After the initial synchronization, CardScan will help you find and remove duplicates, if any (see page 2-4). - Page 27 Choosing Best Option with Data Exchange Wizard Chapter 5 Copying Contacts to and from ® Windows Mobile Devices The CardScan ActiveSync module enables you to synchronize a CardScan file with Windows Mobile devices. These include Windows CE, Pocket PC, and SmartPhone 2003 or later. Synchronization via the CardScan ActiveSync module automatically updates data in a Windows Mobile device whenever you change contact information in the CardScan file, and vice versa.
- Page 28 Chapter 5 Copying Contacts to and from Windows Mobile® Devices 4. Click Continue. The Microsoft ActiveSync window appears. ools→Options 5. Choose T . The Options tab appears. 6. Enable the Contacts CardScan service by selecting the corresponding checkbox. Disable all other Contacts services.
-
Page 29: Ec Declaration Of Conformity
Appendix A: Compliance with FCC and EC FCC Statement This equipment has been tested and found to comply with the limits for a Class B digital device, pursuant to Part 15 of FCC rules. These limits are designed to provide reasonable protection against harmful interference in a residential installation. - Page 30 This page is left blank intentionally. CardScan, Inc.
Need help?
Do you have a question about the LabelWriter® 450 Turbo High-Speed Postage and Label Printer for PC and Mac® and is the answer not in the manual?
Questions and answers