Table of Contents
Advertisement
GB/F
Thank you for purchasing this Toshiba product.
The TOSHIBA PDR-3310 is a digital camera equipped with a 3.22
mega-pixel CCD for high quality digital still photography.
Before using the camera, please read this User's Manual carefully and
follow its instructions to assure proper use.
Nous vous remercions d'avoir acheté ce produit TOSHIBA.
La TOSHIBA PDR-3310 est un appareil photographique numérique
disposant d'un CCD à 3,22 méga-pixels pour des photos numériques
de haute qualité.
Afin d'utiliser correctement cet appareil photo, veuillez lire
attentivement les explications de ce manuel.
Advertisement
Table of Contents

Related Manuals for Toshiba PDR-3310


Summary of Contents for Toshiba PDR-3310
- Page 1 GB/F Thank you for purchasing this Toshiba product. The TOSHIBA PDR-3310 is a digital camera equipped with a 3.22 mega-pixel CCD for high quality digital still photography. Before using the camera, please read this User’s Manual carefully and follow its instructions to assure proper use.
-
Page 2: Table Of Contents
Please purchase “Secure Digital (SD) Memory Cards” or “Multi-Media * MultiMedia Card is a registered trademark of Infineon Technologies AG Contents Cards*” (MMC) for use with this camera. These cards are referred to in (Germany), licensed to MMCA (MultiMediaCard Association). these User’s Instructions as “Memory Cards.”... -
Page 3: Safety Precautions
We disclaim any responsibility and shall be held harmless for any damages or losses incurred by the user in any of the following cases: Read these safety precautions carefully before using the PDR-3310. ¶ Fire, earthquake or any other act of God; acts by third parties; misuse by These instructions contain valuable information on safe and proper use the user, whether intentional or accidental;... - Page 4 Safety Precautions (continued) WARNING DANGER Should you ever notice smoke, a strange odor or Do not disassemble, change or repair the camera. excessive heat coming from the camera, immediately This might cause fire or electric shock. For details on repair turn OFF the power and remove the battery and AC and internal inspection, consult the store of purchase, or adapter.
- Page 5 Safety Precautions (continued) CAUTION CAUTION If you want to use the camera on an airplane, consult with Do not look at the sun through the camera viewfinder. the airline and follow their instructions. This may cause injury of the eyes. Use of this camera is sometimes restricted due to potential radio interference.
-
Page 6: Using Your Camera Correctly
In this case, remove the batteries and reinsert them again to reset the The PDR-3310 is particularly sensitive to sand. If the camera camera’s circuits. comes into contact with sand, not only will the camera become damaged, it will also no longer be repairable. -
Page 7: Notes On Handling Batteries
Notes On Handling Batteries • When the battery is to be stored for a long time, fully The PDR-3310 camera uses a lithium-ion battery pack (PDR-BT9). (This manual simply refers to this battery pack as the “battery”) Other charge the battery and then use the battery until there is no power left once every year and then store it. -
Page 8: Notes On Handling The Ac Adapter
Using Your Camera Correctly (continued) Notes On Handling the AC Adapter NOTES ON COPYRIGHT Be sure to use only the AC adapter provided with your camera. Using a different AC adapter might cause the camera to malfunction. Images taken with digital cameras are for personal enjoyment only When you use the AC adapter, carefully read and strictly observe the and should not be used otherwise without the permission of the Safety Precautions from page 4 onwards and the notes described... - Page 9 Software Application is allowed only on one personal computer. Abbreviations Used In This Manual Toshiba Corporation is not liable whatsoever for any damages to • Windows 98 the user or a third party as a result of use of a device by the...
-
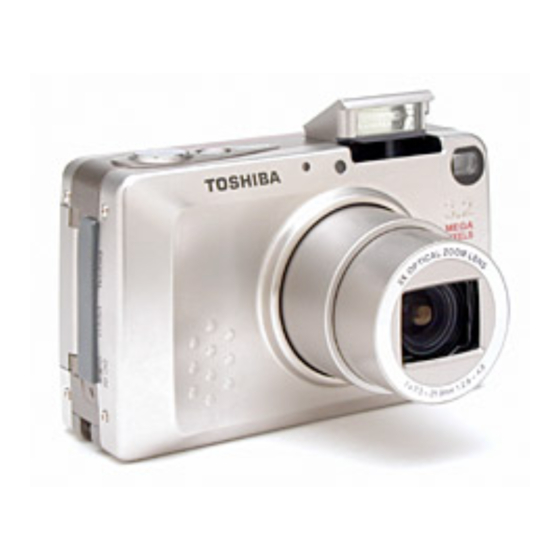
Page 10: Names Of Parts
Names of Parts <Operating Controls> <Displays and Indicators> “ ” Macro/ Mode select lever Landscape mode button Use this lever to switch between (page 37) record, playback, and setup Use this button to select Macro modes. Self-timer LED (red) or Landscape mode. (page 39) “... -
Page 11: Lcd Monitor Information
<Other Parts> <LCD Monitor Information> (The figure below shows all mode/function icons on the display to Optical viewfinder (page 32) explain each function. The actual display is different from the figure.) Flash Macro/Landscape mode (page 37) Light sensor Flash mode (page 35) Metering mode (page 52) Focus mark (lights when focus is set) Lens and lens cover... -
Page 12: Basic Preparations
Full recharging requires ¶ Digital camera ¶ Video cable approximately 5 hours. ¶ USB cable “TOSHIBA PDR-3310” ¶ SD Memory card ¶ CD-ROM which includes During recharging, the caution LED will ¶ Lithium-ion battery pack light steadily. When recharging is driver software ¶... - Page 13 Loading and Removing Memory Cards <Loading> Write Protect Switch (SD Memory Cards only) Slide the memory card door release to open the card door. SD Memory Cards are provided with a write-protect switch. When this switch is moved downward, further recording on the card is disabled, to protect any images and data already LOCK...
-
Page 14: Setting The Date
Setting the Date Follow these instructions to set the date, time, and calendar display mode: <Operation> Set the mode select lever to “ UP”. Press the “#” button. The monitor will show the date/time setting display. Press the “@” and “#” buttons to change the setting item, and the “%”... -
Page 15: Camera Basics
Using the LCD Monitor to Shoot Still Pictures * Note about the Flash Unit The flash will automatically open and close when the camera is turned on and off. Do not force the flash closed when the camera is turn on for use. * Use the LCD monitor to compose your pictures when particularly accurate... - Page 16 3. Compose your picture while 2. Hold the camera steadily with The magnification ratio is both hands as shown to avoid watching through the LCD displayed on the screen. monitor. camera shake. Press the zoom buttons to select between telephoto and wide-angle lens settings, thus enlarging or 2 Press down further on the reducing the size of your subject.
- Page 17 Using the LCD Monitor to Shoot Moving Pictures This function allows you to record <Precautions when Recording> <Other Uses> <NOTE> up to 15 seconds of simple movie ¶ Wait until the caution LED has ¶ The optical zoom can be used, The camera can be connected to a images.
- Page 18 Using the Optical Viewfinder to Shoot Still Pictures 3 The caution LED and card Turning the LCD monitor off will 4. Look through the optical 5. Press the shutter release help conserve battery power. viewfinder while composing button to take the picture. access LED will light while the Turning LCD monitor ON/OFF (page your picture.
-
Page 19: Shooting A Picture Using The Flash
Shooting a Picture Using the Flash A variety of flash modes are available for different conditions. <Usable Flash Range> When sensitivity is normal About 60 cm About 2.5 meters Zoom set at wide Camera Usable flash range Zoom set at telephoto Camera About 2 meters <Flash Modes>... -
Page 20: Macro And Landscape Photography
Macro and Landscape Photography <Operation> Use the macro and landscape shooting modes when photographing <NOTE> extremely close and distant subjects. 1 Press the “ ” button to select ¶ If the caution LED flashes when the desired flash mode. the shutter release button is <Macro/Landscape Selection>... -
Page 21: Photography
Using the Self-Timer <Operation> The self-timer is a convenient function when you wish to include <NOTE> yourself in your pictures, or to avoid camera shake when shooting 1 Press the “ ” button When shooting with the optical closeups. and select the desired mode. viewfinder (LCD monitor turned OFF), if the [ ] button is pressed, the... -
Page 22: Setting Image Quality
Setting Image Quality (File Compression) Use this function to change the amount of file compression and thus <General Guidelines for Selecting Image Quality> image quality, and when shooting movies. For high image quality, select [S] or [F] compression; when taking pictures for Quality Image Dimensions (Pixels) File Size viewing on a television monitor, select [F] or [N], and when taking pictures... -
Page 23: Exposure Compensation
Exposure Compensation White Balance This function provides a range of compensation for exposure. An image’s color will change depending on the kind of light source present. Select the white balance as follows to compensate for different light sources. [AUTO] In this mode, the white balance is set automatically by (default) <Operation>... - Page 24 <Adjusting the Preset Value> 5 Press “ ” to finish the setting. [SETTING DETAILS] menu will Use this function to manually set the white balance value. It allows you appear again. to select what part of the subject you wish to serve as the standard for “white”...
- Page 25 Using Color Mode for B&W and Sepia Images Selecting the Aperture before Shooting (AE Mode) In addition to the normal color picture mode, you can also take pictures By default, the camera uses a programmed automatic exposure mode in black and white (B/W) or sepia tone (Sepia). which automatically sets both aperture and shutter speed in accordance with the available light.
- Page 26 Shooting a Night Scene or the Inside of a Room Selecting the Focus Distance before Shooting (Long Exposure Mode) The camera is set by default to automatic focus (AF), but is can also be By extending the shutter speed (the time the shutter remains open during used with manual focus (MF) if desired.
-
Page 27: Increasing Exposure Sensitivity To 2X, 4X
Increasing Exposure Sensitivity to 2x, 4x 6 Press the “MENU” button This camera is set by default to a standard sensitivity, but the sensitivity <Other Applications> twice to turn off the menu can be increased by a factor of 2x or 4x when desired. This allows you By pressing the “... -
Page 28: Selecting The Metering Mode
Selecting the Metering Mode <Operation> This function allows you to select from three types of light-meter operation. Select the mode that best suits your subject and type of 1 Press the “MENU” button. 4 Press the “%” or “fi” button to photography. - Page 29 Setting the REC Review Digital Zoom ON/OFF In [REC REVIEW] mode, you can display the picture for 2 seconds This function allows the digital zoom function to be set to ON or OFF. immediately after you have taken it. When ON, pressing the “T” button will first cause the lens to zoom to its maximum optical telephoto setting;...
-
Page 30: Other Functions
Other Functions <Focus Lock> <Turning the Exposure Mode Symbols ON/OFF> Camera focus and exposure are measured and locked when the Certain exposure symbols on the shutter is depressed halfway. If you LCD monitor can be temporarily find that your focus is occasionally turned off if desired to avoid incorrect, particularly when shooting cluttering the screen. -
Page 31: Image Playback Basics
Displaying Images on the LCD Monitor To prevent depletion of the battery, use the AC adapter when displaying images for an extended time. Image Playback ¶ Confirm that a memory card Basics containing photographic images is loaded in the camera. Set the mode select lever to “... -
Page 32: Playing Movies On The Lcd Monitor
Playing Movies on the LCD Monitor To play movies, press the “%” <Other Applications> button and select [3], then begin A television screen can be used to the movie playback by pressing preview your photographs. “ ”. Pause Reverse playback Frame-by-frame playback can be used ¶... - Page 33 Advanced Image Playback and Delete Functions...
-
Page 34: Thumbnail" Picture Review In Forward/Reverse Direction
“Thumbnail” Picture Review in Forward/Reverse Direction Displaying Exposure Information Thumbnail images of your pictures can be viewed quickly in succession Information regarding the exposure conditions and functions set at time in either the forward or reverse direction. of exposure can be displayed. “Thumbnails”... -
Page 35: Multiple Image Display (Index Display)
Multiple Image Display (Index Display) Erasure Prevention (Image Protect Function) This function allows you to display six small images at a time on the This function can be used to place a protective lock on individual LCD monitor, providing a quick way to find and index your pictures. pictures, preventing the inadvertent erasure of important images on This feature can be used in conjunction with other functions on the your memory cards. -
Page 36: Erasing All Images
Erasing Individual Images Erasing All Images <Operation> <Operation> 1 Press the “MENU” button. 4 Press the “%” button to select 1 Press the “MENU” button. 4 Press the “ ” button to Press the “#” or “@” button to [EXECUTE]. Press the “#”... -
Page 37: Rotating Images
Rotating Images Images can be rotated 90° to either right or left. <To erase multiple images> ¶ This function cannot be used during multiple image display. Simultaneous use of the all-erase function and image protect function is a convenient way to quickly erase multiple images from a <Operation>... - Page 38 Automatic Playback (Slide Show) Digital Print Order Format (DPOF) Setting This function plays back images automatically at set intervals. Digital Print Order Format (DPOF) is a standard used when printing out digital photographs on a home printer or by a commercial printing service.
- Page 39 Adjusting the Image Size (Trimming) 4 Press the “#” button to display 7 Select [RETURN] and press You can change the size of the picture you have taken using this the print submenu. the “ ” button to complete camera. settings.
-
Page 40: Viewing And Erasing The Trimmed Image
Viewing and Erasing the Trimmed Image 6 When you finish to select the You can view or erase the trimmed image. area, press the “ ” button. 7 Set [IMAGE SIZE]. <Operation> <To Erase a Picture> The size of a single picture will 1 Press “MENU”... -
Page 41: Formatting Memory Cards
Formatting Memory Cards Formatting a memory card prepares the card for use, and erases all previously taken images and other data. Care should be taken when using the formatting function, since reformatting a memory card will also result in the loss of “protected” images. ¶... - Page 42 Turning the Electronic Tone ON/OFF <The Difference between “Erasing” and “Formatting”> The electronic beeping tone heard when the shutter button is pressed can be set to ON or OFF as desired. Image erasing and memory card formatting functions differ in the ¶...
-
Page 43: Selecting Auto Power-Off
Selecting Auto Power-Off (Power-Save Function) When this function is selected, the camera’s power will automatically <Note regarding camera use in the “ ” mode:> turn off if the camera is inactive for a set period of time. The auto When using the camera in the “ ”... -
Page 44: Mode Lock On/Off
Mode Lock ON/OFF <Operation> When enabled, this function preserves the camera mode functions set when the camera power is turned OFF. As a result, the same mode 1 Press the “fi” button to select 3 Press the “fi” button and settings are restored when the power is next turned ON. -
Page 45: Selecting The Display Language
Selecting the Display Language Selecting the Video Output Mode The camera's display language can be set to one of the following When traveling overseas, differences in television standards may make languages: English, Japanese, French, German, Spanish. it impossible to view pictures normally on local television monitors. In this case, use this function to select the television standard of the locality in which you are using the camera. -
Page 46: Creating A New Folder On The Memory Card
Creating a New Folder on the Memory Card (Resetting File Numbers) <Operation> This function is used to create a new folder on the memory card for the storage of new image data. When new images are added to the folder, 1 Press the “%”... -
Page 47: Returning Settings To Their Default Values
Returning Settings to their Default Values This function is used to restore the default values of recording mode settings made with mode lock ON, and setup mode values (excluding [DATE], [VIDEO OUT] and [ LANGUAGE]). <Operation> 1 Press the “%” or “fi” button to 3 Press the “%”... - Page 48 Changing the Display Color for the Setting Buttons In this mode, you can change the color of the active Setting buttons (menus). Choose the color you can easily see from [PURPLE], [RED], [YELLOW], or [BLUE]. <Operation> 1 Press the “%” or “fi” button to 3 Press the “@”...
- Page 49 Transferring Images to a Personal Computer...
- Page 50 You can install the following software from the attached CD-ROM. • Capture images ¶ Image Expert You can capture images photographed by Toshiba Digital Still Use to edit or print captured images and replay captured movies. Camera to your computer. An accessory USB cable is available for For more information, see the manual included with the attached connecting the camera with your computer.
- Page 51 Installing the USB Driver When you are using Macintosh: You have to install the USB driver to your PC before connecting the camera to it. The USB driver is included in the CD-ROM which is You need to install the driver only if you are using Mac OS 8.6. When shipped with the camera.
-
Page 52: Connecting The Usb Cable To Your Pc
Installing the image software Connecting the USB Cable to your PC <Installing Image Expert (Windows)> You need to use the exclusive USB cable to connect TOSHIBA PDR- 3310 to your PC. 1 Insert the attached CD-ROM into the CD-ROM drive. -
Page 53: Viewing The Images On Your Pc
Viewing the Images on your PC On a Windows computer: * Install the USB driver correctly. See pages 92 and 93 "Installing the USB Driver" for the instructions how to install the USB driver. Make sure that: * The card access LED flashes while connecting to the PC and viewing The software for viewing the images has already been installed on or copying the image. - Page 54 Macintosh Windows New Removable Disk Untitled Folder * The SD logo is a registered trademark. * Microsoft and Windows are registered trademarks of Microsoft Corporation in Still images/ Still images/ the United States and/or other countries. Moving images Moving images * Macintosh, Mac OS, QuickTime, and the QuickTime logo are registered All the file names trademarks of Apple Computer, Inc.
- Page 55 LCD Monitor Operations <Turning the LCD Monitor ON/OFF> In the recording mode, the LCD monitor can be turned ON/OFF by pressing the “DISP” button. ¶ To conserve power, it is recommended that the monitor be turned off whenever not being used. <Adjusting LCD Monitor Brightness>...
-
Page 56: Troubleshooting
Troubleshooting Function Symptom Cause Remedy Function Symptom Cause Remedy The LCD monitor The memory card has Insert a new memory card, LCD doesn’t Setting of power-save Press shutter button halfway, displays "Memory insufficient free memory or erase unneeded images appear. function may cause or press other function button Card is full."... - Page 57 Function Symptom Cause Remedy Function Symptom Cause Remedy Image cannot be The write protect Release the SD memory Nothing appears Battery power is Replace the battery pack Play- rotated or set for switch is set (SD card’s write protect lock on the LCD depleted, or no battery with the charged one.
- Page 58 SD Memory Card Handling Precautions ¶ Be sure to turn off the power of the main unit before setting up or ¶ After long time usage, the SD memory card may become warm. This removing the SD memory card. does not indicate any trouble. ¶...
-
Page 59: Trimming
Specifications Type: Digital still camera with record, playback, and erase meters (zoom set at wide). modes. Recording Modes: Flash modes (auto flash, red-eye reduction, fill-in flash, Recording media: SD Memory Card, Multi-Media Card (MMC) flash-off, red-eye reduction forced flash*); macro Recording Capacity (Guideline) and Image Dimensions in Pixels: recording mode, landscape recording mode;... - Page 60 If you modify the camera in any way, Part 15 of the FCC Rules. These limits LCD monitor) without getting approval from Toshiba are designed to provide reasonable (All values assume full battery charge, room Corporation, your camera may violate protection against harmful interference temperature, based on our testing standards).
- Page 62 BRJ040411 Printed in China...
Need help?
Do you have a question about the PDR-3310 and is the answer not in the manual?
Questions and answers