Advertisement
Quick Links
Advertisement

Related Manuals for Cisco PIX-515-RPS - PIX 515-R - Firewall


Summary of Contents for Cisco PIX-515-RPS - PIX 515-R - Firewall
- Page 1 Quick Start Guide Cisco PIX 515E Security Appliance Quick Start Guide Verifying the Package Contents Installing the PIX 515E Security Appliance Configuring the Security Appliance Common Configuration Scenarios Optional Maintenance and Upgrade Procedures...
-
Page 2: About This Document
Part of the market-leading Cisco PIX 500 series, the Cisco PIX 515E security appliance provides a wide range of integrated security services, hardware VPN acceleration, award-winning high-availability and powerful remote management capabilities in an easy-to-deploy, high-performance solution. -
Page 3: Verifying The Package Contents
Verifying the Package Contents Verify the contents of the packing box to ensure that you have received all items necessary to install and configure your PIX 515E security appliance. 100 Mbps Link 100 Mbps FAILOVE R Link 10/100 ETHER NET 1 10/100 ETHER NET 0 CONSO LE PIX 515E... -
Page 4: Installing The Pix 515E Security Appliance
Installing the PIX 515E Security Appliance This section describes how to install your PIX 515E security appliance into your own network, which might resemble the model in Figure 1. Figure 1 Sample Network Layout PIX 515E DMZ server Switch Inside Switch Outside Power... -
Page 5: Configuring The Security Appliance
Note About the Factory Default Configuration Cisco security appliances are shipped with a factory-default configuration that enables quick startup. This configuration meets the needs of most small and medium business networking environments. By default, the security appliance is configured as follows: •... - Page 6 About Configuration from the Command-Line Interface In addition to the ASDM web configuration tool, you can configure the security appliance by using the command-line interface. For more information, refer to the Cisco Security Appliance Command Line Configuration Guide and the Cisco Security Appliance Command Reference.
- Page 7 To use the Startup Wizard to set up a simplified basic configuration on the security appliance, follow these steps: If you have not already done so, connect the inside Ethernet 1 interface of the security Step 1 appliance to a switch or hub by using the Ethernet cable. To this same switch, connect a PC for configuring the security appliance.
-
Page 8: Common Configuration Scenarios
Common Configuration Scenarios This section provides configuration examples for two common security appliance configuration scenarios: • Hosting a web server on a DMZ network • Establishing a site-to-site VPN connection with other business partners or remote offices Use these scenarios as a guide when you set up your network. Substitute your own network addresses and apply additional policies as needed. - Page 9 Because the DMZ web server is located on a private DMZ network, it is necessary to translate its private IP address to a public (routable) IP address. This public address allows external clients to have HTTP access to the DMZ web server in the same way the clients would access any server on the Internet.
- Page 10 4. Click the Manage Pools button at the bottom of the ASDM window. The Manage Global Address Pools window appears, allowing you to add or edit global address pools. For most configurations, global pools are added to the less secure, or public, interfaces. Note 5.
- Page 11 6. In the Add Global Pool Item window: a. Choose dmz from the Interface drop-down menu. b. Click the Range radio button to enter the IP address range. c. Enter the range of IP addresses for the DMZ interface. In this scenario, the range is 30.30.30.50 to 30.30.30.60.
- Page 12 8. When the Add Global Pool Item window appears: a. Choose outside from the Interface drop-down menu. b. Click the Port Address Translation (PAT) using the IP address of the interface radio button. c. Assign the same Pool ID for this pool as you did in Step 6d above. (For this scenario, the Pool ID is 200.) d.
- Page 13 Step 2: Configure Address Translations on Private Networks Network Address Translation (NAT) replaces the source IP addresses of network traffic exchanged between two security appliance interfaces. This translation prevents the private address spaces from being exposed on public networks and permits routing through the public networks. Port Address Translation (PAT) is an extension of the NAT function that allows several hosts on the private networks to map into a single IP address on the public network.
- Page 14 5. Enter the IP address of the inside client. In this scenario, the IP address is 10.10.10.10. 6. Choose 255.255.255.255 from the Mask drop-down menu. 7. Choose the DMZ interface from the Translate Address on Interface drop-down menu. 8. Click the Dynamic radio button in the Translate Address To to section. 9.
- Page 15 Step 3: Configure External Identity for the DMZ Web Server The DMZ web server needs to be easily accessible by all hosts on the Internet. This configuration requires translating the web server IP address so that it appears to be located on the Internet, enabling outside HTTP clients to access it unaware of the security appliance.
- Page 16 Step 4: Provide HTTP Access to the DMZ Web Server By default, the security appliance denies all traffic coming in from the public network. You must create access control rules on the security appliance to allow specific traffic types from the public network through the security appliance to resources in the DMZ.
- Page 17 3. Specify the type of traffic that you want to permit: HTTP traffic is always directed from any TCP source port number toward a fixed Note destination TCP port number 80. a. Click the TCP radio button under Protocol and Service. b.
- Page 18 f. Click the OK button. For additional features, such as system log messages by ACL, click the More Options Note radio button at the top at the top of the screen. You can provide a name for the access rule in the window at the bottom. g.
- Page 19 Scenario 2: Site-to-Site VPN Configuration Site-to-site VPN (Virtual Private Networking) features provided by the security appliance enable businesses to extend their networks across low-cost public Internet connections to business partners and remote offices worldwide while maintaining their network security. A VPN connection enables you to send data from one location to another over a secure connection, or “tunnel,”...
- Page 20 In the first VPN Wizard page, do the following: a. Choose the Site-to-Site VPN option. The Site-to-Site VPN option connects two IPSec security gateways, which can include Note security appliances, VPN concentrators, or other devices that support site-to-site IPSec connectivity. b.
- Page 21 1. Enter the Peer IP address (for PIX 2) and a tunnel group name. 2. Specify the type of authentication that you want to use by performing one of the following: To use a pre-shared key for authentication (for example, “CisCo”), click the Pre-Shared Key –...
- Page 22 Step 3: Configure the IKE Policy IKE is a negotiation protocol that includes an encryption method to protect data and ensure privacy, and an authentication method to ensure the identity of the peers. In most cases, the ASDM default values are sufficient to establish secure VPN tunnels between two peers. To specify the IKE policy, complete the following steps: 1.
- Page 23 Step 4: Configure IPSec Encryption and Authentication parameters 1. Choose the Encryption algorithm (DES/3DES/AES) and Authentication algorithm (MD5/SHA). 2. Click the Next button to continue. Step 5: Specify Local Hosts and Networks Identify hosts and networks at the local site to be allowed to use this IPSec tunnel to communicate with the remote-site peers.
- Page 24 To specify a local host or network to be allowed access to the IPSec tunnel, complete the following steps: 1. Click IP Address. 2. Specify whether the interface is inside or outside by choosing one of the interfaces from the drop-down menu.
- Page 25 To specify a remote host or network to be allowed access to the IPSec tunnel, complete the following steps: 1. Click IP Address. 2. Specify whether the interface is inside or outside by choosing one location from the Interface drop-down menu. 3.
- Page 26 Step 7: View VPN Attributes and Complete Wizard Review the configuration list for the VPN tunnel you just created. If you are satisfied with the configuration, click Finish to complete the Wizard and apply the configuration changes to the security appliance. When configuring PIX 2, enter the same values for each of the options that you selected for Note PIX 1.
-
Page 27: Optional Maintenance And Upgrade Procedures
If you did not order your security appliance with a DES or 3DES-AES license and would like to Cisco.com. purchase one now, the encryption licenses are available at no charge on If you are a registered user of Cisco.com and would like to obtain a DES or 3DES/AES encryption license, go to the following website: http://www.cisco.com/cgi-bin/Software/FormManager/formgenerator.pl If you are not a registered user of Cisco.com, go to the following website:... - Page 28 To use the activation key, follow these steps: Command Purpose pix# show version Shows the software release, hardware configuration, license key, Step 1 and related uptime data. pix# configure terminal Enters global configuration mode. Step 2 Updates the encryption activation key by replacing the Step 3 pix(config)# activation-key...
- Page 29 Command Purpose hostname(config)# configure Erases the running configuration and replaces it with Step 4 factory-default [inside_ip_address the factory default configuration. Entering the [address_mask]] configure factory-default command erases the current running configuration. hostname(config)# write memory Writes the factory default configuration to Flash Step 5 memory.
- Page 30 Figure 4 Cisco PIX Security Appliance Back Panel 100 Mbp s FAIL OVE R Link 10/1 00 ETH ER NE T 0/0 CO NS OLE Console port (RJ-45) RJ-45 to DB-9 PC terminal adapter DB-9 serial cable (null-modem) • If your PIX 515E security appliance has a four-port Ethernet circuit board already installed, the Ethernet circuit boards are numbered as shown in Figure 5.
- Page 31 Guide. If you have a second PIX 515E security appliance to use as a failover unit, install the failover feature and cable as described in the “Installing Failover” section in the Cisco PIX Security Appliance Hardware Installation Guide. Connect the inside, outside, or perimeter network cables to the interface ports. Starting from Step 3 the top left, the connectors are Ethernet 2, Ethernet 3, Ethernet 4, and Ethernet 5.
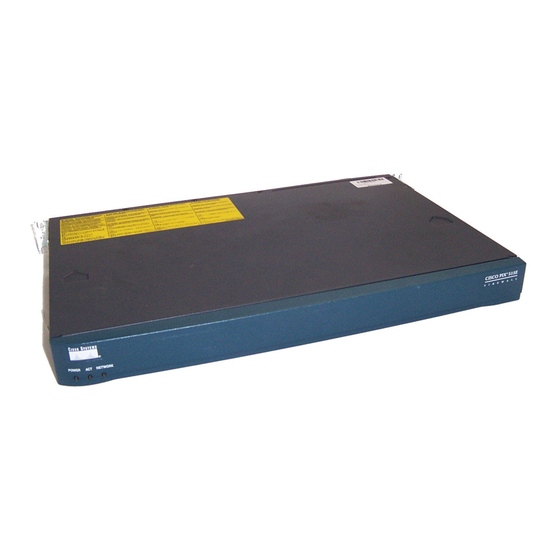
- Page 32 Checking the LEDs POWER ACT NETWORK Table 1 PIX 515E Security Appliance Front Panel LEDs Color State Description POWER Green On when the unit has power. Green On when the unit is the active failover unit. If failover is present, the light is on when the unit is the active unit.
- Page 33 Obtaining Documentation Cisco documentation and additional literature are available on Cisco.com. Cisco also provides several ways to obtain technical assistance and other technical resources. These sections explain how to obtain technical information from Cisco Systems. Cisco.com You can access the most current Cisco documentation at this URL: http://www.cisco.com/univercd/home/home.htm...
- Page 34 Documentation DVD Cisco documentation and additional literature are available in a Documentation DVD package, which may have shipped with your product. The Documentation DVD is updated regularly and may be more current than printed documentation. The Documentation DVD package is available as a single unit.
- Page 35 • Obtain assistance with security incidents that involve Cisco products. • Register to receive security information from Cisco. A current list of security advisories and notices for Cisco products is available at this URL: http://www.cisco.com/go/psirt If you prefer to see advisories and notices as they are updated in real time, you can access a Product Security Incident Response Team Really Simple Syndication (PSIRT RSS) feed from this URL: http://www.cisco.com/en/US/products/products_psirt_rss_feed.html...
- Page 36 After you describe your situation, the TAC Service Request Tool provides recommended solutions. If your issue is not resolved using the recommended resources, your service request is assigned to a Cisco TAC engineer. The TAC Service Request Tool is located at this URL:...
- Page 37 For S1 or S2 service requests or if you do not have Internet access, contact the Cisco TAC by telephone. (S1 or S2 service requests are those in which your production network is down or severely degraded.) Cisco TAC engineers are assigned immediately to S1 and S2 service requests to help keep your business operations running smoothly.
- Page 38 URL: http://www.cisco.com/packet • iQ Magazine is the quarterly publication from Cisco Systems designed to help growing companies learn how they can use technology to increase revenue, streamline their business, and expand services. The publication identifies the challenges facing these companies and the technologies to help solve them, using real-world case studies and business strategies to help readers make sound technology investment decisions.
- Page 40 Fax: 31 0 20 357 1100 Cisco Systems has more than 200 offices in the following countries. Addresses, phone numbers, and fax numbers are listed on the C i s c o W e b s i t e a t w w w . c i s c o . c o m / g o / o f f i c e s Argentina •...
Need help?
Do you have a question about the PIX-515-RPS - PIX 515-R - Firewall and is the answer not in the manual?
Questions and answers