Table of Contents
Advertisement
Advertisement
Table of Contents

Related Manuals for Dolby Laboratories S01/13621


Summary of Contents for Dolby Laboratories S01/13621
- Page 1 Dolby Installation Guidelines Dolby Installation Guidelines S01/13621 Issue 1...
- Page 2 No. 66 Nanlishi Road Xichen District Beijing 100045 China Telephone (86) 10-6802-9727 Dolby, Dolby Surround Pro Logic, AC-3, and the double-D symbol are trademarks of Dolby Laboratories. 2001 Dolby Laboratories, Inc.; all rights reserved. S01/13621 Issue 1 Dolby Installation Guidelines...
-
Page 3: Table Of Contents
List of Figures ...vi List of Tables ...vii Chapter 1 Overview ...1-1 DP562 DP563 DP569 DP570 DP571 DP572 DM100 Chapter 2 Unit Connections and Dimensions DP562 Audio Connections 2.2.1 2.2.2 DP563 2.3.1 2.3.2 2.3.3 2.3.4 DP569 2.4.1 2.4.2 2.4.3 2.4.4 2.4.5 2.4.6 2.4.7... - Page 4 DP571 2.6.1 2.6.2 2.6.3 2.6.4 2.6.5 2.6.6 2.6.7 2.6.8 2.6.9 DP572 2.7.1 2.7.2 2.7.3 2.7.4 2.7.5 2.7.6 2.7.7 2.7.8 2.7.9 DM100 2.8.1 2.8.2 2.8.3 Chapter 3 Installation Issues Venting Timing and Delays 3.2.1 3.2.2 3.2.3 Setup and Calibration Chapter 4 Hot Standby and Alarms DP562 DP563 DP569...
- Page 5 Chapter 5 Common Applications DVD Authoring Monitoring Dolby E/Dolby Digital and Dolby Surround Production 5.2.1 5.2.2 Chapter 6 Serial Communications RS-232 Ports RS-485 Metadata Connections Serial Control Dolby Installation Guidelines ...5-1 ...5-1 Using a DP570 ...5-2 Monitoring with a DP569 and DP562 ...6-1 ...6-1 ...6-2...
-
Page 6: List Of Figures
Front and Back Panels of the DP562 ...2-1 Test Box Schematic...2-3 Front and Back Panels of the DP563 ...2-3 Front and Back Panels of DP569 ...2-4 Diagram of Voiceover and Switched Output Operation...2-16 Hot Standby Operation of the DP569 ...4-2 Typical DVD Encoding System...5-1 Example Equipment Setup for Postproduction Studio or OB Truck...5-2 Example Equipment Setup for use with Consoles with Full Monitoring Functions...5-3... -
Page 7: List Of Tables
Pin Connections for Status/Remote Port...2-2 Pin Connections of GPI/O In Port...2-6 Pin Connections of GPI/O Out Port ...2-7 Pin Connections for the Cat. No. 548 Analog Option Card Multichannel Output ...2-9 Pin Connections for the Cat. No. 548 Analog Option Card Stereo/Mono Output...2-9 Pin Connections for the Cat. - Page 8 Dolby DMU AD/DA Converter...
-
Page 9: Chapter 1 Overview
(Operation of each unit is not covered in this document; for this information, refer to the dedicated user manual supplied with each unit. Additional copies of user manuals can be also obtained from Dolby Laboratories.) Upon purchasing a new Dolby product, please register it on www.dolby.com. Doing so will enable us to notify you of product upgrades and send other information of interest. -
Page 10: Dp570
Dolby Installation Guidelines DP570 The DP570 Multichannel Audio Tool allows users to generate metadata for input into either a Dolby E or Dolby Digital encoder, and to monitor the effects of metadata on an audio source in real time. It also includes features such as multiple speaker selection, audio channel routing (which eliminates the need for an external router), and separate inputs for Dolby Surround Pro Logic decoding and 5.1-channel monitor configuration. -
Page 11: Chapter 2 Unit Connections And Dimensions
Unit Connections and Dimensions DP562 Figure 2-1 Front and Back Panels of the DP562 Dimensions The DP562 occupies one rack unit and measures 45 483 305 mm (1.75 19 inches). Its net weight is 4.5 kg (9.9 lb). Audio Connections The digital audio input is a 3-pin female XLR connector. -
Page 12: Status Activity And Remote Level Control
Dolby Installation Guidelines the User button for three seconds. The LED on the User button will illuminate when the user option is selected. This option is only available in version 2.5 or later of the unit software. See Section 6.4 for further information. The DP562 communicates at 9.6 kbps and has a fixed unit address of 8282. -
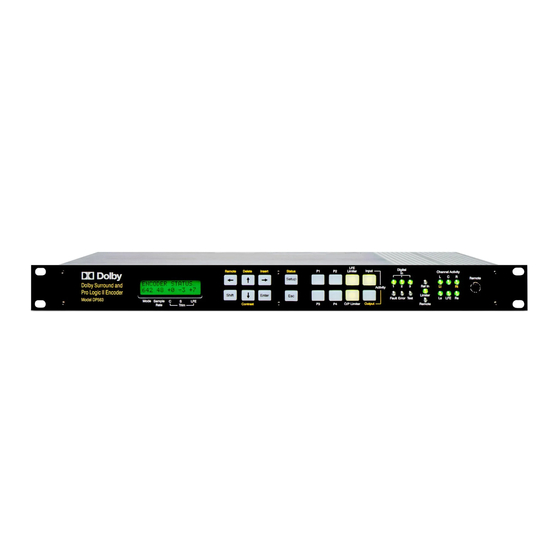
Page 13: Dp563
Dolby Installation Guidelines DP563 Figure 2-3 Front and Back Panels of the DP563 2.3.1 Dimensions The DP563 occupies one rack unit and measures 44 483 324 mm (1.75 19 12.75 inches). Its net weight is 4.6 kg (10.1 lb). Figure 2-2 Test Box Schematic Unit Connections and Dimensions... -
Page 14: Audio Connections
Dolby Installation Guidelines 2.3.2 Audio Connections The digital audio inputs and reference input are provided on female BNC connectors. Input signals should be compliant with AES3-id-1995 (unbalanced, 75 , 1V peak-to- peak standard output). AES3-id signals are very similar to analog composite video, although dedicated AES3 distribution equipment should be used. -
Page 15: Vertical Interval Time Code Input
Dolby Installation Guidelines 2.4.2 Audio Connections The digital audio inputs and reference input are provided on female BNC connectors. Input signals should be compliant with AES3-id-1995 (unbalanced, 75 , 1V peak-to- peak standard output). AES3-id signals are very similar to analog composite video, although dedicated AES3 distribution equipment should be used. -
Page 16: General Purpose I/O
Dolby Installation Guidelines The DP569 can communicate at rates of 9.6, 19.2, or 38.4 kbps. The unit address can be any discrete tributary address as specified in SMPTE RP 113-1996. See Section 6.4 for further information. 2.4.7 General Purpose I/O The GP I/O ports on the DP569 have female 9-pin D-connectors, and operate at 5 V CMOS output levels. -
Page 17: Pin Connections Of Gpi/O Out Port
Dolby Installation Guidelines General Purpose Status Output Port (GPI/O Out) Connection Fault Lock Pass-through Encoding User Preset 1 User Preset 2 User Preset 3 User Preset 4 Ground Pin 1 This output corresponds to the front-panel Fault LED. When a power supply or internal hardware fault is detected, the Fault LED illuminates and the corresponding output signal goes low. -
Page 18: Auxiliary Data
Dolby Installation Guidelines 2.4.8 Auxiliary Data The Aux Data port is an RS-485 port. See Section 5.2 for pin assignments. In later versions of the unit software (v. 1.17 or later), this port can be used as an input for external metadata. -
Page 19: Video Reference
Dolby Installation Guidelines Table 2-4 Pin Connections for the Cat. No. 548 Analog Option Card Multichannel Output Subwoofer + Out Table 2-5 Pin Connections for the Cat. No. 548 Analog Option Card Stereo/Mono Output Digital Ground — — — — Solo In R - Solo In L + SL Ground... -
Page 20: Serial I/O (Remote)
Dolby Installation Guidelines 2.5.4 Serial I/O (Remote) The DP570 will allow remote control via the front-panel (RS-232) or rear-panel (RS- 485) ports. See Section 6.4 for further information. The serial I/O connections can also used for software upgrades. 2.5.5 General Purpose I/O The DP570 has a 37-pin female D-connector for the GPI/O connections. -
Page 21: Dp571
Dolby Installation Guidelines DP571 Figure 2-6 Front and Back Panels of the DP571 2.6.1 Dimensions The DP571 occupies one rack unit and measures 44 483 324 mm (1.75 19 12.75 inches). Its net weight is approximately 2.7 kg (6 lb). 2.6.2 Audio Connections The digital audio inputs are provided on female BNC connectors. -
Page 22: Serial I/O (Remote)
Dolby Installation Guidelines 2.6.5 Serial I/O (Remote) Future versions of the DP571 will allow remote control via the front-panel (RS-232) or rear-panel (RS-485) ports. See Section 6.4 for further information. The serial I/O connections can also used for software upgrades. 2.6.6 General Purpose Input/Output (Status Port) The input and output signals are 0–5 V TTL. -
Page 23: Auxiliary Data
Dolby Installation Guidelines Table 2-9 Preset Mode Tally Indication on Status Port Pin 7 Transition High-to-Low None or Low-to-High High-to-Low 2.6.7 Auxiliary Data The Auxiliary Data port is a 9-pin female RS-232 port that may be used for future enhancements. See Section 5.2 for pin assignments. 2.6.8 Metadata Input The metadata input port is an RS-485 port. -
Page 24: Video Reference
Dolby Installation Guidelines AES3-id signals are very similar to analog composite video, although dedicated AES3 distribution equipment should be used. If the loop-through BNC connectors are not being used to feed additional equipment, terminate them with a standard 75 video terminator. The PCM delay input is of the same specification as the main input, except that no termination is required as the PCM output is electrically isolated. -
Page 25: Status Port Output Routing Mode Selection
Dolby Installation Guidelines Table 2-10 Pin Connections for the Status Port Direction Output Output Output Output Output Output Input Input Pins 1–5 These indicate details regarding the current condition of the unit. A “1” corresponds to a “high” level on the corresponding pin. Pins 7–8 These can be used to select Voiceover and Switched Out modes. -
Page 26: Auxiliary Data
Dolby Installation Guidelines Figure 2-5 Diagram of Voiceover and Switched Output Operation Use the Voiceover and Switched Output functions when only basic control and editing functions are required. One example may be a local transmission center where the switched output could be used to insert a local commercial delivered as stereo PCM audio. -
Page 27: Dm100
Dolby Installation Guidelines DM100 2.8.1 Dimensions The DM100 is a handheld device that measures 100 inches). Its net weight is 0.68 kg (1.5 lb). 2.8.2 Audio Connections Audio I/O is available on XLR, BNC, or Toslink connectors. The female XLR connection has an internal 110 termination, and the female BNC input has an internal 75 termination. - Page 28 Dolby DMU AD/DA Converter...
-
Page 29: Chapter 3 Installation Issues
Venting The Dolby professional audio products are designed to operate within a temperature range of 5° to 45° C. They use natural convection cooling and therefore should not be mounted directly above any heat-generating equipment. DP-series products, with the exception of the DP570, have vent holes in the top and bottom panels, along the left or right edge, depending on the unit (left side for the DP562, DP571, and DP572;... -
Page 30: Dolby Digital Coding And Decoding Delays
Dolby Installation Guidelines 3.2.2 Dolby Digital The amount of delay added by the Dolby Digital encode/decode process varies depending upon the sample rate being used. The table below shows the minimum delay values for encoding. The DP569 allows for the encoding delay to be increased to any value between the minimum value and 450 ms. -
Page 31: Chapter 4 Hot Standby And Alarms
Many Dolby products allow simple implementation for hot standby applications. Hot standby units and redundancy should be considered at a system level. Systems that utilize hot standby features allow automatic routing of the required signals from a unit that develops a fault, to a spare unit in the system. The Dolby products can easily be integrated into other redundant systems, such as the “n+1”... -
Page 32: Dp570
Dolby Installation Guidelines Figure 4-1 Hot Standby Operation of the DP569 For further security, pins 1 and 9 (ground) of the GPI/O ports can be used to control a unit fault alert. If pin 1 goes “low,” then a power supply or hardware fault has occurred. These can be used on both the encoders so that a faulty standby encoder can be identified before it is required. -
Page 33: Chapter 5 Common Applications
Figure 5-1 shows the audio equipment in a typical DVD encoding system. Dolby Laboratories can also supply an interface kit to aid the installation of this system into studios that use either all balanced or unbalanced digital audio connections. -
Page 34: Using A Dp570
Dolby Installation Guidelines 5.2.1 Using a DP570 A few examples are included in this manual for monitoring 5.1 and Dolby Surround production. There are many variations to these setups that will be used, so these are included as a couple of typical designs. Figure 5-2 Example Equipment Setup for Postproduction Studio or OB Truck. -
Page 35: Monitoring With A Dp569 And Dp562
Dolby Installation Guidelines Figure 5-3 Example Equipment Setup for use with Consoles with Full Monitoring Functions Figure 5-3 shows a setup that uses separate program audio and monitor feeds. In this setup, the console being used should feature the required monitoring functions. 5.2.2 Monitoring with a DP569 and DP562 If a DP570 is not available, it is possible to use a DP562 along with a DP569 and... -
Page 36: Dolby Digital/Surround Monitoring
Dolby Installation Guidelines Common Applications Figure 5-4 Dolby Digital/Surround Monitoring... -
Page 37: Chapter 6 Serial Communications
The electrical and mechanical specifications for these ports are as SMPTE 207M. The pin assignments for these connections are shown in the tables below. For information about the remote protocol, contact Dolby Laboratories. RS-232 Ports DP562 Serial I/O (female) -
Page 38: Rs-485
Dolby Installation Guidelines DP571 Auxiliary Data (female) Table 6-2 Pin Connections for 9-Pin RS-232 Ports (DP571) RS-232 Using a Female 8-Pin Mini-DIN Connector This connection is used for the front-panel remote connections. Table 6-3 Pin Connections for 8-Pin RS-232 Ports Connection Ground Sense... -
Page 39: Metadata Connections
Dolby Installation Guidelines Table 6-4 Pin Connections for RS-485 Ports (Excluding Metadata Outputs) DP570 Metadata output DP572 Metadata output Table 6-5 Pin Connections for Metadata Output Ports Metadata Connections Metadata is data that relates to audio data. It is carried in both Dolby E and Dolby Digital bitstreams. -
Page 40: Serial Control
Dolby Installation Guidelines For further information about metadata, see user manuals or the Dolby Digital Professional Encoding Manual. The DP569, DP570, and DP571 have metadata inputs; the DP570 and DP572 have metadata outputs. Connecting a metadata input to a metadata output requires a 9-pin male to male cable with direct connections between the pins.
Need help?
Do you have a question about the S01/13621 and is the answer not in the manual?
Questions and answers