Table of Contents
Advertisement
Quick Links
Advertisement
Table of Contents

Related Manuals for IBM 24P4555 - E 54 - 15" CRT Display


Summary of Contents for IBM 24P4555 - E 54 - 15" CRT Display
-
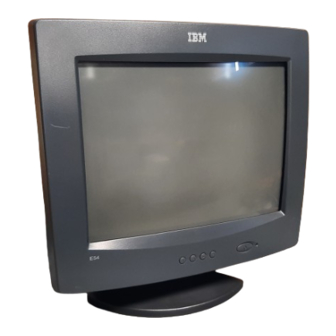
Page 1: Color Monitor
Color Monitor English User's Guide... - Page 2 E54 Color Monitor Users Guide 6331-F7N 6331-P7N...
- Page 3 International Business Machines Corporation. Copyright Lenovo 2005; Portions Copyright IBM Corp. 2004 . All rights reserved. Note to U.S. Government Users -- Documentation related to restricted rights -- Use, duplication or disclosure is subject to restrictions set forth in GSA ADP Schedule Contract with Lenovo Corp.
- Page 4 The following terms are trademarks of Lenovo in the United States, other countries, or both: Lenovo IBM is a trademark of the IBM Corporation in the United States,other countries, or both,and is used under license. Microsoft® Windows®, and Windows NT are trademarks of Microsoft Corporation in the United States, other countries, or both.
-
Page 5: Help And Service Information
Help and Service Information If you are unable to correct the problem yourself, you may seek further help as follows: Call the Customer Support Center. In the US call 1-800-426-7378 In Canada (Toronto Only) call 416-383-3344 In Canada (all others) call 1-800-565-3344 In other countries contact your dealer, retailer, or other Lenovo authorized If possible, stay by your computer. - Page 6 Safety information...
-
Page 7: Table Of Contents
Table of Contents Precautions ............... US-1 Installation ..................US-1 Maintenance ..................US-1 Transportation ..................US-1 Use of the Tilt-Swivel ................US-1 Power Connection Information ............US-1 Identifying Parts and Controls ........ US-2 Unpacking Procedure ..........US-3 Repacking ..............US-3 Setup ................. US-3 Step 1: Install the monitor .............. -
Page 8: Precautions
US-1 PRECAUTIONS Use of the Tilt-Swivel This monitor can be adjusted within the angles shown Installation below. Do not install the monitor in the following places: Hold the monitor at the bottom with both hands when • on surface (rugs, blankets, etc.) or near materials you turn it horizontally or vertically. -
Page 9: Identifying Parts And Controls
US-2 IDENTIFYING PARTS AND Rear CONTROLS See the pages in parentheses for further detail. Front AC input connector This connector provides AC power to the monitor. g. Video input cable Inputs RGB video signals (0.700 Vp-p, positive) and sync signals. Displays menu &... -
Page 10: Unpacking Procedure
US-3 UNPACKING PROCEDURE SETUP This monitor works with platforms running at horizontal frequencies between 30 and 69 kHz. Step 1: Install the monitor • To connect the tilt/swivel base to the monitor, align hooks with the sockets on bottom side of the monitor, and gently push the base towards the front of the monitor. -
Page 11: Step 3: Connect The Power Cord
US-4 Workplace Preparation Step 3: Connect the power cord With the monitor and computer turned off, first Positioning the Monitor connect the proper power cord for your local supply Choose a suitable place to position the monitor where to the monitor, then connect it to a properly grounded it is not near fluorescent desk lighting or any power outlet. -
Page 12: Using The On-Screen Menu
US-5 USING THE ON-SCREEN MENU 1) Menu screen-press the button to display the menu below and exit menus Select mark Press the button to move the selection mark to the desired location. Adjustment icons When the button is pressed. CO NTRAST The selected adjustment screen appears. -
Page 13: Individual Adjustment
US-6 INDIVIDUAL ADJUSTMENT VERTICAL SIZE adjustment Fills the viewable area vertically. CONTRAST adjustment Press the button to make the image smaller, Adjust the screen contrast to match your or press the button to make it larger. Press personal preference. key toggles between VERTICAL SIZE Press the button to decrease contrast and and VERTICAL POSITION. -
Page 14: Language Selection
US-7 COLOR selection MANUAL DEGAUSSING The white of the image can be adjusted. After moving the selector to the degauss icon, 1) Use the button to select: (1)9300 press the button. The degaussing action (2)6500 K or (3)User color. takes place a few seconds later. 2) If the (3):the user’s color is selected, “2”... -
Page 15: Technical Features
US-8 TECHNICAL FEATURES TROUBLESHOOTING Preset modes Before contacting technical support, refer to this section. Resolution V. Freq. Mode (H x V) (Hz) Problem Check & Adjust 640 x 480 60 (VESA) · Blank screen Monitor power switch, power cord, signal cable, 640 x 480 75 (VESA) or connector... -
Page 16: Self-Diagnosis Function
US-9 SELF-DIAGNOSIS SPECIFICATIONS FUNCTION S cre e n S ize 1 5 in. visual d iago nal This monitor is equipped with a self-diagnosis Viewa b le scr een size function. You can easily distinguish if the problem is 1 3 .7 5 in. Anti- Glar e, Anti- on the monitor or on the computer by using the Reflective C o ating*... - Page 17 US-10 Po we r Input Vo lta ge / 100 to 240 V AC Fre que nc y 50 - 6 0 Hz Curre nt Rating 1. 5 A Po we r 75 W ( MAX. ) Co ns umption Dime ns io n 37 0 x 387 x 3 90 mm (W x H x D)
-
Page 18: Service Information
US-11 SERVICE INFORMATION The following parts are for use by Lenovo services, or Lenovo authorized dealers, to support customer warranty. Parts are for service use only. Monitor Information PART NUMBER DESCRIPTION MODEL COLOR 40Y6844 E54 FRU - Monitor MPRII,NH 6331 Pearl White 40Y6845 E54 FRU - Monitor MPRII,NH...
Need help?
Do you have a question about the 24P4555 - E 54 - 15" CRT Display and is the answer not in the manual?
Questions and answers