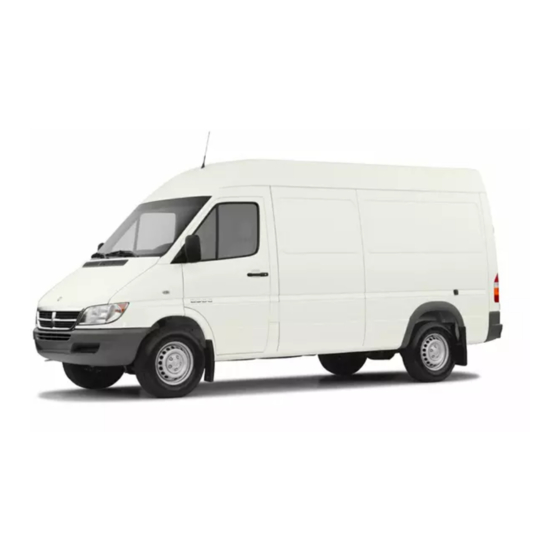
Dodge 2006 Freightliner Owner's Manual

Dodge 2006 Freightliner Owner's Manual

Dodge 2006 sprinter van owner's manual
Table of Contents

Advertisement

Quick Links

SECTION
1
INTRODUCTION . . . . . . . . . . . . . . . . . . . . . . . . . . . . . . . . . . . . . . . . . . . . . . . . . . . . . . . . . . . . . . . . . . . . . . . . . . 3
2
THINGS TO KNOW BEFORE STARTING YOUR VEHICLE . . . . . . . . . . . . . . . . . . . . . . . . . . . . . . . . . . . 11
3
UNDERSTANDING THE FEATURES OF YOUR VEHICLE. . . . . . . . . . . . . . . . . . . . . . . . . . . . . . . . . . . . 57
4
UNDERSTANDING YOUR INSTRUMENT PANEL . . . . . . . . . . . . . . . . . . . . . . . . . . . . . . . . . . . . . . . . . . 89
5
STARTING AND OPERATING. . . . . . . . . . . . . . . . . . . . . . . . . . . . . . . . . . . . . . . . . . . . . . . . . . . . . . . . . . . . 141
6
WHAT TO DO IN EMERGENCIES. . . . . . . . . . . . . . . . . . . . . . . . . . . . . . . . . . . . . . . . . . . . . . . . . . . . . . . . . 231
7
MAINTAINING YOUR VEHICLE . . . . . . . . . . . . . . . . . . . . . . . . . . . . . . . . . . . . . . . . . . . . . . . . . . . . . . . . . 251
8
MAINTENANCE SCHEDULES . . . . . . . . . . . . . . . . . . . . . . . . . . . . . . . . . . . . . . . . . . . . . . . . . . . . . . . . . . . . 303
9
IF YOU NEED CONSUMER ASSISTANCE . . . . . . . . . . . . . . . . . . . . . . . . . . . . . . . . . . . . . . . . . . . . . . . . . 311
10
INDEX . . . . . . . . . . . . . . . . . . . . . . . . . . . . . . . . . . . . . . . . . . . . . . . . . . . . . . . . . . . . . . . . . . . . . . . . . . . . . . . . . . 317
TABLE OF CONTENTS
PAGE
1
2
3
4
5
6
7
8
9
10

Advertisement

Table of Contents
loading

Summary of Contents for Dodge 2006 Freightliner

  • Page 1 SECTION INTRODUCTION ................3 THINGS TO KNOW BEFORE STARTING YOUR VEHICLE .
  • Page 3: Table Of Contents

    CONTENTS Introduction....... . . 4 How to Use this Manual ..... . 5 Warnings and Cautions .
  • Page 4: Introduction

    INTRODUCTION This manual provides information needed to operate and understand the vehicle and its components. Additional detailed information is contained in the Owner’s Warranty Information Book and the Sprinter Service Booklet. WARNING! Be sure to read the Operating Instructions. Other- wise you may not be aware of certain risks and could injur yourself or others.
  • Page 5: How To Use This Manual

    HOW TO USE THIS MANUAL Consult the table of contents to determine which section contains the information you desire. The detailed index, at the rear of this manual, contains a complete listing of all subjects. WARNINGS AND CAUTIONS This manual contains WARNINGS against operating procedures which could result in an accident or bodily injury.
  • Page 6: Vehicle Safety Certification Label, Sample

    Vehicle identification number (location: on the chassis, right hand). VEHICLE SAFETY CERTIFICATION LABEL, SAMPLE AND LOCATION Location: below the driver’s seat on an outward facing position of the mounting pillar. Incomplete vehicle certification label for chassis/cab. Certification Label (vehicle identification number, permissible weights) (2)
  • Page 7 INTRODUCTION 7 Sample Incomplete Vehicle Certification Label Sample Certification Label (Label 2) (Label 1) NOTE: Data shown on label are for illustration purposes only. Data are specific to each vehicle and may vary from data shown in the illustrations. Refer to label on vehicle for actual data specific to your vehicle.
  • Page 8: And Location

    VEHICLE/ENGINE EMISSION LABEL, SAMPLE AND LOCATION Location: on valve cover of the engine NOTE: Data shown on label are for illustration purposes only. Data are specific to each vehicle and may vary from data shown in the illustrations. Refer to label on vehicle for actual data specific to your vehicle.
  • Page 9: Environmental Concerns And Recommendations

    ENVIRONMENTAL CONCERNS AND RECOMMENDATIONS In this manual, whenever you see instructions to discard materials, you should first attempt to reclaim and recycle them. To preserve our environment, follow appropriate environmental rules and regulations when disposing of materials. DRINKING ALCOHOL OR TAKING DRUGS WHILE DRIVING WARNING! Drinking or taking drugs and driving can be a...
  • Page 10: Information Regarding Electronic

    INFORMATION REGARDING ELECTRONIC RECORDING DEVICES (Including notice pursuant to California Code § 9951) Please note that your vehicle is equipped with devices that can record vehicle systems data. This information helps, for example, to diagnose vehicle systems after a collision and to continuously improve vehicle safety.
  • Page 11 THINGS TO KNOW BEFORE STARTING YOUR VEHICLE CONTENTS Ignition Lock/Starter Switch ....13 Immobilizer ......14 Central Locking (Optional) .
  • Page 12 Opening/Closing doors ..... 27 Sliding Door ......30 Rear Cargo Doors .
  • Page 13: Ignition Lock/Starter Switch

    IGNITION LOCK/STARTER SWITCH The steering wheel is locked when the key is removed (0) To remove the key, place the gear selector lever in position "P"; rotate the key in the ignition lock to position 0; and remove the key. The steering wheel is unlocked (1) Preheating and driving position (2) Start position (3)
  • Page 14: Immobilizer

    14 THINGS TO KNOW BEFORE STARTING YOUR VEHICLE Immobilizer The immobilizer is automatically activated when the key is removed from the ignition lock. The engine cannot be started. As soon as the correct key is inserted into the ignition lock, the immobilizer is deactivated. For notes on the remote keyless entry, refer to "Remote Keyless Entry".
  • Page 15: Central Locking (Optional)

    CENTRAL LOCKING (OPTIONAL) To unlock (1) To lock (2) CAUTION! An unlocked vehicle is an invitation to thieves. Always remove the key from the ignition and lock all doors when leaving the vehicle unattended. THINGS TO KNOW BEFORE STARTING YOUR VEHICLE 15 WARNING! For personal security and safety in the event of an accident, lock the vehicle doors when you drive...
  • Page 16: Unlocking

    WARNING! When leaving the vehicle always remove the key from the ignition lock, and lock your vehicle. Do not leave children unsupervised in the vehicle, even if they are secured by a child restraint system. The children could • injure themselves on parts of the vehicle •...
  • Page 17: Central Locking Switch

    After the engine is started (about 1 second), all doors with the exception of the driver-side door are locked automatically. NOTE: In vehicles without central locking only the respective door will be locked or unlocked. CAUTION! In case of an accident, rescue from the outside may be more difficult if the vehicle is locked.
  • Page 18: Locking Status Display

    WARNING! When leaving the vehicle always remove the key from the ignition lock, and lock your vehicle. Do not leave children unsupervised in the vehicle, even if they are secured by a child restraint system. The children could • injure themselves on parts of the vehicle •...
  • Page 19: Locking And Unlocking

    Locking and Unlocking To lock entire vehicle: Press top of central locking switch. The left and the right indicator lamp in the switch illuminate. If one of the two indicator lamps blinks, at least one door is not closed properly. To unlock entire vehicle: Press top of central locking switch again.
  • Page 20: Remote Keyless Entry (Optional)

    flashes four times. Automatic locking when the engine is started is switched on (standard setting). NOTE: A door which is closed after the engine has been started will not be locked automatically. CAUTION! In case of an accident, rescue from the outside may be more difficult if the vehicle is locked.
  • Page 21: Unlocking With Remote Keyless Entry

    The remote keyless entry transmitter transmits in all directions. It does not have to be pointed at the vehicle. Do not expose the remote keyless entry transmitter to high levels of electromagnetic radiation in order to avoid the risk of malfunctions. The remote keyless entry transmitter has an average range of about 32 ft (about 10 m).
  • Page 22: Locking With Remote Keyless Entry

    Press the Πbutton a second time. The passenger door and cargo doors are unlocked and the turn signal lamps, as well as the remote keyless entry transmitter indicator lamp, blink once again. The button must be pressed a second time within about 2.5 seconds, otherwise the second request to open can not be performed.
  • Page 23: Security System With Towing And Passenger Compartment Protection (Optional)

    Replacing Batteries 3. Remove the battery and install new one (note correct polarity; positive terminal up). 4. Press on the battery cover until it snaps into place. THINGS TO KNOW BEFORE STARTING YOUR VEHICLE 23 SECURITY SYSTEM WITH TOWING AND PASSENGER COMPARTMENT PROTECTION Rated voltage: 6 V (OPTIONAL)
  • Page 24: Audible Alarm

    The alarm is triggered if the security system has been activated and • A door is opened, • a door is unlocked from inside, • the engine cover is opened, • the key is used to unlock the vehicle at any door, •...
  • Page 25: Passenger Compartment Protection

    1. Place the key in position 0 or 1 in the ignition lock. 2. Press the switch up (1) to switch off the towing protection. The indicator lamp (2) is briefly illuminated. If passenger compartment protection will be switched off as well, wait until the indicator lamp (2) goes out, 3.
  • Page 26: Alarm Pushbutton (Vehicles With Security Systems Only)

    3. Press switch up (1). The indicator lamp (2) is briefly illuminated. To activate the setting (passenger compartment/ towing protection switched off): 4. Lock the vehicle using the remote keyless entry transmitter. The passenger compartment protection will remain switched off until the vehicle is locked again with the remote keyless entry transmitter.
  • Page 27: Things To Know Before Starting Your Vehicle 27

    The vehicle will be centrally locked if all doors are closed. Switching Off the Alarm and Unlocking the Vehicle Press the alarm pushbutton up one more time. The vehicle will be centrally unlocked if it was not centrally locked before the alarm was manually triggered.
  • Page 28 WARNING! Only drive with the doors properly closed. You could lose the load, for example, and endanger ve- hicle occupants or other road users if the doors are open. Only open the doors when road and traffic conditions permit. Do not leave children alone in the vehicle. They could open a locked door from the inside despite road traffic...
  • Page 29 From the Inside To unlock (1) To lock (2) To unlock and open Pull handle. To lock: Press the handle in. All closed doors will be locked. The door is locked when the white patch in the handle can be seen. If an open door is detected, refer to "Central Locking".
  • Page 30: Sliding Door

    Sliding Door WARNING! Only drive with the doors properly closed. You could lose the load, for example, and endanger ve- hicle occupants or other road users if the doors are open. To prevent possible personal injury, always keep hands and fingers away from the door opening when closing a door.
  • Page 31 From the Inside without Lock Button To unlock (1) To lock (2) To unlock and open: Pull handle. To lock: Press the handle in. The door is locked when the white patch in the handle can be seen. If an open door is detected, refer to "Central Locking".
  • Page 32 Press lock button (1) (all doors are locked) If the central locking automatically unlocks again after having been locked, at least one door is closed incorrectly. If it then locks again within about 5 seconds, then all closed doors are locked. The central locking displays vehicle locking with one or more open doors by means of a special function sequence (locking, unlocking, locking).
  • Page 33: Rear Cargo Doors

    Rear Cargo Doors WARNING! Only drive with the doors properly closed. You could lose the load, for example, and endanger ve- hicle occupants or other road users if the doors are open. To prevent possible personal injury, always keep hands and fingers away from the door opening when closing a door.
  • Page 34 From the Inside without Lock Button To unlock and open: Pull handle. To lock: Press the handle in. The door is locked when the white patch in the handle can be seen. If an open door is detected, refer to "Central Locking".
  • Page 35 If the central locking automatically unlocks again after having been locked, at least one door is closed incorrectly. If it then locks again within about 5 seconds, then all closed doors are locked. The central locking displays vehicle locking with one or more open doors by means of a special function sequence (locking, unlocking, locking).
  • Page 36 To lock manually: Move the handle down until it is in the vertical position. Automatic locking: If the left-hand door is closed, it will be automatically locked as soon as the right-hand door has been closed. NOTE: If an open tailgate is locked before being closed, then only the tailgate will be locked.
  • Page 37: Passenger/Cargo Area Door

    To close: Pull the doors away from the retaining plates on the outer sidewalls. THINGS TO KNOW BEFORE STARTING YOUR VEHICLE 37 Passenger/Cargo Area Door WARNING! Always drive with the doors properly closed, be- cause if the vehicle is operated with the doors open, serious personal injury may result.
  • Page 38 To Unlock the Door from the Passenger Area To unlock, turn key to left (1) To open door (2) To close door and lock (3) To Unlock the Door from the Cargo Area (Optional) To unlock, press latch in direction (1) To open door (2) To close door and lock (3)
  • Page 39: Occupant Restraints

    OCCUPANT RESTRAINTS Seat belts, belt tensioners, airbag and child restraint systems are independent restraint systems whose functions complement each other. All states and provinces require use of child restraints that comply with U.S. Federal Motor Vehicle Safety Standard 213 and Canadian Motor Vehicle Safety Standard 213.
  • Page 40 WARNING! Airbag and belt tensioners are designed to func- tion on a one-time-only basis. An airbag or belt tensioner that was activated must be replaced. An airbag system component integrated in the steering wheel gets hot after the airbag has inflated.
  • Page 41: Seat Belts

    WARNING! Children should never ride sitting on the lap of another occupant. In an accident they will be com- pletely without protection and could even be in- jured by the person they are sitting on. For the safety of all occupants read the child restraint sys- tem manufacturer’s instructions carefully when fitting any child restraint system.
  • Page 42 WARNING! Wear your seat belt snugly. A belt that is worn under your arm is very dangerous. Your body could strike the inside surfaces of the vehicle in a collision, increasing head and neck injury. A belt worn under the arm can cause internal injuries.
  • Page 43 WARNING! Never ride in a moving vehicle with the backrest reclined. Sitting in an excessively reclined posi- tion can be dangerous. You could slide under the seat belt in a collision. If you slide under it, the belt would apply force at the abdomen or neck. This could result in severe personal injuries and death.
  • Page 44: Seat Belt Warning Lamp And Airbag Malfunction

    Seat Belt Warning Lamp and Airbag Malfunction When the key is in position 2 in the ignition lock, the warning lamp < lights up for about 6 seconds; this takes place whether or not the driver’s seat belt is fastened. The warning lamp <...
  • Page 45: Fastening And Removing

    Fastening and Removing Belt tongue (1) Belt buckle (2) Release button (3) THINGS TO KNOW BEFORE STARTING YOUR VEHICLE 45 Fastening Seat Belts 1. Pull the seat belt over the body. The seat belt must not be twisted or you could be injured. 2.
  • Page 46: Belt Height Adjustment

    Removing Seat Belts 1. Press the release button in the belt buckle. 2. Guide the seat belt back to its rest position. WARNING! A frayed or torn belt could rip apart in a collision and leave you with no protection. Inspect the belt system periodically, checking for cuts, frays, or loose parts.
  • Page 47: Driver's Airbag

    DRIVER’S AIRBAG The driver’s airbag is located within the padded center of the steering wheel. THINGS TO KNOW BEFORE STARTING YOUR VEHICLE 47 WARNING! To reduce the risk of injury when the front airbag inflates, it is very important for the driver to al- ways be in a properly seated position and to wear the seat belt.
  • Page 48: Front Seat Passenger Airbag (Not In Conjunction With Folding Seat In Partition Wall)

    FRONT SEAT PASSENGER AIRBAG (NOT IN CONJUNCTION WITH FOLDING SEAT IN PARTITION WALL) WARNING! To reduce the risk of injury when the front airbag inflates, it is very important for the driver to al- ways be in a properly seated position and to wear the seat belt.
  • Page 49: Airbag And Belt Tensioners

    AIRBAG AND BELT TENSIONERS The vehicle is equipped with an airbag for the driver and the front seat passenger as well as belt tensioners for the driver and the front passenger. The system is known as a Supplemental Restraint System (SRS). It has been designed to work together with the seat belt and to supplement.
  • Page 50: Safety Precautions For The Airbag

    Safety Precautions for the Airbag WARNING! Airbags can seriously injure or kill you, especially if you are close to the airbag when it deploys. Always wear your seat belt. Airbags do not replace seat belts but instead supplement the protection offered by seat belts. Wearing a seat belt also makes it less likely that you will be out of position and will not be injured or killed as the airbag deploys.
  • Page 51 WARNING! Do not attempt to manually open the front airbag covers. You may damage the airbags and you could be injured because the airbags may not function as designed. These protective covers for the airbag cushions are designed to open only when the airbags are inflating.
  • Page 52: Pedals

    PEDALS The freedom of movement of the pedals must not be impaired in any way, such as by floormats. WARNING! Do not lay any objects in the driver’s footwell. Be careful that floor mats or carpets in the driver’s footwell have sufficient clearance for the pedals. During sudden driving or braking maneuvers the objects could get caught between the pedals.
  • Page 53: Engine Oil Consumption

    Engine Oil Consumption When the engine has passed the break-in period, oil consumption may reach 0.5 % of the fuel consumption recorded in actual operating circumstances. In isolated cases and in arduous operating conditions, oil consumption may increase to 1 % of the fuel consumption recorded circumstances.
  • Page 54: Inhalation Of Exhaust Gas

    INHALATION OF EXHAUST GAS WARNING! When driving or parking the vehicle, make sure that its exhause system does not come into contact with flamable material (such as dry leaves) as these materials my otherwise catch fire. Inhalation of exhaust gas is hazardous to your health.
  • Page 55 WARNING! If you tension the tensioning belts between the sidewalls, the maximum permissible load for the lashing rings could be exceeded if the brakes are applied suddenly or in the event of an accident. The load would no longer be secured, which could result in serious injuries caused by the load slip- ping.
  • Page 57: Understanding The Features Of Your Vehicle

    UNDERSTANDING THE FEATURES OF YOUR VEHICLE CONTENTS Mirror Adjustment ......59 Interior Mirror (Optional) ....59 Electrically Adjustable Exterior Mirror (Optional) .
  • Page 58 Headlamp Cleaning System (Optional) ..77 Speed Control (Optional) ....77 Sunroof (Optional) ......80 Manual Sun Roof (Optional) .
  • Page 59: Mirror Adjustment

    MIRROR ADJUSTMENT Interior Mirror (Optional) Normal position (DAY) (1) Anti-glare position (NIGHT) (2) UNDERSTANDING THE FEATURES OF YOUR VEHICLE 59 Electrically Adjustable Exterior Mirror (Optional) The switch is located in the door lining next to the door handle. Mirror adjustment, left (1) Mirror adjustment, right (2) When the key is in position 2 in the ignition lock, each mirror may be adjusted by pressing the adjustment...
  • Page 60: Seat Adjustment

    SEAT ADJUSTMENT Driver’s and Front Passenger’s Seat WARNING! Do not adjust the driver’s seat while driving. Ad- just the seat only while the vehicle is parked. Adjusting the seat while driving could cause the driver to lose control of the vehicle. The seat belt might not be properly adjusted and you could be injured.
  • Page 61: Lumbar Support

    Comfortseat (Optional) Seat adjustment, fore/aft (1) Seat cushion depth (Optional) (2) Seat height adjustment, front (3) Seat height adjustment, rear (4) Backrest tilt (5) UNDERSTANDING THE FEATURES OF YOUR VEHICLE 61 Lumbar Support Hand pump (1) Bleeder valve (2) Reinforce support: Use hand pump (1).
  • Page 62: Armrest (Optional)

    Armrest (Optional) Tilt adjustment (1) By adjusting the tilt adjustment (thumbwheel) (1) the tilt of the armrest can be changed. Head Restraint If you need to remove the head restraint, press the catch at the head restraint socket and pull the head restraint up and out.
  • Page 63: Folding Seat At Partition (Optional)

    Folding Seat at Partition (Optional) Key (1) Seat cushion (2) Fold down the seat cushion of the folding seat. UNDERSTANDING THE FEATURES OF YOUR VEHICLE 63 WARNING! When folding down the seat cushion, make sure that nobody can become trapped. The risk of injury to the front-passenger is increased in the event of sharp steering movements or an accident if a key is inserted in...
  • Page 64: Rear Seat Bench Removal And Installation

    REAR SEAT BENCH REMOVAL AND INSTALLATION WARNING! The integrated seat belt can only offer the degree of protection for which it is designed if you install the specified rear bench seats correctly. Never op- erate vehicle unless all rear bench seats are prop- erly installed and all release levers are locked.
  • Page 65: Retrofitting Seat Mounting Cups

    UNDERSTANDING THE FEATURES OF YOUR VEHICLE 65 To install: 1. With the rear bench seat facing in the direction of travel, insert the legs of the rear bench seat in the respective seat mounting cups on the floor. 2. Slide the rear bench seat forwards with some force as far as it will go, until the release levers are heard to engage and all release levers are parallel to the vehicle floor.
  • Page 66: Hood

    HOOD WARNING! When the hood is open, there is a risk of injury due to very hot engine components. When the engine is running or the key is in position 2 in the ignition lock, there is a risk of injury due to moving engine components and the electrical system.
  • Page 67 2. Open the safety catch (2). 3. Swing the hood up until the support strut (3) engages. UNDERSTANDING THE FEATURES OF YOUR VEHICLE 67 To close: 1. Lift the hood up slightly. 2. Press the support strut (3) down. 3. Swing the hood down and make sure that it engages in its retaining catch.
  • Page 68: Headlamp Range Control

    WARNING! Be sure the hood is properly closed before driving. If the hood is not fully latched, it could fly up when the vehicle is moving and block your for- ward vision. Be sure all hood latches are latched fully before driving. When closing the hood, use extreme caution not to catch hands or fingers.
  • Page 69: Interior Lighting

    INTERIOR LIGHTING Interior Lamps in the Driver and Rear-Seat Passenger Area/Cargo Area Permanently on (1) Off (2) Interior lamps are switched on/off by the door contact switches (3) UNDERSTANDING THE FEATURES OF YOUR VEHICLE 69 Interior Lamps with Interior Sensor Protection (Optional) Interior lamp switch (1) Reading lamp switch (2)
  • Page 70: Front Passenger Space Only

    Operation of Interior Lamps Position 1: Continuous operation Position 2: The door contact switches are used to switch the interior lamps on and off Position 3: Switched off Operation of Reading Lamps Position 1: Left-hand reading lamp switched on Position 2: Switched off Position 3: Right-hand reading lamp switched on Interior Lighting with Reading Lamp, Front Passenger Space Only...
  • Page 71: Interior Cargo Area Lighting (Optional)

    Interior Cargo Area Lighting (Optional) The switch is located on the center section of the dashboard. To switch on: Press top of switch: The indicator lamp in the switch will illuminate. To switch off: Press bottom of switch. UNDERSTANDING THE FEATURES OF YOUR VEHICLE 71 The switch (1) is located on the right side of the cargo area at the entrance for the sliding door.
  • Page 72: Multifunction Switch

    The switch (2) is located in the right rear of the cargo area. To switch on: Press top of switch, the indicator lamp in the switch will illuminate. To switch off: Press bottom of switch. NOTE: The interior cargo area lighting will shut off automatically after 15 min.
  • Page 73 Lamp switch (3) C Side lamps, license plate and instrument lighting õ Low beam headlamps, headlamps ƒ Marker lamps, right, combination switch up (1) Marker lamps, left, combination switch down (2) UNDERSTANDING THE FEATURES OF YOUR VEHICLE 73 High beam headlamps (lamp switch positionõ) (4) Headlamp flasher (also when turn signals are on) (5) NOTE: When the key is in the ignition lock in the 0 position and the driver’s or passenger’s door is open, a...
  • Page 74: Window Operation

    WINDOW OPERATION Mechanical Window Operation To open the window: Turn manual window counterclockwise direction. To close the window: Turn the manual window control in a clockwise direction. Electric Window Operation (Optional) Make certain that no one gets caught when the side windows are closed.
  • Page 75: Windshield Wiper Switch

    Place the key in position 2 in the ignition lock. To open the window: Keep switch pressed downward until the window has reached the desired position. To close the window: Keep switch pressed upward until the window has reached the desired position. UNDERSTANDING THE FEATURES OF YOUR VEHICLE 75 WINDSHIELD WIPER SWITCH Intermittent wipe and rain sensor (optional) (1)
  • Page 76: (Optional)

    WARNING! Sudden loss of visibility through the windshield caused by e. g. ice, steam, fog or water could lead to an accident. You might not see other vehicles or other obstacles. To avoid sudden icing of the windshield during freezing weather, warm the windshield with the defroster or with the wind- shield heater (optional) before and during wind- shield washer use.
  • Page 77: Headlamp Cleaning System (Optional)

    Headlamp Cleaning System (Optional) The headlamps will be cleaned with a high-pressure water jet when • the headlamps are switched on • the windshield wipers operate with washer fluid. NOTE: Fluid for the headlamp cleaning system is also supplied from the washer system fluid reservoir. UNDERSTANDING THE FEATURES OF YOUR VEHICLE 77 SPEED CONTROL (OPTIONAL) Set/accelerate speed (1)
  • Page 78 The speed control allows you to drive in a more relaxed manner, for example over long distances, as it automatically maintains the set speed by actively regulating the throttle setting. The speed control lever on the steering column is used to activate and operate the speed control.
  • Page 79 Decrease set speed Push down speed control lever (2) briefly – speed decrease of 0.6 mph (1 km/h) each time. To decrease speed steadily, hold the speed control lever in the push-down position. Resume set speed (after shutting off) Push speed control lever back (4). With the accelerator pedal the set speed can be increased (for passing).
  • Page 80: Sunroof (Optional)

    SUNROOF (OPTIONAL) WARNING! In an accident, there is a greater risk of being thrown from a vehicle with an open sun roof. You could also be seriously injured or killed. Always fasten your seatbelt properly and make sure all passengers are properly secured too. Do not allow small children to operate the electric sun roof.
  • Page 81: Electric Sun Roof (Optional)

    WARNING! Never allow fingers or other body parts, or any ob- ject to project through the sun roof opening. Inju- ry may result. Make sure that nobody can be trapped when closing the sun roof. Electric Sun Roof (Optional) See Section 4, Understanding Your Instrument Panel, for switch locations.
  • Page 82: Ashtray/Cigar Lighter

    Remove cover (1) at the front frame of the sun roof. Remove tool (2) from the cover (1) and insert. Open manually: Press in tool (2) and turn counterclockwise (3). Close manually: Press in tool (2) and turn clockwise (4). Have malfunctions rectified by an authorized Sprinter Dealer.
  • Page 83 To open the ashtray (1): Pull the ashtray (1) out until it locks into place. To close the ashtray (1): Push the ashtray (1) forward over the working point until it reaches the stop. To switch on the cigar lighter (2): Press in the cigar lighter (2), it will automatically spring back as soon as the filament begins to glow.
  • Page 84: Electrical Outlet

    ELECTRICAL OUTLET The electrical outlet is located on the lower right in the center of the dashboard. NOTE: Maximum capacity: 180 VA CAUTION! • Many accessories that can be plugged in draw power from the vehicle’s battery, even when not in use (i.e.
  • Page 85: Mobile And Two Way Radio And Fax Machines

    MOBILE AND TWO WAY RADIO AND FAX MACHINES WARNING! Never operate radio transmitters equipped with a built-in or attached antenna (i.e., without being connected to an external antenna) from inside the vehicle while the engine is running. Doing so could lead to a malfunction of the vehicle’s elec- tronic system, possibly resulting in severe person- al injuries and death.
  • Page 86 The cup holders in the passenger compartment are located in the center below the seat benches. Pull out cup holder in the direction of arrow. WARNING! Your primary responsibility is to drive the vehicle. Do not use cup holder while the vehicle is in motion.
  • Page 87: Glove Compartment

    GLOVE COMPARTMENT To open glove compartment: Pull handle (1) UNDERSTANDING THE FEATURES OF YOUR VEHICLE 87 COMPARTMENTS IN FRONT DOORS Locked (1) Unlocked (2)
  • Page 89: Understanding Your Instrument Panel

    UNDERSTANDING YOUR INSTRUMENT PANEL CONTENTS Instruments and Controls ....91 Instrument Cluster and Indicator Lamps ..93 Indicator Lamp Symbols .
  • Page 90 Upper Air Vents ......122 Heated Rear Window (Optional) ... 123 Windshield Heater (Optional) .
  • Page 91: Instruments And Controls

    UNDERSTANDING YOUR INSTRUMENT PANEL 91 INSTRUMENTS AND CONTROLS...
  • Page 92 Legend For Instruments And Controls 1. Left-hand air vent. 2. Multifunction switch. 3. Speed control. 4. Hood release lever. 5. Instrument cluster, refer to "Instrument Cluster and Indicator Lamps". 6. Hazard warning flasher switch. 7. Steering wheel with horn, front driver airbag. 8.
  • Page 93: Instrument Cluster And Indicator Lamps

    UNDERSTANDING YOUR INSTRUMENT PANEL 93 INSTRUMENT CLUSTER AND INDICATOR LAMPS...
  • Page 94 Legend For Instrument Cluster And Indicator Lamps 1. Tachometer (Engine rpm), refer to "Tachometer (Engine rpm)". 2. Turn signal indicator lamp (left), refer to "Multifunction Switch". 3. Turn signal indicator lamp (right), refer to "Multifunction switch". ® 4. ASR warning lamp or ESP 5.
  • Page 95: Indicator Lamp Symbols

    Indicator Lamp Symbols Acceleration skid control (ASR) or electronic stability program ( or slippery surface warning. Airbag Malfunction (USA only). Parking brake applied. High beam on, refer to "Multifunction Switch". Battery not being charged, refer to "Battery Charge Indicator Lamp". Water in fuel filter, refer to "Water in Fuel Indicator Lamp".
  • Page 96: Multi-Function Indicator

    96 UNDERSTANDING YOUR INSTRUMENT PANEL Multi-Function Indicator WARNING! Never operate buttons (1, 2, 3 and 4) in the multi- function indicator while driving. To operate these buttons the driver must reach through steering wheel, which could significantly impede its movement. Your attention will also be diverted from the road and traffic conditions.
  • Page 97 The multi-function indicator can be used to call up the odometer, trip meter, clock and outside temperature, or information such as remaining time/distance until the next service is due, or the engine oil level. If your vehicle is equipped with reversing aid, the multi-function indicator also displays the distance between your vehicle and a detected obstacle.
  • Page 98: Clock

    Clock Activate the multi-function indicator, refer to "Multi- Function Indicator". Button I – to reverse the time adjustment/ switch between hours and minutes (1) Button ç – to turn the time back (2) Button æ – to advance the time (3) To switch between Time and Outside Temperature Display (Optional) Press the I button briefly.
  • Page 99: Odometer And Trip Meter

    Odometer and Trip Meter Activate the multi-function indicator. The total distance covered by the vehicle will be shown. 1. To switch between the odometer and the trip meter, press button (1) briefly. 2. To reset the trip meter, call up trip meter. Press button (1) and hold until the trip meter shows 0000.
  • Page 100: Outside Temperature Display

    Instrument and display lighting: 1. Switch on the marker lamps, refer to "Combination Switch" 2. Press button ç, to make instrument and display lighting dimmer 3. Press button æ, to make instrument display lighting brighter Outside Temperature Display Clock/outside temperature display selector (1) Press button I briefly.
  • Page 101: Reversing Aid Distance Display (Optional)

    The outside temperature is displayed when the multi- function indicator is activated. Sudden changes in temperature, for instance when leaving a garage, are only shown after a certain delay. NOTE: Outside temperature display °F in USA only. °C in Canada only. WARNING! Even if the display still reads a few degrees above °...
  • Page 102 The following display appears if the reversing aid does not detect an obstacle. NOTE: Distance display • "in" in USA only. • "cm" in Canada only. The distance between the sensors and an obstacle detected within the monitoring range is displayed in increments of 2 in (5 cm).
  • Page 103: Tachometer (Engine Rpm)

    Tachometer (Engine rpm) Do not exceed the maximum permissible engine speed. NOTE: To protect the engine, its fuel supply is interrupted when the maximum rpm is reached. Despite this, the maximum rpm can still be exceeded in overrun mode (e.g. when driving downhill). UNDERSTANDING YOUR INSTRUMENT PANEL 103 Coolant Temperature Gauge The coolant temperature is displayed when the key is...
  • Page 104 CAUTION! Do not leave your vehicle unattended with the engine running as you would not be able to react to the temperature indicator if the engine overheats. This would lead in turn to engine damage. For coolant level indicator lamp /, refer to "Coolant Level Indicator Lamp".
  • Page 105: Indicator Lamp

    Fuel Gauge with Reserve Fuel Indicator Lamp The fuel level is displayed when the key is in position 2 in the ignition lock. UNDERSTANDING YOUR INSTRUMENT PANEL 105 The reserve fuel indicator lamp (1) lights up for about 2 seconds. If the reserve fuel indicator lamp remains on or lights up again when the engine is running, the fuel in the tank hasreached reserve level.
  • Page 106: Battery Charge Indicator Lamp

    Battery Charge Indicator Lamp When the key is in position 2 in the ignition lock, the battery charge indicator lamp # will light up in the instrument cluster. It must go out when the engine is running. If the battery charge indicator lamp # remains on or lights up again while the vehicle is moving, a fault has developed in the battery charge circuit.
  • Page 107: Engine Oil Level Indicator Lamp

    NOTE: Should the water in fuel indicator lamp still not go out after the fuel filter has been drained, the cause should be examined by an authorized Sprinter Dealer. If the indicator lamp does not light up for about 2 seconds with the key in the ignition lock in position 2, there is a malfunction in the water separator system.
  • Page 108: Coolant Level Indicator Lamp

    If the engine oil level indicator lamp : does not go out, or if it lights up again while the vehicle is moving, the engine oil level has dropped to a point close to the minimum level mark on the dipstick. The indicator lamp : lights up only briefly at first, becoming permanent as the oil level drops further.
  • Page 109: Engine Control Unit Indicator Lamp

    If a large quantity of coolant is being lost, or if smaller amounts are lost at regular intervals, have the engine cooling system examined by an authorized Sprinter Dealer. CAUTION! Never run the engine if the coolant level is too low.
  • Page 110: Switch Locations

    110 UNDERSTANDING YOUR INSTRUMENT PANEL SWITCH LOCATIONS...
  • Page 111 Legend for Switch Locations 1. Fog lamp switch (Optional), refer to "Fog Lamp Switch". 2. Headlamp range control, refer to "Headlamp Range Control". 3. Auxiliary heat exchanger switch (Optional). 4. Heated rear window (Optional). 5. Left-hand seat heater switch (Optional). 6.
  • Page 112: Assyst Maintenance Computer (Optional)

    ASSYST MAINTENANCE COMPUTER (OPTIONAL) Function button (‘) (1) Approximately one month or 2,000 miles (3,000 km) before a service is due, the maintenance symbol Symb N00.00-2387-00 lights up when the key is turned to position 2 in the ignition lock. If the remaining time (in days) is shown, the additional symbol È...
  • Page 113 Depending on the driving style, the mileage covered and the operating conditions, the next service due is displayed either as a remaining distance in "mi" (in km) or as a remaining time in "days". The length of time between services should not exceed 2 years. display will cancelled...
  • Page 114: Engine Oil Level - Display In Instrument Cluster (Vehicles With Assyst Maintenance Computer Only)

    Engine Oil Level – Display in Instrument Cluster (Vehicles with ASSYST Maintenance Computer only) If the : indicator lamp lights up briefly when the engine is running, the engine oil level has dropped to the minimum mark. Check the engine oil level without delay and add oil to the upper mark on the dipstick.
  • Page 115: Engine Off

    If the warning Symb N00.00-2150-00 is displayed in the multi-function indicator while the engine is running, the engine oil level is above maximum. CAUTION! Do not operate the engine if the oil level is above maximum. There is a danger of damage to the engine or catalytic converter.
  • Page 116 Briefly press button (1) twice within 1 second. The following displays can then appear in the multi- function indicator: Symb It is not necessary to add N00.00-2151-00 engine oil. Symb 1 quart (about 1 liter) of N00.00-2385-00 engine oil must be added. Symb 1.5 quarts (about 1.4 liters) N00.00-2386-00...
  • Page 117: Engine Oil Level Indicator In Instrument Cluster (Vehicles Without Assyst Maintenance Computer)

    ENGINE OIL LEVEL INDICATOR IN INSTRUMENT CLUSTER (VEHICLES WITHOUT ASSYST MAINTENANCE COMPUTER) If the : indicator lamp lights up when the engine is running, the engine oil level has dropped to the minimum mark. Check the engine oil level without delay and add engine oil up to the upper mark on the dipstick.
  • Page 118: Heating, Ventilation

    HEATING, VENTILATION Temperature control (1) Airflow control (2) Air distribution control (3) Z Air to the windshield and from the air vents X Air to the windshield and footwell and from the air vents Y Air to the footwell and from the air vents h Air from the air vents NOTE: If the vehicle interior has been heated up by intense sunlight, ventilate the interior briefly before...
  • Page 119: Ventilation

    Ventilation 1. Set the airflow control (2) to position 3 or 4. 2. Set the temperature control (1) as illustrated (heater switched off). 3. Set the air distribution control (3) to h. NOTE: Adjust the air vents as required, Air Vents and Center Air Vents". UNDERSTANDING YOUR INSTRUMENT PANEL 119 Air Recirculation Air recirculation indicator lamp (1)
  • Page 120: Heating

    Select air recirculation if dust or unpleasant odors enter the vehicle. NOTE: Prolonged air recirculation can worsen the air quality and lead to fogging up of the windows. Shut off air recirculation as soon as possible. Only with automatic heat regulation and regulated air conditioning (Optional): Air recirculation is automatically switched off after about 15 minutes or when engine is shut off.
  • Page 121: Windows

    De-Fogging and De-Icing The Front Windows 1. Set the airflow control (2) to position 3 or 4. 2. Set the temperature control (1) to P. 3. Set the air distribution control (3) to Z. 4. Switch recirculation, Recirculation". UNDERSTANDING YOUR INSTRUMENT PANEL 121 NOTE: On vehicles with auxiliary heater (water heater): additional...
  • Page 122: Side Air Vents And Center Air Vents

    Side Air Vents and Center Air Vents To open, turn the thumbwheel outwards. To close, turn the thumbwheel inwards. Intermediate settings are possible. Upper Air Vents The upper air vents supply fresh air (not heated) to the passenger/load compartment. To open, turn the thumbwheel forwards. To close, turn the thumbwheel rearwards.
  • Page 123: Heated Rear Window (Optional)

    Heated Rear Window (Optional) The switch for the heated rear window is located on the right-hand side next to the steering column. It can be used only when the engine is running. To switch it on: • Press upward; the indicator lamp in the switch will light up.
  • Page 124: Residual Engine Heat Utilization (Rest)

    Residual Engine Heat Utilization (REST) The REST switch (1) is located on the center section of the dashboard. The residual engine heat utilization system can be used to keep the vehicle interior warm for some time after the engine is switched off. Turn the key to position 0 in the ignition lock or remove it altogether.
  • Page 125: Climate Control

    To switch on: Press switch (1), the indicator lamp (2) in the switch lights up. To switch off: Press switch (1) again, the indicator lamp (2) goes out. NOTE: Run the air conditioning at least once a month for about 10 minutes. possible that automatically switch off at outside temperatures below...
  • Page 126: Dehumidification (On Vehicles With Air Conditioning)

    NOTE: Open and adjust the air vents as required, refer to "Side Air Vents and Center Air At high outside temperatures, a better cooling performance is achieved by switching on air recirculation. For note on air recirculation, Recirculation". Dehumidification (on Vehicles with Air Conditioning) Vents".
  • Page 127: Air Conditioner For The Rear Passenger Compartment (Optional)

    NOTE: It is possible that the air conditioning will automatically switch off at outside temperatures below 41 °F (+5 °C). Dehumidification is then also not possible. To switch on air conditioner, press switch (4). Open the side air vents as required, refer to "Side Air Vents and Center Air Vents".
  • Page 128: Air Recirculation

    To switch it on: 1. Press switch (1) on air conditioning, regulated. The indicator lamp (2) will light up. 2. Operate the airflow switch (3). Blower level 1, press the airflow switch (3) upwards; the left-hand indicator lamp will light up. Blower level 2, press the airflow switch (3) downwards;...
  • Page 129: Air Strainer

    Air Strainer To lock fasteners (1) To unlock fasteners (2) The air strainer is located at the rear of the air conditioner for rear passenger compartment. Increased quantities of sand or dust may settle on the air conditioner for rear passenger compartment air strainer when driving on dusty or sandy streets.
  • Page 130: Electric Blower (Optional)

    Installing the Air Strainer 1. Affix the air strainer (3) to the grating (5) (make certain that the ends project evenly). 2. Replace the air strainer (3) and grating (5) on the cover and press the Velcro closure (4) on the cover (6).
  • Page 131: Heater Booster

    HEATER BOOSTER The switch (1) for activating the heater booster system is located in the center section of the dashboard. The heater booster system can be switched on while the vehicle is being driven to help the engine to reach normal temperature more quickly, which will help to heat up the passenger compartment as...
  • Page 132: Auxiliary Heater - Water Or Air Heater

    AUXILIARY HEATER – WATER OR AIR HEATER (OPTIONAL) WARNING! The auxiliary heating must not be operated at gas stations due to the risk of fire and explosion. For this reason, switch off the auxiliary heating before refuelling. Auxiliary heaters emit fumes when in operation, including carbon monoxide.
  • Page 133 NOTE: After three successive attempts to start the heater, a malfunction will be recorded in the integrated diagnostic system and no further operation on auxiliary heater will be available (lock-out). The work to annul the lock-out must be carried out at an authorized Sprinter Dealer.
  • Page 134: Auxiliary Heater Switch

    Auxiliary Heater Switch To switch it on: Press the switch upward. The indicator lamp in the switch will light up. auxiliary automatically switch off after about 120 minutes. The auxiliary heater will switch over to after-running mode (about 2 minutes). To switch off: Press the switch downward.
  • Page 135 Button H – Select memory (1 – 3), activate preselected time (6) Button ö – Switch on heater (7) Button ý – Set time, day, and preselected time; shorten heating period (min. 1 minute) (8) Button þ – Set time, day, and preselected time; lengthen heating period (max.
  • Page 136 The auxiliary heater is running. Display: Symbol ö, current time and current day of the week. If the ignition is switched off, the auxiliary heater will remain on for another 15 minutes before automatically switching off. The remaining heating period can be lengthened by using the button þ...
  • Page 137: Switched On

    Press the button H until the desired memory (1 – 3) and the preselected time both flash. The preselected time has been activated when the display stops flashing. Within the next 24 hours, the heater will switch on at the preselected time displayed. Activate the preselected time (from 24 hours to a max.
  • Page 138 Heat operation: Different operating conditions will be in effect depending on the heat level required. The integrated control unit adjusts the heat flow using the following operating levels: High – Low – Off Safety Equipment For safety reasons, the heater will automatically switch off if faults occur which cause the device to overheat.
  • Page 139: Auxiliary Heat Exchanger In Load Compartment, Only With Auxiliary Heater (Optional)

    NOTE: Only on vehicles with automatic heater control/regulated air conditioner: Before switching on the heater or entering the switch- on time, the temperature control (1) must be set to maximum heater output (as illustrated). Set the air distribution control (3) as required between Y and Z.
  • Page 140: Auxiliary Heater - Tips For Coping

    AUXILIARY HEATER – TIPS FOR COPING WITH PROBLEMS NOTE: After three successive attempts to start the heater, a malfunction will be recorded in the integrated diagnostic system and no further operation on auxiliary heater will be available (lock-out). The work to annul the lock-out must be carried out at an authorized Sprinter Dealer.
  • Page 141 STARTING AND OPERATING CONTENTS Power Assistance ......144 Starting the Engine ......144 Maximum Engine Speed .
  • Page 142 Deactivating the Acceleration Skid Control (ASR) ......171 Brake Assist System (BAS) (vehicle type 2500 only) ....172 Indicator Lamp Electronic Stability Program (ESP®) (vehicle type 2500 only) .
  • Page 143 Winter tires ......206 Snow Chains ......207 Fuel Requirements .
  • Page 144: Power Assistance

    POWER ASSISTANCE WARNING! When the engine is not running, there is no power assistance for the brake and steering system. In this case, it is important to keep in mind that a considerably higher degree of effort is necessary to brake and steer the vehicle. STARTING THE ENGINE Battery charge warning lamp (1) Engine oil level indicator lamp (2)
  • Page 145: Maximum Engine Speed

    Preheater indicator lamp (3) 1. Apply the parking brake. 2. Automatic transmission, shift selector lever to "P" or "N" position, refer to "Automatic Transmission". 3. Do not depress the accelerator pedal. 4. Turn the key to position 2 in the ignition lock. The preheater indicator lamp q lights up.
  • Page 146: Constant Rpms (Optional)

    Constant RPMs (Optional) The switch for the Constant RPMs is located on the center section of the dashboard. Constant RPMs engine-idling working-RPM level and maintains this level regardless of work load. It can only be used when the vehicle is stationary, the parking brake is engaged and the gear selector lever is in position "P".
  • Page 147: Stopping The Engine

    NOTE: The Constant RPMs will automatically switch off when the parking brake is released, the vehicle is in motion or the control unit detects a malfunction. The Constant RPMs will also automatically switch off when you depress the brake pedal. In this case it will automatically switch on again as soon as you release the brake pedal.
  • Page 148: Automatic Transmission

    AUTOMATIC TRANSMISSION The automatic transmission selects individual gears automatically, dependent upon: • Gear Selector lever position • Accelerator position • Vehicle speed The gear shifting process is continuously adapted, dependent on the driving style, the driving situation and the road characteristics. NOTE: When parking the vehicle or before working on the vehicle with the engine running, apply the parking brake and shift the gear selector lever into "P".
  • Page 149: Accelerator Position

    NOTE: After selecting any driving position from "N" or "P", wait a moment to allow the gear to fully engage before accelerating, especially when the engine is cold. Accelerator Position Partial throttle, for early upshifting and normal acceleration Full throttle, for later upshifting and rapid acceleration Kickdown, (depressing the accelerator beyond full throttle) for downshifting to a lower gear and maximum acceleration.
  • Page 150: Gear Selector Lever Position

    Gear Selector Lever Position The current gear selector lever position (1) is indicated in the gear range indicator display. The automatic gear shifting process can be adapted to specific operating conditions using the gear selector lever. Park Position The park position is to be used when parking the vehicle.
  • Page 151: Gear Selection For Special Circumstances

    NOTE: Coasting the vehicle, or driving with gear selector lever in "N" can result in transmission damage that is not covered by the Sprinter Warranty. w The transmission automatically upshifts through 5th gear. Position "D" provides optimum driving characteristics under all normal operating conditions.
  • Page 152 transmission are negatively affected by this mode of operation. The delayed upshift is effective with vehicle speeds below 31 mph (50 km/h) at partial throttle and engine temperatures below 95 F (+35 C). To avoid overrevving the engine when the gear selector lever is moved to a lower gear, the transmission will not shift to a lower gear if the engine’s revolutions per minute limit would be...
  • Page 153: Transmission Selector Lever, Manually

    TRANSMISSION SELECTOR LEVER, MANUALLY UNLOCKING In the case of power failure the transmission selector lever can be manually unlocked (for vehicle towing). To do so, insert a pin (1) (ball point pen), into the covered opening below the position "D" of the shift pattern.
  • Page 154 The system is operational if after reverse gear is engaged: • an acknowledgement tone sounds • the multi-function indicator shows the distance to an obstacle that has been detected. WARNING! The reversing aid is feature designed to provide as- sistance and may not detect all obstacles. The sys- tem is not a replacement for your own diligence.
  • Page 155 WARNING! Ultrasonic sources, such as the compressed-air brakes of heavy trucks, a car wash or a pneumatic drill, and other parts attached to the vehicle, such as load carriers, could cause the reversing aid to malfunction. The reversing aid sensors must not be scratched or damaged.
  • Page 156: Loading The Vehicle

    For all sensors, the minimum distance between sensor and obstacle is 12 in (30 cm). In the event of a malfunction, a continuous warning signal sounds for approximately three seconds when the vehicle is reversing NOTE: Distance display • "in" in USA only •...
  • Page 157: Loading Guidelines

    WARNING! Unsecured or poorly secured loads, and seats that have been removed, could move around the vehi- cle interior uncontrollably in the event of sudden braking, a rapid change in direction or an acci- dent. This increases the risk of injury to occu- pants in these situations.
  • Page 158: Brakes

    • Protect sharp edges with padding. • Check the tire pressures after loading the vehicle. For passenger vans: • Do not stack loads higher than the upper edge of the backrests. • Always place the load against the backrests of the seat benches.
  • Page 159: Brake Pad Wear Indicator

    NOTE: On long and steep downhill slopes, reduce the load on the brakes by shifting down a gear to utilize the braking effect of the engine. To prevent corrosion on the brake pads, after driving on very wet roads, especially if road salts have been used, apply brakes before parking the vehicle.
  • Page 160: Brake Indicator And Electronic Brake Force Distribution (Ebd) Indicator Lamp

    Brake Indicator and Electronic Brake Force Distribution (EBD) Indicator Lamp USA only Canada only With the key in position 2 in the ignition lock and the parking brake released, the indicator lamp ; (3) lights up for about 2 seconds. If the indicator lamp does not go out after about 2 seconds, the brake fluid level has sunk below the minimum filling capacity.
  • Page 161: Parking Brake Indicator Lamp

    WARNING! Driving with the brake indicator lamp ; (3) illuminated can result in an accident. There may be a malfunction in the brake system or in the electronic brake force distribution. The braking characteristics are affected and the vehicle could skid if it is braked hard.
  • Page 162: Parking Brake

    Parking Brake Only apply the parking brake when the vehicle is stationary. To apply: Pull the lever up as many notches as possible. When the key is in position 2 in the ignition lock, the parking brake indicator lamp will light up in the instrument cluster.
  • Page 163: Driving Safety Systems

    WARNING! When leaving the vehicle always remove the key from the ignition lock, and lock your vehicle. Do not leave children unsupervised in the vehicle, even if they are secured by a child restraint system. The children could • injure themselves on parts of the vehicle •...
  • Page 164: Indicator Lamp

    WARNING! The following factors increase the risk of acci- dents: • Excessive speed, especially in turns • Wet and slippery road surfaces • Following another vehicle too closely The ABS, EBV, ASR, BAS and ESP this risk nor can they prevent the natural laws of physics from acting on the vehicle.
  • Page 165: Anti-Lock Brake System (Abs)

    as the voltage reaches this level again – the ABS is then reactivated. If ABS malfunctions, the other driving safety systems deactivated. handling characteristics of your vehicle change. The other braking and driving systems still function normally. WARNING! If the ABS indicator lamp - does not go out or lights up again while driving, the ABS is malfunc- tioning.
  • Page 166 WARNING! Do not reduce the force applied to the brake pedal if it is necessary to brake the vehicle further. This will negate the main benefit of ABS – the ability to brake without affecting the steerability of the vehicle. In the event of an emergency stop, fully depress the brake pedal.
  • Page 167: Electronic Brake Force Distribution (Ebd)

    Electronic Brake Force Distribution (EBD) The electronic brake force distribution (EBD) prevents the rear wheels from being overbraked when there is little load on the rear axle or if there is not much friction between the tires and road (e.g., if the road is wet). WARNING! If the brake indicator lamp ;...
  • Page 168 If the indicator lamp k remains on or lights up when the engine is running, the acceleration skid control (ASR) or the brake assist system (BAS) malfunctioning. Then the ASR will be switched off automatically. NOTE: If the ABS is malfunctioning or the voltage in the vehicle’s electrical system drops below 10 volts, the indicator lamp k will also light up in the instrument cluster and the ASR and the BAS...
  • Page 169: Acceleration Skid Control (Asr) Warning Lamp And Electronic Stability Program (Esp®)* - If Equipped

    Acceleration Skid Control (ASR) Warning Lamp and Electronic Stability Program (ESP equipped When the key is in position 2 in the ignition lock, the warning lamp v in the speedometer will light up for about 2 seconds. It must go out when the engine is running.
  • Page 170: Acceleration Skid Control (Asr)

    Acceleration Skid Control (ASR) ASR makes it possible to pull away and accelerate on a slippery surface. A spinning wheel is braked and its tractive power is transferred to the wheel with full grip. The acceleration skid control (ASR) improves driving stability at all speeds only on vehicles of the chassis and cargo/passenger vans type 3500 C/HC/SHC ®...
  • Page 171: Deactivating The Acceleration Skid

    Deactivating the Acceleration Skid Control (ASR) See Section 4, Understanding Your Instrument Panel, for switch locations. When driving with snow chains, in deep snow, or on sand or gravel, it can be beneficial to deactivate the acceleration skid control (ASR). The engine’s torque is then no longer limited and the drive wheels are free P54.25-0294-20...
  • Page 172: Brake Assist System (Bas) (Vehicle Type 2500 Only)

    To deactivate the ASR: • Press the upper section of the switch – the warning lamp v in the speedometer lights up. Traction control continues to cut in if, for example, a wheel on one side of the vehicle reaches its limit of adhesion.
  • Page 173: Indicator Lamp Electronic Stability Program (Esp®) (Vehicle Type 2500 Only)

    For the indicator lamp k refer to Acceleration Skid Control (ASR) and Brake Assist ". System (BAS) WARNING! The Brake Assist system (BAS) cannot prevent the natural laws of physics from acting on the vehicle, nor can it increase braking efficiency beyond that afforded by the condition of the vehicle brakes and tires or the traction afforded.
  • Page 174: Electronic Stability Program (Esp®)

    NOTE: If the ABS is malfunctioning or the voltage in the vehicle’s electrical system drops below 10 volts, the indicator lamp will also light up in the instrument ® cluster and the ESP will be deactivated. The indicator lamp will go out as soon as the voltage reaches this level again or the ABS is operational again –...
  • Page 175: Auxiliary Drive (Optional)

    WARNING! ® cannot prevent the natural laws of physics from acting on the vehicle, nor can it increase the traction afforded. ® The ESP cannot prevent accidents, including those resulting from excessive speed in turns, following another vehicle hydroplaning. Only a safe, attentive, and skillful driver can prevent accidents.
  • Page 176: Steering

    CAUTION! Power take off must not exceed 10 kW. Exceeding the power take off may cause damage to the auxiliary drive and/or ribbed V-belt. STEERING When the engine is not running, there is no power assistance for the steering. Greater force will be required to steer the vehicle.
  • Page 177 WARNING! Using tires other than those approved by the vehi- cle manufacturer can have detrimental effects, such as • poor handling characteristics • increased noise • increased fuel consumption Moreover, tires and rims not approved by the vehicle manufacturer may, under load, exhibit dimensional variations deformation characteristics that could cause them...
  • Page 178 WARNING! Replace rims or tires with the same designation, man- ufacturer and type as shown on the original part. See an authorized Sprinter Dealer for further informa- tion. If incorrectly sized rims and tires are mounted: • The wheel brakes or suspension components can be damaged.
  • Page 179: Radial-Ply Tires

    WARNING! Fitting other wheel sizes to the vehicle will change the vehicle’s handling characteristics andmay lead to an accident resulting in death, severe personal injuries and property damage. Only certain tires meeting the tire size/load/speed rating specifications are certified to conform to FMVSS 110 for the Sprinter vehicle at this time.
  • Page 180: Tire Care And Maintenance

    • Regularly check the tires and rims for damage. Dented or bent rims can cause tire inflation pressure loss and damage to the tire beads. • If vehicle is heavily loaded, check tire inflation pressure and correct as required. • Do not allow your tires to wear down too far. Adhesion properties on wet roads are sharply reduced at tread depths under 1/8 in (3 mm) for summer tires and 1/6 in (4 mm) for winter tires.
  • Page 181: Life Of Tire

    Life of Tire The service life of a tire is dependent upon varying factors including but not limited to: • driving style • tire inflation pressure • distance driven WARNING! Tires and spare tire should be replaced after 6 years, regardless of the remaining tread. STARTING AND OPERATING 181 Tread Depth Tread Wear Indicator (TWI) (1)
  • Page 182: Storing Tires

    Treadwear indicators (TWI) are required by law. These indicators are located in six places on the tread circumference and become visible at a tread depth of approximately 1/16 in (1.6 mm), at which point the tire is considered worn and should be replaced. Recommended minimum tire tread depth: •...
  • Page 183 If a tire does not have an arrow on the sidewall indicating the direction of rotation, the wheel can be mounted either way. NOTE: The Tire Identification Number (TIN) must always be visible on the outboard side of the tire. WARNING! Spare wheels may be mounted against the direc- tion of rotation (spinning) even with a unidirec-...
  • Page 184 WARNING! lthough the applicable federal motor vehicle safety laws consider a tire to be worn when the treadwear indicators (TWI) become visible at ap- proximately 1/16 in (1.6 mm), do not allow your tires to wear down to that level. As tread depth ap- proaches 1/8 in (3 mm) for summer tires or 1/6 in (4 mm) for winter tires, the adhesion properties on a wet road are sharply reduced.
  • Page 185: Vehicles Type 2500 C/Hc/Shc

    Vehicles type 2500 C/HC/SHC The vehicles are factory equipped with "L" or "N"-rated tires, which have a speed rating of 74 mph (120 km/h) or 87 mph (140 km/h) respectively. Vehicles type 3500 C/HC/SHC The vehicles are factory equipped with "L", "N" or "R"- rated tires, which have a speed rating of 74 mph (120 km/h), 87 mph (140 km/h) or 106 mph (170 km/h) respectively.
  • Page 186: Recommended Tire Inflation Pressure

    WARNING! Avoid spinning of one drive wheel. This may cause serious damage to the drivetrain which is not covered by the Warranty. Recommended Tire Inflation Pressure WARNING! Follow recommended tire inflation pressures. Do not underinflate tires. Underinflated tires wear excessively and/or unevenly, adversely affect handling and fuel economy, and are more likely to fail from being overheated.
  • Page 187: Important Notes On Tire Inflation Pressure

    For more information, refer to "Important Notes on Tire Inflation Pressure". 1 Recommended cold tire inflation pressures NOTE: Data shown on placard are for illustration purposes only. Tire data are specific to each vehicle and may vary from data shown in the illustration. Refer to placard on vehicle for actual data specific to your vehicle.
  • Page 188: Checking Tire Inflation Pressure

    Keep this in mind when checking tire inflation pressure where the temperature is different from the outside temperature. For example: If inside temperature is 68 °F (20 °C) and the outside temperature is 32 °F (0 °C) then the cold tire inflation pressure should be increased by 3 psi (0.2 bar), which equals 1.5 psi (0.1 bar) for every 18 °F (10 °C) for this outside temperature condition.
  • Page 189 WARNING! Follow recommended tire inflation pressures. Do not underinflate tires. Underinflated tires wear excessively and/or unevenly, adversely affect handling and fuel economy, and are more likely to fail from being overheated. Do not overinflate tires. Overinflated tires can adversely affect handling and ride comfort, wear unevenly, increase stopping distance, and result in sudden deflation (blowout) because they are more likely to become punctured or damaged by...
  • Page 190: Potential Problems Associated With Underinflated And Overinflated Tires

    Potential Problems associated with Underinflated and Overinflated Tires Proper tire inflation pressure is essential to the safe and satisfactory operation of your vehicle. Three primary areas are affected by improper tire inflation pressure: 1. Safety WARNING! Improperly inflated tires are dangerous and can cause accidents.
  • Page 191: Tire Labeling

    2. Economy Improper inflation pressures can cause uneven wear patterns to develop across the tire tread. These abnormal wear patterns will reduce tread life resulting in a need for earlier tire replacement. Underinflation also increases tire rolling resistance and results in higher fuel consumption.
  • Page 192: Speed Rating

    (3) Maximum tire inflation pressure (4) Manufacturer (5) Tireplymaterial (6) Tire size designation, load and speed rating (7) Tire name Tire Size Designation, Load and Speed Rating (1) Design standard (2) Tire width (3) Aspect ratio in % (4) Radial tire code (5) Rim diameter (6) Tire load rating (7) Tire speed rating...
  • Page 193: Tire Sizes For Sprinter Vehicles

    Tire Sizes for Sprinter Vehicles Sprinter type 2500 C/HC/SHC 3500 C/HC/SHC 225/70 R 15 C 112/110 R 195/70 R 15 C 104/102 R (115 N) LT 225/75 R 16 115/112 N LT 225/75 R 16 115/112 N LT 225/75 R 16 115/112 L LT 225/75 R 16 115/112 L 1.
  • Page 194 For example, a load rating of 115 corresponds to a maximum load of 2680 lbs (1215 kg) the tire is designed to support. If two values are given (as illustrated), the first value, preceding the slash "/", applies to single tires (rear axle).
  • Page 195: Tire Speed Rating

    Tire Speed Rating The tire speed rating (7) indicates the approved maximum speed for the tire. The commercial vehicle tires based on European standards may have an additional index in the parentheses (as illustrated). In such case, the index preceding the parentheses is valid for European countries and the parenthesized for the USA and Canada.
  • Page 196: Dot, Tire Identification Number (Tin)

    DOT, Tire Identification Number (TIN) (1) DOT (2) Manufacturer’s identification mark (3) Tiresize (4) Tire type code (at the option of the tire manufacturer) (5) Date of manufacture NOTE: Data shown on tire are for illustration purposes only. Actual data on tires are specific to each vehicle and may vary from data shown in the illustration.
  • Page 197: Dot (Department Of Transportation)

    visible on the outboard side of the tire and if applicable that the direction of rotation is correct when remounting the tire. Rotation (spinning) direction, refer to "Direction of Rotation". DOT (Department Of Transportation) A tire branding symbol (1) which denotes the tire meets requirements of the U.S.
  • Page 198: Maximum Tire Load

    WARNING! Tires and spare tire should be replaced after 6 years, regardless of the remaining tread. Maximum Tire Load (1) Maximum tire load rating NOTE: Data shown on tire are for illustration purposes only. Actual data on tires are specific to each vehicle and may vary from data shown in the illustration.
  • Page 199: Maximum Tire Inflation Pressure

    Maximum Tire Inflation Pressure (1) Maximum permissible tire inflation pressure NOTE: Data shown on tire are for illustration purposes only. Actual data on tires are specific to each vehicle and may vary from data shown in the illustration. This is the maximum permissible tire inflation pressure for the tire.
  • Page 200: Tire Ply Material

    Tire Ply Material (1) Plies in sidewall (2) Plies under tread NOTE: Data shown on tire are for illustration purposes only. Actual data on tires are specific to each vehicle and may vary from data shown in the illustration. This marking tells you about the type of cord and number of plies in the sidewall and under the tread.
  • Page 201 Bead The tire bead contains steel wires wrapped by steel cords that hold the tire onto the rim. Cold Tire Inflation Pressure Tire inflation pressure when your vehicle has been sitting for at least 3 hours or driven no more than 1 mile (1.6 km).
  • Page 202 Kilopascal (kPa) Themetric unit for air pressure. There are 6.9 kPa to 1 psi; another metric unit for air pressure is bars. There are 100 kilopascals (kPa) to 1 bar. Maximum Load Rating The maximum load in kilograms and pounds that can be carried by the tire.
  • Page 203 TIN (Tire Identification Number) Unique identifier which facilitates efforts by tire manufacturers to notify purchasers in recall situations or other safety matters concerning tires and gives purchases the means to easily identify such tires. The TIN is comprised of "Manufacturer’s identification mark", "Tire size", "Tire type code"...
  • Page 204: Rotating Tires

    Vehicle Capacity Weight Rated cargo and luggage load plus 68 kilograms (150 lbs) times the vehicle’s designated seating capacity. Vehicle Maximum Load on the Tire Load on an individual tire that is determined by distributing to each axle its share of the maximum loaded vehicle weight and dividing it by two.
  • Page 205 WARNING! In order to avoid loosing a wheel and in order to re- duce the risk of fatal or serious injuries or vehicle damage, please follow these safety instructions: • Always replace wheel bolts that are damaged or rusted. • Never apply oil or grease to wheel bolts. •...
  • Page 206: Alignment And Balance

    matched for wear to prevent overloading one tire in a set. • To check if tires are even, lay a straight edge across all four tires. The straight edge should touch all the tires. WARNING! 3500 Dual Rear Tires have only one approved di- rection of rotation.
  • Page 207: Snow Chains

    Information placard, refer to "Tires and Wheels". Not all M+S rated radial-ply tires provide special winter performance. Make sure the tires you use show M+S and the mountain/snowflake marking.on the tire sidewall. These tires meet specific snow traction performance requirements Manufacturers Association (RMA) and the Rubber Association of Canada (RAC) and have been designed specifically for use in snow conditions.
  • Page 208 NOTE: Chains must be the proper size for the vehicle, as recommended by the chain manufacturer. Snow chains should only be driven on snow-covered roads at speeds not to exceed 30 mph (50 km/h). Remove chains as soon as possible when driving on roads without snow.
  • Page 209: Fuel Requirements

    To avoid damage to your vehicle, tires or chains, observe the following precautions: • Because of limited chain clearance between tires and other suspension components, it is important that only chains in good condition are used. Broken chains can cause serious vehicle damage. Stop the vehicle immediately if noise occurs that could suggest chain breakage.
  • Page 210: Fuel Filter With Water Separator

    If diesel fuels are used with a sulphur content exceeding 0.5 % by weight, engine oil change intervals must be shortened. Please contact your Sprinter Dealer to obtain the necessary information. Refueling from drums or canisters may lead to the fuel becoming contaminated.
  • Page 211: Diesel Fuels For Use At Very Low Temperatures

    Diesel Fuels for Use at Very Low Temperatures At very low temperatures the fluidity of No. 2 diesel fuel may become insufficient due to parraffin separation. For this reason the vehicle comes equipped with a fuel preheater. It permits a troublefree engine operation to a temperature of approximately 14 °F (–...
  • Page 212: Refueling

    REFUELING 1. Fuel filler neck 2. Fuel filler cap The fuel filler neck (1) is located behind the fuel filler flap next to the driver’s door. The fuel filler flap can be opened when the driver’s door is open. Turn the fuel filler cap (2) on the fuel filler neck (1) counterclockwise and take it off.
  • Page 213: Capacity

    Capacity Fuel tank including reserve fuel about 26.4 US gal (100 l). PROGRAMMED TOP SPEED (OPTIONAL) NOTE: The top speed of this vehicle can be electronically limited to a speed between 19 mph (30 km/h) and 82 mph (132 km/h). The vehicle’s electronic speed controller should be programmed only by a qualified technician by an authorized Sprinter Dealer.
  • Page 214: Bleeding Diesel Fuel System

    BLEEDING DIESEL FUEL SYSTEM If the fuel tank was run empty, the diesel fuel system must be bled after refueling before starting the engine. • Turn the key in the ignition lock to position 2 for at least 30 seconds. •...
  • Page 215 CAUTION! Delaying draining of the fuel filter for a considerable time after the indicator lamp lights up may lead to engine damage. NOTE: Prior to opening water drain screw (3), place a suitable receptacle underneath the drain hose (2). Turn water drain screw (3) on and off only by hand.
  • Page 216: Bleeding The Diesel Fuel System

    Bleeding the Diesel Fuel System The diesel fuel system must be bled before starting the engine. • Turn the key in the ignition lock position 2 for at least 30 seconds. • Return the key to position 0. • Start the engine three to four times. The engine control unit indicator lamp ±...
  • Page 217: Tire And Loading Information

    capacity of your vehicle, called the Gross Vehicle Weight Rating (GVWR). The GVWR includes the weight of the vehicle, all occupants, fuel and cargo. The Certification Label also tells you about the front and rear axle weight capacity, called the Gross Axle Weight Rating (GAWR).
  • Page 218: 218 Starting And Operating

    Tire and Loading Information placard Seating capacity (1) Load limit information (2) NOTE: Data shown on placard are for illustration purposes only. Load limit data and seating data are specific to each vehicle and may vary from data shown in the illustration. Refer to placard on vehicle for actual data specific to your vehicle.
  • Page 219 Step 1 • Locate the statement "The combined weight of occupants and cargo should never exceed XXX kg or XXX lbs." on your vehicle’s placard. Step 2 • Determine the combined weight of the driver andpassengers that will be riding in your vehicle. Step 3 •...
  • Page 220 Combined Number of weight limit of occupants Example occupants and (driver and cargo from passengers) placard 1500 lbs 1500 lbs 1500 lbs The higher the weight of all occupants, the less cargo and luggage load capacity is available. For more information, refer to "Trailer Tongue Load". Seating Occupants weight configuration...
  • Page 221: Trailer Towing

    Certification Label Even after careful determination of the combined weight of all occupants, cargo and the trailer tongue load (if applicable) as to not exceed the permissible load limit, you must make sure that your vehicle never exceeds the Gross VehicleWeight Rating (GVWR) and the Gross Axle Weight Rating (GAWR) for either the front or rear axle.
  • Page 222: Trailer Hitches (Optional)

    Trailer Hitches (Optional) Only install a trailer hitch receiver approved for your vehicle. information installation, please see your authorized Sprinter Dealer. The bumpers on your vehicle are not designed for use with clamp-type hitches. Do not attach rental hitches or other bumper-type hitches to them. To reduce the possibility of damage, remove the hitch ball adaptor from the receiver when not in use.
  • Page 223: Trailer Tongue Load

    Gross Trailer Weight (GTW) is the maximum permissible trailer weight 5,000 lbs. (2,260 kgs) Trailer Tongue Weight Rating (TWR) is the maximum permissible weight of the trailer tongue: 500 lbs. (225 kgs) limit for Sprinter approved hitch receiver. NOTE: The GVWR and GAWR of your vehicle is indicated on the Certification Label.
  • Page 224: Checking Weights Of Vehicle And Trailer

    Checking Weights of Vehicle and Trailer To assure that the tow vehicle and trailer are in compliance with the maximum permissible weight limits, and to know the actual weights, have the loaded vehicle-trailer combination (tow vehicle including driver, passengers and cargo, trailer fully loaded) weighed on a commercial scale.
  • Page 225: Towing A Trailer

    Towing a Trailer There are many different laws, including speed limit restrictions, having to do with trailer towing. Make sure that your vehicle-trailer combination will be legal, not only for where you reside, but also for where you will be driving. A good source for this information can be the police or local authorities.
  • Page 226 WARNING! Take into consideration that when towing a trail- er, the handling characteristics are different and less stable from those when operating the vehicle without a trailer. It is important to avoid sudden maneuvers. Sudden maneuvers may lead to loss of control over the vehicle-trailer combination.
  • Page 227: Parking A Trailer

    CAUTION! Extreme care must be exercised since your vehicle with a trailer will require additional passing distance ahead than when driving without a trailer. Because your vehicle and trailer is longer than your vehicle alone, you will also need to go much farther ahead of the passed vehicle before you can return to your lane.
  • Page 228: Emissions Control System (Catalytic Converter)

    EMISSIONS CONTROL SYSTEM (CATALYTIC CONVERTER) WARNING! When driving or parking the vehicle, make sure that its exhaust system does not come into contact with flammable material (such as dry leaves) as these materials may otherwise catch fire. INHALATION OF EXHAUST GAS WARNING! Inhalation of exhaust gas is hazardous to your health.
  • Page 229: Body Builder Guideline

    BODY BUILDER GUIDELINE If you intend on making any alterations to the vehicle, we strongly recommend that you select one of the following options in order to obtain all necessary information: 1. Contact the authorized Sprinter Dealer nearest you to obtain a copy of the Sprinter Body Builder Guideline.
  • Page 230: A Special Note Concerning Vehicle Alteration

    They are responsible for ensuring that modifications or equipment installation does not affect the safety of the vehicle. A Special Note Concerning Vehicle Alteration WARNING! Any modifications or alterations of the Sprinter vehicle not in compliance with the Sprinter Body Builder Guideline and the Sprinter Operator’s Manual may seriously inhibit its roadworthiness and safety and may lead to an accident resulting in...
  • Page 231 Hazard Warning Flasher Switch ... . . 232 Fire Extinguisher (Optional) ....233 Vehicle Tool Kit ......233 Changing the Tire .
  • Page 232: Hazard Warning Flasher Switch

    HAZARD WARNING FLASHER SWITCH The switch is located on top of the steering column housing. When the hazard warning flasher switch is switched on, the indicator lamp in the switch and the turn signal indicator lamp in the instrument cluster both flash. WARNING! If the rear cargo doors are opened to 90°...
  • Page 233: Fire Extinguisher (Optional)

    FIRE EXTINGUISHER (OPTIONAL) 1. Fire extinguisher 2. Locking mechanism The fire extinguisher is located in the driver’s side entrance area. Pull locking mechanism (2) on the side marked with an arrow to release the tether. Take the fire extinguisher (1) from the holder with an upward movement. WHAT TO DO IN EMERGENCIES 233 NOTE: Read the manufacturer’s instructions on the fire extinguisher carefully and make yourself familiar...
  • Page 234: Changing The Tire

    CHANGING THE TIRE If you get a flat tire while driving, gradually decrease your speed. Hold the steering wheel firmly and slowly move to a safe place on the side of the road. The pressure of the spare wheel always has to be checked regularly (at least after every tenth time at the filling station).
  • Page 235 WARNING! Do not jack the vehicle up more than 1.2 in (30 mm) between the tire and the surface. Otherwise, the vehicle may tip over and may cause serious in- jury or death to you or others. Always lower the vehicle onto sufficient capacity jack stands before working under the vehicle.
  • Page 236: Spare Wheel Location

    Spare Wheel Location WARNING! If the rear cargo doors are opened to 90° (detent position), the rear lights will be concealed. The ve- hicle is then not sufficiently safeguarded at the rear and may only be seen by other road users when they are close to the vehicle.
  • Page 237 Spare Wheel Beneath the End of the Frame Retaining screws for the spare wheel structural member Hook (2) 1. Open the cargo doors and remove the retaining screws (1) with the lug wrench from the vehicle tool kit. 2. Lift the spare wheel structural member, unhinge the hooks (2), and lower the spare wheel structural member.
  • Page 238 2. Turn spare wheel holder to loosen. 3. Remove the spare wheel. Spare Wheel Location for Chassis 1. Loosen thumb nuts by hand and remove. 2. Use wrench to loosen fixing nut to the thread end. 3. Lift spare wheel holder. 4.
  • Page 239: Jack

    JACK WARNING! To avoid the risk of serious or fatal injuries or vehicle damage, please bear the following points in mind: • The jack is intended only for raising the vehicle briefly, for instance, when changing a wheel. If it is not designed to enable work to be carried out underneath the vehicle.
  • Page 240 Front Axle Jack Point (All Vehicles) The vehicle jacking point is located under the longitudinal member in front of the front axle. Rear Axle Jack Point for 8,550 lbs (3,880 kgs) (Vehicle type 2500 HC/SHC) The vehicle jacking point is located under the longitudinal member in front of the rear axle.
  • Page 241 Rear Axle Jack Point for 9,990 lbs (4,530 kgs) (Vehicle type 3500 HC/SHC) The vehicle jacking point is located under the longitudinal member in front of the rear axle. CAUTION! Do not position the jack at the leaf spring or the differential housing.
  • Page 242: Removing A Wheel

    REMOVING A WHEEL 1. Loosen the wheel bolts/nuts. 2. Jack up the vehicle until the wheel is clear of the ground. 3. Unscrew the wheel bolts and remove the wheel (keep the wheel bolts clean). NOTE: If the vehicle moves forwards or backwards while it is being jacked-up, lower it again and reposition the jack.
  • Page 243 WARNING! Different wheel bolts are required for pressed steel and light-alloy wheels. Incorrect wheel lug bolts for the wheels could work loose, thereby causing you to lose control of the vehicle. This could cause an accident resulting in severe personal injuries and and property damage.
  • Page 244 Centering wheels with wheel bolts/nuts • If dual assemblies are used, before placement the inner wheel should be inspected to ensure that all ball bearing rings are in proper position. • Install the wheel and snug the wheel bolts/nuts. • Slightly tighten wheel bolts/nuts. •...
  • Page 245 • Tighten the wheel bolts/nuts in a crosswise pattern to the specified torque with a torque wrench. Vehicle Type 225/70 R 15 C Tire steel light-alloy 6J x 15 ET75 7J x 15 ET76 Wheel fitting Tightening 133 lbf.ft ±7 lbf.ft torque (180 N.m ±10 N.m) •...
  • Page 246: Jump Starting

    WARNING! After changing a wheel, you must, for safety reasons, • have the specified tightening torque checked. The wheels could otherwise work loose. • check the tire inflation pressure and correct it if necessary. • retighten the wheel bolts and wheel nuts to the specified tightening torque once the vehicle has been driven for 30 miles (50 km).
  • Page 247 WARNING! Battery fluid contains sulfuric acid. Do not allow this fluid to come in contact with eyes, skin or clothing. In case it does, immediately flush affect- ed area with water, and seek medical help. The battery housing could be damaged. Never lean over batteries while connecting or jump- starting.
  • Page 248: Towing The Vehicle

    1. First connect the positive terminals of the two batteries (see illustration, Items 1 + 2). Start with the booster battery. 2. Then connect the negative terminal of the vehicle with the booster battery to a vehicle ground point of the vehicle with the discharged battery, such as to the engine block (see illustration, Items 3 + 4).
  • Page 249: If The Engine Is Damaged

    WARNING! Do not tow the vehicle if the key cannot be turned in the ignition lock. If the key cannot be turned, the ignition lock re- mains locked and the vehicle cannot be steered. With the engine not running there is no power assistance for the braking and steering systems.
  • Page 251 MAINTAINING YOUR VEHICLE CONTENTS Engine Compartment ..... . . 253 Sprinter Original Parts ..... . 255 Service Products .
  • Page 252 Headlamps, Taillamps, Identification Lamps, Turn Signal Lenses ..... . . 273 Reversing Aid Sensors ....273 Window Cleaning .
  • Page 253: Engine Compartment

    MAINTAINING YOUR VEHICLE 253 ENGINE COMPARTMENT...
  • Page 254 Legend For Engine Compartment 1. Washer system fluid reservoir. 2. Maintenance indicator for air cleaner element (Optional). 3. Oil dipstick. 4. Oil filler neck. 5. Ribbed V-belt. Auxiliary drive (Optional) refer to “Auxiliary drive“. 6. Fuel filter with water separator. 7.
  • Page 255: Sprinter Original Parts

    SPRINTER ORIGINAL PARTS Every authorized Sprinter Dealer maintains a stock of Sprinter original parts for maintenance and repair work. Over 6,000 retailers around the world guarantee that you can be supplied with Sprinter original parts wherever you are. Over 300,000 different parts and assemblies, including parts for older vehicle models, are distributed from a central parts warehouse using an optimally tuned logistics concept.
  • Page 256: Disposal Of Service Products

    Disposal of Service Products Dispose of service products and of parts which come into contact with them environmentally responsible manner. Comply with applicable bars and regulations. EMISSION RELATED COMPONENT WARRANTY STATEMENT The Manufacturer warrants to the original and each subsequent owner of a Sprinter heavy-duty on highway diesel engine that: (1) the engine was designed, built and equipped so as to conform at the time of sale with the applicable...
  • Page 257: Windshield Washer System Fluid Reservoir

    The following checks should be performed at regular intervals (for example once a week or each time the vehicle is refueled): • Windshield washer system/headlamp cleaning system (optional) – washer system fluid reservoir. • Air strainer, in vehicles with an air strainer element maintenance indicator (optional equipment).
  • Page 258: Air Filter Restriction Indicator (Optional)

    Air Filter Restriction Indicator (Optional) The indicator on the air filter housing in the engine compartment shows the degree of contamination in the air filter element. If the red field reaches the 100 % range, the air filter element should be replaced as soon as possible.
  • Page 259: Engine Oil Level

    NOTE: This chart supercedes ALL previously published viscosity charts. MAINTAINING YOUR VEHICLE 259 Engine Oil Level 1. Oil dipstick 2. Oil filler neck...
  • Page 260: Ribbed V-Belt

    Check the engine oil level at regular intervals with the vehicle standing on a level surface. • Check engine oil level about 5 minutes after stopping the engine, which should have reached its regular operating temperature. operating temperature should have been reached and maintained for some time.
  • Page 261: Hydraulic Brake System, Clutch Mechanism Fluid Level

    Hydraulic Brake System, Clutch Mechanism Fluid Level 1. Brake fluid reservoir Brake fluid level must be between the MIN and MAX marks in the reservoir (1). If the brake fluid is below the MIN mark, there may be a fault in the hydraulic system. Have the system checked as soon as possible by an authorized Sprinter Dealer.
  • Page 262: Engine Coolant

    Failure to use MB 325.0 anticorrosion/antifreeze and/or equivalent to DaimlerChrysler material standard MS- 9769 and/or adhere to the specified replacement interval may result in a significantly shortened service life. For coolant composition and water quality, contact your authorized Sprinter Dealer. Engine Coolant The coolant is a mixture of water and a corrosion inhibitor/antifreeze additive.
  • Page 263: Checking Coolant Level

    A regular check is included in the maintenance service. Checking Coolant Level Pressure cap on coolant reservoir (1) The cooling system is pressurized. Only check the coolant level with the vehicle parking on a level surface and with the engine switched off. –...
  • Page 264 WARNING! •Do not spill antifreeze on hot engine parts. Anti- freeze contains ethylene glycol which may burn if it comes into contact with hot engine parts. • Check coolant level only with the engine switched off and the key in position 0 in the ignition lock.
  • Page 265: Winter Operation

    WINTER OPERATION Have your vehicle winterized by an authorized Sprinter Dealer before the onset of winter. • Have the engine oil changed, if the engine oil filled is not approved for winter use. • Coolant: antifreeze/anti-corrosion concentration in the coolant checked. •...
  • Page 266: Disconnecting The Battery

    The auxiliary battery is located underneath the front passenger seat (optional equipment). The battery will not achieve its maximum service life unless it is kept adequately charged at all times. If the vehicle is used primarily for short distances, or left parked for lengthy periods, have the battery charge checked more frequently.
  • Page 267: Charging The Battery

    Charging the Battery Disconnect the battery before charging it with a battery charger. Comply with the operating instructions for the battery charger. To ensure that the battery is disposed of in an environmentally responsible manner, it should only be replaced by an authorized Sprinter Dealer. Batteries contain material that can harm the environment with improper disposal.
  • Page 268: Replacing Wiper Blades

    Refrigerant Recovery and Recycling R-134a Conditioning hydrofluorocarbon (HFC) that is endorsed by the Environmental Protection Agency and is an ozone- saving product. However, recommends that conditioning performed by dealers or other service facilities using recovery and recycling equipment. REPLACING WIPER BLADES Refrigerant manufacturer service...
  • Page 269: Appearance Care And Corrosion Protection

    4. Insert the end of the wiper arm (2) into the larger cutout (3) of the wiper blade. 5. Push the wiper blade into the end of the wiper arm (2) until the retaining spring (1) engages. MAINTAINING YOUR VEHICLE 269 Appearance Care and Corrosion Protection WARNING! Many cleaning products can be hazardous.
  • Page 270 tree resins etc. should be removed immediately to avoid paint damage. Frequent washing reduces and/ or eliminates the aggressiveness and potency of the above adverse influences. More frequent washings are necessary to deal with unfavorable conditions; for example operation near the ocean, in industrial areas (smoke, exhaust emissions), or during the winter months.
  • Page 271: Power Washer

    Power Washer When using a power washer for cleaning the vehicle always observe manufacturers’ operating instructions. CAUTION! Never use a round nozzle to power wash tires. The intense jet of water can result in damage to the tire. Always replace a damaged tire. Always keep the jet of water moving across the surface.
  • Page 272: Tar Stains

    Tar Stains Quickly remove tar stains before they dry and become more difficult to remove. A tar remover is recommended. Paintwork, Painted Body Components Paint care should be applied when water drops on the paint surface do not "bead up", normally every 3 to 5 months, depending on climate and washing detergent used.
  • Page 273: Ornamental Moldings

    When washing the underbody, do not forget to clean the inner sides of the wheels. WARNING! Dirty or iced-up steps and entrances create a risk of slipping or falling. Keep steps, entrances and footwear free from dirt (e.g. mud, clay, snow and ice). Ornamental Moldings For regular cleaning and care of very dirty chrome- plated parts, use a chrome cleaner.
  • Page 274: Window Cleaning

    Window Cleaning Use a window cleaning solution on all glass surfaces. An automotive glass cleaner is recommended. There are 2 steps in the front bumper. This makes it easier to clean the windshield. WARNING! For safety reasons, remove key from ignition lock before cleaning the windshield, otherwise the wiper motor can suddenly turn on and cause in- jury.
  • Page 275: Light Alloy Wheels

    Light Alloy Wheels A wheel care product should be used for regular cleaning of the light alloy wheels. If possible, clean wheels once a week, using a soft bristle brush and a strong spray of water. Follow instructions on container. NOTE: Use only acid-free cleaning materials.
  • Page 276: Upholstery

    Upholstery Using aftermarket seat covers or wearing clothing that have the tendency to give off coloring (e.g. when wet etc.) may cause the upholstery to become permanently discolored. By lining the seats with a proper intermediate cover, contact discoloration will be prevented.
  • Page 277: Standard Fuse And Relay Equipment

    Fuses, relays and diodes (optional equipment) are below the driver’s seat, refer to "Optional Fuse and Relay Equipment". CAUTION! When replacing a blown fuse, it is important to use only a fuse having the correct amperage rating. The use of a fuse with a rating other than indicated may result in a dangerous electrical system overload.
  • Page 278 278 MAINTAINING YOUR VEHICLE Position of fuses and relays Fuses (4) Relays (5)
  • Page 279 MAINTAINING YOUR VEHICLE 279 Fuse Assignment, Standard Equipment...
  • Page 280 No. Rated Circuit Parking lamp right, taillamp right High beam head lamp,right High beam head lamp, left, high beam indicator lamp Backup lamp Brake lamp Windshield wiper motor Horn, heated rear window, air recirculation switch, optional equipment relay (terminal 15) Interior lighting, cigarette lighter, radio (terminal 30) Clock, hazard warning lamps,...
  • Page 281: Relay Assignment, Standard Equipment

    Relay Assignment, Standard Equipment Windshield wiper motor (W) (1) Diesel engine control unit (M) (2) Turn signals (B) (3) MAINTAINING YOUR VEHICLE 281 Fuse and Relay Optional Equipment The cover is located below the driver’s seat. Remove cover: 1. Press both detent springs down and remove cover. Install cover: 2.
  • Page 282 282 MAINTAINING YOUR VEHICLE Fuse, Relay, and Diode Assignments – Optional Equipment...
  • Page 283 NOTE: The arrangement of the fuses (1) depends on the optional equipment installed on the vehicle. The assignments are shown on the inside of the cover of the fuse box. Diodes: Circuit Not in use Not in use Not in use Not in use MAINTAINING YOUR VEHICLE 283 Fuses:...
  • Page 284: Bulb Replacement

    BULB REPLACEMENT WARNING! Bulbs and bulb holders can become very hot. Al- low the lamp to cool down before changing the bulb. Keep bulbs out of reach of children. Do not use bulbs which have been dropped or which show signs of scratches on the glass. They could explode.
  • Page 285 Turn signal lamp and sidemarker lamp, 3457 NA – 12V 28/7.5W, yellow glass (1) Low beam headlamp, H7 – 12V 55W (2) Fog lamp, H1 – 12V 55W (3) Side and parking lamps, W5W – 12V 5W (4) High beam headlamps, H1 – 12V 55 (5) MAINTAINING YOUR VEHICLE 285 Turn Signal Lamps and Side-Marker Lamps 1.
  • Page 286 Low Beam Headlamps 1. Unplug the cable connector from the bulb. 2. Unclip in the retaining springs. Press the retaining springs towards the headlamps and down (direction of arrow). 3. Remove the bulb. 4. Insert the new bulb so that the retaining lugs are fed into the recesses in the reflector section of the bulb holder.
  • Page 287 Fog Lamp (Optional) 1. Remove the cable connector from the bulb holder. 2. Press both retaining springs in the direction of the headlamps and then outward (in the direction of the arrow). MAINTAINING YOUR VEHICLE 287 3. Remove the bulb. 4.
  • Page 288 Side and Parking Lamps 1. Pull out the bulb holder with the bulb. 2. Replace the bulb. 3. Insert the bulb holder. 4. Secure the housing cap. High Beam Headlamp 1. Unplug the cable connector from the bulb. 2. Press the retaining spring towards the headlamps and outwards (direction of arrow).
  • Page 289: Taillamps

    Taillamps Cargo/Passenger Van Locked (1) Unlocked (2) Bulbs are changed from inside the cargo area. The rear lamp cluster bulb holder is located behind the interior paneling. Remove the paneling. MAINTAINING YOUR VEHICLE 289 Brake lamp, taillamp, standing lamp, P21/5W – 12V 21/5W (1) Backup lamp, P21W –...
  • Page 290 Chassis (1) Retaining screws (2) Clearance lamp, R5W - 12V 5W (3) Turn signal lamp, P21W - 12V 21W (4) Stop lamp, P21W - 12V 21W (5) Taillamp, R5W - 12V 5W (6) Backup lamp, P21W - 12V 21W (7) License plate lamp (driver‘s side only), R5W - 12V 5W 1.
  • Page 291: License Plate Lamps (Cargo/Passenger Vans Only)

    License Plate Lamps (Cargo/Passenger Vans Only) 1. Press the bulb socket to the left, against the force of the spring, and remove. 2. Replace the bulb, C5W – 12V 5W. 3. Install the cover. 4. Re-install the bulb socket. MAINTAINING YOUR VEHICLE 291 Additional Brake Lamp (Cargo/Passenger Vans Only) (1) Retaining screws...
  • Page 292: Side-Mounted Turn Signals

    Side-Mounted Turn Signals 1. Press the lamp housing to the front, against the force of the spring, and remove. 2. Replace the bulb, W5W - 12V 5W 3. Install the bulb socket. Side-Marker Lamps, Standing Lamps (Optional) Retaining screws (1) Bulb socket (2) 1.
  • Page 293: Identification Lamps

    Identification Lamps (Cargo/passenger vans only) (1) Retaining screw 1. Take out the retaining screw (1) and remove the lamp housing. 2. To change a bulb, 12V 4CP Press the bulb into the bulb socket, turn it counterclockwise and remove. 3. Insert the new bulb. 4.
  • Page 294: Interior Lighting With Reading Lamp

    Interior Lighting with Reading Lamp 1. Use a screwdriver on the catch spring to press in and remove the bulb housing. 2. Replace the bulb, K – 12V 10W. 3. Install the lamp housing. Interior Lighting with Interior Sensor Protection 1.
  • Page 295: Exit Lamps (Optional)

    Exit Lamps (Optional) (1) Lamp housing (2) Cable connector (3) Bulb holder MAINTAINING YOUR VEHICLE 295 1. Use a screwdriver on the catch spring to remove the lamp housing (1). 2. Press the locating spring on the cable connector (2), hold it down, and remove the cable connector (2).
  • Page 296: Capacities

    CAPACITIES Engine with oil filter Engine oil All vehicles about 9.5 US qt (9.0 l) Fuel tank Including reserve fuel about about about 26.4 US gal 2.8 US gal 2.7 US gal (100 l) (10.5 l) (10.0 l) Cooling system Windshield washer system about...
  • Page 297: Recommended Fluids And Lubricants

    Recommended Fluids and Lubricants The manufacturer recommends for your vehicle model the use of DaimlerChrysler approved fluids and lubricants, e.g. engine oil, gear oil, automatic transmission fluid, brake fluid, power steering fluid, coolant and anti-corrosion/anti-freeze fluid only. WARNING! Failure to use fluids and lubricants which meet the standards and specifications described in this booklet or failure to adhere to the specified re- placement intervals may result in damage to safe-...
  • Page 298 The following oils have been determined to meet DaimlerChrysler requirements. MB approved Engine Oil 76 Pure Synthetic Motor Oil 76 Royal Triton QLT Agip All Guard Motor Oil Agip Eurosport Agip Synthetic PC Akron Ultra Clear C1-4 BP Vanellus C6 Global Plus Brad Penn Euro-Diesel LD Castrol Elixion Castrol Tection S...
  • Page 299 Raloy Motor Diesel Repsol Turbo UHPD Roshfrans Voltro Diesel Shell Helix Ultra Shell Helix Ultra Shell Rimula X CH-4 Shell Rimula X CH-4 Shell Rotella T Multigrade Super Diesel Oil MB-3 Supreme Duty Diesel Engine Oil Multi- grade Unoil GX-7 Ursa Premium TDX Ursa Premium TDX Valvoline SynPower MXL...
  • Page 300 COMPONENT SERVICE INTERVAL Air Conditioning The air conditioning system of your vehicle contains R-134a, a refrigerant that does not deplete the ozone layer in the upper atmosphere. Refrigerant R-134a — Automatic once only at Transmission Fluid 80,000 mi (128,000 km) Brakes Use brake fluid approved to DaimlerChrysler standard MB 331.0 and/or DaimlerChrysler material standard MS-9971, brake fluid certified to DOT 4 Plus standards, that also maintains a minimum dry boiling point (ERBP) of 500°F (260°C),...
  • Page 301 COMPONENT SERVICE INTERVAL Engine Coolant, 15 years or Anticorrosion/ 160,000 mi Antifreeze Fluid (256,000 km) Power Steering Power Steering, no fluid service required Power Steering fluid — Rear Axle Gear Oil 120,000 mi (192,000 km) PRODUCT NAME/PRODUCT NUMBER EURO Peak Coolant/Anti-freeze, OLD WORLD INDUSTRIES Zerex G05, The Valvoline Company Zerex G48, The Valvoline Company Glysantin G05, BASF AG...
  • Page 303: Maintenance Schedules

    MAINTENANCE SCHEDULES CONTENTS Introduction ......304 Warranty ....... . . 304 Maintenance - Without ASSYST Maintenance Computer .
  • Page 304: Introduction

    304 MAINTENANCE SCHEDULES INTRODUCTION This is intended as a guide to the service requirements of your vehicle. It contains all necessary instructions concerning service intervals and operations which have to be carried out. Scope and frequency of maintenance work primarily depend on the vehicle's operating conditions.
  • Page 305: Maintenance - Without Assyst

    The use of Special lubricant additives is not recommended. The use of such additives may affect your warranty rights. With regard to legal stipulations concerning emissions control, please note that engines have to be serviced and adjusted in accordance with special instructions and using special measuring equipment.
  • Page 306: Maintenance - With Assyst Maintenance Computer

    306 MAINTENANCE SCHEDULES MAINTENANCE - WITH ASSYST MAINTENANCE COMPUTER ASSYST provides you with information on the best possible timing for maintenance work. When the next maintenance service is due, this will be indicated in the multi-function display with the symbol 9 Oil service and fuel filter replacement 9 Maintenance service - displayed in km/miles or days.
  • Page 307: Special Maintenance Requirements

    SPECIAL MAINTENANCE REQUIREMENTS bodies built manufacturers DaimlerChrysler Corporation are fitted to the vehicle, the maintenance requirements and lubrication intervals specified by the body manufacturer must be adhered to, in addition to all standard maintenance requirements. Brake Fluid Only use brake fluids approved by the manufacturer (DOT 4 plus).
  • Page 308: Scope Of Work For Maintenance Service

    308 MAINTENANCE SCHEDULES SCOPE OF WORK FOR MAINTENANCE SERVICE Oil Service Oil change Engine: Oil change and filter replacement Check fluid levels of the following system, refill as necessary. If fluid is lost, trace and eliminate cause – as a separate order.
  • Page 309 Check fluid levels for the following systems, correct as necessary. Should there be a loss of fluid which cannot be explained by regular use, trace and eliminate the cause. Engine cooling system Check corrosion inhibitor/antifreeze, refill as necessary. Hydraulic brake system Battery Windscreen washer system Engine...
  • Page 310: Additional Maintenance Work

    310 MAINTENANCE SCHEDULES Additional Maintenance Work Automatic transmission once only at 80,000 miles/ 128000km Oil and filter change During every second maintenance service Air cleaner without maintenance indicator: Air cleaner filter element renewal Check poly-V-belt for wear and signs of damage During every fourth maintenance service Change rear axle fluid Additional Maintenance Work After ...
  • Page 311: If You Need Consumer Assistance

    IF YOU NEED CONSUMER ASSISTANCE CONTENTS Suggestions For Obtaining Service For Your Vehicle ......312 Prepare for the Appointment .
  • Page 312 SUGGESTIONS FOR OBTAINING SERVICE FOR YOUR VEHICLE Prepare for the Appointment If you’re having warranty work done, be sure to have the right papers with you. Take your warranty folder. All work to be performed may not be covered by the warranty, discuss additional charges with the service manager.
  • Page 313 • If for some reason you are still not satisfied, talk to the general manager or owner of the dealership. They want to know if you need assistance. • If your dealership is unable to resolve the concern, you may contact the Manufacturer’s Customer Center.
  • Page 314 Service Contract You may have purchased a service contract for your vehicle to help protect you from the high cost of unexpected repairs after your manufacturer’s new vehicle limited warranty expires. The manufacturer stands behind only the manufacturer’s Service Contracts. If you purchased a manufacturer’s Service Contract, you will receive Plan Provisions and an Owner Identification Card in the mail within three weeks of your vehicle delivery date.
  • Page 315 WARRANTY INFORMATION See your manufacturer’s Warranty Information Booklet for information on your warranty coverage and transfer of warranty. MOPAR® PARTS Mopar® fluids, lubricants, parts, and accessories are available from your dealer. They will help you keep your vehicle operating at its best. REPORTING SAFETY DEFECTS In the 50 United States and Washington D.C.: If you believe that your vehicle has a defect which could...
  • Page 317: Air Vents

    A Special Note Concerning Vehicle Alteration..230 Acceleration Skid Control ..... 167 Deactivating....... 171 Indicator Lamp .
  • Page 318: Auxiliary Heater

    ASSYST ........305 ASSYST Maintenance Computer ....112 Automatic Lock Feature .
  • Page 319 Care of Vehicle Engine Cleaning ......272 Headlamps, Taillamps, Turn Signal Lenses ..273 Vehicle Washing .
  • Page 320 Climate Control ......125 Clock ........98 Comfortseat .
  • Page 321 Emission Related Component ....256 Emissions Control System ..... 228 Engine Break-in Recommendations .
  • Page 322 Hazard Warning Flasher Switch ....232 Head Restraint ....... . 62 Headlamp Cleaning System .
  • Page 323 Location ........239 Jump Starting ....... . 246 Lamps Acceleration Skid Control .
  • Page 324 Introduction....... 304 Oil Service ....... . 308 Once a Year .
  • Page 325 Radio Transmitters ......84 Rear Cargo Doors ......33 Rear Seat Bench .
  • Page 326 Rear Seat Bench ......64 Security System with Towing and Passenger Compartment Protection ..... . . 23 Audible Alarm .
  • Page 327 Care and Maintenance ..... . 180 Changing the Tire ......234 Cleaning .
  • Page 328 Towing Protection ......24 Switching off ....... 24 Towing Protection and Passenger Compartment Protection Switch.
  • Page 329 Water in Fuel Indicator Lamp ....106 Wheels and Tires ......176 Window Cleaning .

Table of Contents