Table of Contents
Advertisement
®
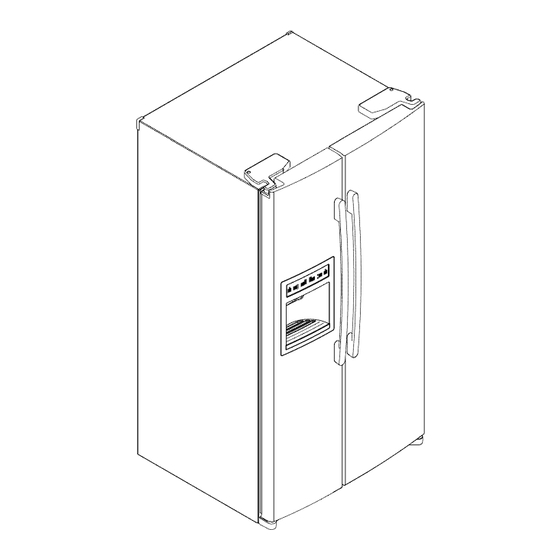
SIDE-BY-SIDE
REFRIGERATOR
Use & C_:_reGu d,_
REFRIGERADOR
DE DOS PUERTAS
RI_FRIGI_RATEUR COTE .A,COTE
Models / Modelos / ModUles
795.5881"
* =color number, nOmero de color, num6ro de couleur
Z !
0
I-
Z
Sears, Roebuck and Co., Hoffman Estates, IL 60179 U.S.A.
www.sears.com
MFL62155401
Printed inMexico
Sears Canada, Inc., Toronto, Ontario, Canada M5B 2B8
www.sears.ca
Advertisement
Table of Contents

Subscribe to Our Youtube Channel
Related Manuals for Kenmore 5881 - 26.5 cu. Ft. Refrigerator


Summary of Contents for Kenmore 5881 - 26.5 cu. Ft. Refrigerator
- Page 1 ® SIDE-BY-SIDE REFRIGERATOR Use & C_:_reGu d,_ REFRIGERADOR DE DOS PUERTAS RI_FRIGI_RATEUR COTE .A,COTE Models / Modelos / ModUles 795.5881" * =color number, nOmero de color, num6ro de couleur Sears, Roebuck and Co., Hoffman Estates, IL 60179 U.S.A. www.sears.com MFL62155401 Printed inMexico Sears Canada, Inc., Toronto, Ontario, Canada M5B 2B8 www.sears.ca...
-
Page 2: Table Of Contents
Warranty Crisper and Crisper Cover Freezer Compartment Shelf Protection Agreements Product Record Ice Storage Bin Removal Important Safety Instructions Door Rack and Support Water Filter 17-19 Refrigerator Features 20-22 Refrigerator Installation 8-12 Care and Cleaning Unpacking your refrigerator General Cleaning Tips Installation Outside Base Grille Installation... -
Page 3: Warranty
SIDE-BY-SIDE REFRIGERATOR ® Kenmore Refrigerator Warranty One Year Limited Warranty When installed, operated and maintained according to all instructions supplied with the product, if this appliance fails due to a defect in material or workmanship within one year from the date of purchase, call 1-800-4-MY-HOME _ to arrange for free repair. -
Page 4: Protection Agreements
Master Protection Agreements Congratulations on making a smart purchase.Your Once you purchase the Agreement, a simple phone call is Kenmore _ product is designed and manufactured for years all that it takes for you to schedule service. You can call of dependable operation. -
Page 5: Important Safety Instructions
This guide contains many important safety messages. Always read and obey. This is the safety alert symbol. It alerts you to safety messages that inform you of hazards that can kill or hurt you or others, or cause damage to the product. All safety messages will be preceded by the safety alert symbol and the hazard signal word DANGER, WARNING, or CAUTION. - Page 6 Ir!_ [__ li!!,,-,]:l[o]i {o} I II! p]1:1 l i / _!_,I I _v_i :1l i d Child entrapment and suffocation are not problems of Before you throw away your old the past. Junked or abandoned refrigerators are still Refrigerator or freezer: •...
-
Page 7: Refrigerator Features
Usethispagetobecome morefamiliar w iththeparts andfeatures. P agereferences a reincluded foryour convenience. Note:Thisguidecoversseveral different m odels.The r efrigerator youhavepurchased m ayhavesomeor alloftheitemslisted below. T helocations o fthefeatures shown belowmaynotmatch yourmodel. O Freezer D oorRack Dairy Corner For storage of dairy products utomatic Icemaker such as butter and cheese. -
Page 8: Refrigerator Installation
INSTALLATION 1. Avoid placing unit near heat sources, direct sunlight or Excessive Weight Hazard moisture. Use two or more people to move and install 2. To minimize noise and vibration, the refrigerator refrigerator. MUST be installed on a solidly constructed floor. Failure to do so can result in back or other injury 3. -
Page 9: Leveling The Refrigerator
LEVELING THE REFRIGERATOR DOOR HANDLE REMOVAL NOTE: It is ALWAYS recommended to remove the Place level on refrigerator shelf as shown below. refrigerator doors when it is necessary to move the refrigerator through a narrow opening. If necessary, follow the directions below to remove the door handles. Removing refrigerator handle •... -
Page 10: Removing And Replacing Refrigerator Doors
Removing the left (freezer) door with water line connection. Electric Shock Hazard • Remove the Locking Clip from connector (figure 1). • Pull up the water feed tube while pressing area • Disconnect electrical supply to the refrigerator (figure 2) as shown in the figures below. before installing. - Page 11 (1), z(2) _(4) (6) ..Reinstalling the right (Refrigerator) door I_ Right Door Reinstalling the right (Freezer) door 1. Place the door onto the lower hinge pin. 1. Feed the water tube through the lower hinge pin and 2. Fit top hinge (5) over hinge lever latch (6) and into place the door onto the lower hinge pin.
-
Page 12: Door Alignment
DOOR ALIGNMENT ADDITIONAL ADJUSTMENT NOTE: If after leveling the refrigerator (see LEVELING If rotating the leveling legs does not result in satisfactory THE REFRIGERATOR) the doors are still misaligned door alignment, you may fine tune the alignment by follow the directions below. adjusting the right door adjustment hinge pin. -
Page 13: Using Your Refrigerator
ENSURING PROPER AIR CIRCULATION NEXT In order to ensure proper temperatures, air must flow 1. Clean your refrigerator thoroughly and wipe off dust between the refrigerator and freezer sections. As shown accumulated during shipping. 2. Install accessories such as ice cube bin, drawers, in the illustration below, cool air enters through the refrigerator of the freezer section and moves up. -
Page 14: Adjusting Control Settings
ADJUSTING CONTROL SETTINGS Ultra Ice Give the refrigerator time to cool down completely before making final adjustments. It is best to wait 24 To select Ultra Ice, press (_ and the indicator will hours before doing this. The initial settings mentioned in light up. -
Page 15: Food Storage Guide
FOOD STORAGE GUIDE STORING FROZEN FOOD Wrap or store food in the refrigerator in airtight and NOTE: For further information about preparing food for moisture-proof material unless otherwise noted. This freezing or food storage times, check a freezer guide or a reliable cookbook. -
Page 16: Water Dispenser
WATER DISPENSER • Fixed shelf Lightly lift up the front part of shelf to pull it ahead, then take it out while lifting the rear part of shelf. • Tray can be easily removed by pressing and pulling it. • Tilt up the front of tray slightly and snap the tabs into the holes to reinstall the tray. -
Page 17: Ice Storage Bin Removal
DOOR RACK AND SUPPORT ICE STORAGE BIN REMOVAL Lift the door rack holding both sides (b and pull it out in Lift the ice shelf (b and pull it out © as shown in the © direction. figure below. WATER FILTER Before removing or installing water filter: 1. - Page 18 Removing the waterfilter: After installing water filter 1.Forfirst-time installation, remove filtersubstitute cap a) Replace the cover lamp and shelf to the initial (_}) b yturning it counterclockwise a quarter t urnand position. pulling itdown. T hesubstitutecapmustberetained b) After installing filter, turn on household water supply. for thefuture.If the filter is removed andnot c)Dispense at least 1 gallon of water to purge trapped replaced, i t is necessary to reinstallthe substitute...
- Page 19 Performance Data Sheet Models Number 5231JA2002B-S Use with replacement cartridge 5231JA2002B This system has been tested according to NSF/ANSI Standards 42 for the reduction of the substances listed below. The concentration of the indicated substances in water entering the system was reduced to a concentration less than or equal to the permissible...
-
Page 20: Care And Cleaning
DOOR LINERS AND GASKETS Do not use cleaning waxes, concentrated detergent, bleaches, or cleaners containing petroleum on plastic refrigerator parts. Use a clean sponge or soft cloth and a mild detergent in warm water. Wash, rinse and dry all surfaces thoroughly. PLASTIC PARTS (covers and panels) ExplosionHazard... -
Page 21: Power Interruptions
To change the refrigerator light: Remove cover by pressing upward on bottom O and c) If neither a food locker nor dry ice is available, rotating outward (_ turn the bulb counterclockwise, consume or dispose of food at once. Replace with 40 watt (maximum / appliance bulb, REMEMBER: In a power failure, a full freezer stays cold longer than a partially filled one. -
Page 22: When You Move
WHEN YOU MOVE room temperature, number of door openings and other operating conditions. When you are moving your refrigerator to a new home, If the refrigerator is used before the water connection follow these steps to prepare it for the move. made to the icemaker, set the power switch to O (off). -
Page 23: Connecting The Water Line
BEFORE YOU BEGIN Two 1/4" outer diameter compression nuts and 2 This water line installation is not warranted by the Ferrules (sleeves) refrigerator or icemaker manufacturer. Follow these connect the copper tubing to instructions carefully to minimize the risk of expensive the shutoff valve and the water damage. - Page 24 ROUTE THE TUBING iNSTALLATiON iNSTRUCTiONS (CONTINUED) Route the tubing between the cold water line and the refrigerator. 3. DRILL THE HOLE FOR THE VALVE Route the tubing through a hole drilled in the wall or Drill a 1/4" hole in the water floor (behind the refrigerator or adjacent base pipe (even if using a self- cabinet) as close to the wall as possible.
- Page 25 iNSTALLATiON iNSTRUCTiONS 10. TURN THE WATER ON AT THE SHUTOFF VALVE (CONTINUED) Tighten any connections that 9. CONNECT THE TUBING TO THE leak. REFRIGERATOR Reattach the compressor NOTES: compartment access cover. • Before making the connection to the refrigerator, be sure the refrigerator power cord is not plugged in to the wall outlet.
-
Page 26: Troubleshooting Guide
The defrost timer will click when the automatic defrost UNDERSTANDING SOUNDS YOU MAY HEAR cycle begins and ends. The thermostat control (or Your new refrigerator may make sounds that your old refrigerator control, depending on the model) will also one didn't make. Because the sounds are new to you, click when cycling on and off. - Page 27 LIGHTS DO NOT WORK Check if... Then... Light bulb has burned out. Replace with an appliance bulb of the same wattage, size and shape available at your local hardware store. (See the LIGHT BULB REPLACEMENT Section.) Turn the temperature control to the OFF position and unplug the refrigerator prior to replacement.
- Page 28 THE ICEMAKER IS NOT PRODUCING ICE OR ICE CUBES ARE FREEZING TOO SLOWLY Check if... Then... The freezer temperature is cold enough to produce ice, SETTING THE CONTROLS section, t Wait 24 hours after hook-up for ice production. See the Door left open, Check to see if something is holding the door open,...
- Page 29 DOORS WILL NOT CLOSE COMPLETELY Check if... Then... The refrigerator wobbles or seems unstable. Level the refrigerator. Refer to the LEVELING AND DOOR CLOSING section. Remove and replace the doors according to the The doors were removed during product installation REMOVING, AND REPLACING or REVERSING and not properly replaced.
- Page 30 TEMPERATURE IS TOO WARM OR THERE IS INTERIOR MOISTURE BUILDUP Check if... Then... The doors are opened often. When the door is opened, warm humid air is allowed into the refrigerator. The more the door is opened, the faster the humidity builds up, and the more warm air the refrigerator must cool.
- Page 31 Your Home ..For expert troubleshooting and home solutions advice: iiiiiiiiiii iiiiiiiiiii ... For repair- in your home - of all major brand appliances, lawn and garden equipment, or heating and cooling systems, no matter who made it, no matter who sold it! For !he replacement parts, accessories owner s manuals that you need to do-it-yourself.
Need help?
Do you have a question about the 5881 - 26.5 cu. Ft. Refrigerator and is the answer not in the manual?
Questions and answers