Table of Contents
Advertisement
Quick Links
Advertisement
Table of Contents
Troubleshooting

Related Manuals for Visioneer PATRIOT 430 - FOR WINDOWS


Summary of Contents for Visioneer PATRIOT 430 - FOR WINDOWS
- Page 1 Visioneer ® Patriot 430 Scanner User's Guide for Windows...
- Page 2 Inc. All Rights Reserved. All other products mentioned herein may be trademarks of their respective companies. Information is subject to change without notice and does not represent a commitment on the part of Visioneer. The software described is furnished under a licensing agreement.
- Page 3 IF YOU FIND PHYSICAL DEFECTS IN THE MATERIALS OR THE WORKMANSHIP USED IN MAKING THE PRODUCT DESCRIBED IN THIS DOCUMENT, VISIONEER WILL REPAIR, OR AT ITS OPTION, REPLACE THE PRODUCT AT NO CHARGE TO YOU, PROVIDED YOU RETURN IT (POSTAGE PREPAID, WITH PROOF OF YOUR PURCHASE FROM THE ORIGINAL RESELLER) DURING THE 90-DAY PERIOD AFTER THE DATE OF YOUR ORIGINAL PURCHASE OF THE PRODUCT.
-
Page 4: Table Of Contents
What’s in the Box ........1 The Visioneer Patriot 430 Scanner ......2 What You Need . - Page 5 Visioneer Patriot 430 Scanner Specifications ....87 Visioneer Patriot 430 Scanner Parts List ..... 88 Index .
-
Page 6: Welcome
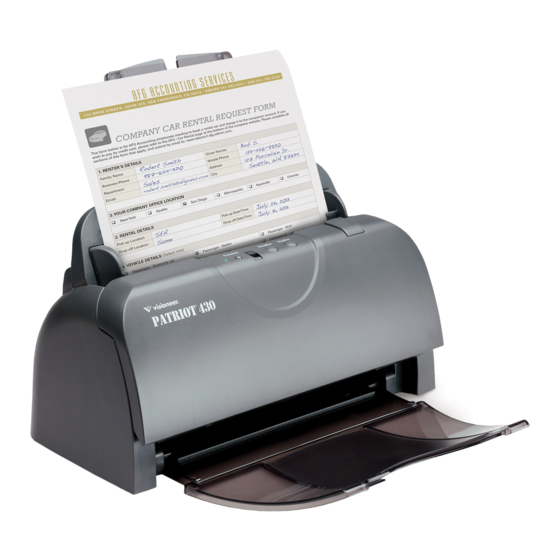
ELCOME Your new Visioneer Patriot 430 scanner can quickly scan single-sided or double-sided stacks of color, grayscale, and black-and-white documents, up to 8.5" x 14", and place their images on your computer. ’ S IN THE Before proceeding, check the contents of the box. If items are missing or damaged, contact the dealer where you purchased the scanner. -
Page 7: The Visioneer Patriot 430 Scanner
430 S ’ ISIONEER ATRIOT CANNER UIDE 430 S ISIONEER ATRIOT CANNER Status light LED Number Input Tray ADF cover release Control panel Output tray Power switch USB port Power jack Input tray—Holds documents in place. ADF cover release—Opens the cover on the ADF. Control panel—OneTouch scanning buttons. -
Page 8: What You Need
The following documentation is provided with your scanner: ■ Quick Install Guide—Abbreviated installation instructions. ■ Visioneer Patriot 430 Scanner User’s Guide—On the Installation CD; contains detailed installation, scanning, configuration, and maintenance information. ■ PaperPort User’s Guide—On the Installation CD; contains detailed feature and configuration information for the PaperPort software. -
Page 9: Chapter 1: Installation
If you already have a scanner connected to your computer, you need to ■ remove its driver programs first before beginning the installation of your Visioneer Patriot 430 scanner. Please see the User’s Guide that you received with your other scanner for specific instructions. ■... -
Page 10: Step 1: Assemble The Scanner
1: A SSEMBLE THE CANNER 1: A SSEMBLE THE CANNER 1. Remove the scanner from its protective foam and plastic bag. 2. Check inside the document feeder mechanism and carefully remove any foam particles that may have gotten inside it. Leave the cover open so you can attach the Input tray. -
Page 11: Step 2: Install The Software
430 S ’ ISIONEER ATRIOT CANNER UIDE 2: I NSTALL THE OFTWARE To install the software: 1. Start Microsoft Windows and make sure no other applications are running. 2. Insert Disc 1 into your computer’s CD-ROM drive. The Installation menu automatically opens. Note: If the CD does not start, check the following: •... - Page 12 2: I NSTALL THE OFTWARE 3. On the Main Menu, select Install Products. 4. Make sure the boxes for Nuance PaperPort® and Scanner Driver are checked. 5. Click Install Now.
- Page 13 1. The Welcome to the OneTouch 4.0 Setup Wizard opens. 2. Click Next. 3. On the Visioneer License Agreement window, read the license agreement. If you accept the terms, select I Agree, and click Next. If you choose not to accept the license agreement, the installation will...
- Page 14 OneTouch 4.0 software. The OneTouch 4.0 software will not run and you cannot use the OneTouch features. You can only use the Visioneer Patriot 430 TWAIN driver to scan from applications with a TWAIN interface. You will not be able to use the buttons on the...
- Page 15 430 S ’ ISIONEER ATRIOT CANNER UIDE 6. During installation you will see this window asking you to select one of the images for the Color Space setting. Select the option that looks best to you and click Next. This sets a default gamma value for scans and can be changed later on. 7.
-
Page 16: Step 3: Connect The Power Supply
Connect the power supply and power cord, and plug the power supply into an electrical outlet. To connect your Visioneer Patriot 430 scanner: 1. Plug the power supply into the power port on the scanner. Note: Only use the power supply included with your scanner. -
Page 17: Step 4: Connect The Usb Cable And Turn On The Power
ABLE AND URN ON THE OWER The Visioneer Patriot 430 scanner connects to any available USB port. Check your computer’s manual for USB port locations. 1. Remove any protective tape from the USB cable. 2. Plug the USB cable into the USB port on the scanner then into a USB port on the computer. - Page 18 4: C USB C ONNECT THE ABLE AND URN ON THE OWER If your computer is running Windows XP or Windows Vista, you will see a message similar to the following. 4. When you’re certain that the software has completely loaded, return to the “Complete the installation by connecting your hardware”...
-
Page 19: Additional Applications Available With Your Scanner
430 S ’ ISIONEER ATRIOT CANNER UIDE DDITIONAL PPLICATIONS VAILABLE WITH CANNER Your scanner includes free, additional applications. To install the additional applications: 1. Return to the CD main menu and click on Install Products. 2. Select the additional applications you want to install, and click Install Now. - Page 20 DDITIONAL PPLICATIONS VAILABLE WITH CANNER 1. If you selected OmniPage Pro to install you will see a window telling you to insert Disc 2. 2. Click Exit Disc 1 and remove Disc 1 from the CD-ROM drive. 3. Insert Disc 2 into the CD-ROM drive. The OmniPage Pro Installation menu opens automatically.
-
Page 21: View And Save The User Guides
AVE THE UIDES 1. On the Main Menu of Disc 1, click User Guides. 2. The Visioneer User Guides window opens. Use this window to view and save the User Guides you want. ® The User Guides are in Adobe PDF format. - Page 22 IEW AND AVE THE UIDES 4. Return to the Visioneer User Guides window and repeat the process to open, view, and save all the other User Guides you want. The Scanner Readme file has late-breaking news about your scanner. The SharePoint Mini-Guide has information about a feature in the OneTouch 4.0 software to link to Microsoft's SharePoint application.
-
Page 23: Register Your Scanner And Check For Updates
430 S ’ ISIONEER ATRIOT CANNER UIDE EGISTER CANNER AND HECK FOR PDATES Registering your scanner is important as it provides you with access to our free telephone support service. Registration also gives you free access to software updates for your scanner. To register your scanner: 1. -
Page 24: Chapter 2: Scanning
HECK FOR PDATES Scanning You have several different scanning options with your Visioneer Patriot 430 scanner. Each method scans equally well, so use the one with appropriate options for the item you are scanning. OneTouch Scanner Buttons—When you press either the Simplex or ■... -
Page 25: Load Documents To Scan
430 S ’ ISIONEER ATRIOT CANNER UIDE OCUMENTS TO 1. Adjust the paper guide for the width of paper, and make sure the input and output trays are fully extended. 2. Load the documents into the scanner face down with the tops of the page inserted into the Automatic Document Feeder. -
Page 26: Scanning From Onetouch
CANNING FROM OUCH CANNING FROM OUCH OneTouch is your main scanning interface for using the scanner. The OneTouch LED on the scanner shows which scan setting will be used for scanning. It is scan setting 6 in the example below. The OneTouch Button Panel that you see on the computer screen shows the pre-set function for each button (such as eMail) and the icons of the applications (called the Destination Applications) where the images will be... -
Page 27: Scan From The Buttons On The Scanner
430 S ’ ISIONEER ATRIOT CANNER UIDE CAN FROM THE UTTONS ON THE CANNER 1. Check the LED number to make sure you’re using the scan setting you want. The current scan setting. Press the Function button to cycle through the scan settings to select the one you want. -
Page 28: Using The Onetouch Button Panel
CANNING FROM OUCH SING THE OUCH UTTON ANEL The OneTouch Button Panel is your on-screen control for the scanner. 1. To open the OneTouch Button Panel, click the OneTouch icon. The OneTouch Icon Click these arrows to navigate through Click these the panel’s three arrows to cycle views. - Page 29 430 S ’ ISIONEER ATRIOT CANNER UIDE EFAULT OUCH ETTINGS ON CANNER Based on the recommended installation of PaperPort and the scanner driver, your scanner is pre-configured to scan items for various basic tasks, such as email or fax, then send the scanned image to an appropriate, pre- selected Destination Application.
-
Page 30: Configuring The Onetouch Buttons
Simplex or Duplex button on the scanner. Note: Some of the options on the OneTouch Properties window (and other OneTouch windows and dialog boxes) are “grayed out” and are not available. Grayed out options are not appropriate for your Visioneer Patriot 430 scanner. -
Page 31: Selecting New Settings For A Button
430 S ’ ISIONEER ATRIOT CANNER UIDE ELECTING ETTINGS FOR A UTTON Click these arrows to see the properties for Select a format for the the button whose scanned image. settings you want to change. Select a software application as the Select a configuration destination to send for scanning the item. -
Page 32: Renaming A Onetouch Button
ONFIGURING THE OUCH UTTONS 4. Select a Format option. The formats are based on the type of Destination Application you select. See “Selecting Page Format Options” on page 39 for more information about the available formats. 5. Click OK to accept any changes and close the window. Note that while the OneTouch Properties window is open, you cannot scan yet by clicking a button on the OneTouch Panel. -
Page 33: Creating A New Scan Configuration
430 S ’ ISIONEER ATRIOT CANNER UIDE REATING A ONFIGURATION The scan configurations are where you select the scanning resolution, brightness, mode (color, black&white, or grayscale), and a number of other settings. The Scan Configurations. Click New to create a new Scan Configuration. - Page 34 ONFIGURING THE OUCH UTTONS ETTINGS 1. On the Scan Configuration Properties dialog box, type a name. Type a new name for the configuration. Select the scan mode and drag the slider to set the resolution. Drag the sliders to set the Brightness and Contrast.
- Page 35 430 S ’ ISIONEER ATRIOT CANNER UIDE ETTINGS Click the Page Settings tab to select page settings. Click to toggle between inches and millimeters. Size —Click Standard , click the menu arrow and choose a page size from the list, or click Custom and enter the horizontal and vertical page dimensions in the boxes.
- Page 36 ONFIGURING THE OUCH UTTONS Straighten Image —Select this option to let the scanner automatically ■ determine if a page is skewed, then straighten its image. The input tray paper guides should be flush to the edges of the paper to prevent paper feeding in at too great of an angle.
- Page 37 430 S ’ ISIONEER ATRIOT CANNER UIDE DVANCED ETTINGS The options of the Advanced Settings tab are for the Color or GrayScale scanning mode. 1. Drag the sliders to the left and right to change the color settings. As you do, the image changes to show the effects of the new settings. Color Saturation—the strength or purity of a color.
- Page 38 ONFIGURING THE OUCH UTTONS EVICE ETTINGS A Device Settings tab is on the Scan Configurations dialog box when your selected Destination Application is a printer or fax application. Fit to page, reduce image if necessary —If the scanned image is too big to be printed or faxed on a single page, the image will automatically be reduced to fit the page.
- Page 39 430 S ’ ISIONEER ATRIOT CANNER UIDE TORAGE PTIONS RCHIVE A Storage Options tab is on the Scan Configurations dialog box when the selected Destination Application is set as Transfer to Storage. See “Transferring Scanned Documents to Storage” on page 60 for instructions on using the Transfer to Storage destination.
-
Page 40: Editing Or Deleting Scan Configurations
ONFIGURING THE OUCH UTTONS DITING OR ELETING ONFIGURATIONS Note: Your scanner comes with a number of configurations pre-set at the factory. We recommend that you keep those configurations locked and do not edit or delete them. That way, you will always have the factory- settings available. -
Page 41: Configure Before Scan
430 S ’ ISIONEER ATRIOT CANNER UIDE ONFIGURE EFORE Choosing Configure Before Scan simply opens either the TWAIN or WIA scanning interface when you press or click a button. You can then use the interface to change the Picture Type, Resolution, and other settings. When you scan, the scanned image will still be sent as the file type and to the same Destination Application already selected in the OneTouch Properties window for that button. - Page 42 ONFIGURING THE OUCH UTTONS WIA—The Windows Image Acquisition (WIA) Interface opens for you to make changes prior to scanning. Please see “Scanning from the WIA Interface” on page 73 for detailed instructions about scanning with the WIA Interface. 5. Select the Destination Application and format. 6.
- Page 43 430 S ’ ISIONEER ATRIOT CANNER UIDE ANCELING A ONFIGURE EFORE 1. Click Cancel in the scanning progress window. 2. The following window will open asking if you want to cancel the entire job. Yes—Scanning stops and all pages scanned in this batch, up to this ■...
-
Page 44: Selecting Page Format Options
ONFIGURING THE OUCH UTTONS ELECTING ORMAT PTIONS The Page Format options that you select determines the file format of the scanned document. Appropriate page format options and file types are available for the type of Destination Application selected for the button. Image Formats Text Formats;... - Page 45 430 S ’ ISIONEER ATRIOT CANNER UIDE MAGE ORMATS Select an image file format for photos, artwork or other documents that you want to save as images. BMP and TIFF are standard image file formats generally used if you want to do additional image processing. Both of those file formats tend to be larger than the JPEG format file size.
- Page 46 ONFIGURING THE OUCH UTTONS ORMATS Selecting the text format option also selects OCR processing as an automatic step for scanning. Therefore, when you scan a document with the text format selected, the text portions of the document are automatically converted to editable text. Text file formats are only available if an OCR application is installed on your computer.
- Page 47 430 S ’ ISIONEER ATRIOT CANNER UIDE Simple Text—The .txt file format. Text with no formatting; used by the standard Microsoft Notepad application. Rich Text Format—The .rtf file format. Text that retains formatting when converted. Available with Microsoft Wordpad and Word. Word Document—The .doc file format used by Microsoft Word.
-
Page 48: Setting Destination Application Properties
ONFIGURING THE OUCH UTTONS ETTING ESTINATION PPLICATION ROPERTIES In the OneTouch Properties window, select a Destination Application then click the Properties button. Click a Destination Application. Click the Properties button. PaperPort Properties These properties apply to designating the PaperPort folder to receive your scanned items. - Page 49 430 S ’ ISIONEER ATRIOT CANNER UIDE When PaperPort opens after you finish scanning, the thumbnails of your scanned documents are on the PaperPort Desktop in that folder. Text Documents Properties These properties apply to text editing applications such as Microsoft Word. The properties apply to the Optical character Recognition (OCR) settings for these applications.
- Page 50 ONFIGURING THE OUCH UTTONS The Add Text Based Link dialog box opens. 3. Click Browse to find the application you want to add to the list. When you select the application using the Browse button, steps 1 and 2 on the dialog box are automatically filled in, and the application icon appears in step 3.
- Page 51 430 S ’ ISIONEER ATRIOT CANNER UIDE Image Documents Properties These properties apply to image processing applications such as Microsoft Paint. 1. Click in the Color document handling settings boxes for the options you want. These options will apply to all the applications in the group. Convert Bitmaps using Screen Resolution—Use this option to ensure that an image will fit on the computer’s screen.
- Page 52 ONFIGURING THE OUCH UTTONS Storage Properties These properties apply to the Destination Application named Transfer to Storage. If a CD burner is attached to your computer, you also use this dialog box to start the Burn to CD process. See the section “Scan and Burn to a CD”...
- Page 53 430 S ’ ISIONEER ATRIOT CANNER UIDE eMail Properties These properties apply to email applications so you can specify the folder for documents that you will attach to an email message. Microsoft ® Outlook will accept direct attachment of documents to a blank email message as soon as scanning is finished, but other email applications do ®...
- Page 54 ONFIGURING THE OUCH UTTONS documentation for more information about Internet options. If you are using AOL, please see the AOL user manual for making changes to the Internet options applicable to AOK. 4. Select the options for color document handling. Convert Bitmaps using Screen Resolution—Use this option to ensure that an image will fit on the computer’s screen.
-
Page 55: Selecting Options For A Button
430 S ’ ISIONEER ATRIOT CANNER UIDE ELECTING PTIONS FOR A UTTON The OneTouch Options determine the types of Destination Applications available for a button. There are also settings on the Options tab that are global to all OneTouch buttons. To select options: 1. - Page 56 ONFIGURING THE OUCH UTTONS Destination Categories: ■ Document Management includes PaperPort and other applications for processing and keeping track of your scanned documents. Image Editors include Microsoft Paint and other drawing and ■ graphics applications. ■ Text Editors include Microsoft Word and WordPad, Microsoft Excel, and other word processing and spreadsheet applications.
- Page 57 430 S ’ ISIONEER ATRIOT CANNER UIDE For example, if you scan a picture to an email application, the scanned image is saved as a temporary file, then attached to the email, and the email is sent. Later, the temporary file of the scanned picture is deleted.
-
Page 58: Scanning With Optical Character Recognition (Ocr)
Note: Visioneer recommends that all OCR processing use the original factory settings for OCR scanning that came with your scanner. When scanning with other settings, use at least 200 dpi for the resolution. If the original documents are of poor quality and have small type font, 300 dpi can be used as the maximum resolution. - Page 59 430 S ’ ISIONEER ATRIOT CANNER UIDE To scan with OCR from the Scanner Buttons: 1. Press the Function button to select an LED number that has a text editing program as the selected Destination Application. 2. Press the Simplex or Duplex button on the scanner. Your scanned pages are sent to the text editing application you selected in the Destination Application list.
-
Page 60: Scanning With Spdf Or Npdf And Searching For Text
ONFIGURING THE OUCH UTTONS CANNING WITH S OR N EARCHING FOR Searchable PDF (sPDF) and Normal PDF (nPDF) are special forms of an Adobe PDF file. sPDF converts scanned text into the PDF format with text search and OCR capabilities. nPDF has those same features, plus you can edit the text in an nPDF document if you have a PDF editing program.The two PDF formats can also produce images with different image quality, so you may want to experiment with them to determine which is better for... - Page 61 430 S ’ ISIONEER ATRIOT CANNER UIDE 4. Choose the Searchable PDF or Normal PDF option for the page format. 5. The settings for the button (Button 8 in this example) now show your page format selection. The page format icon is now set to the selection from the menu.
-
Page 62: Scan And Burn To Acd
ONFIGURING THE OUCH UTTONS CAN AND URN TO A If you have a CD burner attached to your computer, you can scan directly from your scanner onto a CD. This feature is available only on computers running Windows XP or Windows Vista 1. -
Page 63: Scanning With Event Forwarding
430 S ’ ISIONEER ATRIOT CANNER UIDE CANNING WITH VENT ORWARDING If you want to specify an application to use for scanning at the start of the process, you can use event forwarding. 1. Open the OneTouch Properties window. 2. Select Still Image Client as the Destination Application. You cannot choose a page format for this option as the Destination Application is not selected until after starting the scanning batch. -
Page 64: Creating An Html Web Page From Your Scanned Documents
ONFIGURING THE OUCH UTTONS HTML W REATING AN AGE FROM CANNED OCUMENTS You can convert scanned pages to HTML format for posting directly to your web site. Those pages are then viewable by visitors to your web site without the need for any internet plug-ins or other special processing. 1. -
Page 65: Transferring Scanned Documents To Storage
430 S ’ ISIONEER ATRIOT CANNER UIDE RANSFERRING CANNED OCUMENTS TO TORAGE With the Transfer to Storage scanning process, you can scan documents and save them in a folder in one step. The process is ideal for archiving documents without having to manually save or process them in any other way. - Page 66 ONFIGURING THE OUCH UTTONS CANNING TO ULTIPLE OLDERS When archiving documents with the Transfer to Storage option, you can scan them to multiple folders. For example, one folder might be for “Business Receipts,” a second folder might be for “Personal Receipts,” and a third folder might be for “Annual Receipts.”...
- Page 67 430 S ’ ISIONEER ATRIOT CANNER UIDE 7. Click the Storage Options tab. 8. Click the Browse button. 9. Select the folder you created for storing the scanned documents. If you haven’t created the folder yet, you can click the Make New Folder button and type the name for the new folder.
- Page 68 ONFIGURING THE OUCH UTTONS 10. Click OK. The selected folder will now be set as the Storage Location, such as “Business Receipts.” 11. Click OK. The new configuration is now listed as a Transfer to Storage configuration. 12. Repeat the process to create additional new configurations, such as one named “Storage for Personal Receipts.”...
- Page 69 430 S ’ ISIONEER ATRIOT CANNER UIDE Scan to multiple storage folders: 1. Load the documents you want to scan to multiple storage folders. 2. Press the Function button on the scanner to get to the button set up for scanning to storage. 3.
- Page 70 ONFIGURING THE OUCH UTTONS RANSFER OCUMENTS TO A ERVER OR APPED RIVE When selecting the storage location for scanned documents, you can select a local folder, or a folder on a server or mapped drive.You select a mapped drive using the Browse button. 1.
-
Page 71: Checking The Hardware And Setting The Lamp Power Saving
You can also click the Hardware icon at the top of the OneTouch Button Panel, or right-click on the Patriot 430 icon when the OneTouch button panel is in the Hardware View. The Hardware icon The Hardware Properties dialog box opens and shows information about your Visioneer Patriot 430 scanner. - Page 72 ONFIGURING THE OUCH UTTONS 2. Click the Properties button. Your scanner has a built-in power saving feature that is set to power down after 15 minutes of idle time. You can change the time before the scanner powers down, from 10 minutes to a maximum of 10 hours. 3.
-
Page 73: Chapter 3: Scanning From The Twain Interface
User’s Guide for scanning with your Visioneer Patriot 430 scanner. Please refer to an application’s user guide for the appropriate steps to open the TWAIN Interface for your scanner. -
Page 74: Scanning With The Twain Interface
TWAIN I CANNING WITH THE NTERFACE TWAIN I CANNING WITH THE NTERFACE The TWAIN Interface is available from many applications, such as Microsoft Word and Paint, as well as from the PaperPort. You can use the instructions in this section regardless of the application you use to open the TWAIN Interface. - Page 75 430 S ’ ISIONEER ATRIOT CANNER UIDE TWAIN HE OPTIONS ON THE INTERFACE ARE Mode—Select a scanning mode: Black&White to scan in black and white. Use this setting for letters, memos, and other black and white material. This scan mode produces the smallest file size.
- Page 76 TWAIN I CANNING WITH THE NTERFACE Filter—The Filter is the ability of your scanner to automatically remove a color from a scanned item. The Filter option applies to Black&White or Grayscale Mode. The original with a red The scanned item with the watermark over black text.
-
Page 77: Display The Device Configuration
Scan button. ISPLAY THE EVICE ONFIGURATION 1. Click the Visioneer Patriot 430 icon in the top right corner of the TWAIN interface. 2. The Device configuration window opens and shows the information about your scanner. See the section “Checking the Hardware and Setting the Lamp Power... -
Page 78: Chapter 4: Scanning From The Wia Interface
TWAIN I CANNING WITH THE NTERFACE Scanning from the WIA Interface Microsoft Windows XP and Windows Vista include their own scanning interface—known as Windows Image Acquisition (WIA)—for acquiring images from scanners, digital cameras, and other digital devices. This section shows how to use Microsoft Paint to scan using the WIA interface, but you can use other Windows applications as well. - Page 79 430 S ’ ISIONEER ATRIOT CANNER UIDE 3. The WIA scanning window opens. Use this window to select scanning options and start the scanner. 4. Click the button most appropriate for the item you’re scanning. 5. Select a paper size from the Page Size list. 6.
-
Page 80: Fine Tuning Your Scans
UNING CANS UNING CANS You can customize settings before you scan an item to fine tune exactly how you want to scan it. 1. On the scan window, click Adjust the quality of the scanned picture. 2. The Advanced Properties dialog box opens. 3. -
Page 81: Chapter 5: Maintenance
430 S ’ ISIONEER ATRIOT CANNER UIDE Maintenance This section contains information on maintenance, troubleshooting, uninstalling, scanner specifications, and spare parts. LEARING APER If your scanner stops scanning due to a paper jam in the Automatic Document Feeder, a warning dialog box opens after a few moments. To clear a paper jam: 1. -
Page 82: Replace The Adf Pad Assembly
You received a replacement pad in the original scanner box, and you can also order a new one. See the “Visioneer Patriot 430 Scanner Parts List” on page 88 for ordering information. 1. Press the ADF cover release on the top left of the scanner body to open the Automatic Document Feeder cover. -
Page 83: Replacing The Roller Assembly
430 S ’ ISIONEER ATRIOT CANNER UIDE EPLACING THE OLLER SSEMBLY After extended use, the roller may wear out and may need to be replaced. It is a user-replaceable part and can be reordered. Frequent paper jams are a symptom of a worn roller assembly. A worn roller can cause documents to feed in skewed at an angle, or multiple pages to feed at the same time. - Page 84 EPLACING THE OLLER SSEMBLY 5. Discard the worn roller. It cannot be repaired. 6. Before installing the new roller, clean any dust that may have gotten on it during shipping. 7. To install the new roller, insert the right end of the roller into its housing socket.
- Page 85 430 S ’ ISIONEER ATRIOT CANNER UIDE 8. When you are certain that the gears are engaged, swing the roller into it scanner and align the left side with its mount. Then gently slide the roller to the left to fit its left end into its mount. Make sure the left end of the roller is firmly seated into its mount.
-
Page 86: Troubleshooting
TWAIN devices with your computer, you may have selected another source for images. Start the PaperPort software and click the Scan icon, then make sure Visioneer Patriot 430 is selected as the scanner. Problem: During installation I got the error message: PaperPort Installation is not complete. - Page 87 Try cleaning the roller first. See “Clean the Automatic Document Feeder” on page 76. If that doesn’t solve the problem, the pad assembly may need to be replaced. It is user-replaceable. See “Visioneer...
-
Page 88: Status Light Troubleshooting Codes
ROUBLESHOOTING Patriot 430 Scanner Parts List” on page 88 for the ordering number. See “Replace the ADF Pad Assembly” on page 77 for the steps to replace the pad. Problem: If the USB cable is disconnected during a scan, the scanner does not reconnect when the USB cable is plugged back in. - Page 89 Paper jam Open the ADF and remove the jammed page. See “Clearing Paper Jams” on page 76 for details. An internal part in the Re-boot your computer. If the problem persists, contact Other scanner may have Visioneer Technical Support. Codes malfunctioned.
-
Page 90: Uninstall Your Scanner
NINSTALL CANNER NINSTALL CANNER To uninstall the Visioneer Patriot 430 scanner, remove the OneTouch 4.0 software, PaperPort, and any other software provided with your scanner. NINSTALLING THE CANNER AND OUCH OFTWARE 1. On the Windows taskbar, click Start, point to Settings, then click Control Panel. -
Page 91: To Install Another Driver
430 S ’ ISIONEER ATRIOT CANNER UIDE NSTALL NOTHER RIVER Before you can install another driver for your scanner, you must remove the currently installed driver first. Then the new driver can be installed. 1. Uninstall the OneTouch 4.0 driver. a. -
Page 92: Visioneer Patriot 430 Scanner Specifications
430 S ISIONEER ATRIOT CANNER PECIFICATIONS 430 S ISIONEER ATRIOT CANNER PECIFICATIONS Optical resolution 600 x 1200 dpi Bit depth 48-bit color (internal), 16-bit grayscale (internal) Maximum item size 8.5" x 14" Minimum item size 2.5" x 2" (automatic document feeder) Scan method Automatic document feeder (ADF) ADF specifications... -
Page 93: Visioneer Patriot 430 Scanner Parts List
430 S ’ ISIONEER ATRIOT CANNER UIDE 430 S ISIONEER ATRIOT CANNER ARTS Please use the following part names and numbers when ordering replacements for your scanner. Part Name Part Number Input Tray 57-0112-000 Output Tray 57-0108-000 ADF Pad 57-0111-000 Roller Assembly 57-0113-000 USB Cable... -
Page 94: Index
NDEX I N D E X Document Management 51 documentation 3 dpi 75 Duplex 31 duplex button 2, 19, 22 cleaning 76 ADF pad assembly replace 77 eMail 51 Advanced Properties 75 eMail Properties 48 Advanced Settings Tab 32 error codes 83 aspect ratio 33 Excel Spreadsheet 42 Autocrop to Original 30, 70... - Page 95 NDEX Properties button 27 Lamp timeout setting 67 LED number 19 Resolution 29, 70, 75 Link Properties 43 Rich Text Format 42 roller replacement 78 rtf file format 42 Microsoft Internet Explorer 59 Microsoft Outlook 48 Moire Patterns 30, 71 saturation 32 monitor 3 Scan Configuration 25, 29...
- Page 96 NDEX USB port 12 Text Documents Properties 44 Text Editors 51 VRS 17 Text Formats 41 TIFF 40 Transfer to Storage 60 WIA 37, 73 troubleshooting 81 Windows Image Acquisition 73 TWAIN 36, 58 Word Document 42 TWAIN standard 68 xls file format 42 uninstall 85...
- Page 97 NDEX...
- Page 98 Copyright © 2009 Visioneer, Inc. 05-0705-100a...
Need help?
Do you have a question about the PATRIOT 430 - FOR WINDOWS and is the answer not in the manual?
Questions and answers