Table of Contents
Advertisement
Quick Links
Advertisement
Table of Contents

Related Manuals for Visioneer Strobe 400


Summary of Contents for Visioneer Strobe 400
- Page 1 Visioneer ® Strobe 400 User's Guide for Windows...
- Page 2 Information is subject to change without notice and does not represent a commitment on the part of Visioneer. The software described is furnished under a licensing agreement. The software may be used or copied only in accordance with the terms of such an agreement. It is against the law to copy the software on any medium except as specifically allowed in the licensing agreement.
- Page 3 IF YOU FIND PHYSICAL DEFECTS IN THE MATERIALS OR THE WORKMANSHIP USED IN MAKING THE PRODUCT DESCRIBED IN THIS DOCUMENT, VISIONEER WILL REPAIR, OR AT ITS OPTION, REPLACE THE PRODUCT AT NO CHARGE TO YOU, PROVIDED YOU RETURN IT (POSTAGE PREPAID, WITH PROOF OF YOUR PURCHASE FROM THE ORIGINAL RESELLER) DURING THE 90-DAY PERIOD AFTER THE DATE OF YOUR ORIGINAL PURCHASE OF THE PRODUCT.
-
Page 4: Table Of Contents
To Connect the Scanner Power to the Computer ....... . . - Page 5 Calibrating Your Scanner ........
- Page 6 Uninstalling the Scanner and OneTouch Software ........
- Page 7 ABLE OF ONTENTS 400 U ’ ISIONEER TROBE UIDE...
-
Page 8: Welcome
Welcome Congratulations on purchasing your Visioneer Strobe 400 scanner. With your scanner, you can quickly scan single-sided or double-sided items and place their electronic images on your computer. ’ S IN THE Before proceeding, check the contents of the box. If items are missing or damaged, contact the dealer where you purchased the scanner. -
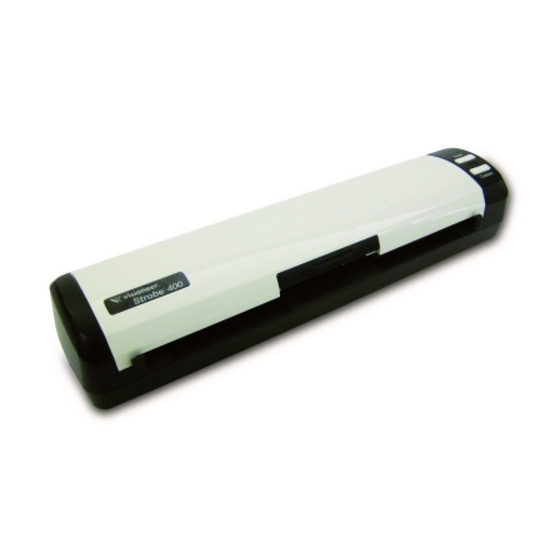
Page 9: The Visioneer Strobe 400 Scanner
OneTouch Scanner Buttons—When AutoLaunch™ is not enabled, you can scan by pressing the Scan or Custom button. Paper Feed Slot—Insert the item you want to scan into the paper feed, face up. The scanner grabs the page and pulls it through while scanning. -
Page 10: System Requirements
Windows operating system: Windows XP (Service Pack 1 and 2), Windows Vista, or Windows 7 The scanner is compatible with Service Pack 3 for Windows XP and Service Pack 1 for Windows Vista. • Windows XP: Minimum of 512 megabytes (MB) of internal memory (RAM) Windows Vista and 7: Minimum of 1 gigabyte (GB) of internal memory (RAM) •... -
Page 11: Documentation
Scanner User’s Guide—On the Installation Disc 1; contains detailed installation, scanning, configuration, and maintenance information. • Scanner Readme—On the Installation Disc 1; contains the latest information about your scanner and software installation. • PaperPort User’s Guide—On the Installation Disc 1; contains detailed feature and configuration information for the PaperPort software. -
Page 12: Assemble The Scanner
Assemble the Scanner SSEMBLING THE OWER Select the AC plug adapter that matches the wall power outlet. North American Align the tabs on the bottom of the plug adapter with the slots in the power supply base. Place the adapter in the base and press down to hold it in the base against the tension arm. Twist the adapter to the right, while pressing down on the adapter, until you hear a “click”... -
Page 13: Connect The Scanner Power Cord
ONNECT THE CANNER OWER You can power the scanner through the standard power cord to a wall outlet, or use the USB power cord to power the scanner through a USB port on the computer. -
Page 14: To Connect The Scanner Power To The Wall
Note: Only use the USB power cable included with your scanner. Connecting any other type of USB power cable may damage your scanner, and will void its warranty. If you do not have your USB power cable, you can order a new one by contacting our Customer Service department. Please refer to the Technical Support Card, included with your scanner, for our company contact information, or visit the Parts &... - Page 15 400 S ’ ISIONEER TROBE CANNER UIDE...
-
Page 16: Installation
If you already have a scanner connected to your computer, you may need to remove its driver programs first before beginning the installation of your Visioneer Strobe 400 scanner. Please see the User’s Guide that you received with your other scanner for specific instructions. -
Page 17: Install The Software And Connect The Scanner
400 S ISIONEER TROBE CANNER NSTALL THE OFTWARE AND To install the software: Start Microsoft Windows and make sure no other applications are running. Insert the Installation Disc 1 into your computer’s CD-ROM drive. The Installation Disc main menu automatically opens. Note: If the disc does not automatically start, check the following: •... -
Page 18: Installing The Scanner Driver
On the Main Menu, select Install Products . Make sure the boxes for Scanner Driver, Visioneer OneTouch, and Nuance PaperPort® are checked. Click Install Now. NSTALLING THE CANNER RIVER The scanner driver installation will start first. The Welcome to the Scanner Driver Setup Wizard opens. - Page 19 ISIONEER TROBE CANNER On the Visioneer License Agreement window, read the license agreement. If you accept the terms, select I Agree, and click Next. If you choose not to accept the license agreement, the installation will terminate and the scanner driver will not be installed.
- Page 20 STOP when you see the “Complete the installation by connecting your hardware” window. Do NOT click OK yet. Leave the window open and proceed to the next section. Note: If you do not see this on-screen diagram for connecting the scanner, stop and follow the instructions below.
-
Page 21: Connect The Usb Cable And Turn On The Power
ONNECT THE ABLE AND URN ON THE The Visioneer Strobe 400 scanner connects to any available USB port. Check your computer’s manual for USB port locations. Remove any protective tape from the USB cable. Plug the USB cable into the USB port on the scanner then into a USB port on the computer. - Page 22 HI-SPEED USB hub”. Plug the USB cable into a USB 2.0 port (if available) or just disregard the message. If you leave it plugged into the USB 1.1 port, your scanner may scan a bit slower. Your computer then recognizes that a scanner has been plugged into the USB port and automatically loads the appropriate software to run the scanner.
- Page 23 A Calibration window opens on-screen after Windows finishes detecting the scanner. Insert the calibration page into the scanner in the direction shown on the calibration page itself. Depending on the version of Windows you are using, you may be prompted to click Next to proceed with calibration, and click Finish when calibration is complete.
-
Page 24: Installing Visioneer Onetouch
NSTALLING ISIONEER OUCH The Visioneer OneTouch software installation will automatically start after you click Close on the Driver Installation Complete window. Click Next on the Welcome to the OneTouch Setup Wizard window. On the Visioneer License Agreement window, read the license agreement. If you accept the terms, select I Agree, and click Next. -
Page 25: Installing Paperport
400 S ISIONEER TROBE CANNER NSTALLING APER If you left the default selection to install PaperPort from the installation disc, the PaperPort software installation will start automatically after you click Close on the OneTouch Installation Complete window. The Select Language window opens for the PaperPort software. Select the language you want to use then click OK . -
Page 26: Register Your Scanner
Press Enter on your computer’s keyboard or click the option on screen to go to the web address. When the Visioneer web page loads, click on the Support & Drivers link at the top of the page. Click on Register Your Product at the bottom of the Support & Drivers page. -
Page 27: Applications Available With Your Scanner
Adobe Reader and print PDF files. The User Guides on your scanner’s installation CD’s are in PDF format and require Adobe Reader for you to view and save them. The Adobe Reader installer is located in the User Guide section on the Installation Disc 1. - Page 28 If you selected OmniPage Pro to install you will see a window telling you to insert Disc 2. Click Exit Disc 1 and then eject Disc 1 from the CD-ROM drive. Insert Disc 2 into the CD-ROM drive. The OmniPage Pro Installation menu opens automatically. If it does not open, see the note on page 15.
-
Page 29: View And Save The User Guides
Click on View software documentation to access the user guides for the software applications provided with the scanner. For instance, the Nuance paper user guide is in this section. Please note that the user guide for the Nuance OmniPage software is on the Installation Disc 2 with the OmniPage software. - Page 30 Click the name of the User Guide you want to view and it will open in Adobe Reader. Use the Adobe Save command to save that User Guide to your computer. When you’re finished, click Main Menu to return to the main Visioneer Installation window and click Exit .
- Page 31 400 S ’ ISIONEER TROBE CANNER UIDE...
-
Page 32: Loading Documents To Scan
When OneTouch is installed, AutoLaunch is enabled and the scanner starts scanning when an item is inserted in the front of the scanner. The item is scanned using the settings in the OneTouch Properties window for the Scan button on the scanner. - Page 33 Adjust the paper guides to the width of the item being scanned. Place an item face up in the paper feed slot. The scanner grabs the top edge of the paper and automatically begins to scan and feed the paper through the scanner.
-
Page 34: Scanning Plastic Cards
Adjust the paper guides to the width of the item being scanned. Place an item face up in the paper feed slot. The scanner grabs the top edge of the card and automatically begins to scan and feed the paper through the scanner. -
Page 35: Turn Autolaunch Off/On
AUNCH If you want to scan from OneTouch button panel on screen, or to be able to place a page in the scanner and wait until you are ready to initiate the scan, you can turn the AutoLaunch feature off. This option is in the Device Settings for your scanner’s hardware properties. - Page 36 Paper pickup delay—If the AutoLaunch option is enabled, the Paper pickup delay option also becomes available. The Paper pickup delay is the amount of time you want the scanner to wait until it feeds the item into the scanner to start scanning.
-
Page 37: Scan From The Onetouch Buttons
IMPORTANT: Make sure you insert the item in the scanner as straight as possible. If the page is inserted at an angle, it may get caught under the paper guides and tear as it is pulled through the scanner. ’... - Page 38 Press the Scan or Custom button, on the scanner, to start scanning. A scan progress window opens an the image is sent to the selected destination in the OneTouch Properties for the Scan button. In this example, the Destination Application is the PaperPort software.
-
Page 39: Scanning Interfaces
CANNER CANNING NTERFACES You have several different scanning options with your Visioneer Strobe 400 scanner. Each method scans equally well, so use the one with appropriate options for the item you are scanning. • OneTouch Scanner Buttons —When you press either the Scan or Custom button, documents are scanned using the scan settings assigned to the button. -
Page 40: Scanning From Onetouch
Scanning From OneTouch Based on the recommended full installation of the scanner driver and the Visioneer OneTouch software, OneTouch is your main scanning interface for using the scanner. The OneTouch Button Panel, that you see on the computer screen, shows the pre-set function for each button (such as Scan), and the icon of the destination (called the Destination Application) where the images will be sent when scanning is finished. -
Page 41: Scan From The Onetouch Button Panel
OneTouch panel. If AutoLaunch is turned on, the scanner will automatically scan when a page is inserted in the scanner. Adjust the guides, on the front of the scanner, for the width of the item you are scanning. Press down on the card lever if you are scanning plastic cards. -
Page 42: Features Of The Onetouch Button Panel
EATURES OF THE OUCH The OneTouch panel is your on-screen set of controls for the scanner. From the panel you can access the hardware settings for your scanner and configure the scanner buttons. The Detail View The Title Bar •... -
Page 43: Configuring The Onetouch Buttons
Place a page in the scanner. Click on the button that you made the changes for. The scanner starts scanning and sends the image to the application, with the file format and scanning configuration you specified. Note: The next section contains detailed information on making changes to the OneTouch Properties window. -
Page 44: Selecting New Settings
ELECTING ETTINGS Click the Options tab to select options. Select the Destination Application that will open when you are finished scanning. You use the destination application to view and work with your scanned images. The settings on the OneTouch Properties window are: Select Destination —The list of Destination Applications that OneTouch can send a scanned image to so that this application opens immediately after scanning is complete. - Page 45 400 S ISIONEER TROBE CANNER Select Configuration —The list of available scan configurations for the selected button. The configuration’s basic settings include: scanning mode, resolution (dpi), page size, brightness (Br), and contrast (Cr). To see a selected scan configuration’s settings, click its icon. Click the icon again to close the detailed information.
-
Page 46: Creating A New Scan Configuration
OK/Cancel/Apply buttons — OK accepts any changes and closes the window. Apply accepts any changes but leaves the window open so you can continue making additional changes. Cancel closes the window without accepting any changes. REATING A ONFIGURATION The scan configurations are where you select the scanning resolution, brightness, mode (color, black&white, or grayscale), and a number of other settings. - Page 47 400 S ISIONEER TROBE CANNER The Scan Settings Tab On the Scan Configuration Properties dialog box, type a name. Type a new name for the configuration. Select the scan mode and drag the slider to set the resolution. Drag the sliders to set the Brightness and Contrast.
- Page 48 • AutoCrop to Original—Select this option to let the scanner automatically determine the size of the item being scanned. Always use the paper guides on the scanner so the page is not skewed. Skewed pages may not crop properly. •...
- Page 49 Duplex scanning. If you are scanning light weight paper, such as 16lb or 18lb printer paper, the scanner may be picking up faint images through the paper and the driver will not drop those pages out of the final file. The “Skip Blank Originals”...
- Page 50 The Advanced Settings tab Click the Advanced Settings tab. The options of the Advanced Settings tab are for the Color or Grayscale scanning mode. Drag the sliders to the left and right to change the color settings. As you do, the image changes to show the effects of the new settings.
- Page 51 400 S ISIONEER TROBE CANNER The Device Settings Tab A Device Settings tab is on the Scan Configurations dialog box when your selected Destination Application sends the scanned image to a printer, fax application, or other device. You use the options on the Device Settings tab to select settings for the device.
-
Page 52: Editing Or Deleting Scan Configurations
Editing and deleting is normally for the configurations you create, not for your scanner’s pre-set configurations. Note: Your scanner comes with a number of configurations pre-set at the factory. To ensure that your scanner will always have a set of correct scan configurations, do not delete the pre-set configurations. We also recommend that you keep those configurations locked so they are not inadvertently deleted. -
Page 53: Configure Before Scan
EFORE You can set up the scanner so that, when you press a button or click it on the Button Panel, a different scanning interface opens before the scanning starts. To set up the scanner for this capability, you select Configure Before Scan from the scan configuration list. - Page 54 Select the scan configuration Configure Before Scan . Right-click on Configure Before Scan and choose an interface to use for configuring before scanning. TWAIN —The TWAIN Interface opens for you to make changes prior to scanning. Refer to the chapter Scanning from TWAIN. WIA —The Windows Image Acquisition (WIA) Interface opens for you to make changes prior to scanning.
-
Page 55: File Format Options
No —Scanning stops, but all pages scanned in this batch, up to this point, are not deleted and the TWAIN interface remains open. You can place a new page in the scanner, adjust the TWAIN settings for it, then click the Scan button in the TWAIN interface to continue scanning. - Page 56 CANNING OUCH The available options are for images and text. Text Formats; TEXT is only one of several text formats available. Image Formats The Text Formats are for text file types. The names of the formats indicate their file types. See "Text Formats"...
- Page 57 400 S ISIONEER TROBE CANNER To select a JPEG or PDF file size: Select JPG or PDF as the page format. Right-click on the JPG or PDF icon. A menu opens. Choose the file size/image quality option for your scanned images. Minimize Size —Smallest file size, lowest image quality.
-
Page 58: Selecting Options For Onetouch
To select a file type for the text format: Select the Destination Application. Right-click on the text format icon. The menu options depend on the type of Destination Application you select. Example menu for the Text format when the selected application is Microsoft’s Word. - Page 59 400 S ISIONEER TROBE CANNER To select options: Open the OneTouch Properties window and click the Options tab. Select options as described below. Show All Destinations —This option selects all the Destination Application categories. The list of Destination Applications available for the selected button will include all the applications on your computer that fall into these categories.
- Page 60 Global Options • Show Progress Window —Select this option to display the progress window of the document(s) during scanning. • Use enhanced folder browser—Select this option if you want to save your scans to a network location that is not a mapped drive on your computer. •...
-
Page 61: Setting Destination Application Properties
400 S ISIONEER TROBE CANNER ETTING ESTINATION PPLICATION The different types of Destination Applications have various properties that you can select. On the OneTouch Properties window, click a Destination Application. Click the Properties button. Click a Destination Application. Click the Properties button A OneTouch 4.0 Link Properties dialog box opens for the type of Destination Application you selected, and the available options are for that type of application. - Page 62 This could occur if you scanned a photograph with a scanner button set for text applications. Show message if text recognition failed —A message will open on the screen if the OCR reader does not detect text in the image.
- Page 63 400 S ISIONEER TROBE CANNER To add another application to the list, click the Add Application button. The Add Text Based Link dialog box opens. Click Browse to find the application you want to add to the list. When you select the application using the Browse button, steps 1 and 2 on the dialog box are automatically filled in, and the application icon appears in step 3.
- Page 64 Image Documents Properties These properties apply to Microsoft Paint and other image processing applications. Click in the Color document handling settings boxes for the options you want. These options will apply to all the applications in the group. Convert Bitmaps using Screen Resolution —Use this option to ensure that an image will fit on the computer’s screen.
- Page 65 400 S ISIONEER TROBE CANNER Storage Properties These properties apply to the Destination Application named Transfer to Storage. If a CD burner is attached to your computer, and your computer is running Windows XP or Windows Vista, you also use this dialog box to start the Burn to CD process.
- Page 66 eMail Properties These properties apply to email applications so you can specify the folder for documents that you will attach to an email message. Microsoft Outlook email message as soon as scanning is finished, but other email applications may not. If you’re using one of those applications, such as America Online documents so you can manually attach them to your email messages.
-
Page 67: Scan And Burn To Acd
CAN AND URN TO A If you have a CD burner attached to your computer, you can scan directly from your scanner onto a CD. This feature is available only on computers running Windows version XP or later. To scan and burn to a CD: Open the OneTouch Properties window. -
Page 68: Scanning With Event Forwarding (Sti)
Select Still Image Client as the Destination Application. You cannot choose a page format for this option because the actual Destination Application is not selected until after you press the scanner button. Choose a Scan Configuration and click OK . -
Page 69: Creating An Html Web Page From Your Scanned Documents
400 S ISIONEER TROBE CANNER HTML W REATING AN You can convert scanned pages to HTML format for posting directly to your web site. To scan and create an HTML web page: Open the OneTouch Properties window. Select Microsoft Explorer as the Destination Application. Choose HTML as the Format. -
Page 70: Transferring Scanned Documents To Storage
RANSFERRING CANNED With Transfer to Storage scanning, you can scan documents and save them in a folder in one step. The process is ideal for archiving documents without having to manually save or process them. If you choose a text format for the file format, the images are automatically converted by the OCR process into editable text and numbers before being saved. -
Page 71: Scanning To Multiple Archive Folders
400 S ISIONEER TROBE CANNER Scanning begins and your scanned pages are stored in the location that you specified on the OneTouch 4.0 Link Properties window. When selecting the storage location for scanned documents, you can select a local folder, or a folder on a server or mapped drive. - Page 72 Click the New button. The Scan Configuration Properties dialog box opens. To help you remember which folder it is, give the new configuration a name that indicates the folder name, such as “Business Receipts.” Click the Scan Settings , Page Settings , and Advanced Settings tabs, and select the settings you want. Click the Storage Options tab.
- Page 73 400 S ISIONEER TROBE CANNER Select the folder you created for storing the scanned documents. 10. Click OK . The selected folder will now be set as the Storage Location, such as “Business Receipts.” 11. Click OK . The new configuration is now listed as a Transfer to Storage configuration. 12.
- Page 74 13. You will now have multiple configurations set up for the Transfer to Storage destination, and each configuration scans documents to separate folders. 14. Now click the arrow buttons to select a scanner button for each new configuration. Click Apply to set that button for that configuration.
-
Page 75: Scanning With Optical Character Recognition (Ocr)
The OneTouch OmniPage Module or the OmniPage Pro software must be installed on your computer in order to use the OCR options with the OneTouch software and your Visioneer scanner. The OneTouch OmniPage Module was automatically installed when you installed your driver from the installation disc. -
Page 76: Text Formats
CANNING OUCH ORMATS You select the text format option by clicking on the text icon on the OneTouch Properties window. This is the text format icon. This example of the text format icon is nPDF. Selecting the text format option also selects OCR processing as an automatic step for scanning. Therefore, when you scan a document with the text format selected, the text portions of the document are automatically converted to editable text. - Page 77 400 S ISIONEER TROBE CANNER Right-click on the text format icon. Example menu for the TEXT format when the Destination Application is Microsoft Word. Choose the file type that you want for the text format. Your selection of a file type pertains only to the Destination Application currently selected on the OneTouch Properties window.
-
Page 78: Selecting Onetouch Omnipage Ocr Options
The Use MRC option is available for sPDF and PDF. ELECTING OUCH The software you installed for your scanner includes a set of advanced OCR options integrated with OneTouch 4.0. Note: The OCR options apply globally to all the OneTouch Destination Applications that perform OCR. -
Page 79: The Ocr Tab
400 S ISIONEER TROBE CANNER Choose OCR Options from the menu. The OCR Properties window opens with the OCR tab selected. OCR T The options shown on the OCR tab window are for spellchecking scanned text, replacing missing or unrecognized characters, and setting the speed and quality levels of the OCR processing. ’... - Page 80 CANNING OUCH Choose the options you want from the OCR window. Languages in Document—Click on the language(s) in list that correspond to the languages in the documents to be scanned. You can click on multiple languages. These are the languages that will be recognized during the OCR process.
-
Page 81: Creating Your Own Dictionaries
Type each word you want in your new dictionary, followed by a carriage return. Make sure to spell the words correctly as they will be used for spellchecking. Here is an example of what the text file might look like: Visioneer OneTouch OmniPage... - Page 82 The User Dictionary Files window opens and shows the available dictionaries. MyDictionary is an example of a user dictionary. Click Add New. The Add New User Dictionary window opens. Click the drop-down arrow for Files of type and choose Text Files (.txt). 10.
-
Page 83: Editing User Dictionaries
400 S ISIONEER TROBE CANNER 11. The text file now appears on the list of user dictionaries that you can use for spellchecking. 12. Select a dictionary and click Set As Current to set it as the current dictionary for spellchecking. The label [current] is added to the name. - Page 84 To import a list of words from another text file, click Import. The Import Contents of User Dictionary window opens. Select the file that has the words you want to add to your user dictionary. Importing will add the entire list of words in a file to the user dictionary. Click Import.
-
Page 85: The Format Tab
400 S ISIONEER TROBE CANNER Select the dictionary file to export and click Save. The file is exported as a formatted dictionary with the .ud filename extension so it can be opened by other programs. ORMAT The options on the Format tab window are for setting the input and output formats for the scanned documents. - Page 86 • Spreadsheet—Choose this option if the entire document consists of a table that you want to export to a spreadsheet program, or have treated as a table. No flowing text or graphics will be detected. Output Format Options • Automatic—The document will be formatted as close to its original as possible. The OneTouch software will adjust its settings to the most appropriate for the document being scanned in order to match your selected output format.
-
Page 87: Onetouch With Kofax Vrs Technology
OFAX ECHNOLOGY The OneTouch 4.0 software you received with your Visioneer scanner now includes the Kofax® Virtual ReScan® (VRS™) technology. This application has a set of features for improving and enhancing the quality of scanned documents, especially documents that would usually produce poorer quality images. -
Page 88: The Kofax Vrs Settings
VRS S OFAX ETTINGS You select the Kofax VRS settings when creating or editing a scan configuration on the OneTouch 4.0 Properties window. To select the Kofax VRS settings: Open the OneTouch 4.0 Properties window. Click the New button to create a new configuration, or select one of your custom configurations you created earlier and click the Edit button. - Page 89 However, if the page is fed through the scanner at too great an angle, the image may not straighten correctly. In that case, re-scan the page using the paper guides to feed the paper in straight.
- Page 90 • Despeckle —Speckles are small spots on an image that the scanner interpreted as a valid part of the document. For example, an irregularity in the paper, or a small wrinkle, or the holes where a staple was removed may show up as speckles on the scanned image. The Despeckle option identifies these spots and removes them.
- Page 91 400 S ’ ISIONEER TROBE CANNER UIDE When a scan configuration includes VRS options, the OneTouch Panel and the OneTouch Properties window both show the VRS icon as a reminder. The VRS icon on the top of the OneTouch Panel and on the scan configuration remind you that the scan will use the VRS settings.
-
Page 92: Changing The Hardware Settings
HANGING THE ARDWARE Right-click on the OneTouch icon and choose Show Hardware from the pop-up menu. The Hardware Properties dialog box opens and shows information about your Visioneer scanner. ETTINGS CANNING OUCH... - Page 93 Using a paper pickup delay allows you to make sure the page is straight in the scanner before the scanner feeds it through. If the Paper pickup delay is at 0 ms (milliseconds), the scanner starts as soon as the paper sensor detects an item in the paper feed slot.
-
Page 94: Scanning From Twain
Applications such as Nuance PaperPort and OmniPage, and many other applications, can use the TWAIN interface for scanning. The TWAIN interface, described in this section, is the one provided with your scanner and you will see it when scanning from PaperPort or OmniPage. Other TWAIN compliant scanning applications may also access this interface. -
Page 95: Accessing The Twain Interface
Scanner Setup Wizard. • OmniPage: Go to File, then Get Page, then click on Scan. If you get a message that the scanner is not in the OmniPage database, follow the instruction so screen to run the Scanner Setup Wizard. -
Page 96: Scanning With The Twain Interface
TWAIN I CANNING WITH THE The TWAIN interface lists the scanning options available with your Visioneer scanner. Place an item face up in the paper feed slot, with the top pointing into the scanner. Adjust the settings in the TWAIN interface for the item you are scanning. - Page 97 • AutoCrop to original—Select this option to let the scanner automatically determine the size of the item being scanned. Always use the paper guides on the scanner so the page is not skewed. Skewed pages may not crop properly. •...
-
Page 98: Scanning From Wia
Windows applications as well. To scan using WIA from Microsoft Paint: On the Windows taskbar, click Start , point to Programs , point to Accessories, and then click Paint . From the File menu choose From Scanner or Camera . 400 S ISIONEER... - Page 99 The scan window opens. Use this window to select scanning options and start the scan process. Click on the color mode appropriate for the item you are scanning. Place a document in the scanner. Click on the Scan button in the WIA interface.
-
Page 100: Fine Tuning Your Scans
UNING CANS You can select new settings before you scan an item to fine tune exactly how you want to scan it. On the scan window, click Adjust the quality of the scanned picture . Select the options for scanning. Brightness and Contrast —Drag the sliders to the right or left to adjust the brightness and contrast of the scanned image. - Page 101 400 S ’ ISIONEER TROBE CANNER UIDE...
-
Page 102: Maintenance
ALIBRATING CANNER The scanner needs to be calibrated as part of your monthly maintenance of the scanner. You calibrated the scanner on installation of the software, but the scanner requires calibration to maintain image quality. If the scanner is used daily you may need to calibrate the scanner more often. - Page 103 400 S ISIONEER TROBE CANNER The Hardware Properties for your scanner opens. Click on the Properties button to open the Device Settings tab for your scanner. Click on the Calibrate button to start the calibration utility. ’ UIDE...
-
Page 104: Calibrating From The Windows Control Panel
If you do not see Scanners and Cameras, open Printers and Other Hardware then you should see this option. The Strobe 400 should be listed as one of the attached scanners. Right-click on the scanner and choose Properties to open the Device Settings for your scanner. -
Page 105: Calibrating From Twain
ALIBRATING FROM You can access the calibration utility from the TWAIN interface. If you are using Windows Vista 64-bit, or Windows 7 64-bit, and did not install OneTouch with your scanner, use these instructions for calibrating the scanner. Open the TWAIN interface. -
Page 106: Cleaning Your Scanner
Cleaning the inside of the scanner helps to keep your scanner operating at optimum performance. You should clean the inside of the scanner at least once a week or after 5,000 pages have been scanned. If calibration does not resolve any image quality issues you are seeing, you may need to clean the scanner. - Page 107 If you are seeing lines in the scanned image, and calibration did not resolve the issue, make sure there is nothing stuck on the glass plates in the scanner. Gently close the scanner lid. Press down on it until you hear a click as the arms lock the scanner lid in place.
-
Page 108: Additional Cleaning Method
LEANING ETHOD The standard cleaning method for your scanner is to use the dry cleaning cloth in the scanner. If lines, smudges or blurry areas are still in the scanned image you can try cleaning the scanner with Isopropyl rubbing alcohol. -
Page 109: Troubleshooting
Flatten the edges of the page before placing it in the paper feed slot. If the edge of the paper has been folded, it may get stuck in the scanner as it is pulled through. Also, make sure you are inserting the paper straight into the scanner. - Page 110 They are interfering with the installation and OneTouch options, and you need to remove those other drivers and re-install your Visioneer scanner. Please see the documentation that you received with the other scanner for the steps to remove its driver programs. After uninstalling the other scanner’s driver programs, uninstall OneTouch 4.0 using the steps on page 109, then reinstall it using the steps in the...
-
Page 111: Uninstalling Or Reinstalling Your Scanner
2. Windows XP: Double-click the Add or Remove Programs icon. Windows Vista and Windows 7: Double-click the Programs and Features icon. 3. From the list of programs, select Visioneer Strobe 400. Click the Change/Remove (or Uninstall) button. 4. Click Yes when asked to confirm that you want to remove these software programs. -
Page 112: Strobe 400 Scanner Specifications
Microsoft Windows - 32-bit XP (Service Pack 2 or 3) - 32-bit or 64-bit Vista (with or without Service Pack 1 or 2) - 32-bit or 64-bit 7 TWAIN, WIA Visioneer OneTouch® Nuance PaperPort® Nuance OmniPage® Adobe® Reader® NewSoft Presto! BizCard®... -
Page 113: Strobe 400 Spare Part List
400 S ISIONEER TROBE CANNER 400 S TROBE PARE Please use the following part name and number when ordering a replacement USB cable for your scanner. U.S. ’ UIDE Part Name Calibration page Cleaning cloth High Speed USB 2.0 Certified Cable... -
Page 114: Index
Index Actual size, 49 Add Application, 61, 62 Advanced Clarity, 88 Advanced device settings, 49 Advanced Settings tab, 48 America Online® (AOL), 64 Apply button, 44 Aspect ratio, 49 Auto Color Detect, 88 AutoBrightness, 87 AutoCrop, 87 AutoCrop to Original, 46 AutoCrop to original, 95 AutoDeskew, 87 AutoOrientation, 88... - Page 115 NDEX Grayscale mode, 45, 47, 94, 95 Hardware properties, 40, 101 help, 9 HTM file format, 67 htm file format, 75 HTML Document, 75 HTML page, 67 Hue, 48 Image Documents Properties, 62 Image Editors, 57 Image file formats, 54 Improvements and Settings, 46 installation, 14 Instant Delivery, 58...
- Page 116 Scan configuration, 41, 48, 49, 50, 69 Edit or Delete, 50 Lock or unlock, 45 New, 44 Scan Settings Tab, 45 Scan to Folder, 68 Multiple folders, 69 Scanner Device settings, 91, 101 parts, 111 Troubleshooting, 107 scanner components, 7 connecting, 11...
- Page 117 NDEX...
- Page 118 Copyright © 2010 Visioneer, Inc. 05-0802-000...
Need help?
Do you have a question about the Strobe 400 and is the answer not in the manual?
Questions and answers