Table of Contents
Advertisement
Quick Links
Advertisement
Table of Contents

Related Manuals for NextBase SDV485-B - MANUAL 2


Summary of Contents for NextBase SDV485-B - MANUAL 2
- Page 1 MODEL NO. SDV485-B/BY OPERATING INSTRUCTIONS MODE ADJUST SETUP SCAN...
- Page 2 IMPORTANT SAFETY INSTRUCTIONS 1. Read these instructions. 2. Keep these instructions. 3. Heed all warnings. 4. Follow all instructions. 5. Do not use this apparatus near water. 6. Clean only with dry cloth. 7. Do not block any ventilation openings. Install in accordance with the manufacturer's instructions.
- Page 3 PRECAUTIONS Thank you for purchasing this tablet DVD player. Please read this manual carefully before operating and reserve it for future reference. It will be helpful to you if you encounter any operational problem. To reduce the risk of fire or electric shock. Do not expose this WARNING: appliance to rain or moisture, dripping or splashing and that no objects filled with liquids, Such as vases, Shall be placed on...
- Page 4 PRECAUTIONS CAUTION: These servicing instructions are for use by qualified service personnel only. To reduce the risk of electric shock, do not perform any servicing other than that contained in the operating instructions unless you are qualified to do so. WARNING: To reduce the risk of fire or electric shock, do not expose this appliance to rain or moisture.
- Page 5 PRECAUTIONS MACROVISION: This product incorporates copyright protection technology that is protected by U.S. patents and other intellectual property rights. Use of this copyright protection technology must be authorized by Macrovision. If not, the use of this technology is only permitted for domestic use and other limited playback uses.
-
Page 6: Table Of Contents
TABLE OF CONTENTS IMPORTANT IMPORTANT SAFETY INSTRUCTIONS......1 SAFETY INSTRUCTIONS PRECAUTIONS PRECAUTIONS............... TABLE OF CONTENTS TABLE OF CONTENTS........... CAUTIONS ON USING CAUTIONS ON USING THIS PLAYER......THIS PLAYER DISCS PLAYABLE TYPES OF DISCS PLAYABLE ON THIS PLAYER... 10 PLAYABLE FORMATS ........PACKAGE CONTENTS PACKAGE CONTENTS.......... - Page 7 TABLE OF CONTENTS PLAYBACK IN SLOW MOTION........A-B/ REPEAT PLAYBACK..........ZOOM FUNCTION............SEARCHING FOR A SPECIFIC SCENE....... SELECTING SUBTITLE..........CHANGING THE ANGLE..........CHANGING THE AUDIO LANGUAGE......PROGRAM PLAYBACK..........USING THE ON-SCREEN DISPLAY ......PLAYING A MP3 FORMAT DISC AND JPEG CD..PLAYING DivX FILES............
- Page 8 TABLE OF CONTENTS CHANNEL GUIDE TV CHANNELS............RADIO CHANNELS........... CHANNELS FAVORITE..........CHANNEL EDIT............SYSTEM CONFIG TV SETTING.............. AUDIO SETTING............LANGUAGE............... 49 PARENT CONTROL..........49 ANTENNA POWER............ INSTALLATION AUTO SCAN.............. 51 MANUAL SCAN ............51 DEFAULT SETUP............52 GAME BOXMAN..............53 BURNING TETRIS.............53 HIT RAT ..............
- Page 9 CAUTIONS ON USING THIS PLAYER CAUTIONS ON USING THIS PLAYER 1. DO NOT MOVE THE PLAYER DURING PLAYBACK During playback, the disc spins at high speed. So do not lift or move the player. Doing so may damage the disc. 2 .TRANSPORTING THE PLAYER Before transporting the player, be sure to remove the disc and turn off the power, then unplug the power cord.
-
Page 10: Cautions On Using This Player
CAUTIONS ON USING THIS PLAYER 7. WHEN USING WITH CAR POWER CABLE IN CARS Please turn on the engine and then connect the car power cable for using. 8. CLEANING THE PLAYER Normally clean the player with a soft, dry cloth. For tough dirt, apply some neutral detergent diluted in 5 to 6 parts water to a soft cloth, wring out thoroughly. -
Page 11: Types Of Discs Playable On This Player
DISCS PLAYABLE TYPES OF DISCS PLAYABLE ON THIS PLAYER The discs listed on the table below can be played on this player without an adapter. The marks shown on the table below are indicated on the disc's label, package or jacket. Types of playable discs and their Diameter/Playable sides... -
Page 12: Package Contents
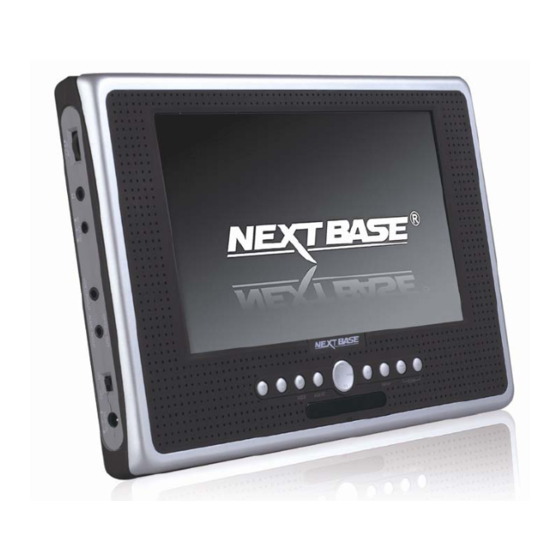
PACKAGE CONTENTS PACKAGE CONTENTS After unpacking, first check the contents of your DVD player package as listed below: Digital TV Antenna Active antenna Operating manual (SDV485-BY) (SDV485-B) Earphone Remote control Car power cable Backplate Screw & gasket AV cable AC / DC adapter Headrest mount NOTES: Actual products' appearance might vary slightly from the pictures shown. -
Page 13: Front Side
PARTS AND CONTROLS FRONT SIDE MODE ADJUST SETUP SCAN 1 2 3 4 11. CH- 1£® 12. CH+ 13. SCAN 3. MODE 4. ADJUST 10. SETUP BUTTON DEFINITION MODE ADJUST SETUP SCAN 1. Play / Pause button Press it to start / pause the playback. (Invalid in DVB-T state) 2. - Page 14 PARTS AND CONTROLS 4. Adjust button :ENT Press it to enter the adjustments of brightness, color, TFT mode and view mode, FM tranmitter and IR tranmitter Press it again to exit. Keep pressing the button for about 1.5 seconds to turn of fthe TFT display and press any key to resume display.
-
Page 15: Right Side
PARTS AND CONTROLS RIGHT SIDE Audio in/out and optical Volume control Use it to adjust the volume of the output jack speaker or the earphone. Input or output audio signals to connected device by setting Earphone jack AV IN /OUT mode value. For connecting a stereo earphone Output optical audio signals to or an amplifier. -
Page 16: Main Unit Rear Side
PARTS AND CONTROLS Slot Protector OPEN button Open the rubber cover to find the card slot Push it to open the cover. and USB port. USB port SD/MMC/MS/MS-PRO card slot Support USB 1.1 use. DVB-T jack DVB-T type aerial input. MAIN UNIT REAR SIDE Support The unit can stand with this device. -
Page 17: Remote Control
PARTS AND CONTROLS REMOTE CONTROL MOBILE ENTERTAINMENT... -
Page 18: Key Description Of Remote Control
PARTS AND CONTROLS KEY DESCRIPTION OF REMOTE CONTROL ZOOM SETUP Press it to bring forth the main setup Zoom the picture on screen. menu. Press it again to exit. MODE Press it to pop out the play modes Jump to previous track. (Invalid in selecting menu: DVD, DVB -T, and DVB-T state ) - Page 19 PARTS AND CONTROLS ANGLE PROGRAM Press it to switch angle. (Invalid in Program playing order of tracks. DVB-T state) (Invalid in DVB-T state) SEARCH Locate title/ chapter/ playtime to play. Press it to enter the electric program (Invalid in DVB-T state) guide.
-
Page 20: Notes On Using The Remote Control Unit
PARTS AND CONTROLS NOTES ON USING THE REMOTE CONTROL UNIT Do not drop or step on the remote control unit or subject it to shocks. Note that the remote control unit may not work if there are obstacles between the remote sensor and itself. Do not expose the remote sensor to strong light. -
Page 21: Connecting The Player To A Tv Set
AUDIO/VIDEO CONNECTIONS CONNECTING THE PLAYER TO A TV SET Yellow Black Yellow White MOBILE ENTERTAINMENT... -
Page 22: Connecting The Adapter To The Dc In 12V Socket
AUDIO/VIDEO CONNECTIONS CONNECTING THE ADAPTER TO THE DC IN 12V SOCKET USING THE EARPHONE 1. Set the volume control to minimum sound level. 2. Connect the earphone plug to the player's " " jack. 3. Adjust the volume control to the preferred sound level. MOBILE ENTERTAINMENT... - Page 23 CONNECTING THE PLAYER TO OTHER DEVICES CONNECTING TO A DOLBY DIGITAL / MPEG DECODER OR AN AMPLIFIER WITH A BUILT -IN DECODER With this player, you can enjoy powerful Dolby Digital or MPEG sound. Output the digital signals from the player's digital output to a decoder or amplifier with built-in decoder.
-
Page 24: Digital Amplifier That Is Not Dolby Digital/ Mpeg Compatible
CONNECTING THE PLAYER TO OTHER DEVICES CONNECTING TO A DIGITAL AMPLIFIER THAT IS NOT DOLBY DIGITAL / MPEG COMPATIBLE Output the digital signals from the player's digital output to a digital amplifier that is not Dolby/MPEG compatible. For instructions of audio settings, refer to AUDIO OUT of AUDIO SETUP. -
Page 25: Connecting To Active Speaker Systems
CONNECTING THE PLAYER TO OTHER DEVICES CONNECTING TO ACTIVE SPEAKER SYSTEMS Main unit right side Black AV cable Yellow To audio input jacks To Video Input jack Yellow Active speaker systems MOBILE ENTERTAINMENT... -
Page 26: Turning On The Power
BASIC OPERATIONS TURNING ON THE POWER Connect the AC/DC adapter to a socket. Connect the DC output plug of the adapter to the DC input jack on the main unit. Switch the POWER button to ON position. The included AC/DC adapter is compatible with voltage from 100V to 240 V, you can use it on trips overseas. -
Page 27: Loading
BASIC OPERATIONS LOADING Press the OPEN button to open the cover. Place in a disc and press it down the disc with your fingers near the center hole. A click is heard. Notes: Set the disc securely. Failure to set it securely could result in damage. -
Page 28: Playback
BASIC OPERATIONS PLAYBACK Turn on the power of the player. Open the disc cover. Insert a disc correctly. Close the cover. PLAY/PAUSE The player will load the disc and play automatically. If not, please press the button. STOP PLAYBACK 1. Press on the remote control while playing. -
Page 29: Playback In Slow Motion
BASIC OPERATIONS PLAYING AT FAST SPEED 1. Press button on the main unit board or on the remote control during playback. 2. The playback speed will be changed each time you press the The speed will be changed to 2X, 4X, 8X, 20X, 1X each time you press the button. -
Page 30: Zoom Function
BASIC OPERATIONS ZOOM FUNCTION 1. Press ZOOM on the remote control during playback. The picture on the screen will be zoomed. ZOOM 2. The zooming rate changed each time when the ZOOM button is pressed. The sequence is 2X, 3X, 4X, 1/2X, 1/3X, 1/4X, 1X. SEARCHING FOR A SPECIFIC SCENE 1. -
Page 31: Program Playback
BASIC OPERATIONS PROGRAM PLAYBACK The program playback function can automatically play titles, chapters, or tracks in accordance with the programmed order. 1. Insert a disc and then press the PROGRAM button on the remote control. At this time, menu appears as below. 2. -
Page 32: Using The On-Screen Display
BASIC OPERATIONS USING THE ON-SCREEN DISPLAY 1. This DVD video player allows you to view the operational status and disc s information on screen. 2. Press OSD button on the remote control during playback. The disc s information will be displayed on screen. ¢... -
Page 33: Playing Divx Files
BASIC OPERATIONS PLAYING DivX FILES Your player is an official DivX Certified product that plays DivX.5, DivX.4, DivX.3, and DivX. VOD video content in compliance with DivX Certified technical requirements. NOTE: To guarantee playback of DivX files the audio must be MP3 format. DivX Certified devices can play any interleaved MP3 audio at any bitrate, both CBR and VBR. - Page 34 BASIC OPERATIONS Note: Supply USB 1.1 use. The player may not work properly if using USB connecting cable. Suggested not to use it. 3. Support SD/MS/MS-Pro / MMC cards. Insert the cards as the following picture shows: This product has been tested with most brand name flash media cards. Using poor quality flash cards may affect the readability of the unit.
-
Page 35: System Setup Tv System
SYSTEM SETUP The system setup options are illustrated below: TV SYSTEM If you want to connect the player to a TV, please choose a correct TV system first. AUTO: Choose this setting if your DVD player is connected to a multi-system TV. NTSC: Choose this setting if your DVD player is connected to a NTSC TV. -
Page 36: Screen Saver
SYSTEM SETUP SCREEN SAVER Set the screen saver option to ON status. When your DVD player is at STOP or NO DISC status, or there is a frame frozen for a little long time, the screen saver will be displayed. This feature can protect the screen from damage. ON: Choose this setting to activate the screen saver. -
Page 37: Rating
SYSTEM SETUP RATING The rating feature works with DVD discs that have been assigned a rating. This helps you to control the types of DVDs that the player can be watched. There are eight limited rating options: KID SAFE, G, PG, PG13, PG-R, R, NC-17, ADULT . The default setting is ADULT . -
Page 38: Audio Lang
LANGUAGE SETUP The language setup options are illustrated below: OSD LANGUAGE Highlight the OSD LANGUAGE option, and press the arrow buttons to choose the OSD language you prefer. Press ENTER to confirm, and it will display OSD in that language. There are 5 optional OSD languages: English, German, Spanish, French and Italian. -
Page 39: Subtitle Lang
LANGUAGE SETUP SUBTITLE LANG. Highlight the SUBTITLE LANG. option, and press the arrow buttons to choose the subtitle language you prefer. Press ENTER to confirm. If the disc you are playing has that language available, it will display subtitles in that language. There are 7 optional subtitle languages: Chinese, English, Japanese, French, Spanish, Italian and German. -
Page 40: Digital Setup Audio Out
DIGITAL SETUP The digital setup options are illustrated below: AUDIO OUT Highlight the AUDIO OUT option, and press the arrow buttons to choose the audio output mode you prefer. Press ENTER to confirm. There are 3 optional audio output modes: SPDIF/OFF, SPDIF/RAW and SPDIF/PCM. SPDIF/OFF: Choose this setting to output analog signal, and there will be no signal is outputted from optical jack. - Page 41 DIGITAL SETUP DYNAMIC RANGE Choose this setting to adjust the line out compressing ratio and get different effects. If adjusting to FULL, the audio signal peak value will be compressed to be the minimum; while adjusting to OFF, to be the maximum. DIGITAL SETUP AUDIO OUT FULL...
- Page 42 DIGITAL SETUP -DIVX[R] VIDEO ON DEMAND- YOUR REGISTRATION CODE IS: XXXXXXXX TO LEARN MORE VISIT WWW.DIVX.COM/VOD [DONE] NOTE: The registration code will be changed each time you use it to download the DivX files. You have to use new code to carry out downloading operation next time. MOBILE ENTERTAINMENT...
-
Page 43: Language
FIRST TIME INSTALLATION First, press MODE button to enter DVB-T enjoyment . For the first time use, the system will pop out a message: First Time Installation. F i r s t T im e In s t a l l a t i o n D o y o u w a n t t o s t a r t f i r s t t i m e i n s t a l l a t i o n w i z a r d ? Y E S... -
Page 44: Scan
SPECIAL KEYS E P G ( E L E C T RI C P R O G R A M G U I D E ) A quick program guide that the user can easily move up/down to view the brief description of the selected program. - Page 45 SPECIAL KEYS Channel : Frequency : 474000KHZ Progress 2/49 TV : Radio : Country list for selecting: England, Italy, France, Spain, Holland, Australia, Norway, Sweden, Finland, Portugal, Others, China, Taiwan, and Germany. Just select your preferred scan area and press ENTER to start scan. A U D I O Audio channel information displays.
-
Page 46: Channel Guide Tv Channels
CHANNEL GUIDE SYSTEM SETTING Press the SETUP key on the remote control to bring up the main menu. There are four classifications: Channel Guide, System Config, Installation and Game. T V C H A N N E L S " "... - Page 47 CHANNEL GUIDE C H A N N E L S F AV O R I T E This function will help you to classify all the channels to four groups: Favor, Movie, News and Show. After the classification, please exit from the menu. Then you can use Left (Fav-) / Right (Fav+) buttons to choose your favorite groups and UP(CH+)/ Down ( CH-) buttons to get each specific channel within the groups.
- Page 48 CHANNEL GUIDE Move program Channel Guide Channel Edit NO . MOVE Delete 0001 GD 1 0002 GD 2 0003 GD 3 0004 GD 4 UP/DOWN key to move program ENTER key to finish move 1. Press ENTER to bring up the Move symbol. 2.
-
Page 49: Parent Control
SYSTEM CONFIG buttons to get your actual need. T V S E T T I N G Select the corresponding TV system.( Auto means the output signal format will be changed automatically according to the received signal.) System Config TV Setting NTSC Audio Setting Language... -
Page 50: Language
SYSTEM CONFIG L A N G U A G E English System Config German TV Setting Spanish Audio Setting Language English French German Parent Control Spanish Italian Antenna Power French Exit Setup Italian The default is English. P A R E N T C O N T R O L System Config TV Setting Audio Setting... - Page 51 SYSTEM CONFIG If you want to change the Channel Lock, you will be required to input the password first. Parent Control Change Lock Change pin Press Enter Channel Lock Press Enter Password: **** After unlocked, a whole channel list will be displayed for your selecting. Channel Guide Channel Lock Lock...
-
Page 52: Auto Scan
INSTALLATION AUTO SCAN Auto scanning. Auto Scan Select Country Select Country England Installation Start Scan Press Enter Auto Scan Manual Scan Default Setup Exit Setup Note: Press SCAN on the remote control to bring up the quick auto scan. " "... - Page 53 INSTALLATION D E F A U LT S E T U P Resume the factory settings. Installation Message BOX R e s e t t o d e f a u l t ! Auto Scan Manual Scan Default Setup Exit Setup Cancel Note:...
-
Page 54: Boxman
GAME Get to the game function from the main menu. You will find three kinds of games in DTV state. Game BoxMan Burning Tetris Hit Rat Exit Setup BOXMAN buttons to control the little man to move the boxes to the appointed place. - Page 55 GAME HIT RAT Press 1,2,3,4,5,6,7,8,9 to hit the rat according to its corresponding directions of where it appears on the screen. SCORE OO LEVEL 1 MOBILE ENTERTAINMENT...
-
Page 56: Fm Transmitter
FM TRANSMITTER INSTRUCTIONS FM TRANSMITTER 1. Press ADJUST button to enter the adjustments of brightness, color, TFT mode, " " view mode, FM transmitter and IR transmitter. 2. Use the buttons on the main unit board or buttons on the remote control to choose FM transmitter, then press enter button. -
Page 57: Ir Transmitter
IR TRANSMITTER IR TRANSMITTER 1. Press ADJUST button to enter the adjustments of brightness, color, TFT mode, " " view mode, FM transmitter and IR transmitter. 2. Use the buttons on the main unit board or remote control to choose IR transmitter, then press enter button. - Page 58 Fit the Portable DVD Player to the Headrest Mount or VESA Wall Mounting Bracket 1. The followings show you how to fit the portable DVD player to the headrest mount in the car. 1). Take out the headrest mount and fix it on the car chair. Release the straps Place the two mounting straps over Secure the mount by tightening...
-
Page 59: Guide
MINI-MAGNETIC ANTENNA INSTALLATION GUIDE Please place the antenna as follows to improve the receiving strength of TV signals. Please position the antenna on the Please position the antenna close roof when using in-car. (Do not use to the window when using in-door. it when the car is moving) (SDV485-BY) (SDV485-B) -
Page 60: Size And Parameter
OTHERS SIZE AND PARAMETER Product name: TABLET DVD player Power: DC12V Consumption: <10W Audio out: R/L 2ch,OPTICAL Video out: Composite 260X175.6X26.5mm Size: Weight: 950g MOBILE ENTERTAINMENT... -
Page 61: Trouble Shooting
OTHERS TROUBLE SHOOTING Symptoms Possible causes Remedies Load the disc with the Disc is loaded label side up, and firmly incorrectly. The disc does pressed into the center. Make sure the disc is Disc is dirty or not play free from scratches or scratched. - Page 62 SDV485-B/BY-ENG-NB-A0...
Need help?
Do you have a question about the SDV485-B - MANUAL 2 and is the answer not in the manual?
Questions and answers