Motorola T80, T80 EXTREME Manual
- Owner's manual (142 pages) ,
- Owner's manual (176 pages) ,
- Owner's manual (15 pages)
- Also fits for
- T80 extreme
Advertisement
Package Contents
- 2 x TLKR T80/T80 Extreme Radio
- 2 x Belt Clip
- 1 x 2-Slot Charging Cradle
- 1 x AC Adapter
- 2 x Battery support brackets
- 2 x Rechargeable NiMH battery packs
- 2 x Headset (for T80 Extreme Only)
- 2 x Lanyard (for T80 Extreme Only)
- TLKR T80/T80 Extreme Owner's Manual
Frequency Chart
| Ch. | Freq. (MHz) | Ch. | Freq. (MHz) | Ch. | Freq. (MHz) |
| 1 | 446.00625 | 4 | 446.04375 | 7 | 446.08125 |
| 2 | 446.01875 | 5 | 446.05625 | 8 | 446.09375 |
| 3 | 446.03125 | 6 | 446.06875 |
Features and Specifications
- 8 PMR Channels
- 121 Sub-Codes (38 CTCSS Codes & 83 DCS codes)
- Up to 10 km Range*
- Internal VOX Circuitry
- LED Torch
- 10 Selectable Call Tone Alerts
- Backlit LCD Display
- Roger Beep
- Up Timer
- Room Monitor
- Battery Charger
- Battery Level Meter
- Channel Monitor
- Channel Scan
- Dual Watch
- Keypad Lock
- Auto Power Off
- Auto Squelch Control
- Auto Repeat (Scrolling)
- Battery Save
- Battery Low Alert
- Battery Low Sleep
- Tone (On/Off)
- Direct Call (Caller ID Call)
- Group Call
- Silent Mode
- All Call
- Auto Channel Change
- IP Rating: IPX2 (for T80), IPX4 (for T80 Extreme)
- Power Source: NiMH battery Pack / 4 AAA Alkaline batteries
- Battery Life: 16 Hours (under typical use conditions)
*Range may vary depending on environmental and/or topographical conditions.
Control and Functions

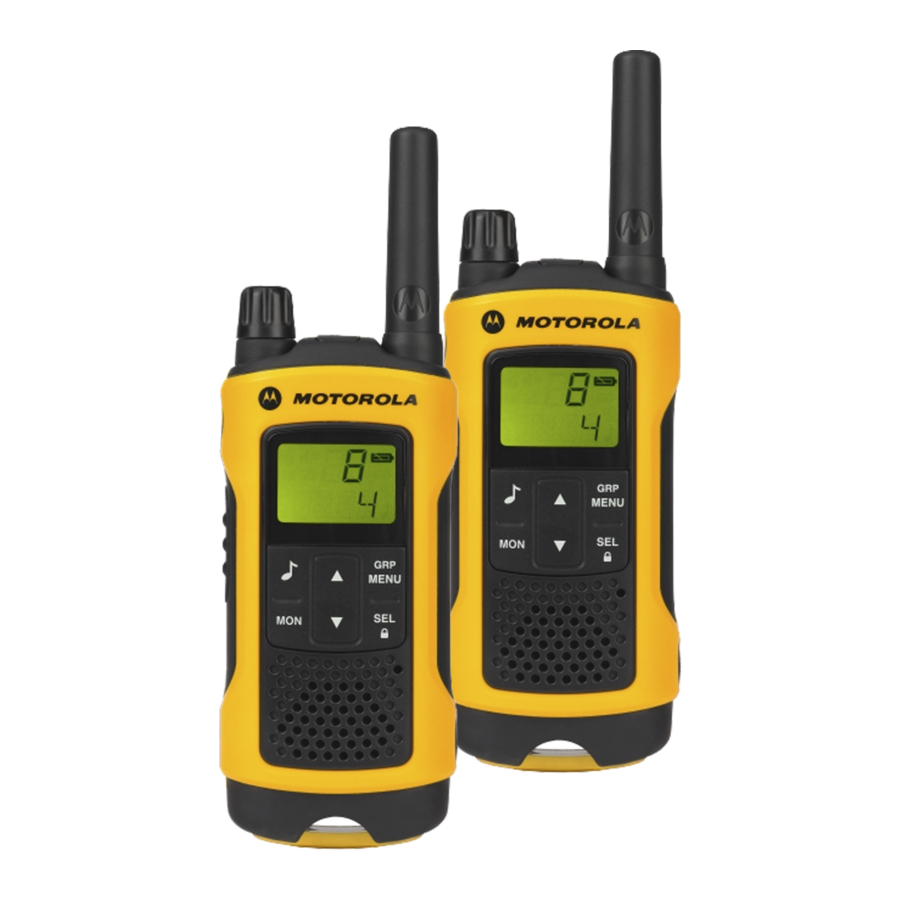
Note: Radio depicted is T80 Extreme. Also applicable for T80 radio.
Display

- Silent Indicator
- Transmit Indicator
- Receive Indicator
- Dual Watch Indicator
- Auto Power Off Indicator
- Key Lock Indicator
- Scan Indicator
- Channel Indicator
- Battery Level Meter
- Group Indicator
- VOX/Room Monitor Indicator
- Call Indicator
- Sub-code (Group ID/Code) Indicator
- Colon (for Up Timer)
Installing the Battery
- Make sure your radio is turned OFF.
- For T80: To remove the battery compartment door, press the tab at the bottom of the compartment door. For T80 Extreme: To remove the battery compartment door, use a coin to wedge the battery door open.
- Install the NiMH batteries into the battery compartment.
- Replace the battery compartment door.
Battery Level and Low Battery Alert
Charging the Radio
Direct Charging:
- Make sure your radio is turned OFF.
- Connect the AC adapter to the radio's DC IN 9V. Connect the other end of the AC adapter to a vehicle accessory power outlet.
- Charge the battery pack for 14 hours.
Using the Charging Cradle:
- Make sure your radio is turned OFF.
- Connect the AC adapter to the DC IN 9V of the charging cradle.
- Place the charging cradle on a stable surface.
- Place the radio in the charging cradle with the keypad facing forward.
- LED indicator will illuminate and remain illuminated as long as the radio is in the charger.
Note: Charge the battery pack for 14 hours.
Using the Battery Support Bracket:
- Remove the rechargeable NiMH battery pack from the radio.
- Place the battery support bracket into the charging cradle.
- Install the NiMH battery pack into the charging cradle.
Ensure that the charging contacts are correctly aligned. - LED indicator will illuminate and remain illuminated as long as the radio is in the charger.
Note: Charge the battery pack for 14 hours.
Basic Radio Operations
Read this reference guide completely before attempting to operate the unit.
Turning your Radio On/Off
To turn your radio ON, turn the rotary knob clockwise.
To turn your radio OFF, turn the rotary knob counterclockwise.
Adjusting the Volume
Increase volume by turning the rotary knob clockwise.
To decrease volume, turn the rotary knob counterclockwise.
Adjusting the Sound (Key Beeps)
Your radio emits a beep each time one of the buttons is pressed (except the PTT and  button).
Press and hold the  button while turning the radio ON to switch the sound ON/OFF.
Navigating through the Menu
Your radios has two Menu functions: Select Menu and Common Menu.
- To enter the Select Menu, press theSEL/
![]() button.
button. - To enter the Common Menu, press theMENU/GRP button.
- Additional presses of theSEL/
![]() button or MENU/GRP button will advance you through the Menu.
button or MENU/GRP button will advance you through the Menu. - To exit the Menu function, do one of the following:
- Press theMENU/GRP button,
- Press thePTT button
- Wait 10 seconds until the unit automatically returns to "Normal" mode.
Talking on Your Radio
- Hold your radio 5–8 cm from your mouth.
- Press and hold thePTT button while speaking. The
![]() appears on the display.
appears on the display. - Release thePTT button. You can now receive incoming calls. When you do, the
![]() appears on the display. To respond, repeat procedure from step 1.
appears on the display. To respond, repeat procedure from step 1.
Note: When you continue to transmit for 60 seconds, the radio emits TX Time Out tone and the ![]() icon flashes. The radio will stop transmitting.
icon flashes. The radio will stop transmitting.
In order to speak to someone, both your radios must be set to the same channel and Sub-Code. Refer to "Selecting a Channel and a Sub-Code" below.
Selecting a Channel and a Sub-Code To select a Channel:
- SEL/
![]() button to enter Select Menu. Advance until the Channel indicator blinks.
button to enter Select Menu. Advance until the Channel indicator blinks. ![]() or
or ![]() to the required channel.
to the required channel.
 or
or To select a Sub-code:
- SEL/
![]() button to enter Select Menu. Advance until the Sub-code indicator blinks.
button to enter Select Menu. Advance until the Sub-code indicator blinks. ![]() or
or ![]() to the required Sub-code.
to the required Sub-code.- Exit the Select Menu.
Select Menu
Your radio navigates through the Select Menu as follows:

Voice Operated Transmission (VOX)
Transmission is initiated by speaking into the microphone of radio instead of the pushing the PTT button. To select the VOX level:
- MENU/GRP button to enter Common Menu. Advance and select "VOX".
- SEL/
![]() to select.
to select. ![]() or
or ![]() to the desired VOX sensitivity level.
to the desired VOX sensitivity level.- Exit the Select Menu.
Note: Level "N"(OFF) disables VOX. Levels 1-5 set the sensitivity of the VOX circuit. Use level 1 in quiet environments, and use level 5 in very noisy environments. You can find the appropriate sensitivity level by speaking into the microphone. If the flashes, your voice is accepted.
Transmitting a Call Tone
Your radio is equipped with 10 selectable call tones.
To select a call tone:
- MENU/GRP button to enter Common Menu. Advance to "TONE".
- SEL/
![]() to select.
to select. ![]() or
or ![]() to the desired call tone.
to the desired call tone.- Exit the Common Menu.
To transmit the selected call tone:
![]() to transmit the selected call tone. The selected tone will automatically be transmitted for a fixed length of time.
to transmit the selected call tone. The selected tone will automatically be transmitted for a fixed length of time.- PTT to cancel Call Tone.
Auto Power Off
Auto Power Off feature allows you to set the time that the radio turns off automatically.
- MENU/GRP button to enter Common Menu. Advance until "PWR" and the current Auto Power Off time blinks.
- SEL/
![]() to select.
to select. ![]() or
or ![]() to select the time from ON, 1H, 2H, and 3H.
to select the time from ON, 1H, 2H, and 3H.- Exit the Menu.
Common Menu
Your radio navigates through Common Menu as follows:

Group Menu

- Press and hold MENU/GRP to enter GROUP MENU.
![]() or
or ![]() to proceed to each menu (GRP/CODE/RING/ID).
to proceed to each menu (GRP/CODE/RING/ID).- SEL/
![]() to select.
to select. ![]() or
or ![]() to proceed to desired condition or number.
to proceed to desired condition or number.- SEL/
![]() to select.
to select. - MENU/GRP to exit.
Set Group Mode
- Press and hold MENU/GRP to enter GROUP MENU.
- SEL/
![]() to control Group Mode.
to control Group Mode. ![]() or
or ![]() to "Y". SEL/
to "Y". SEL/![]() to go to Group Menu and Group Code Setting.
to go to Group Menu and Group Code Setting.![]() or
or ![]() to "N". SEL/
to "N". SEL/![]() to exit from Group Menu.
to exit from Group Menu.
Set Group Code
![]() or
or ![]() to choose the Group Code.
to choose the Group Code.- SEL/
![]() to complete Group Code setting.
to complete Group Code setting. - The radio enters "Ring Tone Setting Menu"
- MENU/GRP to back to Group Menu.
Set Ring Tone
The user can select the Ring Tone for a Direct Call. Ring Tones are the same as Call Tones.
![]() or
or ![]() to select a Ring Tone.
to select a Ring Tone.- The selected Ring Tone sounds.
Set ID
Each radio in the group needs to be set with an ID. The user can set an ID name of up to four (4) characters.
![]() or
or ![]() to select an ID number.
to select an ID number.- If the ID is already taken, USED is seen. If USED is not shown, then the ID is available.
- SEL/
![]() to advance to setting ID Name.
to advance to setting ID Name.
Set ID Name
The ID Name appears on the other radio's display when you make an All Call or a Direct Call. The ID Name will also on the other radio's display when they are placing a Direct Call. When no ID name is set, the unit number appears.
![]() or
or ![]() to select a character that will blink on the display.
to select a character that will blink on the display.- SEL/
![]() to select and move to the next character.
to select and move to the next character. - SEL/
![]() to register the ID number and ID Name.
to register the ID number and ID Name.
Note: The radio cancels selected ID Number and entered ID Name, then exits from Group Menu when MENU/GRP button is pressed.
Channel Setting in Group Mode
To set Auto Channel Change in Group Mode:
- MENU/GRP to enter Group Mode.
- SEL/
![]() to enter Channel Setting.
to enter Channel Setting. ![]() or
or ![]() to "Auto Channel Change Setting".
to "Auto Channel Change Setting".- SEL/
![]() to select. A channel number will blink and "ALL" is seen.
to select. A channel number will blink and "ALL" is seen. ![]() or
or ![]() to select the channel.
to select the channel.- SEL/
![]() or
or ![]() to transmit Auto Channel Change command.
to transmit Auto Channel Change command. - MENU/GRP to return to Channel Setting in Group Mode.
To set Manual Channel in Group Mode:
- MENU/GRP to enter Group Mode.
- SEL/
![]() to enter Channel Setting.
to enter Channel Setting. ![]() or
or ![]() to "Manual Channel Setting".
to "Manual Channel Setting".- SEL/
![]() to select. A channel number will blink and "MY" is seen.
to select. A channel number will blink and "MY" is seen. ![]() or
or ![]() to select the channel manually.
to select the channel manually.- SEL/
![]() to exit from Manual Channel setting.
to exit from Manual Channel setting. - MENU/GRP to return to Channel Setting in Group Mode.
Set All Call
- MENU/GRP to enter Group Mode.
![]() to enter All/ Direct Call Setting.
to enter All/ Direct Call Setting.![]() or
or ![]() to select All Call Transmission. "SYNC" is seen.
to select All Call Transmission. "SYNC" is seen.- SEL/
![]() or
or ![]() to exit this setting, and transmit All Call.
to exit this setting, and transmit All Call.
All Call Tone sounds.![]() and
and ![]() blinks while transmitting.
blinks while transmitting. - MENU/GRP to exit.
 and
and Set Direct Call

- MENU/GRP to enter Group Mode.
![]() to enter All/ Direct Call Setting.
to enter All/ Direct Call Setting.![]() or
or ![]() to select an ID Number.
to select an ID Number.![]() or SEL/
or SEL/ ![]() to transmit Direct Call Command. The selected Call Tone sounds. The display shows TX icon and CALL icon while transmitting.
to transmit Direct Call Command. The selected Call Tone sounds. The display shows TX icon and CALL icon while transmitting.- MENU/GRP to go back to All/Direct Call setting.
Features on Your Radio
Channel Scan Mode
Enables your radio to scan for active channels. When activity is detected, your radio lands (stays) on that channel for 2 seconds (5 seconds for VOX ON without headset). To transmit on that channel, press the PTT button. When activity on the landed channel ends, your radio continues scanning other channels. To turn the channel scan ON:
- MENU/GRP to enter Common Menu. Advance to "SCAN".
- SEL/
![]() to turn ON channel scan.
to turn ON channel scan. - MENU/GRP or PTT to turn OFF Scan mode.
Dual Watch Mode
Enables your to scan the current channel and another channel alternately.
To set another channel and start Dual Watch:
- MENU/GRP to enter Common Menu. Advance to "2CH".
![]() or
or ![]() to select the channel, then press SEL/
to select the channel, then press SEL/![]()
![]() or
or ![]() to select the Sub-code, then press SEL/
to select the Sub-code, then press SEL/ ![]() .
.- The radio starts to Dual Watch.
Note: If you set the same channel and Sub-code as the current channel, Dual Watch doesn't work. - MENU/GRP to turn the Dual Watch mode OFF.
Room Monitor
Enables your radio to detect voice/noises (according to the sensitivity level set) and transmit back to the listening radio without pushing the PTT button. The monitoring radio is not able to receive any transmissions in this mode. To turn Room Monitor ON:
- MENU/GRP to enter Common Menu. Advance to "ROOM".
- SEL/
![]() to select.
to select. ![]() or
or ![]() to the desired room monitor sensitivity level.
to the desired room monitor sensitivity level.
Note: Use level 1 in quiet environments. Use level 5 in very noisy environments.- SEL/
![]() to turn ON room monitor.
to turn ON room monitor.
MENU/GRP to turn OFF Room Monitor.
Note: When the voice/noise in the monitored room continues for more than 60 seconds, the monitoring radio stop monitoring for 5 seconds, and resumes.
Silent Mode
Silent mode will mute all incoming calls. The backlight of the radio blinks when there's an incoming call. If the call is not answered, the backlight turns off and the ![]() blinks until there is no signal. The T80/T80 Extreme radio will vibrate when there is a missed call.
blinks until there is no signal. The T80/T80 Extreme radio will vibrate when there is a missed call.
The silent mode will be disabled for 15 seconds when you transmit, receive or press any other buttons. To turn silent mode ON:
- MENU/GRP to enter Common Menu.
- Select "SLNT".
- SEL/
![]() to select.
to select. ![]() to turn Silent Mode ON. "Y" is displayed on the Channel Indicator.
to turn Silent Mode ON. "Y" is displayed on the Channel Indicator. ![]() appears.
appears.![]() to turn Silent Mode OFF. "N" is displayed on the Channel Indicator.
to turn Silent Mode OFF. "N" is displayed on the Channel Indicator. ![]() disappears.
disappears.
 appears.
Up Timer
Enables your radio to time up to 59 minutes 59 seconds. You can receive incoming calls in this mode. To use up timer:
- MENU/GRP to enter Common Menu. Advance to "TIME".
- SEL/
![]() to select the Up Timer.
to select the Up Timer. - SEL/
![]() to start the Up Timer.
to start the Up Timer. - SEL/
![]() to pause the Timer.
to pause the Timer.
SEL/![]() to ON/OFF the Timer.
to ON/OFF the Timer. - MENU/GRP or PTT to stop or reset up timer.
Note: If a call is received, the ID Name will be indicated and then the radio will return to timer mode and the Call Icon will blink.
Key Lock
Press and holdSEL/  until /"LOCK" appears to lock the keypad.
Press and hold SEL/ until /"UNLK" disappears to unlock the keypad.
LCD Backlight
The LCD display will automatically illuminate for 10 seconds after any button is pressed (except for PTT).
Monitor Mode
Enables you to listen for weak signals on the current channel.
To turn the Monitor Mode ON:
- Press theMON button for brief listening. The
![]() icon blinks.
icon blinks. - Press and hold the MON button for 2 seconds for continuous listening. The
![]() icon continues to blink.
icon continues to blink.
To turn the Monitor Mode OFF:
Press the MON, MENU/GRP or SEL/ ![]() button to return to "Normal" mode. The
button to return to "Normal" mode. The ![]() icon stops blinking.
icon stops blinking.
Roger Beep
Sounds to indicate the end of a PTT or VOX transmission. It can be heard through the speaker when Key Beep is on. It cannot be heard through the speaker if Key Beep is turned off.
Press and hold the ![]() button while turning the radio ON to turn the Roger Beep ON. Repeat the step to turn Roger Beep OFF.
button while turning the radio ON to turn the Roger Beep ON. Repeat the step to turn Roger Beep OFF.
LED Torch
Your radio has a built-in LED Torch.
The LED Torch indicator will remain on until the button is released.
PRODUCT SAFETY AND RF EXPOSURE FOR PORTABLE TWO-WAY RADIOS
 Before using this product, read the operating! instructions for safe usage contained in the Product Safety and RF Exposure booklet a u t i on enclosed with your radio.
ATTENTION!
Before using this product, read the RF energy awareness information and operating instructions in the Product Safety and RF Exposure booklet to ensure compliance with RF energy exposure limits.
Documents / ResourcesDownload manual
Here you can download full pdf version of manual, it may contain additional safety instructions, warranty information, FCC rules, etc.
Advertisement


Need help?
Do you have a question about the T80 and is the answer not in the manual?
Questions and answers