Advertisement
Quick Links
Advertisement

Related Manuals for XTZ ELIASSON E-IW61


Summary of Contents for XTZ ELIASSON E-IW61
- Page 1 IN-WALL AND IN-CEILING SPEAKERS OWNER’S MANUAL...
- Page 2 And — once you listen to them in your home — we trust you will be equally grateful that you chose XTZ ELIASSON. Please Read This Manual before you start installing your speakers The following pages contain some sound advice, bound to help you get the most out of your speakers.
- Page 3 Speaker Installation The installation process will follow these steps. – Determine speaker placement – Plan your wire run – Cut holes – Run speaker wires – Install the speaker – Aim the tweeters and set the speaker switches – Install the grills Step 1.
- Page 4 The left and right speakers would be at the same height as the listeners' ears and TV / behind projection screen, about 100 cm (~40 inches) off the floor, and separated by 45° to 60° (when viewed from the seating position). The in-wall center channel speaker would be mounted vertically directly above or below the TV.
- Page 5 Subwoofer speaker placement The location of your subwoofer will greatly affect how evenly the bass is distributed throughout the listening area. A subwoofer that is placed correctly will give you even, accurate sound throughout its frequency range. Here are a few guidelines for getting the most out of your subwoofer: 1.
- Page 6 2. Select your speaker wire and purchase the proper lengths. Now that you know the speaker locations and have a wire routing plan, the wire lengths you will need can be estimated. A good guide is to use 1.5 mm (16 gauge) wire for runs up to about 15 meters (~50 feet) and 2.5 mm (14 gauge) wire for runs longer than that.
- Page 7 Step 4. Run speaker wires Before installation, connect the speaker cable with the wiring terminal of the speaker. After the connection, make sure that the speaker cable is connected correctly and firmly without falling off. Note: the red speaker wire is connected to the positive pole (+) of the speaker terminal, and the black speaker wire is connected to the negative pole (-) of the speaker terminal.
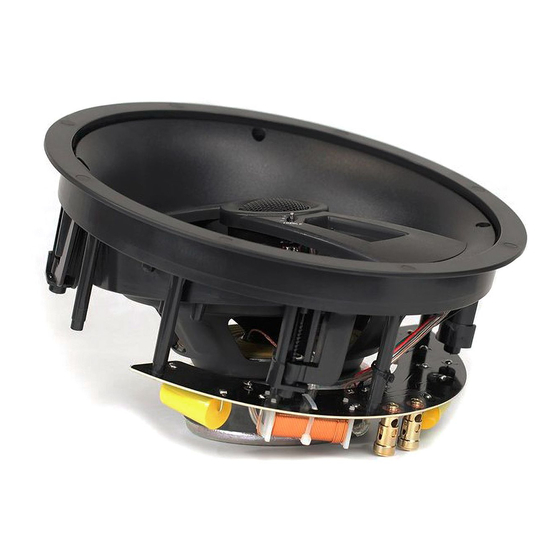
- Page 8 These pictures are for illustration purposes only. Step 5. Install the speaker Before installation, check whether the connection between the speaker cable and the terminal on the speaker is firm. Check whether the expansion screw installed is tight. Align the four hanger holes on the back of the speaker with the expansion screws on the wall, and then hang the screw into the hanger holes.
- Page 10 Step 6. Aim the Tweeter and Set the Speaker Switch Your in-ceiling speakers may have tweeters that can be aimed, and adjustable treble levels so that they can perform well in a wide variety of circumstances. We offer some guidelines but, ultimately, trust your own ears.
- Page 11 Removing the grill: If you need to remove grills after installation, the best method is to insert the supplied tool through a grill-hole near the edge and simply pull the grill out. SETTING UP YOUR RECEIVER FOR HOME THEATER USE 1.
- Page 12 SPECIFICATIONS IN-CEILING: E-IC6 E-IC8 Construction Type 2-way in-ceiling Speaker 2-way in-ceiling Speaker Tweeter driver 1 x 25 mm (1") Titanium dome 1 x 25 mm (1") Titanium dome Midrange / 1 x 165 mm (6.5") Woven fiber 1 x 203 mm (8") Woven fiber Woofer driver glass composite cone glass composite cone...
- Page 13 SPECIFICATIONS IN-WALL: E-IW8 E-IW61 E-IW62 3-way In-Wall 2-way In-Wall 3-way In-Wall Construction Type Speaker Speaker Speaker 1 x 25 mm (1") 1 x 25 mm (1") 1 x 25 mm (1") Aluminium- Aluminium- Aluminium- Tweeter driver magnesium alloy magnesium alloy magnesium alloy dome dome...
Need help?
Do you have a question about the ELIASSON E-IW61 and is the answer not in the manual?
Questions and answers