Advertisement
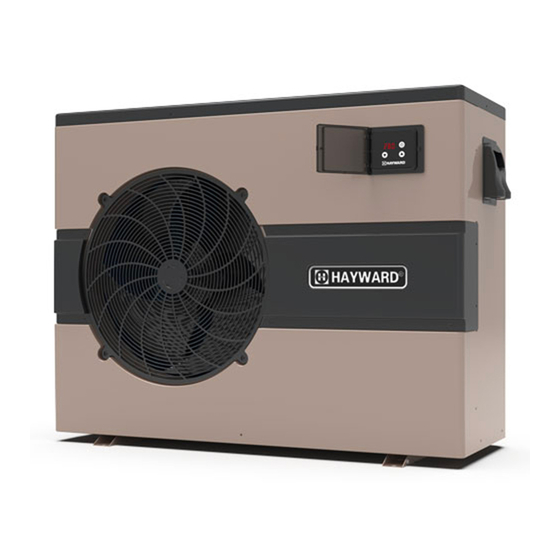
HP50HA2/HP70HA2 Heat Pump
Above Ground & In Ground Pool/Spa Heater
Installation and Operation Manual
HP50HA2
HP70HA2
Hayward Industries
1415 Vantage Park Dr., Suite 400
Charlotte, NC 28203
Phone: (908) 355-7995
www.hayward.com
USE ONLY HAYWARD GENUINE REPLACEMENT PARTS
Contents
Safety Instructions...............1
Getting Started....................2
Installation..........................9
Water Piping.......................11
Electrical Connections........14
Check Out & Start-Up..........16
Maintenance & Service.......24
Troubleshooting................26
51300022501 RevE
Advertisement

Related Manuals for Hayward HP70HA2


Summary of Contents for Hayward HP70HA2
-
Page 1: Table Of Contents
Safety Instructions....1 Getting Started....2 Installation......9 Water Piping.......11 Electrical Connections..14 Check Out & Start-Up..16 Maintenance & Service..24 Troubleshooting....26 HP50HA2 HP70HA2 Hayward Industries 1415 Vantage Park Dr., Suite 400 Charlotte, NC 28203 Phone: (908) 355-7995 www.hayward.com USE ONLY HAYWARD GENUINE REPLACEMENT PARTS... -
Page 2: Safety Instructions
This product must be installed and serviced by authorized personnel, qualified in pool/spa heater installation. Im- proper installation and/or operation can cause death, serious injury and/or property damage. See product rating plate for manufacturer information. SAVE THESE INSTRUCTIONS USE ONLY HAYWARD GENUINE REPLACEMENT PARTS... -
Page 3: Getting Started
Getting Started What to Expect When Operating Your Pool Heater This flow chart provides guidance to protect pool users and product by maintaining good water quality. USE ONLY HAYWARD GENUINE REPLACEMENT PARTS... - Page 4 FIGURE 1: Name of Heat Pump components 4” USE ONLY HAYWARD GENUINE REPLACEMENT PARTS...
- Page 5 CONFORMANCE WITH CODES: The heater shall be installed in accordance with all local and state codes and with the requirements of the authority having jurisdiction of the installing site. The heater installation must conform to the latest edition of the above listed installation codes. USE ONLY HAYWARD GENUINE REPLACEMENT PARTS...
- Page 6 NOT use an extension cord to connect unit to electric supply. Provide a properly located electrical receptacle. To reduce the risk of electric shock replace damaged wiring immediately. Locate conduit to prevent abuse from lawn mowers, hedge trimmers and other equipment. Do NOT ground to a gas supply line. FIGURE 2a: Single Phase Wiring Diagram HP50HA2 USE ONLY HAYWARD GENUINE REPLACEMENT PARTS...
- Page 7 Mechanical Entrapment - There is potential for jewelry, swimsuit, hair decorations, finger, toe or knuckle to be caught in an opening of a suction outlet cover resulting in mechanical entrapment. USE ONLY HAYWARD GENUINE REPLACEMENT PARTS...
- Page 8 Do NOT ground to a gas supply line. WARNING Risk of Electric Shock. Failure to ground all electrical equipment can cause serious or fatal electrical shock hazard. Electrical ground all electrical equipment before connecting to electrical power supply. USE ONLY HAYWARD GENUINE REPLACEMENT PARTS...
- Page 9 Failure to perceive heat. • Failure to recognize the need to leave the spa. • Physical inability to exit the spa. • Fetal damage in pregnant women. • Unconsciousness resulting in danger of drowning. USE ONLY HAYWARD GENUINE REPLACEMENT PARTS...
-
Page 10: Installation
(2) as required For above ground installations: 1 1/2inch PVC pipe Schedule 40 or 1 1/2 in clear vinyl tubing. The HP50HA2 comes with the required barb adapter for tubing connection. Included barbed plastic condensation drain fitting is for use on underside of unit base. This fitting is designed to accept 3/4” clear vinyl tubing and should be run to a suitable drain. - Page 11 If possible, the pad should be placed at the same level or slightly higher than the filter system equipment pad. FLOORING: This heater may be installed on either non-combustible flooring or combustible flooring that does not reduce the bottom clearance of the heater. Ultralite™ or equivalent concrete-over-foam HVAC pads are acceptable. USE ONLY HAYWARD GENUINE REPLACEMENT PARTS...
-
Page 12: Water Piping
Figure5. Install a separate positive seal corrosion resistant check valve between the heater outlet and the chlorinator to prevent highly concentrated sanitizer from back siphoning into the heater. Back siphoning may occur when the pump is shut off and a pressure differential is created. USE ONLY HAYWARD GENUINE REPLACEMENT PARTS... - Page 13 However, if there is any chance of “back-siphoning” of hot water when the pump stops running, it is suggested that a check valve be used on the heater outlet pipe down stream of bypass system. USE ONLY HAYWARD GENUINE REPLACEMENT PARTS...
- Page 14 (except gas piping), and conduit within 5 ft. (1.5 m) of inside walls of swimming pool or spa. IMPORTANT - Reference NEC codes for all wiring standards including, but not limited to, grounding, bonding and other general wiring procedures. USE ONLY HAYWARD GENUINE REPLACEMENT PARTS...
-
Page 15: Electrical Connections
All remote wiring must be run in a conduit separate from incoming power. Use 22 AWG wire for runs less than 30 feet. Use 20 AWG wire for runs over 30 feet. The maximum allowable run is 200 feet. USE ONLY HAYWARD GENUINE REPLACEMENT PARTS... - Page 16 30 ft) for the connection from the Omni control to the HP70HA2. Route the cable through appropriate knockouts making sure they are not shared with high voltage wiring. Refer to the diagram below showing a Hayward OmniLogic control wired to the heat pump. Note that the position of each colored conductor is the same at both ends of the communication cable.
-
Page 17: Check Out & Start-Up
DOWN - Press this key UP - Press this key to to select the downward select the upward option option or decrease the or increase the parameter parameter value. value. USE ONLY HAYWARD GENUINE REPLACEMENT PARTS... - Page 18 Target Temperature Increments: Pressing the UP or DOWN key for less than 2 seconds will change the target temperature by increments of 0.1°F/°C. Pressing and holding the UP or DOWN key for longer than 2 seconds will change the target temperature by increments of 1°F/°C. USE ONLY HAYWARD GENUINE REPLACEMENT PARTS...
- Page 19 With the heater on, press the UP key for 2 seconds. The controller will buzz and the interface will flicker, indicating that the outlet water temperature is dis- played. After 10 seconds of no operation or pressing the the ON/OFF key, the unit will return to the main interface. Heater On - Main Interface Outlet Temperature Display (flickering) USE ONLY HAYWARD GENUINE REPLACEMENT PARTS...
- Page 20 Follow the steps below to enable bypass operation. From the main interface, press and hold the UP and DOWN keys for 10 seconds to enter the password setting interface. Heater On - Main Interface Password Setting Interface USE ONLY HAYWARD GENUINE REPLACEMENT PARTS...
- Page 21 Use the UP and DOWN keys to select the parameter “b”. Press and hold the UP and DOWN keys for 1 second to enter the bypass operation setting interface. User Setting Interface Bypass Operation Setting Interface (Parameter “b” selected) USE ONLY HAYWARD GENUINE REPLACEMENT PARTS...
- Page 22 NOTE: If a fault occurs, the error code will be displayed on the heater interface and no opera- tions can be performed. If the fault is cleared, the heater interface will return to the “rC” display. Remote Control Interface (Only displayed when connected to an Omni Control system) USE ONLY HAYWARD GENUINE REPLACEMENT PARTS...
- Page 23 After changing the setting values, wait 5 seconds for the unit to save the settings and return to the clock setting interface. Use the UP and DOWN keys to select the next clock or timer setting that you would like to adjust until you are finished. USE ONLY HAYWARD GENUINE REPLACEMENT PARTS...
- Page 24 AI/DIO7 Water output temperature (input) CN12 Program port AI/DIO8 Coil 1 temperature (input) CN13 Centralized control communication port Wire Control Interface Definition Sign Meaning 485B 485A 12V (power +) Communication signal GND (power -) USE ONLY HAYWARD GENUINE REPLACEMENT PARTS...
-
Page 25: Maintenance & Service
- to name a few. Improper chemistry (See Table4) balance and mineral content can cause scaling and deposits to form on pool walls, in the filtration system, in the heat exchanger tubes and additionally can promote corrosive USE ONLY HAYWARD GENUINE REPLACEMENT PARTS... - Page 26 Always disconnect power circuit before connecting the heat pump, or working on the heat pump. This equipment contains wiring that carries high voltage. Contact with these wires could result in death or personal injury and/or may also cause property damage. USE ONLY HAYWARD GENUINE REPLACEMENT PARTS...
-
Page 27: Troubleshooting
- To avoid possible outer jacket damage or injury: (1) no materials should be stored against the jacket and (2) care should be taken to avoid unnecessary contact (especially by children) with the jacket. USE ONLY HAYWARD GENUINE REPLACEMENT PARTS... - Page 28 1. Install a new fan motor Fan Motor 2 Fault 2. Wire connection between DC fan motor module 2. Check the wire connection and make sure they are and fan motor is in bad contact in good contact USE ONLY HAYWARD GENUINE REPLACEMENT PARTS...
- Page 29 Check and adjust the current EEPROM Overcurrent Warning MCU error Check if the chip is damaged and replace if necessary V15V Over/Undervoltage Fault V15V is overloaded or undervoltage Check the V15V input voltage (range: 13.5V to 16.5V) USE ONLY HAYWARD GENUINE REPLACEMENT PARTS...
- Page 30 NOTES USE ONLY HAYWARD GENUINE REPLACEMENT PARTS...
- Page 31 NOTES USE ONLY HAYWARD GENUINE REPLACEMENT PARTS...
- Page 32 All other trademarks not owned by Hayward are the property of their respective owners. Hayward is not in any way affiliated with or endorsed by those third parties. For patent information, refer to www.hayward.com/patents. USE ONLY HAYWARD GENUINE REPLACEMENT PARTS...
Need help?
Do you have a question about the HP70HA2 and is the answer not in the manual?
Questions and answers