
Related Manuals for Braun CENTURY Series


Summary of Contents for Braun CENTURY Series
-
Page 2: Warranty Card
Serial Number Identification Tag Numbers Letters for for Series Series Code Code Warranty Card Must be filled out to activate the 5yr warranty One copy for the dealer & one for end user Fill out the warranty card and send it in. - Page 3 Note cylinder for Rollstop One piece activation foot Page 1...
- Page 4 Page 2...
- Page 5 Stow Block Adjustments Stow Block Kit Even space between 28751A Vertical Arm and Platform, Top to Bottom. Lift Adjustments Tighten Loosen Here Here Tighten Here Loosen Here Base plate shim # 34939ks Page 3...
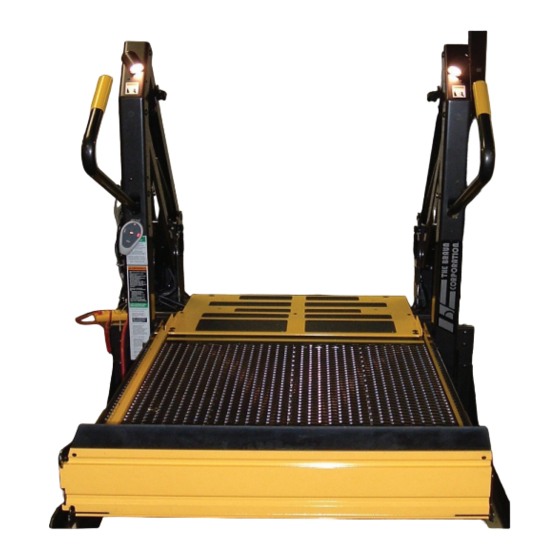
- Page 6 Millennium Platform Angle Adjustment Adjust platform angle so Angle A equals Angle B 1” Century/Vista Platform Angle Adjustment Page 4...
- Page 7 Tower 3 & 4 Tower 1 & 2 controls the control the switching of the position of the pump pressure platform and for the fold bridge plate at safety. Tower 3 vehicle floor at the same time level controls when the threshold alarm can activate.
- Page 8 Outter barrier Relief adjust Platform fold Millennium only adjustment screw Dual Relief Adjustment century or vista 9/16 Ford spark plug socket Page 6...
- Page 9 Page 7...
- Page 10 REMOVE VENT LINE FROM REAR OF ALL CYLINDERS IF STEADY DRIP OR STREAM OF FLUID IS PRESENT, REPLACE CYLINDERS MUST REMOVE LINE FROM FITTING ON CYLINDER, NOT AT RESERVIOR CAP!!! Hydraulic fluid is Exxon Univis HVI 26 Braun part number 32840ks Page 8...
- Page 11 Lift must have a minimum of 11 volts while pump is running w/engine off !! Volt meter com to pump ground Red lead to power stud Attach the lift ground cable to the vehicles frame Page 9...
-
Page 12: Interlock Connection
Lift Power Source Interlock connection control circuit The interlock input is now 12 volt supply a 12V signal on gray w/red It supplies Interlock 12V to the jumper prt # on off switch 31797A Page 10... - Page 13 Redundant Relay Protects Against Welded Up Solenoid Troubleshooting The Redundant Relay Re -set the breaker. Does it fail right away? Yes. Tighten all main power & Replace the “UP” Solenoid. ground cables. Operate the lift. Does the breaker fail when “UP” or “FOLD”...
- Page 14 Page 12...
- Page 15 Page 13...
- Page 16 Page 14...
- Page 17 Page 15...
- Page 18 Page 16...
- Page 19 Page 17...
- Page 20 Page 18...
- Page 21 Page 19...
- Page 22 Page 20...
- Page 23 Page 21...
- Page 24 Page 22...
- Page 25 Page 23...
- Page 26 Page 24...
- Page 27 Page 25...
- Page 28 Page 26...
- Page 29 Page 27...
- Page 30 Page 28...
- Page 31 Page 29...
- Page 32 Page 30...
- Page 33 Page 31...
- Page 34 Page 32...
- Page 35 Page 33...
- Page 36 Page 34...
- Page 37 Page 35...
- Page 38 Page 36...
- Page 39 Page 37...
- Page 40 Page 38...
- Page 41 Page 39...
- Page 42 Page 40...
- Page 43 Page 41...
- Page 44 Page 42...
- Page 45 Page 43...
- Page 46 Page 44...
- Page 47 Page 45...
- Page 48 LCD Lift Codes To better understand the Braun LCD Trouble shooting display you must first understand the numbers that appear on the screen. There are Flashing Codes, Solid Error Codes, and Solid Normal Operational Codes. Flashing Codes #65-89: About 10 seconds after an operation has stopped there are a set of scrolling flashing numbers that indicate whenever a particular sensor or switch has been activated.
- Page 49 LCD Lift Codes Listed below are codes that the lift controller outputs during lift operation. The codes will be displayed on an LCD screen located on the lift control board inside the pump module. See the Manual Operating Instructions in the operator's manual for pump cover removal instructions.
- Page 50 SOUTH POLE MUST FACE SWITCH If a sensor is not working make sure the south side of the magnet is facing the sensor. The sensor will have a white dot on the south side. Sensor logic • 8 volt input •...
- Page 51 Rollstop Raised Probing yellow wire Understand the difference between 8v and 12v volts when checking the signal from the sensor. 8 or 9 volts when the sensor is activated. Rollstop Deployed Probing yellow wire Then 11 to 12 volts when the sensor is not activated. Remember the 11 volts you see is a back feed from the circuit board.
- Page 52 Millenium with Rotary Encoder Series 02 - C5 Lift Condition Threshold(A) Threshold (B) Bridge Ground IB Raised Barrier Codes Latched Detect Barrier jumper Occupied Occupied Occupied Occupied Stowed Free Fold Zone Occupant Detect Zone Floor Level 1" Below Floor Level Inner Roll Stop Locked 1 Foot Off Ground Ground Level ( Not Bridged)
- Page 53 NOTES Page 51...
- Page 54 10,000 cycles and the cost of labor to repair or replace those parts for one (1) year or 3,000 cycles. If The Braun Corporation receives the warranty registration card within 20 days after the lift is put into service, the warranty labor coverage will increase from one (1) year or 3,000 cycles to three (3) years or 10,000 cycles.
-
Page 55: How To Get Service
(30) days for repairs to be com- pleted, you must, to the extent permitted by law, notify Braun directly, in writing, at the above address, of the unsuccessful repair(s) of the alleged defect(s) so that Braun can become directly involved in providing service pursuant to the terms of this limited warranty. -
Page 56: Legal Remedies
You must inspect the product for this type of damage when you take delivery. If you find any such defect or damage you must notify the selling dealer, or Braun, at the time of delivery to have these items covered by this limited warranty and to have work performed on the items at no cost to you as provided by this limited warranty.
Need help?
Do you have a question about the CENTURY Series and is the answer not in the manual?
Questions and answers