Advertisement
Analog Chronographs ........................................................... 4
Chrono Type I & II............................................................... 4
Chrono Type III & IV ......................................................... 16
Chrono Type V................................................................... 26
Analog/Digital Chronographs ............................................ 35
Automatic Chronographs .................................................... 43
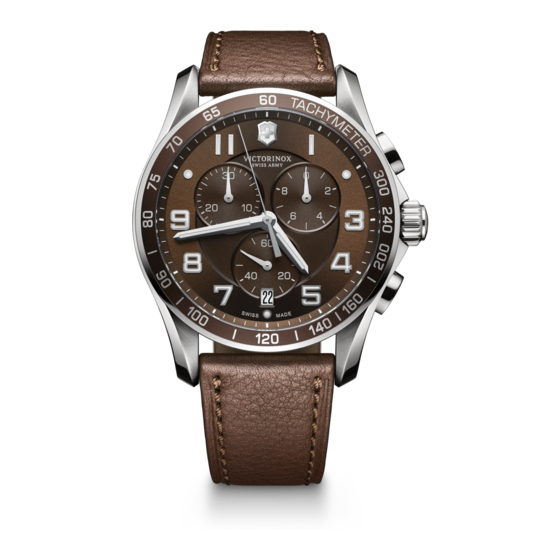
Tachymeter Feature .............................................................. 47
Ratchet Bezel Feature ........................................................... 49
Water-Resistance ................................................................... 50
Battery ...................................................................................... 51
Advertisement
Table of Contents

Related Manuals for Victorinox CHRONOGRAPH


Summary of Contents for Victorinox CHRONOGRAPH
-
Page 1: Table Of Contents
Analog Chronographs ............4 Chrono Type I & II............... 4 Chrono Type III & IV ............16 Chrono Type V..............26 Analog/Digital Chronographs ..........35 Automatic Chronographs ............ 43 Tachymeter Feature .............. 47 Ratchet Bezel Feature ............49 Water-Resistance ..............50 Battery .................. -
Page 2: Analog Chronographs
CHRONOGRAPH OPERATING PROCEDURE 30-minute One-tenth second timer This chronograph movement features a 30 minute counter, one tenth counter Crown second timer, sweep seconds hand and date calendar. It enables short times to be measured to an accuracy of one tenth of a second Seconds in a 30-minute period. - Page 3 SETTING THE DATE & TIME CHRONO TYPE II The Quick-Set feature allows the hour hand to be advanced without CHRONO TYPE I advancing the minute hand and will also quick-set the calendar. It is A. Pull out the crown to position 2. especially useful when traveling to different time zones, as the hour hand can be rapidly advanced to set the desired time.
- Page 4 D. Push back the crown in to its normal position (1). The date and to turn the crown until the desired time is set. time are now set. Remember that the date advances at 12:00 midnight, not 12:00 noon. TO SET TIME ALONE: Refer to instructions “C“. D.
- Page 5 • Press pusher B to continue timing. • Press pusher A once to start the timing operation: The chronograph has continued its measurement so that the press again to stop timing. tenth of a second hand now reverts to zero and the other hands “fly back”...
-
Page 6: Chrono Type Iii & Iv
• Once the timing operation has been completed, press pusher B. • Pull out the crown to position 2. The hands on the chronograph and totalizer reset to zero. • Press pusher B briefly until the hand reverts to the... -
Page 7: Chrono Type V
Zero Reset of the Tenths of a Second Counter Hand • Press pusher B briefly until the hand reverts to the original position. • Pull out the crown to position 2. Zero Reset of the Tenths of a Second Counter Hand •... - Page 8 B. Turn the crown until the correct date appears. CHRONOGRAPH OPERATING PROCEDURE C. Push the crown back into position 1. Chrono types III & IV feature a 12-hour counter, a 30-minute counter, sweep second hand counter and date calendar. They enable time to NOTE: The date can be changed during the date changing between be measured to an accuracy of one second in a 12-hour period.
- Page 9 Setting the Date and Time CHRONO TYPE III A. Pull out the crown to position 2 (the watch continues Display elements Control buttons to run). B. Turn the crown until yesterday’s date appears. C. Pull out crown to position 3. Second hand Push button A D.
- Page 10 CHRONO TYPE IV The chronograph function records the time of an event in seconds up to 12 hours. Display elements Control buttons Basic Function (Elapsed Time) • Press pusher A (top) once to start the timing operation: Minute hand Push button A press again to stop timing.
- Page 11 To reinitialize the hands, proceed as follows. • Press pusher B to continue timing. The chronograph has continued its measurement so that the CHRONO TYPE III chronograph hands catch-up to allow for the elapsed time.
- Page 12 Zero Reset of the Hour Counter (position 6:00) Zero Reset of the Center Stop Second • Single step: press pusher A briefly. • Single step: press pusher A briefly. • Continuous: press and hold pusher A. • Continuous: press and hold pusher A. Adjusting next hand press pusher B.
- Page 13 (for storage). CHRONOGRAPH OPERATING PROCEDURE Pusher A (at 2 o’clock): Initialization This chronograph movement features a 60 minute counter-hand, a of the 60 second timer hand. 60 second counter hand (both located on center post – silver with red Pusher B: Initialization of the 1/10th tip) and one tenth second indicator.
- Page 14 SETTING THE DATE & TIME (CHRONO TYPE V) INSTRUCTIONS FOR SCREW DOWN CROWN Remember, the date advances at 12:00 midnight, not 12:00 noon. NOTE: You must always push in and screw down the crown to form a water-resistant seal with the case. Never operate the crown when INSTRUCTIONS FOR PULL OUT CROWN the watch is wet.
- Page 15 until it is sealed tight into its normal position (1). The Measurement of Elapsed Times date and time are now set. • Press pusher A (at 2 o’clock) to start the timing oper- ation. TO SET TIME ALONE: Unscrew the crown by turning it •...
- Page 16 • Press pusher B to continue timing. The chronograph will con- REINITIALIZING THE CHRONOGRAPH HANDS tinue its measurement by reverting the 1/10th hand to zero Following an incorrect activate, violent impact or exposure to a and “flying back” to the elapsed time.
-
Page 17: Analog/Digital Chronographs
Zero Reset of the 1/10th Second Counter ANALOG/DIGITAL CHRONOGRAPHS • Pull out the crown to position 3. • Press pusher B briefly until the hand reverts to the Digital original position (on 0). Display • Push the crown back down firmly against the case to A Start/Stop position 1. - Page 18 DIGITAL DISPLAY ADJUSTING THE DATE, MONTH, DAY Pusher C = MODE By means of the pusher the different functions can be selected. These are: MODE – Date DATE – Second Time Zone (12 or 24 hour display) – Alarm – Chrono (60 Minutes) / LAP By pressing pusher A + B simultaneously when the date or the sec- 3 sec.
- Page 19 ADJUSTING THE DATE, MONTH, DAY (cont.) ADJUSTING THE SECOND TIME ZONE MODE 3 sec. C or B...
- Page 20 ADJUSTING THE ALARM USING THE CHRONOGRAPH MODE MODE START/STOP ALARM ON - OFF ALARM ON - OFF RESET...
-
Page 21: Automatic Chronographs
LAP TIME AUTOMATIC CHRONOGRAPH (SELF-WINDING MECHANICAL WATCH) The chronograph movement indicates the hours, minutes, seconds and date and enables short times to be measured to an accuracy of 1/5th of a second in a 12 hour period. The crown C has three positions •... - Page 22 SETTING THE TIME • Push-piece A: Chronometer start/stop • Wind the movement if necessary. • Push-piece B: Chronograph zero reset. • Pull the crown out to position 3. The seconds hand will stop. Watch Indications • If your watch indicates the date, make sure that the position of the...
-
Page 23: Tachymeter Feature
• Pull the crown out to position 2. • Once the timing operation has stopped, press push-piece B. The chronograph and totalizer hands are reset to zero. • Turn the crown clockwise until the correct date appears. • Push the crown back down firmly against the case to position 1. -
Page 24: Ratchet Bezel Feature
TO MEASURE SPEEDS OF TRAVEL: RATCHET BEZEL (Available on select models only) 1. Assume you wish to measure a car’s average speed over a one The rotating ratchet bezel, available on select models only, was mile course. Start the stopwatch when the car passes the starting designed to enable divers to time dives, but can be used to measure point. -
Page 25: Water-Resistance
Please check the indication of water resistance on the case back of Your timepiece may be powered by a 1.55 volt silver oxide watch your Victorinox Swiss Army watch and carefully read the corre- battery. DEAD BATTERIES SHOULD BE REPLACED IMMEDIATELY.
Need help?
Do you have a question about the CHRONOGRAPH and is the answer not in the manual?
Questions and answers