
Related Manuals for Electrolux Professional EHT8I


Summary of Contents for Electrolux Professional EHT8I
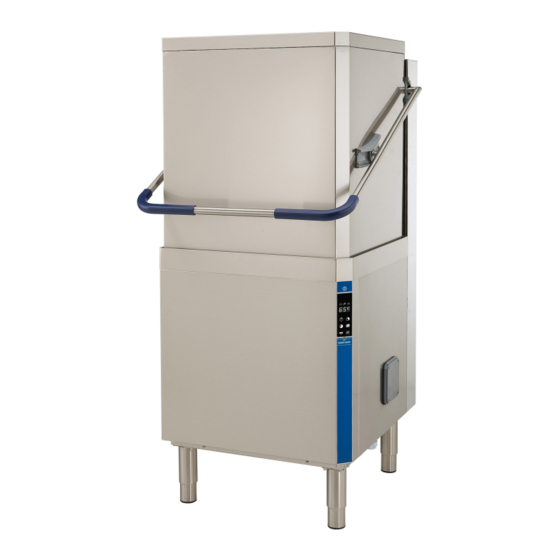
- Page 1 Hood dishwasher Installation manual * 59566WM00- 2022.06 *Original instructions...
- Page 2 Installation diagram Manual hood type (single skin) without drain pump and without Energy Saving Device (ESD)
- Page 3 Installation diagram Manual hood type (single skin) without drain pump and with Energy Saving Device (ESD)
- Page 4 Installation diagram Manual hood type (single skin) with drain pump and without Energy Saving Device (ESD)
- Page 5 Installation diagram Manual hood type (single skin) with drain pump and with Energy Saving Device (ESD)
- Page 6 Installation diagram Manual hood type (double skin) with drain pump and without Energy Saving Device (ESD)
- Page 7 Installation diagram Manual hood type (double skin) with drain pump and with Energy Saving Device (ESD)
- Page 8 Installation diagram Automatic hood type with drain pump and without Energy Saving Device (ESD)
- Page 9 Installation diagram Automatic hood type with drain pump and with Energy Saving Device (ESD)
- Page 10 CWI = Cold water Inlet pipe ⌀=3/4″ G EI = Electrical Inlet WI = Water Inlet pipe ⌀=3/4″ G EQ = Equipotential screw D = Drain pipe internal ⌀=40 mm(ʌ) - 20 mm(*) XD = Inlet pipe for detergents (ʌ) Only for model with free-fall drainage XR = Inlet pipe for rinse-aid (*) Only for model with drain pump XI = Inlet pipe for delime...
- Page 11 Foreword Read the following instructions, including the warranty terms before installing and using the appliance. Visit our website www.electroluxprofessional.com and open the Support section to: Register your product Get hints & tips of your product, service and repair information The installation, use and maintenance manual (hereinafter Manual) provides the user with information necessary for correct and safe use of the appliance.
-
Page 12: Table Of Contents
Contents A SAFETY INFORMATION ........................13 General information ........................13 General safety ........................... 13 Personal protection equipment ...................... 14 Transport, handling and storage ....................14 Installation and assembly ......................15 Water connection........................15 Electrical connection ........................15 Machine cleaning and maintenance....................16 Service............................. -
Page 13: Asafety Information
SAFETY INFORMATION General information These appliance is intended to be used for commercial applications, for example in kitchens of restaurant, canteens, hospitals. It must be used for washing plates, dishes, glassware, cutlery and similar articles. To ensure safe use of the machine and a proper understanding of the manual it is necessary to be familiar with the terms and typographical conventions used in the documentation. -
Page 14: Personal Protection Equipment
• Remove any flammable products or items from the work area. • Machine positioning, installation and disassembly must be carried out by the specialised personnel in conformity with the current safety regulations, regarding the equipment used and the operating procedures. Personal protection equipment Summary table of the Personal Protection Equipment (PPE) to be used during the various stages of the appliance's service life. -
Page 15: Installation And Assembly
• For machine lifting and anchoring, do not use movable or weak parts such as: casings, electrical raceways, pneumatic parts, etc. • Do not push or pull the machine to move it, as it may tip over. Use proper tool to lift the machine. -
Page 16: Machine Cleaning And Maintenance
• To protect the power supply of the machine against short circuits and/or overloads, install a thermal fuse or a suitable automatic thermal magnetic circuit breaker, ADS (Automatic Disconnection of Supply). • To protect the power supply of the machine against current leakages, install a high- sensitivity manual reset RCD (Residual Current Device), suitable for overvoltage category III. -
Page 17: Disposal Of Packing
His professionalism covers the Electrolux Professional spa - Viale Treviso, 15 - 33170 Pordenone (Italy) mechanical, electrotechnical and elec- tronics fields. Danger source of possible injury or harm to health. -
Page 18: Appliance Identification
E = Electrolux, Z = Zanussi, N = To brand, IP25 K = Kipro, A = Alpeninox, H = Hakpro, KXT Electrolux Professional spa - Viale Treviso, 15 - 33170 Pordenone (Italy) = Klumaier X Tanner, V = Veetsan (2) Machine... -
Page 19: Responsibility
This manual is intended solely for consultation by the operator operation and invalidates the original manufacturer and can only be given to third parties with the permission of warranty); Electrolux Professional company. • operations carried out by non-specialised personnel; Keeping the manual • unauthorized modifications or operations;... -
Page 20: Characteristics Of Power Supply
Model NHT8/EHT8/ ZHT8I/AHT8I/ KHT8/HHT8/ EHT8I/NHT8I/ EHT8M/ EHT8M6/ EHT8TIL/ XHT8/ZHT8/ HHT8I/XHT8I/ EHT8IUSPH5 EHT8IUSPH6 ZHT8TIL VHT7/ VHT7I/ Rinse cycle water consumption Boiler capacity Tank capacity Cycle duration in “High 45-84-150 45-84-150 Productivity“ mode sec. 50-84-150 50-84-150 45-84-150 45-84-150 45-84-150 (VHT7G) (VHT7IG) Cycle duration in “NSF/ sec. -
Page 21: Transport: Instructions For The Carrier
Transport: Instructions for the carrier Storage The machine and/or its parts must be stored and protected IMPORTANT from damp, in a non-aggressive place, free of vibrations and The transported load can shift: with room temperatures between -10℃ [14℉] and 50℃ •... -
Page 22: Extraction Hood
Arranging the machine • Adjust the equipment by turning the special adjustable feet and making sure it is perfectly level, both length wise and • Wear protective gloves and unpack the machine. crosswise. • Lift the equipment with a lift truck, remove the base and position it the place of use. -
Page 23: Plumbing Connections
Plumbing circuits Polyethylene Hood dishwasher without drain pump • Outer wrapping • Instructions bag Polypropylene • Straps Polystyrene foam • Corner protectors The parts in wood and cardboard can be disposed of, respecting the current regulations in the country where the machine is used. -
Page 24: E.10 Electrical Connections
Power supply 380-415V 3N~ Hood dishwasher without drain pump and with Energy Saving Device (ESD) Open the power supply terminal board and insert the jumpers provided as follows: one jumper between terminals 2 and 4 and another between terminals 4 and 6. Using a suitable power supply cable (see C.1 Main technical characteristics table), connect the three phases to terminals 1, 3 and 5, the neutral to terminal 6 and the earth wire to the terminal... -
Page 25: E.10.1 Connections Provided For Energy Control
Power supply 220 - 230V 1N Connect the “HACCP“ network to terminals 2 and 3 of connector X4. Open the power supply terminal board and insert the jumpers provided as follows: two jumpers between terminals 1, 3, 5 and another two between terminals 2, 4 and 6. Using a suitable power supply cable (see C.1 Main technical characteristics table), connect the phase and neutral to terminals 5 and 6 respectively and the earth wire to the terminal... -
Page 26: Electrical Connections For Automatic Detergent And Rinse-Aid Dispensers
outside by looking for the counter sunk marks on the • Connect the detergent dispenser between terminals 7 and 9. external panel. These connection points are live for a set time during filling of the tank and at the start of the wash cycle (see paragraph Inside the tank there is a hole “P“... -
Page 27: Basic Controls
Drain / self-cleaning cycle Wash cycle 1 “Delime“ cycle This button starts Wash cycle 1. When the cycle is selected, ACTIVE / WASH SAFE CONTROL the button indicator is lit up. This cycle is recommended for washing not very dirty dishes. LED bar Active/Wash Safe Control indicator In the Active/Wash Safe Control... -
Page 28: Hbasic Machine Setup
NOTE! To obtain excellence washing performance, use detergent, rinse aid and descaling agent sug- gested by Electrolux Professional. In the Electrolux Professional web site, open the “Accessories and Consumables“ web page and navigate into the dishwashing equipment tab to order most suitable detergents and accessories. -
Page 29: Note For External Dispenser
3. select the parameter dIn; Parameter description Value Unit of measure of dispensers (G-L = g/l or SEC = seconds) Initial amount of 2.00 g/l detergent Initial amount of 0.12 g/l rinse-aid Amount of deter- 2.00 g/l gent during the cycle Amount of rinse- 0.12 g/l... -
Page 30: Idishwasher With Incorporated Continuous Water Softener
Example 1 Suggestion: to check the effectiveness of the rinse-aid, look at freshly washed glasses against the light. Drops of Supposing that an external detergent dispenser has been water remaining on the glass indicate an insufficient amount connected with a tank concentration measuring sensor, a while streaks indicate an excess. -
Page 31: Jtroubleshooting
NOTE! • Pour approx. 2 kg of coarse salt [NaCl] in container “A“ (an The salt container always has water in it, there- amount sufficient to fill the salt container up to the rim) using fore it is normal if water comes out during filling. the special funnel supplied. - Page 34 Electrolux Professional SPA Viale Treviso 15 33170 Pordenone www.electroluxprofessional.com...
Need help?
Do you have a question about the EHT8I and is the answer not in the manual?
Questions and answers