
Related Manuals for AZENTA IntelliXcap 48


Summary of Contents for AZENTA IntelliXcap 48
-
Page 1: Cover
IntelliXcap Automated Screw Cap Decapper Re-Capper User Manual 24, 48, 96 and Extended Height 319430 Revision C... - Page 2 © 2023 Azenta US, Inc. All rights reserved. The information included in this manual is proprietary information of Azenta US, Inc. and is provided for the use of Azenta US, Inc. customers only and cannot be used for distribution, reproduction, or sale without the express written permission of Azenta US, Inc.
- Page 3 200 Summit Drive, 6th Floor Burlington, MA 01803 U.S.A. European Union Representative Im Leuschnerpark 1B 64347 Griesheim, Germany For Technical Support: Location Contact Number Website North America +1-800-379-7221 +41-31-770-7373 Europe www.azenta.com +44-161-777-2107 Japan +81-3-6628-2950 Copyright © 2023, Azenta US, Inc.
-
Page 4: Revision History
Part Number: 319430 Rev. C Revision History Part Number: 319430 IntelliXcap User Manual Revision Date Revision A 19 DEC 2018 Revision B 25 AUG 2021 Revision C 30 JAN 2023 Copyright © 2023, Azenta US, Inc. -
Page 5: Table Of Contents
Site Requirements Space Requirements Environmental Requirements Electrical Requirements 4. Installation Unpacking Safety Requirements Preparation Package Contents Procedure Repacking Safety Requirements Procedure 5. Operation Overview Theory of Operation Basic Process LED Indicators Starting the Product Copyright © 2023, Azenta US, Inc. - Page 6 Maintenance Schedule Viewing Machine Servicing and Cartridge Replacement Intervals Schedules and Procedures Parts Cleaning Inspecting the Cartridge Waste Disposal System Test 7. Troubleshooting Error Messages Technical Support Error Recovery Manual Recovery Appendix A: Integrating the IntelliXcap Copyright © 2023, Azenta US, Inc.
-
Page 7: Safety
This product is intended for use by industrial customers and should be serviced only by Azenta or Azenta trained representatives. The service manuals and related materials are provided in English at no charge and are intended for use by experienced technicians. -
Page 8: Explanation Of Hazards And Alerts
Indicates a situation or unsafe practice which, if not avoided, may result in equipment damage. Notice signal word is white on blue background with no icon. Copyright © 2023, Azenta US, Inc. -
Page 9: Alert Example
The following is an example of a Warning hazard alert. Figure 1-1: Components of a Safety Alert Number Description How to Avoid the Hazard Source of Hazard and Severity General Alert Icon Signal Word Type of Hazard Hazard Symbol(s) Copyright © 2023, Azenta US, Inc. -
Page 10: Regulatory Compliance And Declaration Of Conformity
The IntelliXcap meets the requirements of the European Union’s Machinery Directive 2006/42/EC and 2014/30/EU as a completed machine. In accordance with the Directive, Azenta Life Sciences has issued a Declaration of Conformity and the IntelliXcap has a CE mark affixed. -
Page 11: General Safety Considerations
Use of this product in a manner or for purposes other than for what it is intended may cause equipment damage or personal injury. Only use the product for its intended application. Do not modify this product beyond its original design. Always operate this product with the covers in place. Copyright © 2023, Azenta US, Inc. - Page 12 The IntelliXcap can only be used with tubes and cartridges that have been configured and tested. Do not use altern- ative tubes and cartridges that have not been configured and tested. Copyright © 2023, Azenta US, Inc.
-
Page 13: Safety Functions
Untrained or improperly equipped personnel performing this procedure may cause damage to the equipment. Only Azenta Life Sciences trained personnel should perform this procedure. Personnel performing this procedure must read and understand this procedure and have the proper tools and supplies ready before starting. -
Page 14: Safety Door
Opening of the access door while tool is in use initiates an immediate stop function of all moving parts. This function protects operators against hazardous moving parts accessible through the front of the IntelliXcap. Copyright © 2023, Azenta US, Inc. - Page 15 All energy must be removed from the equipment per the facility’s Lockout/Tagout procedure before servicing. If local procedures are not available, follow the procedure for Lockout/Tagout in OSHA Standard 29CFR 1910.147. Copyright © 2023, Azenta US, Inc.
- Page 16 1. Safety IntelliXcap Automated Screw Cap Decapper Re-Capper Safety Functions Part Number: 319430 Rev. C Copyright © 2023, Azenta US, Inc.
-
Page 17: Overview
2. Overview This manual describes the proper use of the machine. The IntelliXcap is a new generation of sample-tube de-/re-capper, which is comprised of a basic chassis assembly and a screwing-head module. This includes interchangeable cap-driver cartridges that allow the user to change the tube type that needs to be decapped. The IntelliXcap is equipped with a light curtain which reduces the risk of damage to tubes, samples and the instrument that could be caused by failed de-capping / capping or the use of incorrect consumables. -
Page 18: Concepts And Terminology
The IntelliXcap is intended for use in a laboratory environment by trained laboratory personnel and should be serviced only by Azenta or Azenta trained representatives. The manuals and related materials are intended for use by trained and experienced technical personnel. - Page 19 16-bit address for a particular register, which is also a 16-bit value. Development environment by Microchip Technology, used for developing firmware for their MPLABX range of PIC microcontrollers Profile See 'Cartridge profile'. Profile number Numbered profile which corresponds to cartridge number. Copyright © 2023, Azenta US, Inc.
-
Page 20: Product Illustration
Setpoints which do not need to be stored in non-volatile memory, e.g. commands. Waste Mode of operation where caps are not refitted but dropped off into a carrier. Working profile See 'Loaded profile'. Product Illustration 46-8018 – IntelliXcap 96 Extended Height Copyright © 2023, Azenta US, Inc. -
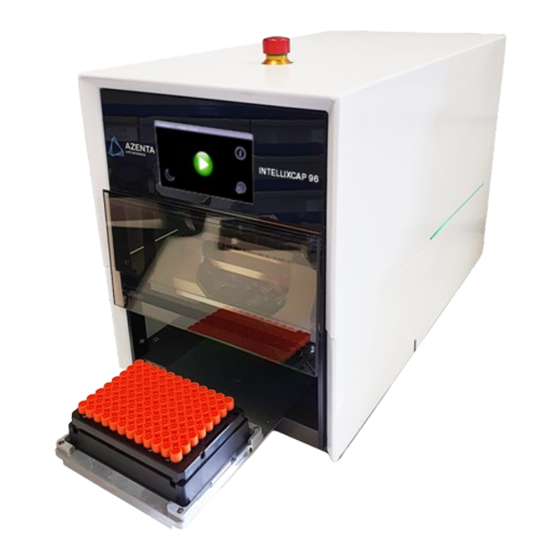
Page 21: 46-8012 - Intellixcap 96
Azenta Life Sciences 2. Overview Part Number: 319430 Rev. C Product Illustration 46-8012 – IntelliXcap 96 46-8011 – IntelliXcap 48 Copyright © 2023, Azenta US, Inc. -
Page 22: 46-8010 - Intellixcap 24
2. Overview IntelliXcap Automated Screw Cap Decapper Re-Capper Product Illustration Part Number: 319430 Rev. C 46-8010 – IntelliXcap 24 Copyright © 2023, Azenta US, Inc. -
Page 23: Specifications And Site Requirements
3. Specifications and Site Requirements Specifications Unit Software and Firmware Table 3-1: Software and Firmware Software/Firmware Version Controller Display Light curtain Site Requirements Space Requirements Ensure enough space is available to accommodate the ejected stage platform. The machine has a rectangular footprint and is regarded as highly stable. - Page 24 3. Specifications and Site Requirements IntelliXcap Automated Screw Cap Decapper Re-Capper Part Number: 319430 Rev. C Figure 3-1: Machine Dimensions Copyright © 2023, Azenta US, Inc.
- Page 25 Distance (when 121 mm 121 mm 121 mm 121 mm ejected) Extended Stage Distance (when 207 mm 207 mm 207 mm 207 mm ejected) System Weight 27 kg 28 kg 22 kg 24 kg Copyright © 2023, Azenta US, Inc.
-
Page 26: Environmental Requirements
Dust 0.1 mg/m and below (non-conductive levels) For use in Pollution Degree 2 environment Pollution Degree Decontamination treatment with Hydrogen Peroxide Gas needs to be avoided as it will damage the electronic parts. Copyright © 2023, Azenta US, Inc. -
Page 27: Electrical Requirements
The machine operates below the noise emissions level: < 70 dB(A) Two fuses: Fuses 250 V, 5A (5x20 mm) IEC 60127 fuse only Not less than 1MΩ at 1,000V Insulation Resistance Phase 1 = 50GΩ Neutral = 50GΩ UI Connection RS 232 cable Copyright © 2023, Azenta US, Inc. - Page 28 3. Specifications and Site Requirements IntelliXcap Automated Screw Cap Decapper Re-Capper Part Number: 319430 Rev. C Copyright © 2023, Azenta US, Inc.
-
Page 29: Installation
4. Installation Read the Safety Chapter Failure to review the Safety chapter and follow the safety warnings can result in death or serious injury. All personnel involved with the operation or maintenance of this product must read and understand the information in this safety chapter. Follow all applicable safety codes of the facility as well as national and international safety codes. -
Page 30: Unpacking
Unpack the kit (as described in "Procedure" on page 33) and inspect and confirm the contents (as described in "Package Contents" on the facing page) are present and correct. Report any missing or damaged items to Azenta Life Sciences. Copyright © 2023, Azenta US, Inc. -
Page 31: Package Contents
CABLE ASSY,POWER,RIGHT ANGLE,C13,3 323305 POLE,US CABLE ASSY,POWER,RIGHT ANGLE,C13,3 323306 POLE,EU CABLE ASSY,PWR CORD,AUS/NZ PLUG TO 334125 90°C13,10A,1.8M 323307 Cable USB A-A 323308 Cable Serial RS 232 IntelliXcap Automated Screw Cap Decap- 319430 per Re-Capper User Manual Copyright © 2023, Azenta US, Inc. - Page 32 4. Installation IntelliXcap Automated Screw Cap Decapper Re-Capper Unpacking Part Number: 319430 Rev. C Product Description Quantity Part Image Code FORM,FACTORY ACCEPTANCE 354817 TEST,INTELLIXCAP 96 CUSTOMER CFAT,INTELLIXCAP 24, 48 AND 322663 Copyright © 2023, Azenta US, Inc.
-
Page 33: Procedure
Azenta Life Sciences 4. Installation Part Number: 319430 Rev. C Unpacking Procedure Step Action Unscrew the lid and remove it from the wooden crate. Remove the foam support from each top corner. Copyright © 2023, Azenta US, Inc. - Page 34 4. Installation IntelliXcap Automated Screw Cap Decapper Re-Capper Unpacking Part Number: 319430 Rev. C Step Action With two people, remove the outer cardboard box. Open the outer cardboard box. Copyright © 2023, Azenta US, Inc.
- Page 35 Azenta Life Sciences 4. Installation Part Number: 319430 Rev. C Unpacking Step Action Remove the foam support from each top corner. Copyright © 2023, Azenta US, Inc.
- Page 36 Remove the box that is located down the side of the outer cardboard box. The box contains documentation, cables and any cartridges. Ensure that all parts are included as described in "Package Contents" on page Copyright © 2023, Azenta US, Inc.
- Page 37 Remove the foam supports from the top of the IntelliXcap. With two people, carefully lift the IntelliXcap system out of the inner cardboard box by the blue straps and place it on a flat surface that can hold 30 kg. Copyright © 2023, Azenta US, Inc.
- Page 38 IntelliXcap Automated Screw Cap Decapper Re-Capper Unpacking Part Number: 319430 Rev. C Step Action Remove the blue straps and set them aside. Remove the anti-static bag and set it aside as it is required for Step 20. Copyright © 2023, Azenta US, Inc.
- Page 39 Twist to release the e-stop button so that a green ring is visible below the red knob. Connect the power cable from the instrument back to the electrical power socket (100/240VAC). NOTE: Ensure that the door is free from obstructions, and that there is nothing in front of the instrument. Copyright © 2023, Azenta US, Inc.
- Page 40 The system initializes and displays the No cartridge fitted pop-up. Press the OK button. The door closes and the system initializes the sequence of installing a cartridge. The door then opens and the tray extends. Copyright © 2023, Azenta US, Inc.
- Page 41 Remove the foam block used to secure the IntelliXcap stage in place. Stick all provided plastic shipping tape to the foam block. Place the straps, foam block and shipping tape inside the anti-static bag and save them. They will be needed if shipping the system. Copyright © 2023, Azenta US, Inc.
- Page 42 4. Installation IntelliXcap Automated Screw Cap Decapper Re-Capper Unpacking Part Number: 319430 Rev. C Step Action Load the required cartridge onto the stage. Copyright © 2023, Azenta US, Inc.
-
Page 43: Repacking
Use the provided straps installed around the unit when removing the IntelliXcap from the packaging. When lifting the IntelliXcap, use the cavity in its back and tilt the IntelliXcap to secure the bottom front of the instrument. Copyright © 2023, Azenta US, Inc. -
Page 44: Procedure
4. Installation IntelliXcap Automated Screw Cap Decapper Re-Capper Repacking Part Number: 319430 Rev. C Figure 4-1: Lifting the IntelliXcap Procedure Step Action Power on the IntelliXcap. Copyright © 2023, Azenta US, Inc. - Page 45 Azenta Life Sciences 4. Installation Part Number: 319430 Rev. C Repacking Step Action Press the Settings button. Press the Cartridge Change button. Copyright © 2023, Azenta US, Inc.
- Page 46 4. Installation IntelliXcap Automated Screw Cap Decapper Re-Capper Repacking Part Number: 319430 Rev. C Step Action Remove the cartridge. Copyright © 2023, Azenta US, Inc.
- Page 47 Repacking Step Action Remove and set aside any shipping plastic tape from the foam block, then place the foam block on the stage. Press the Next button. The tray retracts and the head lowers. Copyright © 2023, Azenta US, Inc.
- Page 48 When the head lowers to the position shown below and begins to compress the foam block, press the E- Stop button to stop the process and lock the head in place. Release the E-stop button. Power off the IntelliXcap. Disconnect all cables from the equipment. Copyright © 2023, Azenta US, Inc.
- Page 49 Close the door and apply the plastic shipping tape from the base to the door (as shown below) to lock the door. Move the crate and provided packaging equipment (straps and foam blocks) to an appropriate pack- aging area. Place the IntelliXcap inside the provided anti-static bag. Copyright © 2023, Azenta US, Inc.
- Page 50 Wrap both straps around the equipment using the provided foam pads to protect the case from the metal strap buckles. With two people, carefully lift the IntelliXcap system and place it inside the provided cardboard box. Copyright © 2023, Azenta US, Inc.
- Page 51 Azenta Life Sciences 4. Installation Part Number: 319430 Rev. C Repacking Step Action Add the foam blocks that lock the instrument in place. Seal the box with parcel tape. Copyright © 2023, Azenta US, Inc.
- Page 52 4. Installation IntelliXcap Automated Screw Cap Decapper Re-Capper Repacking Part Number: 319430 Rev. C Step Action Pack all cables in the small box. Copyright © 2023, Azenta US, Inc.
- Page 53 Azenta Life Sciences 4. Installation Part Number: 319430 Rev. C Repacking Step Action Slide the small box down the side of the larger one. Place the foam supports in each top corner. Copyright © 2023, Azenta US, Inc.
- Page 54 IntelliXcap Automated Screw Cap Decapper Re-Capper Repacking Part Number: 319430 Rev. C Step Action Seal the box with parcel tape. With two people, place the cardboard box into the crate. Place the foam supports in each top corner. Copyright © 2023, Azenta US, Inc.
- Page 55 Azenta Life Sciences 4. Installation Part Number: 319430 Rev. C Repacking Step Action Screw the lid onto the crate. Copyright © 2023, Azenta US, Inc.
- Page 56 4. Installation IntelliXcap Automated Screw Cap Decapper Re-Capper Repacking Part Number: 319430 Rev. C Copyright © 2023, Azenta US, Inc.
-
Page 57: Operation
5. Operation Overview This chapter provides complete operation directions for the Azenta Life Sciences IntelliXcap. The operation of the IntelliXcap is covered for both normal operating conditions and emergency conditions. The IntelliXcap shall be screened off appropriately before operation and it must only be used to remove and replace screw caps on micro tubes in specific, SBS-footprint rack types. -
Page 58: Theory Of Operation
NOTE: If the instrument detects that the tube rack is of a height different to that expected, it returns an error message. The IntelliXcap de-caps or caps all of the tubes. NOTE: The time for required to de-cap or re-cap varies from 20–40 seconds. Copyright © 2023, Azenta US, Inc. -
Page 59: Led Indicators
Do not change settings. It is the responsibility of each person working on this product to know the applicable regulatory safety codes as well as the facility safety procedures, safety equipment, and contact information. Copyright © 2023, Azenta US, Inc. - Page 60 Connect the power cable into the electrical power socket (100/240VAC) on the back of the device. Ensure that the door is free from obstructions, and that there is nothing in front of the instrument. Copyright © 2023, Azenta US, Inc.
- Page 61 Turn the IntelliXcap on, using the switch at the rear of the system. The IntelliXcap starts up and begins the Initialization process. NOTE: During this process, the door opens and the stage moves into its extended position. Once initialization is complete, the Home screen is displayed. Copyright © 2023, Azenta US, Inc.
-
Page 62: Capping The Tubes
Part Number: 319430 Rev. C De-Capping the Tubes Step Action Ensure that the correct cartridge for the tray is inserted. See "Manage the Cartridges" on page 68 Place the rack of capped tubes on the tray. Copyright © 2023, Azenta US, Inc. - Page 63 The instrument confirms the height of the tubes. If the height scan is successful, the machine begins de-capping. NOTE: If the instrument detects that the tube rack is of a height different to that expected, it returns an error message. Copyright © 2023, Azenta US, Inc.
- Page 64 If required, you can stop the current process by pressing the E-Stop button on the top of the unit. NOTE: You can continue to de-cap after pressing the E-stop. On completion, the de-capped tubes are returned via the tray. Copyright © 2023, Azenta US, Inc.
-
Page 65: Re-Capping The Tubes
Re-Capping the Tubes Re-Capping the Tubes Once the de-capping process has finished, the IntelliXcap is ready to start the re-capping process. Step Action When ready, place the rack of uncapped tubes back on the tray. Copyright © 2023, Azenta US, Inc. - Page 66 The instrument scans and detects the correct height of the tubes. The machine begins the recapping process. NOTE: If the instrument detects that the tube rack is of a height different to that expected, it returns an error message. Copyright © 2023, Azenta US, Inc.
- Page 67 If required, you can stop the current process by pressing the E-Stop button on the top of the unit. NOTE: You can continue to re-cap after pressing the E-stop. On completion, the re-capped tubes are returned via the tray. Copyright © 2023, Azenta US, Inc.
-
Page 68: Manage The Cartridges
Table 5-2: IntelliXcap 96 Part IntelliCartridges for IntelliXcap 96 Description (single cartridge) Number IntelliXcap Automated Screw Cap Decapper Cartridge, 96 format, for Azenta Life Sciences internal 48-8013-01 thread IntelliXcap Automated Screw Cap Decapper Cartridge, 96 format, for Azenta Life Sciences external... - Page 69 Table 5-3: IntelliXcap 48 Part IntelliCartridges for IntelliXcap 48 Description (single cartridge) Number IntelliXcap Automated Screw Cap Decapper Cartridge, 48 format, for Azenta Life Sciences external 48-8015-01 thread IntelliXcap Automated Screw Cap Decapper Cartridge, 48 format, for Azenta Life Sciences and...
-
Page 70: Change Cartridge
Part Number: 319430 Rev. C Part IntelliCartridges for IntelliXcap 24 Description (single cartridge) Number IntelliXcap Automated Screw Cap Decapper Cartridge, 24 format, for Azenta Life Sciences 4ml 48-8017-10 glass vials IntelliXcap Automated Screw Cap Decapper Cartridge, 24 format, for Azenta Life Sciences 6ml... - Page 71 Azenta Life Sciences 5. Operation Part Number: 319430 Rev. C Manage the Cartridges Step Action Ensure there is nothing on the stage. Press the Settings button on the Home screen. Select Cartridge Change. Copyright © 2023, Azenta US, Inc.
- Page 72 The stage moves inside the unit and the cap-driver cartridge is lowered and placed onto the stage. When the homing process is complete, place the new cartridge on the stage. NOTE: Verify the cartridge fits the alignment inserts on the sides of the stage’s frame. Copyright © 2023, Azenta US, Inc.
- Page 73 The head carries out a re-initialization process which needs to be completed before the first de-capping process can be carried out. Cartridge ID is 15 If the cartridge ID number is 15, the following screen is displayed. This screen allows you to do the following. Copyright © 2023, Azenta US, Inc.
- Page 74 If you have inserted the wrong cartridge, press the Cartridge Change button to eject it. Load a Stored Profile Step Action Press the Load stored profile button. Enter an extended profile number (between 16–96). Copyright © 2023, Azenta US, Inc.
- Page 75 Load and Use a New Profile Step Action Connect the USB. NOTE: When the USB lead is plugged in, the LCD display is disabled and a warning dialog is displayed. Load in the profile using Datalogger. Copyright © 2023, Azenta US, Inc.
- Page 76 5. Operation IntelliXcap Automated Screw Cap Decapper Re-Capper Manage the Cartridges Part Number: 319430 Rev. C Step Action Unplug the USB. Press the Use loaded profile button. A confirmation message is displayed. Press OK. Press Done. Copyright © 2023, Azenta US, Inc.
-
Page 77: Manage Setpoints
Manage Setpoints Setpoints are configurable parameters which define machine operation. There are occasions when you might change setpoints under the instruction of Azenta service or engineering staff. For example, if the IntelliXcap is not behaving correctly, changing a setpoint to see what effect it has can assist in diagnostics. -
Page 78: Edit Setpoints
NOTE: Use the up and down arrows to find the relevant record, if required. Field Description Notes The setpoint ID. M1—Main Z motor M2—Stage/Nest motor Description A description of the setpoint. M3—Cartridge motor M4—Safety Door motor Factory The factory (default) value. Current The currently set value. Copyright © 2023, Azenta US, Inc. -
Page 79: Manage Profiles
(Def) value. Press OK. Manage Profiles You can view the details of the currently loaded profile by pressing the Manage Profiles button. The profile information is displayed. Copyright © 2023, Azenta US, Inc. -
Page 80: Standby Mode
EEPROM storage according to the cartridge number, however it could also be a profile that was loaded in using datalogger. Part number The Azenta part number. Operation > Save This is to be used by Azenta service personnel only. Profile Operation > Load This is to be used by Azenta service personnel only. Default A cyclic redundancy check for the profile and the machine, in hexadecimal form. -
Page 81: Configure Automatic Standby Mode Entry After Inactivity
Part Number: 319430 Rev. C Standby Mode Configure Automatic Standby Mode Entry after Inactivity Step Action Press the Settings button on the Home screen. Press the Auto Standby button. The Auto Standby screen is displayed. Copyright © 2023, Azenta US, Inc. - Page 82 Press the – and + buttons to change the amount of time of inactivity before the machine enters standby mode. NOTE: You can press and hold each button to speed up the process. Press the tick button to confirm. Copyright © 2023, Azenta US, Inc.
-
Page 83: Exit Standby Mode
Azenta Life Sciences 5. Operation Part Number: 319430 Rev. C Standby Mode Exit Standby Mode To exit standby mode, press anywhere on the screen. Copyright © 2023, Azenta US, Inc. - Page 84 5. Operation IntelliXcap Automated Screw Cap Decapper Re-Capper Standby Mode Part Number: 319430 Rev. C Copyright © 2023, Azenta US, Inc.
-
Page 85: Preventative Maintenance
However, it is recommended that the preventative maintenance procedures and schedule provided in this section be followed to extend the operating life of the IntelliXcap. If additional procedures are required, they will be supplied along with their maintenance schedules by Azenta Life Sciences. -
Page 86: Maintenance Schedule
IntelliXcap Cartridge General Visual 2,500 cycles Inspection Preventative 20,000 cycles or 12 months, whichever comes sooner Maintenance Visit At 40,000 cycles, it is recommended that the cap drive Exchange 5,000 cycles motors are replaced Copyright © 2023, Azenta US, Inc. -
Page 87: Viewing Machine Servicing And Cartridge Replacement Intervals
6. Preventative Maintenance Part Number: 319430 Rev. C Viewing Machine Servicing and Cartridge Replacement Intervals Step Action Press the Info button on the Home screen. Press the Counters button. The Counters screen is displayed. Copyright © 2023, Azenta US, Inc. -
Page 88: Schedules And Procedures
Parts Azenta Life Sciences can provide all parts required for preventive maintenance. For a list of these parts, contact Azenta Life Sciences Technical Support. To obtain additional information about parts for preventative maintenance, contact your local Azenta Sales Representative, or call Azenta Life Sciences Technical Support. -
Page 89: Cleaning
Maintenance and cleaning must comply with 1.6 of Annex I of 2006/42/EC. Step Action Switch off the IntelliXcap to remove any risk of personal injury. Wipe the IntelliXcap externally with a microfiber or lint free cloth. Copyright © 2023, Azenta US, Inc. - Page 90 It is important that the orange filter on the light source is always free of dust so it can always effectively identify the rack and cap carriage. If necessary, use isopropyl alcohol to disinfect and further clean surfaces. Copyright © 2023, Azenta US, Inc.
-
Page 91: Inspecting The Cartridge
Switchboards, motors, cables and other electronics must be demounted and treated separately according to local law. Metal parts are disposed of as scrap metal. System Test The System Test functionality is to be used by Azenta service personnel only. Copyright © 2023, Azenta US, Inc. - Page 92 6. Preventative Maintenance IntelliXcap Automated Screw Cap Decapper Re-Capper System Test Part Number: 319430 Rev. C Copyright © 2023, Azenta US, Inc.
-
Page 93: Troubleshooting
7. Troubleshooting Unauthorized Service Personal injury or damage to equipment may result if this product is operated or serviced by unauthorized personnel. Only qualified personnel are allowed to transport, assemble, operate, or maintain the Product. Properly qualified personnel are those who have received certified training and have the proper qualifications for their jobs. - Page 94 Door open failure at end of cartridge eject sequence Door close failure at end of cartridge eject sequence M1 failed to reach waste position within S4, during auto-waste sequence. Not sure this will ever occur M1 homing error Copyright © 2023, Azenta US, Inc.
- Page 95 Tube detected after decap retry (caps screwed back on) Close tray failure M3 homing error Close tray failure Open door failure M1 homing error M2 homing error M3 homing error M2 homing error Door close failure -end of sequence Copyright © 2023, Azenta US, Inc.
- Page 96 Light curtain signal failure (check wiring between controller and light curtain) Limit switches fail i.e. top and bottom switches both showing as closed. Usually power supply failure or faulty switch (input reads closed when switch fails) Emergency stop, low motor voltage Copyright © 2023, Azenta US, Inc.
-
Page 97: Technical Support
Error code shown at top of start screen. See "Error Messages" on page Is the unit part of an Yes/No integrated system? Information shown on the screen during initialization, and can be found by navigating to Info > SW Version. Firmware version Copyright © 2023, Azenta US, Inc. -
Page 98: Error Recovery
E-stop has been pressed after decapping but before recapping. Close Tray Closes the tray If there are still caps attached to the ejecting pins, position a bowl to collect the falling caps, then Eject Caps press this button. Copyright © 2023, Azenta US, Inc. - Page 99 Once the caps have been ejected and collected, press this button. Safety Door Raises the access door. Screwing Moves the screwing head up. head Up System Test This is for use by Azenta service personnel only. Copyright © 2023, Azenta US, Inc.
- Page 100 7. Troubleshooting IntelliXcap Automated Screw Cap Decapper Re-Capper Error Recovery Part Number: 319430 Rev. C Copyright © 2023, Azenta US, Inc.
-
Page 101: Appendix A: Integrating The Intellixcap
RS 232 can fully control the entire system and eliminates the use of the touch- screen while operating. Commands for the IntelliXcap vary depending on the version of Firmware being used – to obtain the relevant command set, or for additional support please contact Azenta technical support at Service.Products@azenta.com...
Need help?
Do you have a question about the IntelliXcap 48 and is the answer not in the manual?
Questions and answers