Advertisement
Quick Links
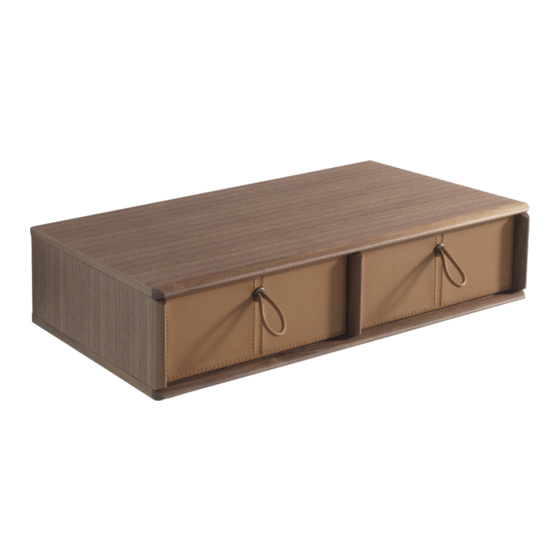
BAYUS 5
Design: G. & O. Buratti
Istruzioni di montaggio
Assembly-instruction
1
Verificare l'altezza a cui si desidera posizionare il pensile in modo da ottenere la distanza a cui posizionare il supporto, come rappre-
sentato nell'esempio in figura.
Verify the desired height of the shelf in order to obtain the correct height to place the wooden support, as shown above in the drawing.
90
580
FLOOR
90
Advertisement

Related Manuals for porada BAYUS 7


Summary of Contents for porada BAYUS 7
- Page 1 BAYUS 5 Design: G. & O. Buratti Istruzioni di montaggio Assembly-instruction FLOOR Verificare l’altezza a cui si desidera posizionare il pensile in modo da ottenere la distanza a cui posizionare il supporto, come rappre- sentato nell’esempio in figura. Verify the desired height of the shelf in order to obtain the correct height to place the wooden support, as shown above in the drawing.
- Page 2 Posizionare il supporto sulla parete e segnare i 4 fori, verificandone l’allineamento orizzontale. Place the support against the wall and mark the 4 holes to be drilled, verifying horizontal alignment to the floor. Praticare i 4 fori precedentemente segnati sul muro e fissare il supporto alla parete con viti e tasselli in dotazione. Verificare che tasselli e viti in dotazione siano adatti al tipo di parete alla quale verrà...
- Page 3 Con l’aiuto di una chiave a brugola, fissare il pensile alla piastra avvitando le due viti in dotazione dai vani interni. Using an allen key, screw the two supplied screws to the support in order to fix the shelf from the inside of the containers.
- Page 4 If present, insert the drawers and manually screw and fasten the drawer stop pins (2 each) under the top of the shelf. PORADA Arredi s.r.l. - 22060 Cabiate (Como) - Italia - via B. Buozzi, 2 - Tel. +39 031 766215 - Fax +39 031 768386 - info@porada.it - www.porada.it...
-
Page 5: Istruzioni Di Montaggio
BAYUS 6 Design: G. & O. Buratti Istruzioni di montaggio Assembly-instruction 1150 FLOOR Verificare l’altezza a cui si desidera posizionare il pensile in modo da ottenere la distanza a cui posizionare il supporto, come rappre- sentato nell’esempio in figura. Verify the desired height of the shelf in order to obtain the correct height to place the wooden support, as shown above in the drawing. - Page 6 Posizionare il supporto sulla parete e segnare i 4 fori, verificandone l’allineamento orizzontale. Place the support against the wall and mark the 4 holes to be drilled, verifying horizontal alignment to the floor. Praticare i 4 fori precedentemente segnati sul muro e fissare il supporto alla parete con viti e tasselli in dotazione. Verificare che tasselli e viti in dotazione siano adatti al tipo di parete alla quale verrà...
- Page 7 Con l’aiuto di una chiave a brugola, fissare il pensile alla piastra avvitando le due viti in dotazione dai vani interni. Using an allen key, screw the two supplied screws to the support in order to fix the shelf from the inside of the containers.
- Page 8 If present, insert the drawers and manually screw and fasten the drawer stop pins (2 each) under the top of the shelf. PORADA Arredi s.r.l. - 22060 Cabiate (Como) - Italia - via B. Buozzi, 2 - Tel. +39 031 766215 - Fax +39 031 768386 - info@porada.it - www.porada.it...
- Page 9 BAYUS 7 Design: G. & O. Buratti Istruzioni di montaggio Assembly-instruction FLOOR Verificare l’altezza a cui si desidera posizionare il pensile in modo da ottenere la distanza a cui posizionare il supporto, come rappre- sentato nell’esempio in figura. Verify the desired height of the shelf in order to obtain the correct height to place the wooden support, as shown above in the drawing.
- Page 10 Posizionare il supporto sulla parete e segnare i 4 fori, verificandone l’allineamento verticale. Place the support against the wall and mark the 4 holes to be drilled, verifying alignment to floor and walls.
- Page 11 Praticare i 4 fori precedentemente segnati sul muro e fissare il supporto alla parete con viti e tasselli in dotazione. Verificare che tasselli e viti in dotazione siano adatti al tipo di parete alla quale verrà fissato il supporto, altrimenti provvedere alla sostituzione con materiale idoneo. Drill the 4 holes and previously marked and fix the support to the wall with the dowels supplied.
- Page 12 Using an allen key, screw the two supplied screws to the support in order to fix the shelf from the inside of the containers. PORADA Arredi s.r.l. - 22060 Cabiate (Como) - Italia - via B. Buozzi, 2 - Tel. +39 031 766215 - Fax +39 031 768386 - info@porada.it - www.porada.it...
Need help?
Do you have a question about the BAYUS 7 and is the answer not in the manual?
Questions and answers