
Related Manuals for Viessmann KW1


Summary of Contents for Viessmann KW1
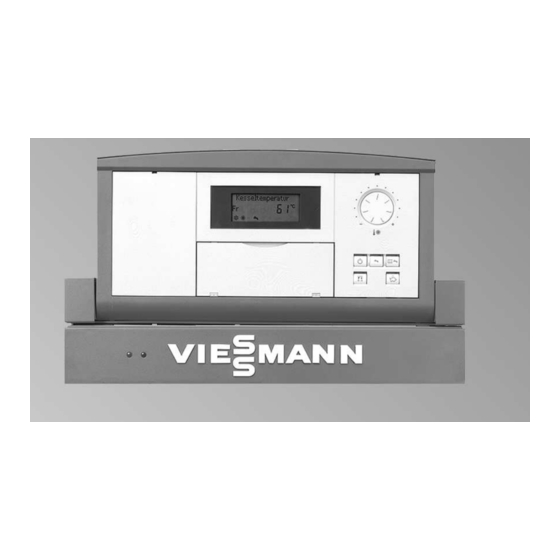
- Page 1 VIESMANN Installation and service instructions for contractors Vitotronic 200 Type KW1 Weather-compensated, digital boiler control unit For applicability, see the last page VITOTRONIC 200 Please keep safe. 5862 699 GB 8/2008...
- Page 2 Safety instructions Safety instructions Please follow these safety instructions closely to prevent accidents and material losses. Safety instructions explained the Code of Practice of relevant trade associations, Danger all current safety regulations as This symbol warns against the defined by DIN, EN, DVGW, TRGI, risk of injury.
- Page 3 Instal- charge static loads. ling non-authorised compo- nents and non-approved modifications/conversion can compromise safety and may invalidate our warranty. For replacements, use only ori- ginal spare parts from Viessmann or those which are approved by Viessmann.
- Page 4 Index Index Installation instructions Preparing for installation System version ................... Installation sequence Overview of electrical connections .............. Inserting cables and applying strain relief............ Inserting the boiler coding card ..............Changing the high limit safety cut-out setting (if required) ......10 Changing the thermostat setting (if required) ..........
- Page 5 Index Index (cont.) Codes Resetting codes to their delivered condition ..........56 Calling up code 1 ..................56 Overview ....................56 Code 2......................57 Designs Connection and wiring diagram ..............72 Components Components from the parts list..............74 Radio clock receiver, part no. 7450 563 ............79 Flue gas temperature sensor, part no.
- Page 6 Preparing for installation System version One directly connected heating circuit without mixer A Boiler with Vitotronic 200 C KM BUS subscriber or KM BUS B DHW cylinder distributor (only with several KM BUS subscribers) D Heating circuit without mixer (Heating circuit A1)
- Page 7 Installation sequence Overview of electrical connections The illustration shows the lower part of the control unit from the back. 230 V~ plugs Flue gas temperature sensor sÖ Heating circuit pump (heating cir- (accessories) cuit A1) (accessory) aVG KM BUS subscriber or KM BUS sA Circulation pump for cylinder distributor (accessories) heating (accessories)
- Page 8 Installation sequence Overview of electrical connections (cont.) When connecting external switching contacts or components to the low voltage circuit of the control unit, the safety requirements of protection class II, i.e. 8.0 mm air gap/creeping distance or 2.0 mm insulation thick- ness from 'live' components must be observed.
- Page 9 Installation sequence Inserting cables and applying strain relief (cont.) Inserting the boiler coding card Only use the boiler coding card included with the boiler product documentation (see also table below). Boiler Coding card Part no. Vitola 200, type VB2A, VX2A 7818 915 Vitola 222 7818 915...
- Page 10 Installation sequence Inserting the boiler coding card (cont.) Insert the boiler coding card through the cut-out in the cover into slot "X7". Changing the high limit safety cut-out setting (if required) In the delivered condition, the high limit safety cut-out is set to 110 °C and can be adjusted to 100 °C.
- Page 11 Installation sequence Changing the high limit safety cut-out setting (if . . . (cont.) A EGO slotted screw B JUMO slotted screw Changing the thermostat setting (if required) In the delivered condition, the thermostat is set to 75 °C and can be adjusted to 87 °C/95 °C.
- Page 12 Installation sequence Changing the thermostat setting (if required) (cont.) Note Never set the thermostat higher than 75 °C if the high limit safety cut-out has been adjusted to 100 °C. Please note Excessive DHW temperatures can damage the DHW cylinder. If the system is operated in conjunction with a DHW cylinder, ensure that the maximum permissible DHW temperature is not exceeded.
- Page 13 Installation sequence Connecting sensors A Flue gas temperature sensor C Cylinder temperature sensor B Boiler water temperature sensor D Outside temperature sensor Installation point for outside temperature sensor North or north-western wall, 2 to Not immediately below balconies or 2.5 m above ground level; in multi- gutters storey buildings, in the upper half of Never render over...
- Page 14 Installation sequence Connecting pumps (cont.) Pumps 230 V~ Rated current 4(2) A~ Recommended connecting cable H05VV-F3G 0.75 mm H05RN-F3G 0.75 mm A Pump B To the control unit Pumps 400 V~ For controlling the contactor Rated current 4(2) A~ Recommended connecting cable H05VV-F3G 0.75 mm...
- Page 15 Installation sequence Connecting pumps (cont.) Variable speed pumps Connect via plug aVG in the control unit or in the KM BUS distributor. External connection to plug "X12" Please note 'Live' contacts lead to short circuits or phase failure. The external connection must be zero volt. External burner start (stage 1) Connect the zero volt contact.
- Page 16 A To the control unit B To the burner Burner without plug Install the mating plug from Viessmann or from the burner manu- facturer; connect the burner cable. Extension with a two-stage/modulating burner, part no. 7404 The function extension is supplied with the boiler.
- Page 17 Installation sequence Burner connection (cont.) Terminal codes T6, T7, T8 Control chain "Burner stage 2 or modulation con- troller" (for two-stage operation via two-point controller; for modulating operation via three-point controller) From the burner Mod. burner closed Mod. burner open/stage 2 Signal pass direction: Control unit burner...
- Page 18 Installation sequence Power supply (cont.) Main isolator requirements (if required) For combustion equipment to DIN Fit the main isolator outside the instal- VDE 0116, the main isolator installed lation room; it must be able to sepa- on site must comply with the require- rate all non-earthed conductors ments of DIN VDE 0116 "section 6"...
- Page 19 Installation sequence Power supply (cont.) Colour coding to DIN IEC 60757 brown blue GNYE green/yellow Fitting the top part of the control unit Please note To prevent damage to the PCB, switch off the control unit power supply.
- Page 20 Installation sequence Fitting the top part of the control unit (cont.)
- Page 21 Installation sequence Opening the control unit...
- Page 22 Commissioning Controls and display elements A User interface B Rotary selector for standard room temperature C Flap open User interface: Time/date Central heating time program Standby mode DHW heating time program DHW only DHW circulation pump time Heating and DHW program Economy mode Holiday program...
- Page 23 Commissioning Testing the high limit safety cut-out 1. Hold down the "TEST" key (posi- 3. Wait until the boiler water tempera- tion " ") until the burner shuts ture has dropped approx. 15 to down: 20 K below the selected safety Thermostat "...
- Page 24 Commissioning Checking outputs (actuators) and sensors (cont.) The following relay outputs can be controlled subject to system design: Display screen Explanation "Burner On" Subject to the setting of coding ad- dress "02" "Burner stage 1 On" "Burner stage 1 + 2 On" "Burner mod.
- Page 25 Commissioning Adjusting the heating curves (cont.) Example for outside temperature 14 °C A Low temperature heating, slope 0.8 to 1.6 B Heating system with a boiler water temperature in excess of 75 °C, slope greater than 1.6 Adjusting the set room temperature The heating curve is offset along the axis of the set room temperature.
- Page 26 Commissioning Adjusting the heating curves (cont.) Set the "Standard room tempera- ture" with rotary selector " ". The value will be automatically accepted after approx. 2 s. Adjustment of the standard room tem- perature from 20 to 26 °C A Boiler water temperature or flow temperature in °C B Outside temperature in °C C Set room temperature in °C...
- Page 27 Commissioning Adjusting the heating curves (cont.) Press the following keys: 1. E for "Reduced room tem- perature". 2. a/b for the selected value. 3. d to confirm. Adjustment of the reduced room tem- perature from 3 to 14 °C A Boiler water temperature or flow temperature in °C B Outside temperature in °C C Set room temperature in °C...
- Page 28 Service scans Service level overview Function Key combination Exit Page Adjusting the dis- Press d and a play contrast simultaneously; the display darkens Press d and b simultaneously; the display becomes lighter Relay test Press K and d si- Press d multaneously for ap- prox.
- Page 29 Service scans Diagnosis (temperatures, boiler coding card and brief scans) Press the following keys: 2. a/b for the required scan. 1. K + G simultaneously for 3. d Scanning is completed. approx. 2 s. The following values can be scanned, subject to the system equipment level: Display screen Explanation...
- Page 30 Service scans Diagnosis (temperatures, boiler coding card and . . . (cont.) Brief Display screen scan System design Burner Number (see coding address type of KM "00") 0: Single BUS sub- stage scribers 1: Two- stage 2: Modu- lating Software Software Software version...
- Page 31 Service scans Scanning operating conditions Press the following keys: 2. a/b for the required scan. 1. c Scanning is active. 3. c Scanning is completed. The following operating conditions can be scanned, subject to the system equipment level: Display screen Explanation "Holiday program"...
- Page 32 Service scans Scanning operating conditions (cont.) Display screen Explanation "Solar pump On"/"Solar circuit Off" In conjunction with a solar thermal sys- tem with the Vitosolic 100 or 200. "Solar pump" (hours run) In conjunction with a solar thermal sys- tem with the Vitosolic 100 or 200. Various languages The respective languages can be se- lected as permanent display language...
- Page 33 Service scans Display "Service" (cont.) After a service has been carried out 1. Reset code "24:1" to "24:0". 3. If required, reset the flue gas tem- perature to its actual value. Note Press the following keys: If coding address "24" is not reset, K and G approx.
- Page 34 Troubleshooting Faults with fault display on the programming unit Fault display layout A Fault display C Fault number B Fault symbol D Fault code The red fault indicator flashes for "Fault" flashes in the programming every fault. unit display when a fault message is issued.
- Page 35 Troubleshooting Faults with fault display on the programming unit (cont.) 3. d All fault messages are acknowledged simulta- neously, the fault display will be deleted and the red fault indicator continues to flash. Calling up acknowledged fault messages Press the following keys: 2.
- Page 36 Troubleshooting Faults with fault display on the programming unit (cont.) Fault codes Fault code System character- Cause Measures on the dis- istics play Control mode Maintenance Service required "0F" is only dis- played in the fault Note history After the service, set coding address "24:0".
- Page 37 Troubleshooting Faults with fault display on the programming unit (cont.) Fault code System character- Cause Measures on the dis- istics play Circulation pump for Short circuit, cy- Check the cylinder tem- cylinder heating on: linder tempera- perature sensor (see Set cylinder tem- ture sensor page 77) perature = set boiler...
- Page 38 Troubleshooting Faults with fault display on the programming unit (cont.) Fault code System character- Cause Measures on the dis- istics play Control mode Break, collector Check solar control unit temperature sen- sensor sor, connection at S1 Solar control unit of the Vitosolic installation and service instruc- tions...
- Page 39 Troubleshooting Faults with fault display on the programming unit (cont.) Fault code System character- Cause Measures on the dis- istics play Control mode Internal fault Check PCB Constant mode Invalid hardware Check main PCB recognised Boiler is regulated Boiler coding card Plug in boiler coding by the thermostat fault...
- Page 40 Troubleshooting Faults with fault display on the programming unit (cont.) Fault code System character- Cause Measures on the dis- istics play Control mode, max. Communication Check connection, pump speed fault, variable cable/lead and coding speed heating cir- address "E5" cuit pump Control mode Heating circuit Check the DIP switch...
- Page 41 Troubleshooting Faults that are not displayed at the programming unit Boiler cold, burner does not start Set emissions test switch to " " Pumps are not running Check operating voltage (main isolator, power supply cable, plug fÖ, ON/OFF switch, fuses F1 6.3 A (slow) and F2, 4 A (slow)). F1 or F2 fuse faulty: Disconnect all 230 V plugs (pumps, burner, mixer motors, etc.).
- Page 42 Troubleshooting Faults that are not displayed at the programming . . . (cont.) Boiler water temperature too high or too low Compare the actual and the set boiler water temperature Set value too high or too low Check the settings of the time switch, heating curves and coding addresses. Check the set value adjuster and remote control (if installed): Select a very high day temperature and a very low night temperature.
- Page 43 Troubleshooting Faults that are not displayed at the programming . . . (cont.) Check fuse F2, 4 A (slow). If the fuse Check pump connection and pump. has blown: Check any additional control Disconnect the pump and mixer devices (e.g. maximum thermostat). motor plugs.
- Page 44 Function description Boiler water temperature control Brief description The boiler water temperature is When the DHW cylinder is heated regulated by starting up and shut- up, a set boiler water temperature is ting down the burner. In the deliv- defaulted that lies 20 K above the ered condition, the switching set DHW temperature (adjustable differential is ±2 K, relative to the...
- Page 45 Function description Boiler water temperature control (cont.) Auxiliary circuits Function extension 0 to 10 V (see Two-stage/modulating burner: An page 87). extension can be connected for con- Plug "X12" for external burner start trolling a two-stage/modulating (see page 15). burner (see page 16). External hook-up via control module V (see page 85).
- Page 46 Function description Boiler water temperature control (cont.) Heat demand-dependent switching hysteresis The heat demand-dependent switching hysteresis, therefore, takes the boiler load into account. The switching hysteresis, i.e the burner runtime varies subject to actual heat demand. ERB50 function Code "04:1" Subject to heat demand, values between 6 and 12 K result.
- Page 47 Function description Heating circuit control Brief description The set flow temperature of the The flow temperature is equal to the heating circuit results from the fol- boiler water temperature. lowing Coding addresses that influence Outside temperature the heating circuit control: Set room temperature A0 to Fb.
- Page 48 Function description Heating circuit control (cont.) Compared with the outside tempera- ture, the room temperature has a greater influence on the set boiler water temperature. Changes via cod- ing address "b2". DHW temperature With priority control: The set flow temperature will be adjusted to 0 ºC during cylinder heating.
- Page 49 Function description Heating circuit control (cont.) Frost protection The flow temperature is maintained in accordance with the heating curve for the reduced set value, but at min. 10 °C. A variable frost limit can be set in accordance with coding address "A3". Raising the reduced room temperature During operation with reduced room The outside temperature limits for the...
- Page 50 Function description Heating circuit control (cont.) Example using the settings in the delivered condition A Heating curve for operation with B Heating curve for operation with standard room temperature reduced room temperature Reducing the heat-up time During the transition from operation The value and duration of the addi- with reduced room temperature to tional increase of the set boiler water...
- Page 51 Function description Heating circuit control (cont.) Example using the settings in the delivered condition A Start of operation with standard C Set boiler water or flow tempera- room temperature ture in accordance with the B Set boiler water or flow tempera- selected coding address "FA": ture in accordance with the 50 °C + 20 % = 60 °C...
- Page 52 Function description Cylinder temperature control Brief description The cylinder temperature control is a constant temperature control. This is the result of starting and stopping the circulation pump for cylinder heating. The switching differential is ±2.5 K. When the DHW cylinder is heated up, a set boiler water temperature is defaulted that lies 20 K above the set DHW temperature (adjustable...
- Page 53 Function description Cylinder temperature control (cont.) Priority control With priority control: (Code "A2:2"): The set flow temperature will be adjusted to 0 °C during cylinder heating. The heating circuit pump is switched off. Without priority control: The heating circuit control unit con- tinues to operate with the same set value.
- Page 54 Function description Cylinder temperature control (cont.) Auxiliary circuits DHW heating can be blocked or With control module V (coding enabled by switching the heating pro- address "74"): gram (see coding address "d5"). The DHW circulation pump can be If you switch to "Constant central controlled for a short period via a zero heating with standard room tempera- volt contact.
- Page 55 Function description Cylinder temperature control (cont.) Without pump run-on (code "62:0") Code "55:1", adaptive cylinder heating With adaptive cylinder heating, the the boiler water temperature is 7 K speed of the temperature rise during higher than the DHW temperature. DHW heating is taken into account. Immediate start of the circulation pump for cylinder heating (code The DHW cylinder goes cold (set...
- Page 56 Codes Resetting codes to their delivered condition Press the following keys: 3. d to confirm 1. L + G simultaneously for approx. 2 s. 4. a/b to select "Standard set- ting? No". 2. e "Standard setting? Yes" appears. Calling up code 1 Press the following keys: 5.
- Page 57 Codes Overview (cont.) Coding in the delivered condition Possible change DHW priority A1 A2:2 Cylinder priority to heat- A2:0 Without cylinder priority ing circuit pump for heating circuit pump A2:1 No function A2:3 No function A2:15 Summer econ. A1 A5:5 With heating circuit A5:0 Without heating circuit...
- Page 58 Codes Code 2 (cont.) 6. d to confirm; the display 8. L + G press simultaneously for briefly shows approx. 1 s; code 2 is "Accepted"; the address terminated. flashes again. 7. a/b for the selection of further addresses. Overview The following summary lists all possible coding addresses.
- Page 59 Codes Code 2 (cont.) Coding in the delivered condition Possible change 11:20 Two-stage burner: 11:0 Hook-up delay for en- Hook-up delay abling stage 2 (in addition (integral) 2560 Ks 11:199 to stage 1) in cylinder heating mode, adjusta- ble from 0 to 25472 Ks 1 step 128 Ks 12:20...
- Page 60 Codes Code 2 (cont.) Coding in the delivered condition Possible change 1C:120 Signal B4 at plug fA is 1C:1 Setting range from not available: 1 to 199 s Compensation of signal 1C:199 This time is deducted delay for hours run from the operating time meter.
- Page 61 Codes Code 2 (cont.) Coding in the delivered condition Possible change 32:70 With control module V: 32:0 Minimum set boiler water Minimum set boiler temperature adjustable water temperature 32:127 from 0 to 127 °C; observe 70 °C for external burn- thermostat setting "...
- Page 62 Codes Code 2 (cont.) Coding in the delivered condition Possible change 61:0 The circulation pump is 61:1 The circulation pump switched on subject to starts immediately the boiler water tem- perature 62:10 The circulation pump 62:0 Circulation pump without will run on for a max. of run-on 10 min 62:1...
- Page 63 Codes Code 2 (cont.) Coding in the delivered condition Possible change 72:0 Observe coding ad- 72:1 "Off" during DHW heating dress "58": to the second set value DHW circulation pump: 72:2 "On" during DHW heating "On" according to time to the second set value program 73:0 DHW circulation pump:...
- Page 64 Codes Code 2 (cont.) Coding in the delivered condition Possible change 85:10 Wintertime starts: 85:1 January to December October 85:12 86:5 Wintertime starts: Week 86:1 Week 1 to week 5 of the 5 of the selected month selected month 86:5 87:7 Wintertime starts: Last 87:1...
- Page 65 Codes Code 2 (cont.) Coding in the delivered condition Possible change A0:0 Without remote control A0:1 With Vitotrol 200; auto- matic recognition A0:2 With Vitotrol 300; auto- matic recognition A2:2 With cylinder priority for A2:0 Without cylinder priority heating circuit pump A3:2 Outside temperature A3: 9...
- Page 66 Codes Code 2 (cont.) Coding in the delivered condition Possible change A4:0 With frost protection A4:1 No frost protection; this setting is only possible if code "A3: 9" has been selected. Note Observe the information regarding coding address "A3". A5:5 With heating circuit A5:0 Without heating circuit...
- Page 67 Codes Code 2 (cont.) Coding in the delivered condition Possible change A6:36 Extended economy A6:5 Extended economy mode mode disabled enabled, i.e. the burner A6:35 and heating circuit pump are switched off at a vari- able value, adjustable from 5 to 35 °C plus 1 °C. This value is based on the adjusted outside tem- perature, comprising the...
- Page 68 Codes Code 2 (cont.) Coding in the delivered condition Possible change b5:0 With remote control: b5:1 Heating circuit pump Without room tempera- logic function, see the fol- ture-dependent heating b5:8 lowing table: circuit pump logic func- tion Parameter ad- With heating circuit pump logic function: dress b5:...
- Page 69 Codes Code 2 (cont.) Coding in the delivered condition Possible change C0:0 With remote control and C0:1 With shutdown time opti- for the heating circuit, misation: operation with room max. offset 1 h temperature hook-up C0:2 With shutdown time opti- must be programmed:: misation: Without shutdown time...
- Page 70 Codes Code 2 (cont.) Coding in the delivered condition Possible change E1:1 With remote control: E1:0 Set day temperature ad- Set day temperature justable from 3 to 23 °C adjustable at the remote E1:2 Set day temperature ad- control from 10 to 30 °C justable from 17 to 37 °C E2:50 With remote control:...
- Page 71 Codes Code 2 (cont.) Coding in the delivered condition Possible change F9: 14 Temperature limit for F9:+10 Temperature limit adjus- raising the reduced set table from +10 to 60 °C room temperature F9: 60 14 ºC; see example on page 49. FA:20 Raising the set boiler FA:0...
- Page 72 Designs Connection and wiring diagram Main PCB Programming unit Power supply unit PCB Boiler coding card Electronics PCB...
- Page 73 Designs Connection and wiring diagram (cont.) Optolink PCB/emissions test sK DHW circulation pump (on site) switch fÖ Power supply, 230 V/50 Hz Electrical interfaces fA Oil/gas burner (connection F1, F2 Fuse according to DIN 4791) High limit safety cut-out X12 External burner start 110 °C (100 °C) (stage 1) Thermostat 75 °C (87 °C,...
- Page 74 Components Components from the parts list Main PCB The main PCB comprises: Sockets for the power supply con- Relay for selecting pumps and burn- nection, heating circuit pump and burner Sockets for sensor connection Fuse F2, 4 A (slow) Power supply unit PCB The power supply unit PCB comprises Programming unit, PCB, sen- the low voltage supply for all electro-...
- Page 75 Components Components from the parts list (cont.) Displaying: Temperatures Operating conditions Faults Fuses 6.3 A (slow), 250 V 4 A (slow), 250 V Switching capacity H Switching capacity H Max. power loss 2.5 W Max. power loss 1.6 W To protect the total device, burner, To protect the pumps pumps and electronics Burner connecting cables...
- Page 76 Components Components from the parts list (cont.) Central fixing M10, capillary Electrical test in accordance with 1600 mm long; sensor 3 mm, VDE 0701 (or local regulations) 180 mm long Function test with TEST key (see page 23) Thermostat Set to 75 ºC in the delivered condi- Controls the maximum boiler water tion;...
- Page 77 Components Components from the parts list (cont.) Boiler water temperature sensor and cylinder temperature sensor Connection See page 13. Check sensor 1. Disconnect plug § or %. 2. Check the sensor resistance across plug terminals "1" and "2". 3. Compare the measurement with the actual temperature (for scanning, see page 29).
- Page 78 Components Components from the parts list (cont.) Specification Sensor type Viessmann Pt500 Protection IP 32 Permiss. ambient temperature during operation Boiler water 0 to + 130 °C temperature sensor Cylinder tem- 0 to + 90 °C perature sensor during storage and transport -20 to + 70 °C...
- Page 79 Components Components from the parts list (cont.) Specification Sensor type Viessmann Ni500 Protection IP 43 Permissible ambi- ent temperature during operation, storage and transport -40 to + 70 °C Radio clock receiver, part no. 7450 563 The radio clock receiver sets the time at the control unit and any remote control that may be connected, fully automatically.
- Page 80 Components Radio clock receiver, part no. 7450 563 (cont.) Check reception During reception, the green LED on If the red LED flashes, rotate the aer- the radio clock receiver flashes. ial until reception is confirmed by the flashing of the green LED. Specification Protection IP 43...
- Page 81 "Tempera- tures, boiler coding card and brief scans"). Check the installation and, in case of severe deviation, replace the sensor. Specification Sensor type Viessmann Pt500 Protection IP 60 Permiss. ambient temperature during opera- 0 to + 600 °C tion...
- Page 82 Components Remote control Vitotrol 200, part no. 7450 017 With integral room temperature sensor. Settings Day temperature Heating program Economy and party mode Function changes Changes can be made via the follow- "A0", "b0" and "E1" (see chapter ing coding addresses: "Code 2").
- Page 83 Components Remote control (cont.) Coding Never adjust DIP switch S6. D PCB DIP switches (back of the casing top) Specification during opera- 0 to + 40 °C tion Power supply via KM BUS. during storage Power consump- and transport 20 to + 65 °C tion 0.2 W Setting range for...
- Page 84 Components Remote control (cont.) Function changes Changes can be made via the follow- "A0", "b0" to "b9", "C0" to "C8", "E1", ing coding addresses: "E2" and "F2" (see chapter "Code 2"). Connection A Wall mounting base for Vitotrol 300 B To the control unit or to the KM BUS distributor...
- Page 85 Components Remote control (cont.) Codes Never adjust DIP switch S3. D PCB DIP switches (back of the casing top) Specification during opera- 0 to + 40 °C tion Power supply via KM BUS. during storage Power consump- and transport -20 to + 65 °C tion 0.5 W Setting range for...
- Page 86 Components Control module V, part no. 7143 513 (cont.) A Control module V wiring chamber B Zero volt contact C To the control unit Please note DE4 External burner demand Fault-free operation cannot be (minimum set boiler water tem- assured if connections are perature) incorrect.
- Page 87 Components KM BUS distributor, part no. 7415 028 (cont.) A KM BUS distributor wiring cham- C KM BUS subscriber connections (sockets "X2" to "X7") B Terminals for connecting further D To the control unit KM BUS subscribers (connection to terminals "X8.1" and "X8.2", "X8.3"...
- Page 88 Components Function extension 0-10 V, part no. 7174 718 (cont.) fÖ Power supply aBJ Zero volt contact aVF 0-10 V input Main isolator (if required) aVG KM BUS to the control unit DIP switch (see table) DIP switch Function Switching output aBJ while heating circuit A1 is in re- duced mode No function No function...
- Page 89 Components External extension H5, part no. 7199 249 For the following connections: External burner start External burner shutdown External safety equipment Flue gas damper A Vitotronic B External extension H5 C Burner External connections at plug aBÖ Please note Plug aBÖ must remain plugged in, 'Live' contacts lead to short cir- even if no connection is made.
- Page 90 Components External extension H5, part no. 7199 249 (cont.) A Jumper "STB" "STB" D External burner blocking B Jumper "TR" "ON/TR" (zero volt contact) C External burner start E Minimum pressure limiter (zero volt contact) F Other external safety equipment External burner blocking 1.
- Page 91 Components External extension H5, part no. 7199 249 (cont.) External safety equipment 1. Remove jumper "STB" "STB". 2. Connect the external safety equip- ment in series. Provisional operation (burner stage 1) Insert jumper "TR" "ON/TR" at "TR" "ON". Motorised flue gas damper, part no. 9586 973 and 9586 974 A Plug aBÖ...
- Page 92 Components Secondary air device Vitoair, part no. 7338 725, 7339 703 A To the burner B To the control unit Colour coding to DIN IEC 60757 black GN/YE green/yellow Function check Press the rotary selector at the motor and simultaneously turn it to its cen- tral position.
- Page 93 Components Secondary air device Vitoair, part no. 7338 725, . . . (cont.) Emergency mode Press the rotary selector on the motor and turn clockwise to the limit, i.e. beyond position " ".
- Page 94 Parts lists Parts lists Information regarding the ordering 040 Outside temperature sensor ! of spare parts 042 Boiler water temperature sensor Quote the part and serial no. (see with plug § type plate A) and the item no. of the 043 Cylinder temperature sensor with required part (as per this parts list).
- Page 95 Parts lists Parts lists (cont.)
- Page 96 Parts lists Parts lists (cont.)
- Page 97 Specification Specification Rated voltage 230 V Rated frequency 50 Hz Rated current Power consumption Protection class Protection IP 20 D to EN 60 529, safe- guard through appropriate design and installation Function Type 1 B to EN 60730-1 Permiss. ambient temperature during operation 0 to +40 °C Installation in living spaces...
- Page 98 Settings and equipment Settings and equipment Tick the adjusted function. Function in the delivered condi- Modified function tion High limit safety cut-out set to Changed to ...ºC 110 ºC Thermostat set to 75 ºC Changed to ...ºC Remote control With remote control Control unit without remote control Vitotrol 200 Vitotrol 300...
- Page 99 Settings and equipment Settings and equipment (cont.) Function in the delivered condi- Modified function tion Switching hysteresis Burner switching hysteresis: 4 K ERB50 function ERB80 function Heating system with DHW heat- ing: DHW is heated from the times when DHW heating is enabled With DHW priority Without cylinder priority control Setting range for DHW tempera-...
- Page 100 Keyword index Keyword index Adaptive cylinder heating Calling up fault messages ......Adjusting the set room temperature 25 Central fault message .
- Page 101 Keyword index Keyword index (cont.) Economy mode 48, 57, 66 Heating circuit control ........Electrical connections, overview Heating circuit pump logic .
- Page 102 Keyword index Keyword index (cont.) Parts lists Scanning actual temperatures ........
- Page 103 Keyword index Keyword index (cont.) Variable speed heating circuit pump Weather-compensated mode ..15, 70 Winter/summertime ......... . .
- Page 104 Applicability Vitotronic 200, type KW1 Only for integration/installation in/on Viessmann boilers. Valid for control units: Part no. 7187 086 Viessmann Werke GmbH&Co KG Viessmann Limited D-35107 Allendorf Hortonwood 30, Telford Telephone: +49 6452 70-0 Shropshire, TF1 7YP, GB Fax: +49 6452 70-2780 Telephone: +44 1952 675000 www.viessmann.com...
Need help?
Do you have a question about the KW1 and is the answer not in the manual?
Questions and answers