Table of Contents
Advertisement
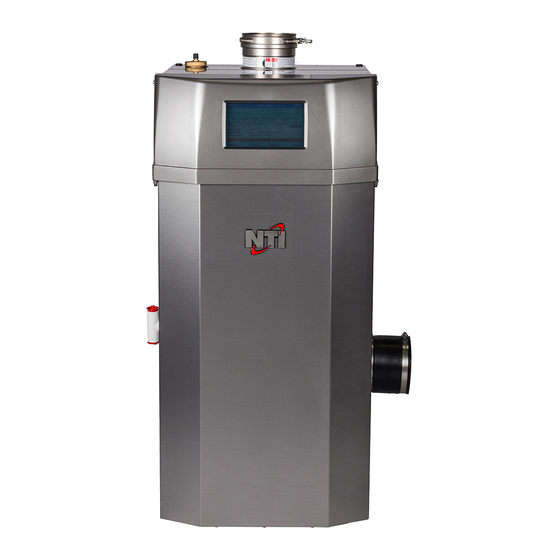
Trinity Lx - WH
Model Numbers: Lx200WH - Lx800WH
Version Date: 2018-07-11
INSTALLATION AND OPERATION INSTRUCTIONS FOR
TRINITY Lx WATER HEATER
TABLE OF CONTENTS
1.0
INTRODUCTION ................................................................................................................ 3
2.0
SPECIFICATIONS .............................................................................................................. 6
3.0
WATER HEATER LOCATION .......................................................................................... 7
4.0
GENERAL VENTING ....................................................................................................... 12
5.0
VENT AND AIR-INTAKE TERMINATION CLEARANCES ........................................ 27
6.0
CONDENSATE DRAIN .................................................................................................... 30
7.0
INSTALLING GAS PIPING .............................................................................................. 31
8.0
LIGHTING THE WATER HEATER ................................................................................ 33
9.0
GAS VALVE AND BURNER SET-UP ............................................................................ 35
10.0 WATER HEATER PIPING ............................................................................................... 42
11.0 LEAD LAG INSTRUCTIONS ........................................................................................... 51
12.0 FIELD WIRING ................................................................................................................. 54
13.0 WIRING SCHEMATICS ................................................................................................... 60
14.0 INSTALLATION CHECKLIST ........................................................................................ 64
15.0 ANNUAL MAINTENANCE AND INSPECTION ........................................................... 65
16.0 PARTS LIST ...................................................................................................................... 67
17.0 TROUBLESHOOTING ..................................................................................................... 79
HAZARD SYMBOLS AND DEFINITIONS
Danger Sign: Indicates a hazardous situation which, if not avoided, will
result in serious injury or death.
Warning Sign: Indicates a hazardous situation which, if not avoided,
could result in serious injury or death.
Caution Sign plus Safety Alert Symbol: Indicates a hazardous situation
which, if not avoided, could result in minor or moderate injury.
Caution Sign without Safety Alert Symbol: Indicates a hazardous
situation which, if not avoided, could result in property damage.
Notice Sign: Indicates a hazardous situation which, if not avoided,
could result in property damage.
This Water Heater must be installed by a licensed and trained Heating
Technician or the Warranty is Void. Failure to properly install this
unit may result in property damage, serious injury to occupants, or
possibly death.
H
Visit us
online
NTI # 85236
Advertisement
Table of Contents

Related Manuals for NTI Lx600WH


Summarization of Contents
Hazard Symbols and Definitions
Danger Sign
Defines hazardous situation resulting in serious injury or death.
Warning Sign
Defines hazardous situation resulting in serious injury or death.
Caution Sign plus Safety Alert Symbol
Defines hazardous situation resulting in minor or moderate injury.
Caution Sign without Safety Alert Symbol
Defines hazardous situation resulting in property damage.
Notice Sign
Defines hazardous situation resulting in property damage.
For Your Safety Read Before Operating
What to do if you smell gas
Procedures to follow if a gas leak is detected.
Operating Instructions
To turn off gas to the water heater
Steps to safely turn off the gas supply to the water heater.
Introduction
General Installation Requirements
Conformance requirements for installation according to codes and standards.
User Responsibilities
Outlines owner responsibilities for maintaining the water heater.
Installer Responsibilities
Defines installer obligations for ensuring a safe and compliant installation.
Attention Liquefied Petroleum (LP) Propane
Natural to LP Propane Conversion Kit
Details conversion kits and orifices required for LP propane operation.
Water heater Vent / Air-Inlet Piping
Specifies requirements for the special venting system for Category IV heaters.
In the State of Massachusetts Only
Installation of Carbon Monoxide Detectors
Mandates installation of hard-wired CO detectors on all dwelling levels.
Approved Carbon Monoxide Detectors
Specifies compliance standards for required carbon monoxide detectors.
Signage
Mandates specific signage near the exhaust vent terminal.
Inspection
Details inspector's role in verifying CO detectors and signage compliance.
Exemptions
Lists equipment exempt from specific Massachusetts installation requirements.
Manufacturer Requirements – Gas Equipment Venting System Provided
Manufacturer's requirements for provided venting system design and components.
Manufacturer Requirements – Gas Equipment Venting System Not Provided
Manufacturer's requirements when venting systems are not provided.
Specifications
Table 2-1 General Specifications
Provides key physical and connection details for all Trinity Lx models.
Table 2-2(a) Water Heater Performance Specifications
Details performance metrics like input modulation and recovery rating.
High Altitude Operation
Provides guidance on de-rating capacity based on altitude.
Table 2-3 De-rate % for High Altitudes
Lists de-rating percentages for various altitudes in Canada and USA.
Water Heater Location
Floor Mounting
Guidelines for mounting the water heater directly on combustible flooring.
Water heater Area Ventilation Air Openings
Specifies ventilation requirements for appliance areas and specific clearances.
Indoor Combustion Air
Discusses provisions for combustion and ventilation air when using indoor air.
Closet Installations
Details ventilation requirements for installing the unit in a closet.
Alcove Installations
Outlines clearances and ventilation for alcove installations.
Residential Garage Installations
Provides mounting guidelines for installations in residential garages.
Wall Mounting Installations (Optional)
Details optional wall mounting procedures for specific models.
Minimum Clearances for Installation and Service
Table 3-1 Minimum Clearances for Installation and Service
Provides minimum clearances required for installation and service.
General Venting
Removing an Existing Water heater from Common Venting System
Steps for safely removing a water heater from a common venting system.
Steps to Removing an Existing Water Heater
Step-by-step instructions for removing an existing water heater.
Venting Details
Direct Vent Installation
Mandatory venting method for specific models, requiring outdoor air connection.
Indoor Combustion Air
Discusses provisions for combustion and ventilation air when using indoor air.
Air Filter Kit
Recommended optional kit for indoor combustion air applications.
Venting Limitation
Limits exhaust vent length when using the Air Filter Kit.
Combustion Air-Inlet and Venting Procedures
Combustion Air-inlet Contamination
Advises drawing combustion air from areas free of dust and contaminants.
Table 4-1 Corrosive Products and Contaminant Sources
Lists products and sources to avoid for air intake to prevent corrosion.
Flammable Solvents and Plastic Piping
Hazards associated with flammable solvents used for piping.
Mandatory Pre-commissioning Procedure for Plastic Venting
Step-by-step procedure for preparing plastic venting before start-up.
Spark Igniter Cable
Specifies minimum separation for spark igniter circuit to prevent failure.
Near Water Heater Vent/Air-inlet Piping
Table 4-2 CPVC Vent Pipe Transition Piece
Details sizes for CPVC transition pieces used with PVC venting.
Table 4-3 Water heater Adapters for Polypropylene and Stainless Steel Venting
Lists approved adapters for Polypropylene and Stainless Steel venting materials.
PVC Exhaust Venting
Warning against direct insertion of PVC into exhaust adapter.
Vent/Air-inlet Pipe Material
Table 4-4 Acceptable Vent and Air-inlet Pipe Material
Lists acceptable materials and installation standards for vent and air-inlet piping.
PVC In Canada
Warning about PVC usage in Canada for condensing water heaters.
Vent and Air-inlet Pipe Sizing and Lengths
Vent and Air-inlet Pipe Length Determination
Explains how to determine maximum pipe lengths based on configuration.
Table 4-5 Allowable Vent and Air-Intake Pipe Size and Lengths
Provides allowable pipe sizes and lengths based on model, gas type, and elbows.
Air Filter Kit Venting Restrictions
Lists venting limitations when using the Air Filter Kit.
Termination Options – Direct Vent Installation
Table 4-6 Optional Vent Termination Kits
Lists optional vent termination kits, suppliers, and compatibility.
Sidewall Termination Examples
Sidewall Termination Examples – Direct Vent Installation
Illustrates various sidewall termination configurations for direct vent installation.
Roof Termination Examples
Roof Termination Examples – Direct Vent Installation
Illustrates various roof termination configurations for direct vent installation.
Sidewall Termination Details
Figure 4-9(a) Two-Pipe Termination (Sidewall)
Details the two-pipe sidewall termination configuration.
Figure 4-9(b) IPEX Concentric Termination (Sidewall)
Details the IPEX concentric sidewall termination configuration.
Figure 4-9(c) Low Profile Termination (Sidewall)
Details the low profile sidewall termination configuration.
Figure 4-9(d) PolyPro / InnoFlue Termination (Sidewall)
Details the PolyPro/InnoFlue sidewall termination configuration.
Roof Termination Details
Figure 4-10(a) Two-Pipe Termination (Roof)
Details the two-pipe roof termination configuration.
Figure 4-10(b) IPEX Concentric Termination (Roof)
Details the IPEX concentric roof termination configuration.
Figure 4-10(c) PolyPro / InnoFlue Termination (Roof)
Details the PolyPro/InnoFlue roof termination configuration.
Figure 4-10(d) Exhaust only Termination (Roof)
Details the exhaust-only roof termination configuration.
Venting Rules and Guidelines
Prevailing Winds
Ensures vent location is not exposed to normal prevailing winds.
Combustion Air-inlet Contamination
Advises drawing combustion air from areas free of dust and contaminants.
Vertical Separation
Specifies minimum vertical separation requirements between air inlet and exhaust vents.
Horizontal Separation
Specifies minimum horizontal separation between air inlet and exhaust vents.
Wall Flashing
Discusses considerations for wall flashing due to white gas plume.
Flue Gas Hazard
Advises positioning vent termination to avoid contact with people and pets.
Elbow Extensions
Details placement of elbows on outside of wall.
Vent Sloping
Specifies slope requirements for indoor exhaust piping.
Vent Supports
Details support requirements for vent and air-inlet piping.
Roof Exhaust
States discharge direction must point away from roof pitch.
Roof Flashing
Mandates adequate flashing where pipe enters the roof.
Rain Cap
Advises installing a rain cap over existing chimney openings.
Venting Below Grade
Provides guidelines for installations that exit the wall below grade.
Vent Screens
Instructs on installing factory supplied vent screens on elbows.
Condensate Hazard
Warns against locating vents over public walkways due to condensate hazards.
Warning Plate
Specifies placement of the warning plate for sidewall venting.
Wall Thickness
Provides installation guidelines for direct vent termination wall thickness.
Venting Options
Discusses venting options, noting sidewall may not be preferred.
Vent and Air-Intake Termination Clearances
Table 5-1 Termination Clearances Quick Reference Table
Provides a quick reference table for termination clearances to air-inlet and exhaust vents.
Notes
Contains important notes and clarifications for the termination clearance table.
Condensate Drain
Figure 6-1 All Models Condensate Drain Piping
Illustrates the condensate drain piping configuration for all models.
Drain Vent
Advises not to block or install piping into the drain tee's top branch.
Drain Pipe
Specifies using 1/2" Schedule 40 PVC pipe for the condensate drain.
Floor Drain
Advises checking local authorities regarding condensate disposal regulations.
Installing Gas Piping
Table 7-1 Natural Gas to LP Propane Conversion Kit
Lists LP conversion kit numbers and orifices for various models.
Installation
Provides general guidelines and code references for gas piping installation and sizing.
Lighting the Water Heater
FOR YOUR SAFETY, READ BEFORE OPERATING
Crucial safety information to be read before operating the water heater.
OPERATING INSTRUCTIONS
Detailed instructions for lighting the water heater safely.
TO TURN OFF GAS TO THE WATER HEATER
Steps to safely turn off the gas supply to the water heater.
Water Heater Start-Up and Operation
Initial Start-Up
Steps for initial startup, including pre-commissioning and checks.
Re-lighting Unit
Instructions for safely relighting the water heater if it goes out.
Turning Off The Water Heater
Steps to safely turn off the water heater.
Gas Valve and Burner Set-Up
Gas Line Pressure
Procedure to measure and verify gas line pressure for proper operation.
Table 9-1 Line Pressure and Combustion Parameters
Lists required line pressures and combustion parameters for safe operation.
Table 9-2 Minimum and Maximum Modulation Rates
Details the minimum and maximum modulation rates for each model.
Carbon Monoxide
Warns against operating if emitting Carbon Monoxide above specified limits.
Manifold Pressure
Warns against adjusting manifold pressure; it's factory set.
Gas Valve and Burner Adjustment
Adjustment
Explains the Throttle/Input Adjustment Screw for gas flow and CO2 adjustment.
Lx200WH & Lx300WH Adjustments
Details typical adjustments for the throttle screw on Lx200WH and Lx300WH models.
Lx400WH Adjustments
Details typical adjustments for the throttle screw on the Lx400WH model.
Lx500WH Adjustments
Details typical adjustments for the throttle screw on the Lx500WH model.
Lx600WH-Lx800WH Adjustments
Details typical adjustments for the throttle screw on Lx600WH and Lx800WH models.
Figure 9-5 Throttle/Input Adjustment Screw (All Models)
Illustrates the direction for adjusting the throttle/input screw.
Combustion Calibration
Outlines the procedure for calibrating burner operation using a combustion analyzer.
Flue Gas Analysis and Adjustment
Analysis
Explains the process of flue gas analysis and adjustment for proper operation.
Water Heater Piping
Water Heater System Preparation
Procedures for preparing the system before connecting plumbing to the water heater.
Water Chemistry
Details recommended water chemistry parameters to prevent scale and corrosion.
Potable Water Systems
Discusses suitability for potable water heating and combination space heating.
Definitions of Potable Water Systems
Defines terms related to potable water systems like "Potable Heating Only" and "Combination Space Heating".
Safe Temperatures for Potable Water
Legionella Hazard
Explains the risks of Legionella bacteria growth in water systems.
High Risk Application
Highlights higher Legionella risk in combination heating systems during non-heating seasons.
Contributing Factors to Legionella
Lists factors that contribute to the growth of Legionella in water systems.
Scald Hazard
Discusses the risk of scald injury from excessively hot water.
Water Temperature Safety Guidelines
Thermostatic Mixing Valve
Recommends mixing valves for hot water applications to prevent scalds.
Legislation and Guidelines
Discusses standards and guidelines for Legionella prevention.
General Guidelines
Provides general guidelines for maintaining potable water systems.
Table 10-1 Water Temperature and Legionella/Scald Hazard
Correlates water temperature with Legionella growth and scald hazard.
Near Water Heater Plumbing
Pressure Relief Valve
Details the installation and specifications of the Pressure Relief Valve.
Pressure Gauge
Instructions for installing the factory supplied pressure gauge.
Table 10-2 Pressure Relief Valve Specifications
Lists pressure relief valve specifications for each water heater model.
Safety Flow Switch and System Plumbing
Safety Flow Switch
Details requirements and installation for the safety flow switch.
Table 11-1 Minimum Pipe Sizes for Multiple Water Heater Applications
Provides minimum pipe sizing requirements for multiple water heater applications.
Water Heater System Plumbing
Lists major components required for a proper water heater system installation.
Table 10-4 System Major Component Checklist
Lists major components required for a proper water heater system installation.
Water Heater System Components
Water Heater Circulator
Essential for forcing circulation; details sizing and pipe sizes.
Table 10-5 Minimum Water Heater Circulator and Pipe Sizes
Provides guidance on sizing water heater circulators and associated pipe sizes.
System Backflow Preventer
Information on backflow preventer requirements and mandatory expansion tank.
DHW/Potable Water Expansion Tank
Details requirements for expansion tanks and their installation.
DHW Storage Tank
Discusses requirements for DHW storage tanks and drain valve accessibility.
Tank Components and Safety
Tank Temperature and Pressure Relief Valve
Specifies requirements for the tank's temperature and pressure relief valve.
Tank Thermostat (Aquastat)
Explains the function of the aquastat for monitoring and controlling tank temperature.
Tank Sensor
Describes the use of a tank sensor with the Lx controller for temperature monitoring.
Thermostatic (Anti-Scald) Mixing Valve
Recommends mixing valves for hot water applications to prevent scalds.
Lead Lag Instructions
Multiple Water Heater Applications
Explains the controller's capability to stage up to 8 water heaters in a cascade.
Lead Lag Instructions
Details the setup and configuration for cascade water heater systems.
Plumbing
Instructions on sizing common piping for multiple water heaters.
Water Heater Pump
Discusses pump control and sizing for each water heater in a cascade.
Communication Wiring
Explains how to daisy-chain communication wiring for parallel water heaters.
System Sensor
Details configuring the system sensor input for cascade applications.
Modbus Address
Instructions for assigning unique Modbus addresses to each water heater.
Master Enable
Steps to enable the Master parameter on one water heater for control.
Tank Thermostat
Instructions for connecting the tank thermostat to the master water heater.
DHW Setpoint
Instructions for setting the DHW setpoint via the Lead Lag menu.
DHW switch (Lead Lag)
Steps to configure the DHW switch via the Lead Lag menu.
DHW enable (Local)
Instructions to disable local DHW enable via the configuration menu.
Multiple Water Heater Configuration
Tank Sensor in Cascade Systems
Clarifies that tank sensors are not supported in cascade systems; a thermostat must be used.
Table 11-1 Minimum Pipe Sizes for Multiple Water Heater Applications
Provides minimum pipe sizing requirements for multiple water heater applications.
Field Wiring
Avoid Shocks
Warning to turn off power before performing electrical work to prevent shock.
Field Wiring
General instructions for securing wiring and preventing chafing.
Line Voltage Connections
Details the location and access for line voltage junction boxes on different models.
Fuses (120VAC)
Explains the 7 Amp fuses protecting 120VAC components.
Pump Relays (Lx500WH-Lx800WH)
Details the non-powered isolation relay contacts for high capacity pumps.
Wire Protection
Emphasizes using wire grommets for protection when passing wiring through cabinets.
Power Supply
Specifies the single-phase 120VAC power supply requirement, fused to 15 Amps.
Labeling
Stresses labeling wires before disconnecting them to prevent errors.
Continuity
Recommends checking continuity and polarity of line voltage wiring.
Max Load
States limitations for circulator outputs on Lx200WH-Lx400WH models.
Line Voltage Field Connections
Table 12-1 Line Voltage Field Connections
Details the connections and descriptions for line voltage wiring.
Line Voltage Field Connections (Lx500WH-Lx800WH)
Table 12-1(b) Line Voltage Field Connections (Lx500WH-Lx800WH)
Details the connections and descriptions for line voltage wiring on these models.
Low Voltage Connections
Table 12-2(a) Low Voltage Field Connections (Lx200WH-Lx400WH)
Lists low voltage field connections for Lx200WH-Lx400WH models.
NOTICE: Tank Sensor - when operating in a cascade system...
Clarifies tank sensor usage in cascade systems.
Low Voltage Field Connections (Lx500WH-Lx800WH)
Table 12-2(b) Low Voltage Field Connections (Lx500WH-Lx800WH)
Lists low voltage field connections for Lx500WH-Lx800WH models.
Notes for Low Voltage Connections
Provides additional notes regarding high gas pressure switch and tank sensor usage.
Wiring Schematics
Figure 13-1(a) Connection Diagram (Lx200WH-Lx400WH)
Provides the connection diagram for Lx200WH-Lx400WH models.
Installation Checklist
Installation
Checklist items to complete before initiating the start-up procedure.
Start-up
Procedures to follow during the initial start-up process.
Operational Checklist
Items to verify after the unit has started and is operating.
Before Leaving
Final checks and procedures to perform before leaving the installation site.
Instructions to Installing Contractor
Provides final instructions and responsibilities for the installing contractor.
Annual Maintenance and Inspection
Annual Inspection Checklist
A checklist of items to inspect annually for proper operation and safety.
Combustion Chamber Cleaning Procedure
Step-by-step procedure for cleaning the combustion chamber.
Crystalline Silica
Warning regarding Crystalline Silica exposure during cleaning procedures.
Cleaning Checklist
Checklist items for the combustion chamber cleaning process.
Explosion Hazard (Lx300WH-Lx800WH)
Warns of explosion hazard when disconnecting metallic tubing.
Refractory Ceramic Fibers (RFC) Safety
Personal Protective Equipment Recommended
Recommends personal protective equipment for handling refractory ceramic fibers.
Potential Carcinogen
Warns about crystalline silica formation and health risks from RFC exposure.
Crystalline Silica
Details that combustion chamber components may contain carcinogenic crystalline silica.
Table 15-1 Handling Instructions for Refractory Ceramic Fibers (RCF)
Provides instructions and PPE for reducing exposure to refractory ceramic fibers.
Parts List
Building Owners
Advises building owners on how to obtain replacement parts.
Wholesalers
Instructs wholesalers on how to order replacement parts.
Installers
Guides installers on obtaining parts and technical assistance.
Residential Models (Lx200WH-Lx400WH)
Illustrates cabinet, vent, and air-inlet parts for Lx200WH.
Commercial Models (Lx500WH-Lx800WH)
Figure 16-6 Cabinet, Vent and Air-inlet Parts (Lx500WH-Lx800WH)
Illustrates cabinet, vent, and air-inlet parts for commercial models.
Trinity Lx Parts List
Table 16-1 Parts List: Trinity Lx
Lists part numbers and corresponding models and descriptions.
Trinity Lx Parts List (Continued)
Table 16-1 Parts List: Trinity Lx (Continued)
Continues the list of part numbers, models, and descriptions.
Trinity Lx Parts List (Continued)
Table 16-1 Parts List: Trinity Lx (Continued)
Continues the list of part numbers, models, and descriptions.
Trinity Lx Parts List (Continued)
Table 16-1 Parts List: Trinity Lx (Continued)
Continues the list of part numbers, models, and descriptions.
Trinity Lx Parts List (Continued)
Table 16-1 Parts List: Trinity Lx (Continued)
Continues the list of part numbers, models, and descriptions.
Troubleshooting
Servicing the Water heater
General precautions to observe when servicing the water heater.
Check 120VAC and 24VAC at the Water heater
Procedure to verify the presence of 120VAC and 24VAC at the water heater.
User Interface (Touch-screen Display)
Blank Screen
Steps to troubleshoot a blank touch-screen display.
System Disconnected
Steps to troubleshoot the "System Disconnected" message on the display.
Figure 17-2 Touch-screen Display Electrical Disconnects
Illustrates the electrical disconnects for the touch-screen display.
Troubleshooting Information
Summary and Diagnostics Display
Explains the information provided by the controller's summary and diagnostics display.
Lockout and Alert History
Details how the controller records and displays lockouts and alerts for troubleshooting.
Table 17-1 Troubleshooting Chart
Lists common problems, possible causes, and corrective actions.
Troubleshooting Chart (Continued)
Table 17-1 Troubleshooting Chart (Continued)
Continues the list of common problems, causes, and corrective actions.
Troubleshooting Chart (Continued)
Table 17-1 Troubleshooting Chart (Continued)
Continues the list of common problems, causes, and corrective actions.
Troubleshooting Chart (Continued)
Table 17-1 Troubleshooting Chart (Continued)
Continues the list of common problems, causes, and corrective actions.
Troubleshooting Chart (Continued)
Table 17-1 Troubleshooting Chart (Continued)
Continues the list of common problems, causes, and corrective actions.
Sensor Diagnostics
Table 17-2 Thermistor Resistance vs. Temperature
Provides resistance values for thermistors at different temperatures.
Table 17-3 Hold and Lockout Codes
Lists hold and lockout codes, their descriptions, and notes.
Hold and Lockout Codes
Table 17-3 Hold and Lockout Codes (Continued)
Continues the list of hold and lockout codes and their descriptions.
Hold and Lockout Codes
Table 17-3 Hold and Lockout Codes (Continued)
Continues the list of hold and lockout codes and their descriptions.
Hold and Lockout Codes
Table 17-3 Hold and Lockout Codes (Continued)
Continues the list of hold and lockout codes and their descriptions.
Hold and Lockout Codes
Table 17-3 Hold and Lockout Codes (Continued)
Continues the list of hold and lockout codes and their descriptions.
Hold and Lockout Codes
Table 17-3 Hold and Lockout Codes (Continued)
Continues the list of hold and lockout codes and their descriptions.
Alert Codes
Table 17-4 Alert Codes
Lists alert codes and their descriptions.
Alert Codes (Continued)
Table 17-4 Alert Codes (Continued)
Continues the list of alert codes and their descriptions.
Alert Codes (Continued)
Table 17-4 Alert Codes (Continued)
Continues the list of alert codes and their descriptions.
Alert Codes (Continued)
Table 17-4 Alert Codes (Continued)
Continues the list of alert codes and their descriptions.
Alert Codes (Continued)
Table 17-4 Alert Codes (Continued)
Continues the list of alert codes and their descriptions.
Alert Codes (Continued)
Table 17-4 Alert Codes (Continued)
Continues the list of alert codes and their descriptions.
Alert Codes (Continued)
Table 17-4 Alert Codes (Continued)
Continues the list of alert codes and their descriptions.
Alert Codes (Continued)
Table 17-4 Alert Codes (Continued)
Continues the list of alert codes and their descriptions.
Alert Codes (Continued)
Table 17-4 Alert Codes (Continued)
Continues the list of alert codes and their descriptions.
Alert Codes (Continued)
Table 17-4 Alert Codes (Continued)
Continues the list of alert codes and their descriptions.
Need help?
Do you have a question about the Lx600WH and is the answer not in the manual?
Questions and answers